A freezer that stops working correctly is one of the most costly appliance failures you can face at home. Beyond the inconvenience, a malfunctioning freezer puts hundreds of dollars worth of food at risk within hours. The silver lining is that most freezer problems have clear, diagnosable causes and fixes that do not require an expensive service call.
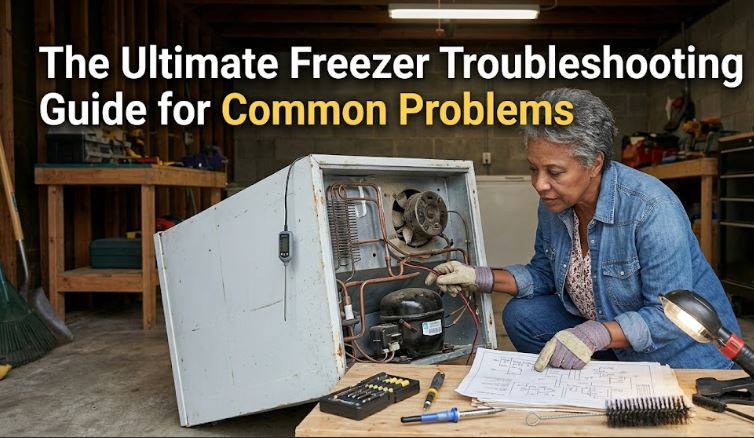
I have worked through freezer diagnostics across standalone chest freezers, upright freezers, and freezer compartments in refrigerator-freezer combos from Whirlpool, GE, Samsung, LG, Frigidaire, and Maytag. The problems in this freezer troubleshooting guide cover the full range of what goes wrong in daily use.
Quick Freezer Troubleshooting Guide
| Problem | Most Common Cause | Quick Fix |
|---|---|---|
| Freezer not freezing | Dirty condenser coils or failed evaporator fan | Clean coils, test evaporator fan |
| Freezer too cold | Faulty temperature control thermostat | Adjust or replace thermostat |
| Freezer frosting over excessively | Faulty defrost system component | Test defrost heater and thermostat |
| Freezer runs constantly | Dirty coils or warm door seal | Clean coils, replace door gasket |
| Freezer not running at all | Tripped breaker or failed start relay | Reset breaker, replace start relay |
| Freezer making loud noise | Worn evaporator fan or condenser fan | Replace relevant fan motor |
| Freezer leaking water | Clogged defrost drain | Clear defrost drain |
| Freezer door not sealing | Worn or dirty door gasket | Clean or replace door gasket |
| Freezer burning smell | Dust on condenser coils or motor | Clean coils and fan area |
| Ice maker not making ice | Faulty water inlet valve or ice maker arm | Check arm position, test valve |
| Freezer light not working | Burned out bulb or faulty door switch | Replace bulb or door switch |
What are the Most Common Freezer Problems?
Shared below are the commonest freezer problems that you can troubleshoot by yourself:
Freezer Not Freezing or Keeping Food Frozen
When your freezer stops maintaining a safe temperature, food safety becomes the immediate priority. The FDA recommends discarding food that has been above 40°F for more than two hours. At the same time, most causes of inadequate freezing are fixable without replacing the entire appliance.
| Cause | Sign | Fix |
|---|---|---|
| Dirty condenser coils | Freezer warm, runs constantly | Clean condenser coils thoroughly |
| Failed evaporator fan motor | Warm freezer, fan not audible | Test and replace evaporator fan motor |
| Faulty defrost system | Frost covering back wall | Run manual defrost, test components |
| Low refrigerant | Gradually warming over weeks | Call appliance technician |
| Faulty temperature control | Temp setting not holding | Replace temperature control thermostat |
Dirty Condenser Coils
The condenser coils release heat extracted from inside the freezer into the surrounding room air. When they become coated with dust, pet hair, and debris, they cannot release heat efficiently. The compressor works harder and longer trying to compensate, temperatures inside the freezer climb, and energy consumption rises noticeably. This is the single most common cause of gradual freezer performance loss.
Recommended Fix
Unplug the freezer and locate the condenser coils. On most upright models they sit underneath the unit behind the front grille or at the back. On chest freezers they are often built into the exterior walls. Use a vacuum with a brush attachment to remove loose debris, then use a condenser coil cleaning brush (View on Amazon) to work through the fins. Clean the coils every six to twelve months as standard maintenance.
Failed Evaporator Fan Motor
The evaporator fan circulates cold air from the evaporator coils throughout the freezer compartment. When it fails, cold air stays concentrated near the coils while the rest of the freezer warms up. You will notice the temperature rising gradually over several hours, and if you open the freezer and listen carefully, the fan will be absent when it should be running.
Recommended Fix
Access the evaporator fan by removing the rear interior panel inside the freezer compartment. Spin the fan blade by hand. It should rotate freely with no resistance. Test the motor for continuity using a multimeter. Replace the evaporator fan motor (View on Amazon) if it reads open or if the blade is physically obstructed by ice buildup, which points to a defrost system problem that also needs addressing.
Faulty Defrost System Causing Ice Blockage
On frost-free freezers, a defrost system cycles on periodically to melt frost from the evaporator coils. When any component of that system fails, frost accumulates on the coils until it forms a solid block of ice that insulates the coils completely. The freezer loses its ability to cool because air cannot circulate across the coil surface at all.
Recommended Fix
Remove all food and unplug the freezer for 24 to 48 hours with the doors open to allow a complete manual defrost. Then test each component of the defrost system individually as described in the excessive frosting section below. Do not simply refreeze without fixing the defrost system or the ice will return within one to two weeks.
Freezer Too Cold and Freezing Everything Solid
A freezer that runs too cold seems like a minor complaint compared to one that does not freeze at all. However, a freezer set or malfunctioning significantly below its target temperature wastes energy continuously, damages food quality through excessive ice crystal formation, and stresses the compressor by running longer than necessary.
| Cause | Sign | Fix |
|---|---|---|
| Temperature dial set too high | Happened after someone adjusted dial | Reset dial to mid-range setting |
| Faulty temperature control thermostat | Freezer over-cools regardless of dial | Test and replace thermostat |
| Stuck open damper (combo units) | Freezer fine, refrigerator freezing | Test and replace damper control |
| Faulty thermistor or temp sensor | Erratic temperature readings | Test thermistor, replace if out of range |
Faulty Temperature Control Thermostat
The temperature control thermostat monitors the internal temperature and signals the compressor to stop running when the target temperature is reached. When it fails in a closed position, the compressor runs continuously regardless of how cold the freezer gets. Food freezes solid, frost accumulates rapidly, and the compressor ages prematurely from the unrelenting workload.
Recommended Fix
Set the temperature dial to the warmest setting. If the compressor keeps running without stopping, the thermostat is not cycling the system off as it should. Disconnect the thermostat and test it with a multimeter. It should show continuity at room temperature and open as it is turned toward the warmest setting. Replace it (View on Amazon) if it stays closed throughout its entire range.
Faulty Thermistor or Temperature Sensor
Modern electronic freezers use a thermistor rather than a mechanical thermostat to monitor temperature. The thermistor changes its electrical resistance as temperature changes, and the control board reads that resistance to determine how cold the freezer is. A faulty thermistor sends an incorrect reading that causes the board to keep the compressor running when it should have stopped.
Recommended Fix
Test the thermistor with a multimeter set to resistance. At freezer temperature, around 0°F, most thermistors read between 16,000 and 20,000 ohms. At room temperature, around 70°F, the reading typically falls between 4,000 and 6,000 ohms. A reading significantly outside those ranges indicates a failed thermistor that needs replacing.
Freezer Frosting Over Excessively
Frost-free freezers should never accumulate more than a light coating of frost on the evaporator coils. Visible frost on the interior walls, ice on food packages, or a thick layer of ice on the back interior panel all indicate that the automatic defrost system has stopped doing its job. This is one of the most common freezer problems across all brands.
| Cause | Sign | Fix |
|---|---|---|
| Failed defrost heater | Thick ice on back wall | Test heater for continuity |
| Failed defrost thermostat | Ice buildup despite heater working | Test thermostat, replace if open |
| Faulty defrost timer | Defrost cycle never initiates | Advance timer manually to test |
| Failed defrost control board | No defrost despite good components | Replace adaptive defrost control |
| Door left open or poor seal | Frost at front of freezer | Check and replace door gasket |
Failed Defrost Heater
The defrost heater is a heating element wrapped around or mounted near the evaporator coils. It activates periodically to melt frost off the coil surface. When the heater element burns out, frost accumulates with every cooling cycle until the coils are buried under inches of ice. The freezer may still cool initially but loses effectiveness rapidly as the ice layer thickens.
Recommended Fix
Unplug the freezer and remove the rear interior panel to expose the evaporator coils and heater. After the ice has thawed or been carefully removed, locate the defrost heater element. Test it with a multimeter for continuity. An open reading confirms the heater has burned out. Replace it with an exact match for your model, noting that heater wattage and physical dimensions vary significantly across models.
Failed Defrost Thermostat or Limiter
The defrost thermostat works as a safety device alongside the heater. It monitors the temperature of the evaporator coils and cuts power to the heater once the coils reach a safe temperature to prevent overheating. A defrost thermostat that has failed open cuts power to the heater permanently, so frost accumulates even though the heater element itself is intact and functional.
Recommended Fix
Test the defrost thermostat by chilling it in your freezer for 30 minutes, then testing it with a multimeter while still cold. It should show continuity when cold and open as it warms toward its rated temperature. Replace it (View on Amazon) if it reads open regardless of temperature.
Faulty Defrost Timer
Older freezer models use a mechanical defrost timer rather than an electronic control board to initiate the defrost cycle. The timer advances through the cycle at a set interval, typically every eight to twelve hours. When the timer motor fails, it stops advancing and the defrost cycle never initiates.
Recommended Fix
Locate the defrost timer, usually found near the temperature control dial or in the compressor compartment. Insert a flathead screwdriver into the timer’s advancement slot and turn it manually until you hear the compressor click off and the defrost heater click on. If the heater activates with a manual turn but the timer never advances on its own, the timer motor has failed and needs replacing.
Freezer Running Constantly Without Cycling Off
A freezer that never shuts off is not just an energy concern. Continuous compressor operation causes excessive wear that shortens the compressor lifespan significantly. Beyond that, a freezer that runs constantly is telling you it is struggling to maintain temperature against something that should not be working against it.
| Cause | Sign | Fix |
|---|---|---|
| Dirty condenser coils | Running constantly, slightly warm inside | Clean condenser coils |
| Worn or dirty door gasket | Frost at door edges, condensation | Clean or replace door gasket |
| Frequent door opening | Happens in busy household | Minimize door opening frequency |
| Faulty temperature control | Runs without cycling regardless of temp | Replace temperature control thermostat |
| Overfilled freezer | Packed so full airflow is blocked | Reorganize to allow air circulation |
Worn or Dirty Door Gasket
The door gasket forms an airtight seal that keeps cold air inside and warm, humid room air outside. When the gasket wears, tears, or loses its magnetic attraction, warm air infiltrates continuously. The compressor runs constantly trying to overcome the constant heat and moisture load entering through the compromised seal.
Recommended Fix
Close the freezer door on a piece of paper and try to pull it out. If the paper slides out with little resistance, the gasket is not sealing properly at that point. Test the full perimeter of the door this way. Clean the gasket with warm soapy water first since a dirty gasket sometimes looks worn when it is actually just compressed with debris. Replace the gasket if cleaning does not restore a firm seal.
Overpacked Freezer Blocking Airflow
A freezer packed too tightly blocks the internal air circulation paths that distribute cold air throughout the compartment. The temperature sensor near the top of the freezer may register the correct temperature while the lower sections warm significantly. The compressor keeps running because the overall average temperature never satisfies the thermostat.
Recommended Fix
Leave at least 20 percent of the freezer volume empty for air circulation. Avoid stacking items directly against the back wall where the evaporator coils are located. Organize food so that cold air can move between items rather than being blocked by solid walls of packaged food.
Freezer Not Running At All
A completely silent freezer with rising internal temperatures requires immediate action to save the food inside. Before assuming the worst, work through the power supply systematically because the most common causes of a completely dead freezer sit entirely outside the appliance itself.
| Cause | Sign | Fix |
|---|---|---|
| Tripped circuit breaker | No power at outlet | Reset breaker |
| Failed start relay | Click then silence, compressor dead | Replace start relay |
| Blown thermal overload | Happened after extended warm period | Replace thermal overload protector |
| Failed compressor | All else checks out | Call appliance technician |
| Power outage | Multiple appliances off | Check neighborhood power |
Failed Start Relay
The start relay is a small component that plugs onto the side of the compressor and provides the electrical boost needed to get the compressor motor spinning from a standing start. When it fails, the compressor attempts to start, you hear a brief click or hum lasting one to three seconds, and then silence as the thermal overload protector shuts it down. This cycle may repeat every few minutes.
Recommended Fix
Unplug the freezer and locate the start relay on the compressor at the back of the unit. Pull it off the compressor terminals and shake it next to your ear. A rattling sound inside the relay confirms it has failed internally. Replace it with an exact match for your compressor model. This is one of the least expensive and most impactful freezer repairs available.
Blown Thermal Overload Protector
The thermal overload protector sits on the compressor alongside or integrated with the start relay. It cuts power to the compressor when it overheats to prevent permanent damage. After a power outage, an extended period of elevated ambient temperatures, or a period of running against restricted airflow, the overload protector may trip and refuse to reset.
Recommended Fix
Allow the compressor to cool completely for at least two hours before testing. Test the overload protector with a multimeter for continuity. A protector that reads open at room temperature after full cooling has failed and needs replacing. Always identify why the compressor overheated before simply replacing the protector.
Freezer Making Loud or Unusual Noises
Freezers make several normal sounds during operation including the compressor hum, refrigerant flowing through the lines, the defrost heater cycling on and off, and ice dropping in ice-maker equipped models. A new noise that is distinctly louder or harsher than those familiar sounds points to a specific component developing a fault.
| Cause | Sign | Fix |
|---|---|---|
| Worn evaporator fan motor | Grinding or squealing from inside freezer | Replace evaporator fan motor |
| Worn condenser fan motor | Humming or rattling from rear or bottom | Replace condenser fan motor |
| Loose condenser fan blade | Rattling noise from compressor area | Tighten or replace fan blade |
| Ice buildup on evaporator fan | Scraping sound, rhythmic | Defrost freezer, fix defrost system |
| Compressor noise | Knocking or loud vibration | Call appliance technician |
Ice Buildup on the Evaporator Fan Blade
When the defrost system fails partially, ice can accumulate around the evaporator fan blade before covering the coils entirely. The blade strikes the ice with every revolution, producing a rhythmic scraping or ticking sound that corresponds exactly with the fan rotation speed. This sound means the defrost system failure is still in early stages, which is actually the best time to catch it.
Recommended Fix
Unplug the freezer and perform a manual defrost as described earlier. Once the ice is fully cleared, the scraping will stop. However, the defrost system fault that allowed the ice to reach the fan blade must be diagnosed and repaired or the problem returns within days. Test the defrost heater, thermostat, and timer or control board as outlined in the excessive frosting section.
Worn Condenser Fan Motor Bearings
The condenser fan motor draws air across the condenser coils and over the compressor to dissipate heat. When the motor bearings wear, they produce a persistent humming, buzzing, or grinding sound from the rear or bottom of the freezer that continues throughout the entire compressor cycle.
Recommended Fix
Unplug the unit and access the condenser fan at the back or underneath. Spin the fan blade by hand. Smooth, quiet rotation indicates healthy bearings. Grinding, resistance, or wobbling points to worn bearings that require motor replacement (View on Amazon). Clean any accumulated dust and debris from the fan area at the same time.
Freezer Leaking Water
Water pooling inside the freezer, dripping from the freezer into the refrigerator compartment below on combo units, or puddling on the floor beneath the unit all point to a drainage problem within the defrost system. Unlike a refrigerator water line leak, freezer water leaks almost always originate from a single predictable source.
| Cause | Sign | Fix |
|---|---|---|
| Clogged defrost drain | Water in bottom of freezer or fridge | Clear defrost drain hole and tube |
| Cracked drain pan | Water on floor under unit | Replace drain pan |
| Door gasket failure | Condensation running down door interior | Replace door gasket |
| Ice maker supply line leak | Water near back of unit | Tighten or replace water supply line |
Clogged Defrost Drain Hole and Tube
During each defrost cycle, water melted from the evaporator coils drains through a small hole at the bottom of the evaporator compartment, down a tube, and into the drain pan beneath the unit where it evaporates. Food particles, ice crystals, and debris block this drain hole regularly. When it clogs, defrost water has nowhere to go and floods the freezer floor or drips into the refrigerator compartment.
Recommended Fix
Locate the drain hole at the bottom of the evaporator compartment behind the rear interior panel. Use a turkey baster filled with hot water to flush the drain hole and the tube below it. For stubborn clogs, push a flexible drain cleaning tool or a straightened coat hanger carefully through the tube to break up the blockage. Flush again with hot water until it drains freely.
Cracked or Overflowing Drain Pan
The drain pan at the bottom of the unit collects defrost water and relies on ambient heat and airflow from the condenser fan to evaporate it between defrost cycles. A cracked pan leaks onto the floor. An intact pan that overflows indicates either an unusually high defrost water volume from excessive frost buildup or a condenser fan that has failed and is no longer evaporating the water quickly enough.
Recommended Fix
Pull the freezer away from the wall and locate the drain pan at the bottom rear. Inspect it for cracks and check the water level. A crack requires pan replacement. A full but intact pan needs the condenser fan and defrost system both checked, since one or both are likely underperforming.
Freezer Door Not Sealing Properly
A freezer door that does not seal correctly is perhaps the most quietly damaging freezer problem of all. The consequences accumulate gradually. Energy bills rise, frost builds at the door edges, the compressor runs more than it should, and food quality suffers from subtle temperature fluctuations that are easy to attribute to other causes.
| Cause | Sign | Fix |
|---|---|---|
| Dirty door gasket | Soft seal, visible debris in gasket | Clean gasket with warm soapy water |
| Worn or cracked door gasket | Tears visible, paper test fails | Replace door gasket |
| Warped door | Gap visible along door edge | Adjust hinges, replace door if warped |
| Misaligned hinges | Door sits crooked when closed | Adjust hinge screws |
| Freezer not level | Door swings open on its own | Adjust leveling feet |
Worn or Cracked Door Gasket
The freezer door gasket contains a flexible magnetic strip that draws the gasket against the door frame and holds it in firm contact. Over years of daily opening and closing, the rubber hardens, cracks, and loses its flexibility. The magnetic strip weakens. Cold air escapes steadily through the compromised seal even when the door appears fully closed.
Recommended Fix
Inspect the gasket along its entire perimeter. Look for tears, cracks, flattened sections, or areas where the gasket has pulled away from the door. Soak a new gasket (View on Amazon) in warm water before installing it to restore flexibility and make fitting it into the door channel significantly easier. A properly fitted gasket should require light but consistent pressure to pull free along its entire length.
Freezer Not Level
A freezer that leans forward or sits unlevel allows the door to swing open on its own rather than staying closed under its own weight and the magnetic gasket force. This is particularly common in chest freezers placed on uneven garage floors and upright freezers on older kitchen flooring.
Recommended Fix
Place a bubble level on top of the freezer in both directions. Adjust the leveling feet at the base of the unit until the freezer is perfectly level side to side and tilted very slightly back, about a quarter inch, so the door swings closed naturally under gravity rather than swinging open.
Freezer Producing Burning or Unusual Smells
Unusual or burning smells from a freezer are easy to dismiss as food-related, but certain smells originate from within the mechanical components and warrant immediate attention. Identifying the smell correctly determines whether the fix is a simple cleaning job or something more urgent.
| Cause | Sign | Fix |
|---|---|---|
| Dust burning on condenser coils | Smell at season start or after cleaning | Clean coils, smell clears quickly |
| Burning plastic or electrical smell | Persistent smell, not food related | Stop use, inspect wiring and motor |
| Mold or mildew smell | Musty smell, especially after defrost | Clean interior and drain pan |
| Spoiled food smell | Smell inside freezer only | Remove and identify spoiled items |
Dust Burning on Condenser Coils or Fan Motor
When a freezer sits unused for a period and then restarts, or when it runs continuously in a dusty environment, dust accumulates on the hot condenser coils and the motor windings. When heat builds up, that dust burns off and produces a brief but noticeable smell. This is generally harmless if it clears within one to two hours of operation.
Recommended Fix
Unplug the unit and clean the condenser coils, condenser fan, and compressor area thoroughly with a vacuum and coil brush. The smell should not return after a thorough cleaning. If it persists beyond a few hours of operation after cleaning, an internal component is overheating and the unit needs professional inspection.
Burning Electrical or Plastic Smell
A burning electrical smell that does not clear quickly, or one that intensifies rather than fading during operation, indicates overheating wiring, a failing motor winding, or a component experiencing an electrical fault. This is not a smell to investigate while the unit keeps running.
Recommended Fix
Unplug the freezer immediately and remove the food to coolers with ice. Inspect the power cord, the wiring at the compressor and fan motors, and the start relay for any signs of heat damage, melted insulation, or discoloration. A burning smell that you cannot trace to a specific and accessible component warrants professional inspection before the unit is returned to service.
Ice Maker Not Making Ice
A freezer-based ice maker that stops producing ice is a common complaint that covers a surprisingly wide range of causes. Before assuming the ice maker itself has failed, spend five minutes ruling out the simple causes that account for the majority of these calls.
| Cause | Sign | Fix |
|---|---|---|
| Shut-off arm in raised position | No ice, arm in up position | Lower the shut-off arm |
| Frozen water supply line | No ice, water not filling tray | Thaw supply line, insulate if needed |
| Faulty water inlet valve | Tray empty, arm in correct position | Test and replace water inlet valve |
| Low water pressure | Ice maker fills slowly or partially | Check supply valve is fully open |
| Failed ice maker module | Tray full but not ejecting ice | Replace ice maker module assembly |
Ice Maker Shut-Off Arm in Raised Position
The wire shut-off arm signals the ice maker to stop production when the ice bin is full. If someone reached into the freezer and accidentally knocked the arm upward, or if a bag of ice was placed under it holding it in the raised position, the ice maker reads the bin as full and stops production indefinitely.
Recommended Fix
Locate the wire arm on the side of the ice maker assembly. Make sure it can move freely downward without obstruction from ice or items in the bin below it. Lower it manually if it is stuck in the raised position. Run a test cycle to confirm ice production resumes.
Faulty Water Inlet Valve
The water inlet valve controls the flow of water from your household supply into the ice maker tray. When the solenoid inside it fails, no water reaches the tray regardless of water pressure or ice maker arm position. You will notice the ice maker cycling through its motions but the tray remaining completely empty.
Recommended Fix
Test the water inlet valve solenoid with a multimeter for continuity. A reading of open indicates a failed solenoid. Replace the entire valve assembly (View on Amazon) rather than attempting to repair the solenoid individually.
Freezer Light Not Working
A freezer interior light that has stopped working is not just inconvenient. It can also mask other problems by making it harder to see the internal condition of the freezer during a quick visual check. Fortunately, this is almost always a simple and inexpensive fix.
| Cause | Sign | Fix |
|---|---|---|
| Burned out bulb | Light off, all else normal | Replace bulb with correct wattage |
| Stuck door switch | Light stays on or stays off | Test and replace door switch |
| Wiring fault | Light works intermittently | Inspect wiring at light socket |
Burned Out Bulb
This is the most obvious cause and the first thing to check. Freezer bulbs are specifically rated for low-temperature operation. Standard household bulbs sometimes work as a substitute but tend to fail earlier than rated because of the thermal cycling between cold operating conditions and warmer temperatures when the door is open.
Recommended Fix
Unplug the freezer before replacing the bulb. Remove the light cover, note the wattage stamped on the existing bulb, and replace it with an exact match rated for appliance use. Do not substitute a higher wattage bulb since the light socket and cover are designed around the heat output of the original specification.
Faulty Door Switch
The door switch cuts power to the interior light when the door is closed and restores it when the door opens. A faulty switch keeps the light off regardless of door position, or more problematically, keeps it on continuously when the door is closed, generating heat inside the freezer and running up energy costs unnecessarily.
Recommended Fix
Test the door switch by pressing its plunger manually while the door is open. If the light goes off when you press the plunger but stays on with the door closed, the door is not depressing the switch fully. Adjust the door alignment. If the light fails to respond to the switch plunger at all, test the switch with a multimeter and replace it if it shows no change in continuity when actuated.
Frequently Asked Questions
How long can a freezer keep food safe during a power outage?
A fully packed freezer maintains food safety for approximately 48 hours after power loss. A half-full freezer maintains safety for about 24 hours. Keep the door closed as much as possible to preserve the cold. Place a thermometer inside before any anticipated outage so you can check the temperature without opening the door. Food that has been above 40°F for more than two hours should be discarded regardless of appearance or smell.
What is the ideal temperature setting for a home freezer?
The FDA recommends 0°F or minus 18°C as the correct freezer temperature for long-term food storage. At this temperature, microbial growth stops completely and food quality is preserved for the maximum rated storage time. Temperatures warmer than 0°F accelerate quality degradation. Temperatures significantly colder than 0°F waste energy without meaningfully improving food preservation.
Why is there frost building up in my frost-free freezer?
A frost-free freezer that develops frost accumulation has a failed automatic defrost system. The three components to check in order are the defrost heater, the defrost thermostat, and the defrost timer or adaptive defrost control board. The heater and thermostat can be tested with a multimeter as described in this guide. If both test good, the timer or control board is the likely culprit. A door gasket that no longer seals properly also introduces enough warm, humid air to overwhelm the defrost system.
How often should I defrost a manual defrost chest freezer?
Manual defrost chest freezers should be defrosted when frost buildup on the interior walls reaches approximately a quarter inch in thickness. For most households this means defrosting once or twice a year. Waiting until the frost exceeds a quarter inch thickness reduces the freezer’s cooling efficiency and takes significantly longer to defrost because of the greater ice volume involved.
Is it normal for my freezer to make cracking or popping sounds?
Yes, cracking and popping sounds are completely normal and occur as the plastic interior walls and shelving expand and contract in response to temperature changes during and after defrost cycles. These sounds are most pronounced right after the compressor kicks on following a defrost cycle when cold air returns rapidly to the warmer interior space. Grinding, scraping, or loud rattling sounds are not normal and point to a specific mechanical issue as described in the noise section of this guide.
When does a freezer repair stop making financial sense?
Apply the same 50 percent rule used for other appliances. If the repair cost exceeds half the price of a comparable new freezer, replacement is generally the smarter financial decision. A compressor replacement on a unit older than ten years falls into this category for most models. Inexpensive repairs like a start relay, door gasket, defrost heater, or evaporator fan motor are worth doing on virtually any freezer regardless of age since the parts are inexpensive and the repair is straightforward.
Why does my freezer run but the temperature keeps fluctuating?
Temperature fluctuation in an otherwise running freezer usually points to one of three causes: a door gasket that seals intermittently rather than constantly, a defrost cycle that is working but leaving the freezer slightly warmer than target during each cycle before recovering, or a dirty condenser coil reducing cooling capacity to the point where the system barely keeps up during warmer ambient conditions. Clean the coils, test the door gasket seal around the full perimeter, and monitor whether the fluctuation tracks with the defrost cycle timing.
Wrapping Up the Freezer Troubleshooting Guide
Most freezer failures trace back to one of a handful of preventable causes. Dirty condenser coils, a worn door gasket, a clogged defrost drain, or a single failed component like a start relay or defrost heater account for the vast majority of problems covered in this guide. None of those require a technician to diagnose, and most of them cost far less to fix than the food a failing freezer puts at risk.
Work through the section that matches your specific symptom, start with the simplest possible causes before moving to components that require testing, and address the root cause rather than just the immediate symptom.

Hi, I’m Barlgan! I created Repair Me Yourself to empower homeowners to tackle appliance repairs with confidence. From decoding error codes to fixing cooling issues, I break down complex repairs into simple, actionable steps that save you time and money.