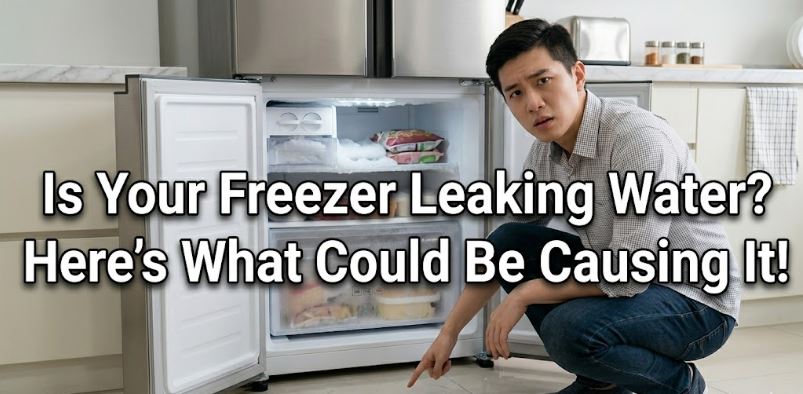
Walking into the kitchen to find a puddle spreading across the floor from the freezer direction is the kind of discovery that demands immediate action. Beyond the obvious mess, water pooling beneath or around an appliance damages flooring, creates mold conditions in the floor cavity below, and can reach electrical components that sit at the base of the unit.
What makes freezer water leaks particularly fixable is that water always tells you where it has been. A puddle beneath the unit points to the drain pan or condensate path. Water pooling inside the compartment points to the defrost drain or door seal. Ice melt dripping down the back exterior points to external condensation from a gasket problem. Follow the water and the cause becomes clear quickly.
Before diving into the causes, here is one important clarification. Frost-free freezers produce water during every automatic defrost cycle. This is completely normal. That water is supposed to drain through the defrost drain tube into the drain pan below the unit where it evaporates from the heat of the condenser. Water becomes a problem only when something interrupts that designed drainage path.
An Overview of Why Your Freezer is Leaking Water
| Where the Water Appears | Most Likely Cause |
|---|---|
| Puddle under the front of the unit | Cracked or overflowing drain pan |
| Water inside the freezer compartment | Clogged defrost drain or improper food placement |
| Water dripping down the back exterior | Door gasket leak causing external condensation |
| Water pooling under the freezer after defrost | Defrost drain blocked, water overflowed during defrost |
| Leak from the ice maker area | Ice maker water line connection or frozen line |
| Water on floor only in humid weather | External condensation from poor gasket seal |
| Leak that started after manual defrost | Normal, place towels next time |
7 Reasons Your Freezer Is Leaking Water and How to Fix Each One
Below are seven issues to explain why a freezer will start leaking all of a sudden and how to troubleshoot them:
1. The Defrost Drain Is Clogged
The defrost drain is the single most common cause of water leaking inside a freezer compartment and the first component to check without exception.
During every automatic defrost cycle, the heater melts frost from the evaporator coil and the resulting water drips into a drain channel at the base of the evaporator compartment. From there it flows through a small drain tube to the drain pan beneath the unit. When this drain channel or tube gets clogged with ice, food debris, or biological growth, the defrost water has nowhere to go. It overflows the drain channel, pools at the bottom of the freezer compartment, and eventually leaks out the door onto the floor.
Here Is How to Clear the Defrost Drain
- Unplug the freezer and remove all food from the compartment
- Locate the defrost drain opening at the bottom rear of the freezer interior, usually a small hole in a recessed channel
- Pour a mixture of hot water and a small amount of dish soap directly into the drain opening. This melts any ice blockage and flushes biological growth from the tube below
- Use a Drain King Blowout Adapter (View on Amazon) attached to a garden hose to flush the drain tube with water pressure from above, clearing any debris lodged deeper in the tube
- Use a flexible pipe cleaner or thin drain brush to clear any compacted debris from the drain opening itself
- Pour a small amount of white vinegar into the drain after clearing to prevent biological growth from rebuilding
- Run the freezer through one complete defrost cycle and confirm water drains correctly before reloading food
2. The Drain Pan Is Cracked or Overflowing
Even when the defrost drain is completely clear, a cracked drain pan causes every drop of correctly draining defrost water to land on the kitchen floor instead of evaporating from the pan as designed.
The drain pan is a shallow plastic tray beneath the freezer that collects defrost water and holds it near the condenser coils where the heat causes the water to evaporate between defrost cycles. Cracks from age, impacts, or warping from heat cycling allow collected water to leak out before evaporation occurs. An overflowing pan, where the defrost water volume exceeds the pan’s evaporation capacity, is less common but happens in very humid environments or when the freezer is running defrost cycles more frequently than normal.
Here Is How to Inspect and Fix It
- Pull the freezer away from the wall and locate the drain pan at the base of the unit, usually accessible by sliding it out on a bracket or removing the kick plate panel
- Inspect the pan carefully for visible cracks, warping, or any section where the plastic has split
- A pan with a small hairline crack can be temporarily sealed with Loctite Repair Waterproof Putty (View on Amazon) as an interim fix while sourcing a replacement
- A pan with significant damage needs full replacement. Search your model number alongside “drain pan” or “drip pan” on Amazon to find the correct replacement for your appliance
- For an overflowing pan without cracks, check whether the drain pan area has adequate clearance for air circulation, since restricted airflow around the condenser slows evaporation and causes overflow
3. The Door Gasket Is Failing
A leaking door gasket contributes to water in two distinct ways, and understanding both helps identify whether the gasket is the cause in your specific situation.
First, a leaking gasket allows warm, humid air into the freezer compartment continuously. That moisture freezes on interior surfaces and contributes to excessive frost that then melts during defrost cycles, producing more water than the drain system can handle. Second, condensation forms on the exterior of the unit near the gasket leak point as warm air contacts the cold door frame, producing drips that run down the outside of the freezer and pool on the floor beneath.
Both pathways connect a failing gasket to water in places it should not be, which is why the gasket inspection is always an early step in any water leak diagnosis.
Here Is How to Inspect and Fix the Gasket
- Close the freezer door on a dollar bill and pull it out. A healthy gasket holds the bill firmly with noticeable resistance. A bill that slides free easily identifies the leak location
- Run your hand slowly around the perimeter of the closed door feeling for any cold air draft
- Inspect the gasket for cracks, tears, permanently compressed sections, or areas that have separated from the door frame
- Clean the gasket with warm soapy water first since grease and debris prevent an intact gasket from sealing correctly
- If cleaning does not restore the seal, the gasket needs replacement (View on Amazon)
4. The Freezer Is Not Level
An unlevel freezer is one of the most overlooked causes of water leaking from an unexpected location, and it is entirely free to fix.
The defrost drain system and drain pan are designed to function with the unit sitting level or tilted very slightly backward. When the freezer tilts forward instead, defrost water that should flow toward the rear drain channel pools at the front of the evaporator compartment instead and eventually leaks out through the door seal or the front base of the unit. The drain pan also sits at an incorrect angle, causing collected water to spill toward the front rather than sitting beneath the condenser coils where it evaporates.
Here Is How to Check and Fix It
- Place a spirit level on top of the freezer and check it side to side and front to back
- The freezer should be level side to side and sit level or tilted very slightly toward the rear, not forward
- Adjust the leveling feet at the base of the unit by turning them clockwise to raise or counterclockwise to lower each corner until the spirit level confirms correct positioning
- For chest freezers, confirm the unit sits fully flat on the floor without any rocking motion when pressed at each corner
- After leveling, monitor the drain location for one complete defrost cycle to confirm water now flows correctly to the rear and into the drain system
5. The Ice Maker Water Line Has a Leak or Is Frozen
This cause applies specifically to combination refrigerator-freezers and standalone freezers with a built-in ice maker. It produces a water leak that appears at a specific location near the ice maker rather than at the front base or rear of the unit.
The water supply line connecting the household plumbing to the ice maker runs through the back of the freezer cabinet and connects to the ice maker fill valve. A loose connection at either end, a pinhole in the supply line from years of use, or a section of line that has frozen solid and then cracked when it thawed all produce water leaks in the ice maker area.
Here Is How to Check and Fix It
- Unplug the freezer and turn off the water supply valve behind the unit, usually on the wall or floor behind the appliance
- Pull the freezer away from the wall and trace the water supply line from the wall connection to where it enters the freezer cabinet
- Look for any visible wet spots, mineral staining, or frost accumulation along the line that indicates the leak location
- Tighten any loose compression fittings at both the wall valve and the ice maker connection with a wrench. Do not overtighten since this cracks plastic fittings
- If the line itself is damaged or cracked, replace it with a new supply line (View on Amazon)
6. Improperly Stored Food Is Creating Excess Moisture
This is the cause that surprises most homeowners because it requires no repair whatsoever. The freezer is functioning perfectly. The way food is stored inside is producing more moisture than the system was designed to handle.
Highly moist foods stored uncovered, such as fruits, vegetables, soups, or stews in open containers, continuously release moisture into the freezer compartment. Food packages pushed directly against the back wall of the freezer create condensation at that contact point that runs down the wall and accumulates at the base. Over time this excess moisture overwhelms the drain system and produces leaking that looks exactly like a mechanical fault.
Here Is How to Fix It
- Store all food in airtight containers or properly sealed freezer bags before placing in the freezer. The Rubbermaid Brilliance Freezer Containers (View on Amazon) seal completely airtight and prevent moisture release into the compartment during storage
- Reorganize items so nothing sits directly against the back wall of the freezer. Leave at least an inch of space between food packages and all interior surfaces
- Allow cooked food to cool completely in the refrigerator before transferring to the freezer to minimize the moisture released into the compartment during the initial freezing process
7. The Defrost Drain Tube Is Frozen
A frozen defrost drain tube is slightly different from a debris clog, though both produce the same symptom of water pooling inside the freezer compartment. When the defrost drain tube freezes, it typically happens at a low point in the tube where water collects and refreezes before it can reach the drain pan. Progressive ice blockage eventually stops all drainage and defrost water overflows into the compartment.
This cause is particularly common in older units where the drain tube insulation has degraded, exposing the tube to the full cold of the freezer environment, and in units where the thermostat runs the unit colder than the correct set point.
Here Is How to Thaw and Prevent a Frozen Drain Tube
- Unplug the freezer and locate the defrost drain tube exit point beneath the freezer, usually where the tube exits the bottom of the cabinet near the drain pan
- Use a turkey baster or syringe filled with hot water to flush the tube from the drain opening inside the freezer compartment downward. The hot water melts the ice blockage and clears the tube
- After clearing, pour a small amount of brine solution, one teaspoon of salt dissolved in two cups of hot water, into the drain opening. The salt lowers the freezing point of residual water in the tube and helps prevent refreezing
- If the tube freezes repeatedly despite clearing, confirm the freezer temperature is not set below 0°F since excessively cold operation increases the likelihood of drain tube freezing. Our post on freezer too cold covers temperature-related issues in detail
Freezer Water Leak Fix Cost Overview
| Cause | DIY Safe | Fix Cost | Pro Service Cost |
|---|---|---|---|
| Clear clogged defrost drain | Yes | Free – $15 | $80 – $150 |
| Level the freezer | Yes | Free | N/A |
| Reorganize food storage | Yes | Free | N/A |
| Thaw frozen drain tube | Yes | Free | N/A |
| Patch or replace drain pan | Yes | $5 – $40 | $100 – $200 |
| Clean or replace door gasket | Yes | Free – $30 | $100 – $200 |
| Tighten ice maker water line | Yes | Free | N/A |
| Replace ice maker water supply line | Yes | $10 – $25 | $80 – $150 |
Frequently Asked Questions
Is it normal for water to appear under my freezer occasionally?
A very small amount of moisture beneath the unit in humid weather can be normal condensation from the exterior of the drain pan. However, a puddle large enough to spread across the floor, recurring water in the same location, or water that appears consistently after every defrost cycle is not normal and points to one of the causes above.
How do I know if it is the defrost drain or the drain pan causing the leak?
The location of the water tells you immediately. Water pooling inside the freezer compartment, particularly at the back bottom corner near the evaporator, points to the defrost drain. Water appearing only beneath the unit at floor level, with nothing visible inside the compartment, almost always points to the drain pan. Inspect the pan while it is full of water rather than empty since small cracks may only be visible when the pan is under load.
Can a leaking freezer damage my floor?
Yes, quickly and significantly. Water reaching hardwood floors causes swelling and warping within 24 to 48 hours. Water reaching laminate causes delamination and buckling. And water seeping into the subfloor creates ideal conditions for mold growth within a few days. Acting on a freezer water leak promptly protects the flooring investment, which typically costs far more to repair or replace than the freezer itself.
My freezer only leaks after I run a manual defrost. Is that a problem?
No, that is completely expected. Manual defrost produces a large volume of water in a short period as the entire accumulated frost load melts simultaneously. Always place thick towels inside the compartment and on the floor below the door before beginning a manual defrost. The leaking during this process is not a fault. If water also appears between manual defrost sessions, one of the causes above is contributing to additional moisture between scheduled defrost cycles.
Why does my freezer leak more in summer than in winter?
Summer humidity is the primary driver of seasonal variation in freezer water leaks. Higher ambient humidity means more moisture enters the freezer on every door opening and through any gasket imperfection. The defrost system handles a significantly larger moisture load during summer, and a partially degraded drain or gasket that manages adequately in winter can overflow during the higher-moisture summer months. Cleaning the drain and checking the gasket at the start of summer prevents most seasonal leak complaints.
Stop Your Freezer From Leaking Water Today!
A freezer leaking water is almost always a drainage or sealing problem, and the location of the water narrows it down to one of a small number of accessible fixes. Clear the defrost drain, confirm the gasket seals correctly, check the drain pan, and level the unit before reaching for any tools or replacement parts.
Those four free checks resolve the vast majority of freezer water leak complaints before any disassembly is needed. But if you encounter other issues worth fixing, consider our freezer troubleshooting guide for tips and recommendations.

Hi, I’m Barlgan! I created Repair Me Yourself to empower homeowners to tackle appliance repairs with confidence. From decoding error codes to fixing cooling issues, I break down complex repairs into simple, actionable steps that save you time and money.