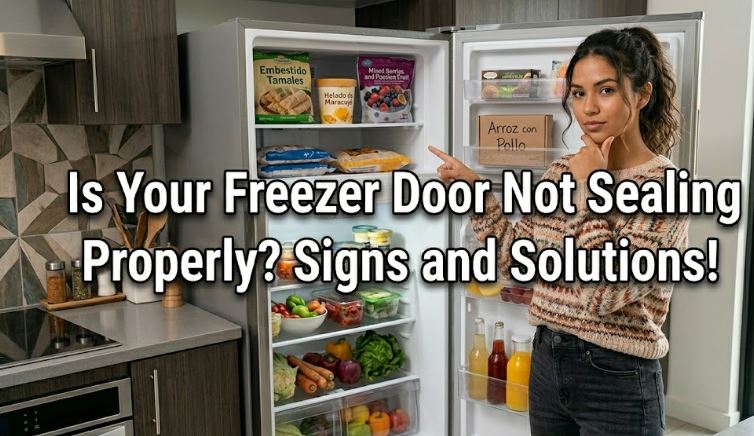
That gap along the freezer door edge seems like a small thing. A minor misalignment. Nothing worth worrying about today. But a freezer door that does not seal correctly is one of those problems that quietly costs you money every single day it goes unaddressed.
Warm air entering through a failed seal forces the compressor to run longer and more frequently. Moisture from that warm air deposits frost throughout the compartment. Food near the door begins to thaw slightly on each cycle. And energy bills climb steadily without any obvious single cause to point at.
The good news is that most freezer door seal failures have straightforward fixes, several of which cost nothing and take under five minutes. The dollar bill test is your starting point for every case: close the freezer door on a dollar bill at several points around the perimeter and pull. A healthy seal grips the bill firmly with clear resistance. A bill that slides out freely identifies both the problem and its exact location.
Why Is Your Freezer Door Not Sealing Properly?
Here’s an overview of why your freezer door won’t shut properly; highlighting the signs and likely causes
| What You Notice | Most Likely Cause |
|---|---|
| Door feels loose, dollar bill slides free all around | Worn or damaged door gasket needs replacement |
| Seal fails at specific spot only | Debris buildup at that location or gasket pulled from groove |
| Frost building specifically around door edges | Gasket leaking warm air at perimeter |
| Door swings open on its own after closing | Freezer tilted forward, hinges worn, or door too heavy |
| Door closes but upper corner does not contact frame | Sagging door from worn or loose hinge |
| Seal feels stiff, hard, or cracked | Gasket has hardened from age and lost flexibility |
| New freezer door not sealing after installation | Gasket needs warming to conform to shape or improper hinge adjustment |
7 Reasons Your Freezer Door Is Not Sealing Properly
The seven issues discussed below are often the reasons a freezer door won’t seal properly:
1. The Gasket Is Dirty or Has Food Debris on It
Before assuming any part has failed or needs replacing, spend three minutes cleaning the gasket. This resolves more freezer door seal complaints than any other single action, and it costs nothing.
Food residue, grease, dried spills, and pet hair accumulate on the gasket surface and in the grooves between the gasket and the door frame over time. Even a thin, uniform layer of grease prevents the flexible rubber from making the flush surface contact it needs to seal correctly. The door appears to close, but microscopic gaps along the contaminated sections allow continuous air exchange between the compartment and the kitchen.
Here Is How to Clean the Gasket
- Mix a small amount of mild dish soap with warm water
- Wipe the entire gasket surface thoroughly with a soft cloth dampened in the solution, paying extra attention to the grooves, corners, and the bottom edge where debris concentrates most heavily
- Use an old toothbrush to reach into the groove where the gasket meets the door frame and remove any accumulated debris that a flat cloth cannot reach
- Rinse with a clean damp cloth and dry the gasket completely before testing
- Perform the dollar bill test again around the full perimeter after drying. If the bill now grips firmly at all tested points, cleaning was the entire solution
- Clean the gasket every three to six months as routine maintenance, always drying it completely afterward since leaving moisture on the gasket accelerates degradation
2. The Gasket Has Pulled Out of Its Retaining Groove
The door gasket is held in place by a retaining groove or channel that runs around the perimeter of the door. On many models, the gasket lip presses into this groove and is held by the door panel itself. On others, it is secured by small screws behind the gasket lip.
When the gasket pulls out of the groove, usually from being snagged by a package, cleaned improperly with a tool, or simply from the adhesive or press-fit connection deteriorating with age, a section of the gasket flips outward or hangs loose. That section no longer contacts the freezer frame and creates a gap that warm air moves through freely.
Here Is How to Reseat the Gasket
- Inspect the full perimeter of the gasket for any sections that have pulled away from the door or are no longer sitting flush in the groove
- Warm a loose gasket section with a hair dryer set to low heat for 30 to 60 seconds. Warmed rubber becomes more pliable and easier to press back into its correct position
- Press the warmed gasket firmly back into the retaining groove, working from one end of the loose section to the other
- Hold it in place for 30 seconds while it cools back to a firm set in the correct position
- For gaskets secured with screws, loosen the screws slightly behind the affected section, reposition the gasket lip correctly, and retighten
- Test with the dollar bill after the gasket fully cools to confirm the section now seals correctly
3. The Gasket Is Worn, Cracked, or Permanently Deformed
Every rubber gasket has a lifespan. Years of daily temperature cycling from ambient kitchen temperature to freezing cold causes rubber to harden, crack, and lose the flexibility it needs to conform to the door frame surface and create a consistent seal. A gasket that was soft and pliable when new becomes stiff and brittle over time, and stiff rubber cannot fill the microscopic gaps between the door and the frame the way supple rubber does.
Signs of a worn gasket include visible cracking along the surface, sections that feel hard rather than flexible when squeezed, a flattened profile that has permanently lost its rounded cross-section, or tears and holes visible under close inspection.
Here Is How to Replace a Worn Gasket
- Measure the dimensions of the existing gasket or locate your freezer’s model number on the inside door frame or rear of the unit
- Search your model number alongside “door gasket” or “door seal” on Amazon.
- Before installing, soak the new gasket in warm water for five to ten minutes to make it pliable and easier to press into the retaining groove evenly
- Remove the old gasket by pulling it from the groove or by loosening the screws that secure it behind the gasket lip
- Press the new gasket into the groove starting at a corner and working around the perimeter, ensuring the lip seats fully and evenly in the channel at every point
- Test with the dollar bill at multiple points around the full perimeter before pushing food back into the compartment
4. The Freezer Is Not Level
An unlevel freezer is one of the most overlooked causes of a door that will not seal correctly, and it is entirely free to diagnose and fix.
Freezer doors are designed to be slightly self-closing, meaning the door’s own weight causes it to swing gently closed when released within a certain range of positions. This self-closing tendency depends entirely on the unit being correctly leveled, with the front feet set very slightly higher than the rear. When the freezer tilts forward instead, gravity pulls the door toward the open position and the door hangs ajar unless actively pushed closed. Even when pushed shut, the weight of a forward-tilting door pulls the seal away from the frame at the bottom, creating a gap that the seal cannot bridge.
Here Is How to Level the Freezer
- Place a spirit level on top of the freezer and check it both side to side and front to back
- For upright freezers, the unit should be level side to side and very slightly higher at the front than the rear to encourage self-closing. A difference of one to two degrees is sufficient
- Adjust the leveling feet at the base of the unit by turning them clockwise to raise or counterclockwise to lower each corner
- Recheck with the spirit level after each adjustment and test the door self-closing behavior by pushing the door to a 45-degree open position and releasing. It should swing gently closed on its own
- For chest freezers, confirm the unit sits completely flat without any rocking motion when pressed at each corner
5. The Door Hinges Are Loose or Worn
The door hinges support the full weight of the freezer door on every opening and closing cycle. Over years of use, hinge mounting screws loosen from vibration, hinge pins wear and develop play, and hinge brackets can bend slightly from repeated stress. Any of these developments cause the door to sag or tilt slightly out of its designed alignment, creating an uneven gap between the door gasket and the freezer frame that the gasket cannot consistently bridge.
A sagging freezer door almost always seals correctly along the bottom and the hinge side but shows a persistent gap at the top opposite corner, since that corner drops away from the frame as the door sags from a worn or loose hinge.
Here Is How to Inspect and Fix the Hinges
- Open the door and look at both hinges for any visible looseness, wobbling, or a gap between the hinge bracket and the door or cabinet frame
- Tighten all hinge mounting screws firmly with the correct screwdriver. Many freezer door sealing problems resolve completely with this step alone
- With the door closed, check the gap between the door and frame at all four corners. An uneven gap that is wider at one corner confirms the door is sagging toward that corner’s hinge
- If tightening the screws does not restore alignment, the hinge pins have worn and the hinge assembly needs replacement (View on Amazon)
6. Ice Has Built Up Around the Gasket or Door Frame
Ice accumulation along the door frame or directly on the gasket contact surface creates a physical barrier that prevents the flexible rubber from pressing flat against the frame. The door closes against a ridge of ice rather than against the smooth frame surface, and the gap above or below that ice ridge allows air exchange on every subsequent closing.
This situation typically develops after a defrost system fault that causes excessive frost buildup as covered in our post on freezer frosting over excessively, or after the door has been left ajar for an extended period allowing warm air to deposit moisture along the door frame.
Here Is How to Clear Ice from the Door Frame
- Unplug the freezer and leave the door open to allow the ice to melt naturally. Place towels on the floor below to catch the melt water
- For faster results, apply warm water with a cloth directly to the iced sections of the door frame, or use a hair dryer set to low heat held at a safe distance from the gasket rubber
- Never use sharp implements to chip ice from around the gasket since these scratch the frame surface and damage the gasket itself
- Once all ice is cleared and the frame is completely dry, plug the unit back in and test the door seal
- Address the underlying cause of the ice formation before the next use, since the seal will ice over again if the root cause remains unresolved
7. The Freezer Is Overfilled and Items Are Blocking the Door
This is the cause that requires no parts, no tools, and no repair: the freezer is simply too full for the door to close completely and seal against the frame.
Items overhanging the door shelf, bags sticking out beyond the shelf edge, or contents pushed so tightly into the compartment that the door cannot swing the final few millimeters into its fully closed position all prevent the gasket from reaching the frame. A door that is blocked from closing completely, even by a few millimeters, leaves a gap that the gasket cannot bridge regardless of its condition.
Here Is How to Fix It
- Open the door and check whether any items are positioned where they could contact the door on closing. Pay particular attention to items on the door shelf, bags protruding from stacked contents, and anything positioned near the front edge of shelves
- Rearrange contents so everything sits fully within the compartment with at least an inch of clearance from the door opening
- Avoid packing the freezer beyond 80 percent of its capacity, which maintains efficient airflow and allows the door to swing fully closed on every use
Freezer Door Seal Fix Cost Overview
| Cause | DIY Safe | Fix Cost | Pro Service Cost |
|---|---|---|---|
| Clean dirty gasket | Yes | Free | N/A |
| Reseat displaced gasket | Yes | Free | N/A |
| Level the freezer | Yes | Free | N/A |
| Rearrange overfilled contents | Yes | Free | N/A |
| Tighten loose hinge screws | Yes | Free | N/A |
| Thaw ice from door frame | Yes | Free | N/A |
| Replace worn door gasket | Yes | $15 – $40 | $100 – $200 |
| Replace worn door hinges | Moderate DIY | $20 – $50 | $100 – $200 |
Frequently Asked Questions
How do I know if my freezer door gasket actually needs replacing or just cleaning?
The dollar bill test tells you whether the seal is failing, but it does not tell you why. After a thorough cleaning with warm soapy water and complete drying, run the dollar bill test again. If the seal now grips firmly at all points around the perimeter, cleaning was the fix. If specific spots still let the bill slide free after cleaning, check those spots for gasket displacement from the groove. And if the gasket is seating correctly, clean, and still fails to grip, the rubber has worn enough that replacement is the only remaining fix.
Can a poor freezer door seal really increase my energy bill significantly?
Yes, measurably so. Even a small continuous gap in the door seal allows warm air to enter on every cycle of the compressor, forcing it to run longer than normal to replace the lost cold. Studies by appliance manufacturers consistently show that a failing door seal increases energy consumption by 15 to 25 percent compared to a properly sealed unit. Over a full year, that difference amounts to $30 to $80 in additional electricity costs for an average household freezer, which is often more than the cost of a replacement gasket.
My freezer gasket looks fine but the door still does not seal at one corner. What else could it be?
A corner that fails to seal despite a visually intact gasket almost always points to a hinge that has loosened slightly, allowing the door to sag just enough that the corner drops away from the frame. Tighten all hinge mounting screws firmly and repeat the dollar bill test at that corner. If tightening the hinges does not resolve the corner gap, the hinge pin itself has worn and the hinge assembly needs replacement.
How long does a freezer door gasket typically last?
A freezer door gasket typically lasts eight to fifteen years under normal use. Factors that shorten gasket lifespan include cleaning with harsh chemicals or abrasive tools, snagging the gasket with sharp food packages, repeatedly opening the door aggressively, and ambient kitchen heat that accelerates rubber degradation. Cleaning the gasket with mild soapy water and drying it thoroughly two to three times per year maintains its flexibility significantly longer than neglected gaskets.
My new freezer door does not seem to seal as well as my old one. Is that normal?
A brand new freezer door gasket often needs a short break-in period to conform fully to the door frame shape. New gaskets are manufactured in a compressed state and the rubber takes one to two weeks of regular door use to relax into the precise contour of the frame. If sealing improves over the first few weeks of use, this is normal. If it remains poor after three to four weeks, the gasket was installed incorrectly, the door alignment needs adjustment, or the replacement gasket is not the correct part for your specific model.
Start With the Dollar Bill Test and the Fix Reveals Itself
A freezer door not sealing properly is one of the most fixable appliance problems in the home, and the majority of cases resolve without spending a single dollar. Clean the gasket thoroughly, check the door alignment, level the unit, tighten the hinges, and clear any ice from the frame before drawing any conclusions about gasket replacement.
Those five free steps together resolve the vast majority of door seal failures. When they do not, a replacement gasket at $15 to $40 is still one of the most affordable appliance repairs available and one of the highest-return maintenance investments in terms of energy savings. For other common freezer problems, check out our recent freezer troubleshooting guide for tips and product recommendations.

Hi, I’m Barlgan! I created Repair Me Yourself to empower homeowners to tackle appliance repairs with confidence. From decoding error codes to fixing cooling issues, I break down complex repairs into simple, actionable steps that save you time and money.