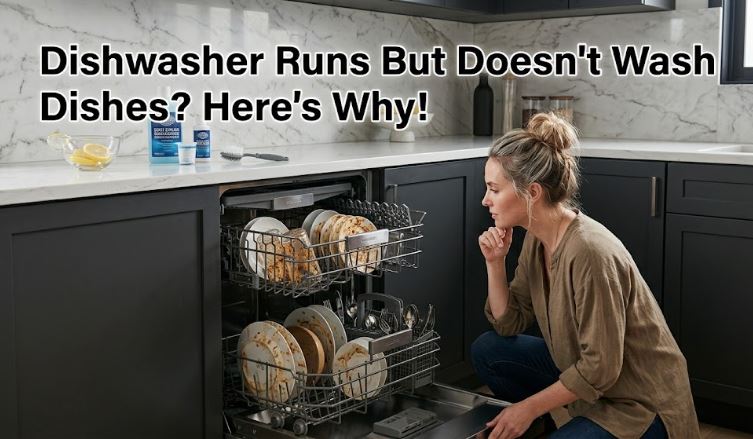
There’s a specific kind of frustration that comes with opening a dishwasher after a full cycle and finding the dishes look exactly as they did when you loaded them. The machine ran. You heard the water. You see steam. And yet the food is still there — dried harder now than when you started.
A dishwasher that runs but doesn’t wash dishes is one of the most common appliance complaints across every brand and model. The good news is that most causes are identifiable without a technician, and many are fixable in under 30 minutes. This guide walks through every likely cause, how to test for it, and when to call for backup.
Why Your Dishwasher Runs But Leaves Dishes Dirty
Before diving into individual causes, it helps to understand the sequence a dishwasher must complete to actually clean dishes. Water must enter the machine at sufficient pressure and temperature, rotate through spray arms at adequate force, encounter the right concentration of detergent at the right point in the cycle, and drain completely. Break any link in that chain and you get dishes that look untouched.
The most common culprits — in order of how frequently they appear — are a clogged filter, blocked or damaged spray arms, low water temperature, a failed detergent dispenser, poor loading habits, and insufficient water fill. We’ll work through each one methodically.
Step 1: Check the Filter First
The filter is where most diagnoses should begin. It’s the most commonly neglected component in a dishwasher, and a clogged filter is the single most frequent cause of dishes coming out dirty.
The filter sits at the base of the dishwasher tub, below the lower spray arm. When it’s blocked with accumulated food particles, grease, and debris, the machine can’t circulate clean water effectively. Instead, it recirculates progressively dirtier water throughout the cycle — coating your dishes with a thin layer of the same food particles it’s supposed to be removing.
How to clean the dishwasher filter
Cleaning it takes about five minutes:
- Remove the lower rack and locate the filter — it’s usually a cylindrical mesh assembly that twists counterclockwise to unlock
- Lift it out and separate the inner and outer filter components if they’re designed to separate
- Rinse both parts under hot running water, using a soft toothbrush to loosen any grease or debris stuck in the mesh
- Reinsert and twist clockwise to lock back into place
Most manufacturers recommend cleaning the filter once a month during regular use. If you haven’t done it in six months or more, expect visible buildup — sometimes substantial — and run a cleaning cycle after reinstalling it.
Step 2: Inspect the Spray Arms
If the filter is clean and dishes are still coming out dirty, the spray arms are the next place to look. These rotating arms are responsible for distributing water across every surface in the dishwasher. When their jets clog, water distribution suffers dramatically.
What to check
Are the spray arms rotating freely? Start a cycle, wait 5 minutes, then open the door quickly. Check that the arm has moved position. If it hasn’t, something is physically blocking it — typically an overloaded rack, a tall pan handle, or a dropped utensil.
Are the jet holes clogged? Remove the spray arms — most unscrew by rotating the center cap counterclockwise. Hold them up to a light. Every small hole should be clear. Use a toothpick or thin wire to clear any blockages, then rinse under running water before refitting.
Are the arms cracked or warped? Physical damage to the spray arm reduces water pressure and flow direction. A visibly cracked arm needs replacement. Spray arm replacements are widely available online by model number and are typically a straightforward swap.
Step 3: Check the Water Temperature
Hot water is essential for dissolving detergent, breaking down grease, and actually cleaning food residue. Most dishwashers require incoming water at a minimum of 120°F to perform correctly.
If your water heater is set below that temperature, or if the hot water line runs a long distance to the kitchen, the first few gallons entering the dishwasher may be lukewarm at best. This directly impairs detergent activation and grease removal — and the machine continues through the cycle regardless of whether the water is actually doing the job.
Quick test: Run your kitchen faucet on hot for 60 seconds before starting the dishwasher. This purges the cold water sitting in the pipe and ensures the first fill uses genuinely hot water. If cleaning improves noticeably, a long water line to your kitchen is part of the problem.
Check your water heater: The US Department of Energy recommends 120°F as the standard setting. Higher temperatures increase the risk of scalding; lower ones compromise appliance performance.
Step 4: Test the Detergent Dispenser
A dishwasher that fills, runs, and drains — but whose detergent pod or tablet comes out intact at the end of the cycle — has a dispenser problem, not a cleaning problem. If the detergent never releases, the machine is running on nothing but water.
Common dispenser failures
| Problem | Likely Cause | Fix |
|---|---|---|
| Pod comes out whole and undissolved | Dispenser door stuck or broken spring | Clean dispenser, check spring tension |
| Pod stuck to wet dispenser tray | Moisture in dispenser before loading | Dry dispenser before adding pod |
| Door opens but pod doesn’t dissolve | Water temperature too low | Check water heater and flush hot water before starting |
| No pod placed in dispenser | User error | Always place pod in main dispenser, not loose in the tub |
| Pod placed correctly but nothing releases | Dispenser door blocked by tall item | Rearrange load to ensure the door opens fully |
The dispenser door opens at a specific point in the cycle — usually during the main wash phase. If a large pan, cutting board, or pot is positioned directly in front of it, the door can’t open. That’s an easy fix: reorganize the load so nothing obstructs the dispenser area.
If the spring mechanism is physically broken, the dispenser door latch assembly is a replaceable part. Check your model number and search for the component on Amazon or manufacturer parts pages.
Step 5: Evaluate How You’re Loading the Dishwasher
Loading habits account for a surprising share of poor washing results. The spray arms rotate and project water in specific arcs. Anything that interrupts those arcs creates “shadow” zones where water never reaches.
Loading mistakes that cause dirty dishes
- Nesting items together — stacked bowls, piled plates, or silverware clumped in the basket all block water contact on interior surfaces
- Facing dishes the wrong direction — dish surfaces should face the spray arm, not away from it. In the lower rack, dishes should face the center; in the upper rack, angled downward
- Overloading — the most common single cause of poor results on an otherwise functional machine
- Blocking the detergent dispenser — tall items in the lower front-left area of the rack can prevent the door from swinging open
- Placing items upside-down incorrectly — cups and bowls should be inverted so water doesn’t pool, but angled so water can reach inside rather than just running off
A useful test: after loading, reach in and manually rotate each spray arm. If anything catches or stops the rotation, reorganize before starting the cycle.
Step 6: Check Water Fill Level
If the dishwasher isn’t filling with enough water, no amount of properly working spray arms can compensate. The spray arms need adequate water volume to generate the pressure required to rotate and project effectively.
How to test it: Start a cycle, let it run for 5 minutes, then open the door. You should see standing water at the base of the tub — typically reaching the bottom of the heating element. If the tub appears nearly dry, the machine isn’t filling adequately.
Possible causes include:
- A closed or partially closed water supply tap behind the dishwasher — check this first
- A clogged inlet valve strainer — a small mesh filter where the supply hose connects to the machine, which can collect mineral deposits over time
- A faulty water inlet valve — if the valve is failing, it may only partially open, restricting flow
- A stuck float switch — a small float inside the tub that prevents overfilling; if it’s stuck in the raised position, it tells the machine the tub is already full
The supply tap and float switch are quick DIY checks. The inlet valve strainer can be cleaned with minimal tools. The valve itself, if failing, is a component-level replacement that a confident DIYer can handle with the right part, or a quick technician visit.
Step 7: Rule Out Hard Water and Detergent Issues
Hard water is an often overlooked contributor to dishes that appear dirty or leave a white film. Dissolved minerals in hard water — primarily calcium and magnesium — interfere with detergent effectiveness and leave deposits on dishes and glassware, making everything look uncleaned even after a full cycle.
Signs of a hard water problem include white or chalky film on glasses and dishes, cloudy glassware that used to be clear, and mineral deposits building up inside the dishwasher tub on the walls and spray arms.
Detergent quality matters significantly. Liquid detergents can lose potency if they’ve been exposed to humidity or stored for extended periods. Powder detergent that has clumped is essentially inactive. Budget detergents often contain lower concentrations of enzymes and cleaning agents, which perform poorly on baked-on food and grease.
Switching to a higher-quality detergent pod and ensuring you’re using rinse aid consistently often resolves cases where the machine appears to be running correctly but results are poor.
When the Problem Is a Component Failure
If you’ve worked through every step above and cleaning still doesn’t improve, the issue has moved past DIY territory into component failure. The most common mechanical failures that cause a dishwasher to run but not wash include:
Circulation pump failure — the pump that drives water through the spray arms. Signs include a weak spray sound, low water pressure from the arms, or no spray sound at all during the wash phase.
Wash motor failure — closely related to the pump, this drives the spray arm rotation. If the arms don’t move despite clean jets and unobstructed racks, the motor may be failing.
Heating element failure — if water temperature remains low despite a correctly set water heater, the dishwasher’s internal heating element may not be functioning. This affects both cleaning performance and drying.
For these repairs, the best path is a licensed appliance technician. Attempting pump or motor work without experience can create additional problems — and depending on the machine’s age, replacement may be more economical than repair. That said, you can get new countertop dishwashers under $400, among many other affordable dishwashers, which ultimately may prove worth it.
Quick Diagnosis for a Dishwasher That Runs But Doesn’t Wash Dishes
| Symptom | Most Likely Cause | DIY Fix |
|---|---|---|
| Food residue on all dishes | Clogged filter | Clean filter monthly |
| Pod comes out whole | Stuck dispenser door or low water temp | Check spring, flush hot water first |
| Top rack only comes out dirty | Upper spray arm clogged or blocked | Clean or reposition items |
| Bottom rack only comes out dirty | Lower spray arm blocked | Clear obstruction, check arm rotation |
| White film on all dishes | Hard water or wrong detergent | Use rinse aid; switch to premium pods |
| Dishes look pre-rinsed but unclean | Pre-rinsing too thoroughly | Scrape but don’t pre-rinse; let enzymes work |
| Water feels cool during cycle | Low inlet water temp or element failure | Flush hot water before starting; check heater |
| Weak spray sound during cycle | Low fill or pump issue | Check supply tap and fill level |
Recommended Products That Directly Address These Problems
These three products target the most common causes of a dishwasher that runs without cleaning effectively. All are available on Amazon with consistently strong ratings.
1. Affresh Dishwasher Cleaner — 6 Tablets
For machines that have been running poorly for weeks or months, a deep clean cycle with Affresh is often the most impactful first step. It penetrates and dissolves the mineral deposits, grease film, and bacteria that accumulate inside spray arms, the pump, internal hoses, and the filter housing — all areas that manual cleaning can’t effectively reach. Real owners consistently report dishes cleaning noticeably better after the first cycle.
- 6 tablets — 6-month supply at one tablet per month
- Works inside spray arms, pump, tub, internal hoses, and drain
- Can be used with or without a dish load — unique among dishwasher cleaners
- Formulated with EPA Safer Choice-certified ingredients; septic safe
- Recommended by Whirlpool, Maytag, KitchenAid, JennAir, and Amana
- Compatible with all dishwasher brands and models
Check current price and reviews on Amazon
2. Cascade Platinum ActionPacs Dishwasher Detergent — 62 Count
If detergent quality is contributing to poor cleaning, Cascade Platinum is the most recommended upgrade. The pods dissolve within the first minutes of the cycle — releasing enzymes that break down food residue from early in the wash phase. The built-in Dawn grease-fighting chemistry makes a measurable difference on oily pans and greasy cookware. The hard water protection formula also helps reduce the mineral film that makes dishes look dirty even after a full cycle.
- 62 ActionPacs — approximately 2 months of daily use
- Fast-dissolving pod releases cleaning power early in the wash phase
- Contains food-seeking enzymes that break down starch and protein residue
- Built-in Dawn grease-fighting chemistry for pots and pans
- Hard water protection formula reduces spotting and film
- Works effectively even on the Quick Wash cycle
Check current price and reviews on Amazon
3. Finish Jet-Dry Dishwasher Rinse Aid — 32 oz (315 Washes)
Many owners experiencing a dishwasher that doesn’t seem to clean properly are actually experiencing a drying failure misread as a cleaning failure. Dishes that appear damp, coated with a film, or visually unclean despite a full cycle often just lack rinse aid. Finish Jet-Dry reduces water surface tension during the final rinse, causing water to sheet off dishes rather than bead and dry as spots. It also helps prevent the hard water mineral film that gets misidentified as food residue on glassware. The 32 oz bottle covers approximately 315 washes at standard dosing.
- 32 oz bottle — approximately 315 washes; one refill per month
- Reduces water spots and hard water film on glassware, flatware, and plastics
- Compatible with all dishwasher models and brands
- Works with any dishwasher detergent for improved combined results
- Dispenses automatically through the rinse aid compartment each cycle
- Provides 3x better drying performance vs detergent alone
Check current price and reviews on Amazon
Frequently Asked Questions
Why does my dishwasher run a full cycle but nothing gets clean?
In most cases, the root cause is one of four things: a clogged filter recirculating dirty water, blocked spray arms that can’t distribute water properly, insufficient water temperature for detergent activation, or a detergent dispenser that isn’t opening correctly. Start by cleaning the filter and spray arms — these two steps alone resolve the majority of cases.
My detergent pod keeps coming out whole — what’s wrong?
A pod that exits the cycle intact indicates the dispenser door didn’t open at the right moment. Check for a broken spring in the dispenser door mechanism, moisture in the dispenser tray that caused the pod to stick before the cycle started, or a dish or pan positioned directly in front of the dispenser that physically blocked the door from opening. Always load the dispenser dry and confirm nothing obstructs the door swing.
Could pre-rinsing my dishes be causing the problem?
Yes — counterintuitively, thorough pre-rinsing can reduce cleaning performance. Modern dishwashers with soil sensors detect the level of food residue and adjust the cycle intensity accordingly. If dishes arrive nearly clean, the sensor registers a light load and uses less water, lower temperature, and shorter wash time. The enzymes in detergent also need food particles to work effectively. Scrape solid food into the trash, but leave the residue for the machine.
How do I know if it’s the pump or spray arm causing the problem?
Start a cycle, wait 5 minutes, and carefully open the door. Listen: you should hear an active spraying sound with reasonable pressure. If it’s very quiet or sounds like a trickle, low water pressure from either a fill issue or a pump problem is likely. Reach in and manually check if the spray arm has moved position since you started the cycle. If it’s in the same spot, the arm is either blocked or the pump isn’t driving it. Clean the arm jets and retest before assuming the pump has failed.
When should I call a technician instead of fixing it myself?
If you’ve cleaned the filter and spray arms, confirmed the water supply is fully open, verified the detergent dispenser is functioning, and ensured the machine fills to the correct level — and cleaning still doesn’t improve — you’re likely dealing with a component failure. Circulation pump issues, heating element failure, and inlet valve problems all benefit from professional diagnosis. For machines older than 10 years, weigh the cost of repair against replacement.
The Bottom Line
A dishwasher that runs but doesn’t wash dishes is almost never a sign that the appliance is beyond saving. In the vast majority of cases, the fix involves cleaning the filter, clearing the spray arms, adjusting how you load the machine, or switching to a better detergent with consistent rinse aid use.
Work through each step methodically before assuming a mechanical failure. Most owners who follow this sequence find a resolution before they ever need to pick up the phone. And if you do reach the point of needing a technician, you’ll arrive at that call with a clear picture of what you’ve already ruled out — which saves time and money during diagnosis.
For more dishwasher repair tips and guides, check out our complete dishwasher troubleshooting guide.

Hi, I’m Barlgan! I created Repair Me Yourself to empower homeowners to tackle appliance repairs with confidence. From decoding error codes to fixing cooling issues, I break down complex repairs into simple, actionable steps that save you time and money.