Intermittent dryer heating is one of the trickiest appliance problems to diagnose. Sometimes the dryer works perfectly. Other times you pull out clothes that are barely warmer than when they went in. And because the problem comes and goes, it is easy to convince yourself the dryer is fine until an entire load comes out cold and damp again.
The reason intermittent heating is tricky is that it points to a component that is failing but has not fully failed yet. That actually makes it more urgent than a dryer with no heat at all, because a partially failed component puts extra stress on surrounding parts and can escalate into a bigger repair if left alone.
Let’s go through every cause so you can pin it down before it gets worse.
Dryer Heating Intermittently Quick Reference
| When the Heat Cuts Out | Most Likely Cause |
|---|---|
| Heat works at start then fades mid-cycle | Partially clogged exhaust vent or weak cycling thermostat |
| Heat works on some cycles but not others | Loose wiring connection or failing timer contacts |
| Heat starts then cuts off after 10-15 minutes | Overheating from vent restriction, high-limit thermostat triggering |
| Gas dryer lights briefly then goes cold | Failing gas valve solenoids |
| Heat inconsistent regardless of load size | Partially broken heating element or weak moisture sensor |
| Works fine then randomly stops heating | Control board fault or intermittent breaker leg (electric) |
What Causes a Dryer to Heat On and Off Repeatedly?
Your dryer is likely to heat intermittently or inconsistently due to the reasons shared below:
1. The Exhaust Vent Is Partially Blocked
This is the most common cause of intermittent dryer heating, and it is the first thing to check every single time.
A fully blocked vent kills heat entirely by blowing the thermal fuse. But a partially blocked vent is sneakier. It restricts airflow just enough to cause the dryer to overheat during a cycle, which triggers the cycling thermostat or high-limit thermostat to cut the heating element off temporarily. Heat returns briefly once temperatures drop, then cuts off again as the machine overheats once more. The result is a cycle of heat on, heat off that leaves clothes damp and takes twice as long as it should.
Beyond the intermittent heating problem, a partially blocked vent is also a fire risk that should never be left unaddressed. Plus, it’s often t blame for a dryer that takes two cycles to dry clothes.
How to Clear a Partially Blocked Vent
Start by pulling the machine away from the wall and checking the flex duct for kinks or compression. Make sure the dryer sits at least eight inches from the wall so the duct has enough clearance to maintain a smooth curve rather than a sharp bend.
Then disconnect the vent hose and vacuum out lint from both the hose and the wall duct. The Holikme Dryer Vent Cleaning Brush Kit (View on Amazon) attaches to a standard drill and extends deep into long vent runs that a vacuum alone cannot reach. Also check the exterior vent cap outside your home and confirm the flap opens freely. A stuck or partially blocked cap is one of the most overlooked causes of airflow restriction.
2. The Cycling Thermostat Is Failing
The cycling thermostat is the component responsible for turning the heating element on and off throughout the cycle to maintain a consistent drum temperature. A healthy thermostat switches the element on when the temperature drops and off when it reaches the set point, creating a steady heat level throughout the drying cycle.
When the cycling thermostat begins to fail, it does this job inconsistently. Sometimes it switches the heating element on normally. Other times it cuts the element off and never brings it back on, leaving the drum running cold for the rest of the cycle.
This is one of the most common causes of intermittent heating on older machines and is often misdiagnosed as a vent problem because the symptoms look similar from the outside.
How to Test and Replace the Cycling Thermostat
Unplug the dryer and locate the cycling thermostat on the exhaust duct or blower housing, depending on your model. Test it with a multimeter for continuity at room temperature. A working thermostat shows continuity when cold. Intermittent or absent continuity at room temperature confirms it is failing, and thus requires a replacement (view on Amazon).
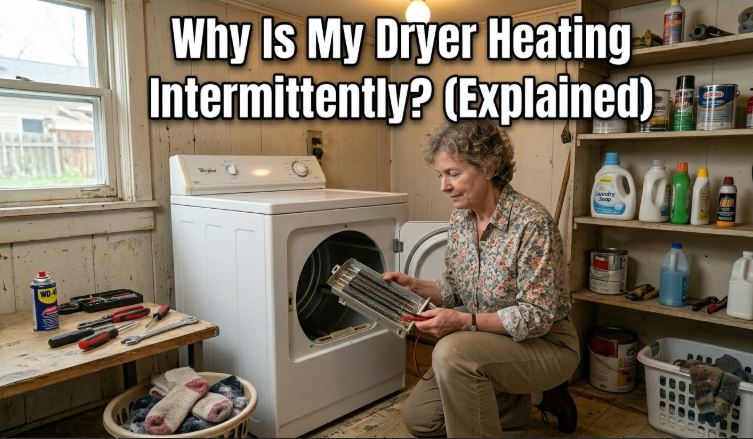
3. The Heating Element Is Partially Broken (Electric Dryers)
A heating element does not always fail all at once. Sometimes only part of the coil breaks, and the remaining coil still generates some heat, just not enough to dry a full load efficiently.
A partially broken element produces inconsistent heating because the surviving coil section works harder than it should and cycles off more frequently under the extra load. On some cycles it generates enough warmth to feel like the dryer is working. On others it barely heats at all.
A partially broken element also creates a short-circuit risk if the broken coil section touches the element housing, which is why this is worth addressing promptly rather than letting it run.
How to Test and Replace a Partially Broken Heating Element
Unplug the dryer and remove the back panel to access the heating element housing. Inspect the coil visually for any breaks, dark spots, or sections where the coil sags away from its supports. Then test the element with a multimeter for continuity. A partially broken coil may still show continuity but will have a different resistance reading than a healthy element.
Check out replacement dryer heating elements on Amazon.
4. The Gas Valve Solenoids Are Wearing Out (Gas Dryers)
This is the classic intermittent heating cause for gas dryers, and it follows a very recognizable pattern that makes it relatively straightforward to identify.
The gas valve solenoids open the gas valve to allow fuel to reach the burner at the start of each heat cycle. When they begin to wear out rather than fail completely, they can still open the valve at the beginning of the cycle but lose the ability to hold it open or reopen it as the cycle progresses. The dryer heats initially, sometimes for ten to fifteen minutes, then goes cold as the valve closes and refuses to reopen.
This heat-then-cold pattern is the clearest sign of failing solenoids rather than a fully dead one.
How to Replace Gas Valve Solenoids
Unplug the dryer and turn off the gas supply valve. Access the gas valve assembly from the front panel. The solenoid coils clip directly onto the valve body and disconnect from the wiring harness without any special tools.
Replacing all the coils at once rather than just the weakest one prevents the same problem from returning within a few months. Find suitable dryer gas valve solenoid kits on Amazon.
5. There Is a Loose Wiring Connection or Intermittent Breaker Issue
A loose wire connection at the terminal block, heating element, or thermostat creates exactly the kind of unpredictable heating that is hard to pin down. The connection carries current normally when the wire is at a certain temperature or position, then loses contact as the machine vibrates or heats up during the cycle.
On electric dryers, an intermittent fault on one of the two 240-volt circuit legs causes the same result. The heating element loses power partway through the cycle when the breaker leg flickers, then regains it briefly, creating a random pattern of heat and no heat that looks like a component fault from the inside.
How to Check Wiring Connections and the Breaker
Unplug the dryer and remove the back panel. Inspect the wiring connections at the heating element, both thermostats, and the terminal block where the power cord connects. Look for loose connectors, burnt terminal ends, or wires that pull away from their connectors with gentle hand pressure.
Reseat any loose connections firmly and replace any connectors showing signs of heat damage. Also go to the breaker panel and flip the dryer’s double-pole breaker fully off then fully on, since a partially tripped leg does not always look tripped from the outside. If the breaker trips repeatedly, have a licensed electrician inspect the circuit before continuing to use the dryer.
6. The Moisture Sensor Bars Are Coated With Residue
This cause is specific to dryers with auto-dry cycles, and it produces one of the most confusing versions of intermittent heating because the machine thinks it is doing its job correctly.
The moisture sensor bars are two small metal strips inside the drum that detect the moisture level in the clothes by measuring electrical conductivity between them. The dryer uses this reading to decide when to reduce heat or stop the cycle. When these bars get coated with fabric softener residue or dryer sheet wax, they lose sensitivity and misread dry clothes as already done, cutting the heat early and ending cycles prematurely.
The result is a dryer that sometimes works perfectly and other times produces barely any heat at all, depending entirely on how much residue has built up.
How to Clean the Moisture Sensor Bars
Locate the two thin metal strips on the inside front wall of the drum, just below the door opening on most models. Rub them firmly with a soft cloth dampened with a small amount of rubbing alcohol. This dissolves fabric softener residue without damaging the metal.
Avoid using dryer sheets going forward and switch to liquid fabric softener added in the washer instead. Dryer sheets are the primary source of sensor bar coating and are one of the simplest habits to change for long-term heating consistency.
7. The Timer or Control Board Has a Developing Fault
When all the components above test fine and the heating is still inconsistent, the timer or control board becomes the final suspect.
The timer controls the sequence of heating cycles by sending voltage to the heating circuit at the right moments. Worn or corroded timer contacts send that voltage inconsistently, producing intermittent heat that has no apparent pattern. A control board developing a fault does the same thing electronically, cutting the heat signal randomly depending on which part of the board is affected.
This is the least common cause but worth checking when everything else clears.
How to Diagnose a Timer or Control Board Issue
Start with a hard reset. Unplug the dryer for two full minutes, plug it back in, and run a timed dry cycle rather than an auto-dry cycle to bypass the moisture sensor entirely. If heat becomes consistent on timed dry but remains intermittent on auto-dry, the moisture sensor rather than the board is the real culprit.
If intermittent heating occurs even on timed dry after the reset, run the machine’s diagnostic mode to check for stored error codes. Search your model number alongside “diagnostic mode” for the correct sequence. For timer-based machines, test the timer contacts with a multimeter for consistent continuity during the heating phase.
Intermittent Heat Fix Cost and Difficulty Overview
| Cause | DIY Difficulty | Part Cost | Pro Repair Cost |
|---|---|---|---|
| Clean exhaust vent | Easy | Free – $20 | $80 – $150 |
| Clean moisture sensor bars | Very easy | Free | N/A |
| Reset breaker leg | Very easy | Free | N/A |
| Reseat loose wiring | Easy | Free | $80 – $150 |
| Cycling thermostat kit | Easy | $10 – $25 | $100 – $180 |
| Gas valve solenoid kit | Moderate | $15 – $30 | $120 – $220 |
| Heating element | Moderate | $20 – $50 | $150 – $300 |
| Timer or control board | Advanced | $40 – $200 | $150 – $350 |
Frequently Asked Questions
Why does my dryer heat fine at the start of the cycle then go cold?
Heat at the start followed by a cold finish almost always points to either a partially blocked exhaust vent causing overheating, or failing gas valve solenoids on a gas dryer. The vent blockage causes thermostats to cut the element off after the drum reaches a dangerous temperature, while weakening solenoids lose the ability to hold the gas valve open as the cycle progresses.
Can fabric softener sheets really cause intermittent heating?
Yes, genuinely. Dryer sheet wax coats the moisture sensor bars over time and causes the auto-dry cycle to misread the moisture level in the drum. The dryer thinks the load is done far earlier than it actually is and cuts the heat cycle short. Cleaning the sensor bars with rubbing alcohol resolves this immediately.
Why does my dryer heat on short cycles but not long ones?
This pattern points strongly to a partial vent blockage. Short cycles do not generate enough heat buildup to trigger the overheat cutoff, while longer cycles push the drum temperature high enough that the safety thermostat trips the heating element. Cleaning the vent is almost always the fix in this specific situation.
How do I know if it is the thermostat or the heating element causing intermittent heat?
Test both with a multimeter. A cycling thermostat that shows inconsistent continuity at room temperature is the culprit. A heating element with a visible break in the coil or an abnormal resistance reading is the issue. Since both are often accessed through the same disassembly steps, it is practical to test and replace both if either shows any sign of fault.
Is intermittent heating more dangerous than no heat at all?
In some ways, yes. A dryer with no heat at all is not a fire risk. Intermittent heating caused by a partial vent blockage means the dryer is repeatedly overheating and recovering, which stresses the thermal fuse, thermostats, and heating element simultaneously. A partially blocked vent also means lint is accumulating somewhere in the system, which is a genuine fire hazard worth addressing urgently.
Fix Your Intermittently Heating Dryer While the Clues Are Still There
Intermittent heating is easier to diagnose than no heat at all because the pattern of when it fails tells you exactly which component to look at. A dryer that heats then goes cold mid-cycle points to the vent and thermostats. A gas dryer that lights then goes cold points to the solenoids. A dryer that ends cycles too early points to the moisture sensors.
Start with the free checks first: clean the vent, clean the sensor bars, and flip the breaker. Those three steps cost nothing and resolve a significant portion of intermittent heating complaints before any tools come out.
Remember to also check out our ultimate dryer troubleshooting guide, which walks you through several other dryer problem diagnostics.

Hi, I’m Barlgan! I created Repair Me Yourself to empower homeowners to tackle appliance repairs with confidence. From decoding error codes to fixing cooling issues, I break down complex repairs into simple, actionable steps that save you time and money.