Your Whirlpool microwave has power. The display lights up, buttons beep when you press them, and everything looks normal. But when you hit start, nothing happens.
You’ve already checked the obvious stuff. The door is closed, the timer is set, and power is flowing to the outlet. Still, your microwave refuses to start cooking, and you’re stuck wondering what’s wrong.This frustrating problem affects thousands of Whirlpool owners every year.
The good news is that most Whirlpool microwave start failures come from fixable problems like defective door switches, blown thermal fuses, misaligned latches, or activated child lock features.
I’m going to walk you through all twelve causes and show you how to fix them.
Quick Diagnosis Guide for a Whirlpool Microwave That Won’t Start
| Symptom | Display Message | What’s Wrong | First Step | Repair Cost |
|---|---|---|---|---|
| No response at all | None | Control lock active | Check for lock icon | $0 |
| Beeps but won’t start | None | Door switch problem | Test door closure | $60-$150 |
| “Open close door” shows | Exact phrase | Failed door switch | Replace switch | $80-$180 |
| Works when door pressed hard | None | Worn latch | Adjust or replace | $40-$120 |
| Start button dead | None | Bad membrane switch | Replace touchpad | $100-$220 |
| Display works, nothing else | None | Blown thermal fuse | Test continuity | $90-$180 |
| Starts sometimes | None | Loose ribbon cable | Reseat connections | $0-$80 |
| Error codes showing | Various codes | Specific component failure | Decode the error | Varies |
How Whirlpool Microwave’s Start Sequence Works
Your microwave runs through a complex safety check before it’ll start heating food. Understanding this sequence helps you figure out what’s broken.
First, the control board receives your start command when you press the button. This kicks off the entire verification process.
Next, all three door interlock switches must register as closed. These switches work in series for triple redundancy: primary, secondary, and monitor. If any one fails, nothing starts.
Then the thermal fuses protecting against overheating must show continuity. These are one-time safety devices that permanently open when temperature limits get exceeded.
The control board also verifies that your power level and timer settings make sense. It checks that logical cooking parameters actually exist before proceeding.
Only after every single safety check passes does the control board energize the magnetron. Any single verification failure stops the entire process cold.
Why Won’t My Whirlpool Microwave Start?
Discussed below are 12 issues that can stop a Whirlpool microwave from starting:
1. Door Interlock Switch Failure
Three door switches create safety interlocks that prevent your microwave from operating with an open door. When any one of these switches fails, starting becomes impossible even with the door firmly closed.
The primary switch enables control circuit power. The secondary switch provides redundant safety verification, while the monitor switch detects failures in the other two switches.
These are electromechanical components rated for about 100,000 operations, and they typically fail between years 5 and 8 of regular use. Testing requires a multimeter (View on Amazon) set to continuity mode where you press each switch manually while measuring resistance across the terminals.
Functional switches should show zero ohms when closed and infinite ohms when open. Any deviation from these readings indicates switch failure that needs replacement.
2. Door Latch Misalignment
Worn hinges cause the door to sag, which prevents proper latch engagement. The switches don’t close completely even though the door looks shut to you.
Visual inspection usually reveals misalignment where the latch hook doesn’t enter the strike plate squarely. Listen for three distinct clicks when closing the door firmly, because missing or weak clicks indicate alignment problems.
Hinge adjustment or replacement costs $40 to $80, and this preventive repair helps you avoid more expensive switch replacement down the road. Some misalignments respond to strike plate adjustment where you loosen the mounting screws and reposition the plate to restore proper engagement.
3. Blown Thermal Fuse
Thermal fuses protect against fire by permanently opening circuits when temperatures exceed 165°C. Once blown, these devices require complete replacement since they don’t reset.
Whirlpool places thermal fuses near the magnetron and in exhaust pathways where blocked ventilation or magnetron overheating can trigger activation. Testing requires multimeter continuity checks, and blown fuses show infinite resistance across their terminals.
Replacement fuses cost only $5 to $10, but you need to disassemble the cabinet to access them. Professional installation takes 45 to 60 minutes.
Always identify why the fuse blew before replacing it. Simply installing new fuses without addressing root causes guarantees the problem will happen again.
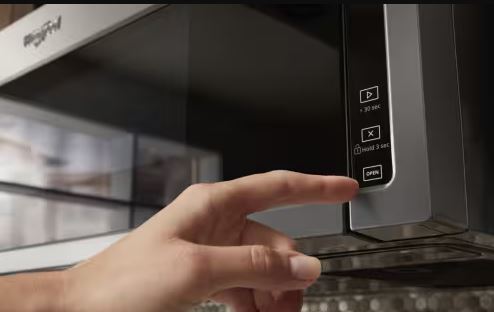
4. Child Lock or Control Lock Activation
Control lock deliberately disables start functions to prevent accidental operation, and this feature causes the most common “won’t start” service calls. Look for a lock icon on the display since most Whirlpool models show this symbol when control lock is active.
Press and hold “Stop/Cancel” for 3 seconds on standard models, and the lock icon should disappear when you’ve successfully deactivated it. Some over-the-range models require “Off” plus “Start” held simultaneously for 3 seconds, so consult your manual for model-specific sequences.
Control lock accounts for roughly 30% of “broken microwave” complaints, making this zero-cost solution a huge money-saver that prevents unnecessary service calls.
5. Start Button Membrane Deterioration
Your Whirlpool microwave’s start button experiences more mechanical stress than any other control because everyone presses it multiple times every day. The membrane switch beneath the button wears out from this concentrated usage.
Symptoms include needing multiple presses or very firm pressure to activate, and eventually the button stops responding entirely. Testing involves pressing the start button while measuring continuity at the touchpad connector, where worn membranes show increased resistance.
Touchpad assembly replacement costs $100 to $220 depending on model complexity, and this repair includes the entire control panel with all buttons. A temporary fix involves pressing slightly off-center on the start button to access less-worn membrane areas.
6. Control Board Power Supply Failure
The main control board includes voltage regulators that provide power to various circuits. When these regulators fail, the start function may lose power while other systems keep working.
The display continues working because it operates on separate power rails, which creates confusing partial failure symptoms. Professional testing measures voltage at the start button circuit where expected readings are 3 to 5 volts DC depending on touchpad type.
Control board replacements (View on Amazon) cost $200 to $380 for most Whirlpool models, and this repair makes economic sense for built-in and premium units. Some electronics repair specialists offer component-level board repair where voltage regulator replacement costs $100 to $180 when feasible.
7. Ribbon Cable Disconnection
A flat ribbon cable connects your touchpad to the main control board, and this cable can partially disconnect or develop broken conductors over time. Symptoms include intermittent start button function where the button works sometimes but fails randomly without any pattern.
Cabinet vibrations and repeated door slamming loosen ribbon cable connectors, and even millimeter-scale movement causes failures. Remove and reseat the ribbon cable firmly, then clean the gold contacts with 90% isopropyl alcohol if you see any oxidation.
Damaged ribbon cables require replacement, and these model-specific parts cost $20 to $45.
8. Failed Magnetron Thermal Protector
The magnetron includes an integral thermal protector that prevents overheating damage. When this device opens, the control board can’t start the magnetron at all.
Unlike thermal fuses, magnetron protectors usually reset after cooling, so your microwave works when cold but refuses to start after you’ve used it. Repeated protector activation indicates inadequate cooling, so clean the magnetron cooling fins and verify fan operation before replacing any components.
Professional diagnosis identifies whether the protector is faulty or responding to actual overheating. This distinction prevents unnecessary magnetron replacement that costs $200 to $350 when the protector won’t reset.
9. Defective Door Sensor
Some Whirlpool models use electronic door sensors instead of mechanical switches to detect door position through magnetic or optical means. Sensor failures create “door open” conditions even with fully closed doors, and the control board refuses to start based on this faulty sensor feedback.
Testing requires specialized equipment that measures sensor output voltage, so DIY diagnosis is limited to visual inspection. Sensor replacement costs $50 to $100 for parts with professional installation adding another $60 to $100 in labor.
Sensors fail less frequently than mechanical switches but aren’t repairable, so complete replacement is necessary when they malfunction.
10. Interlock Monitor Circuit Failure
The monitor circuit continuously verifies proper door switch operation, and when this safety system detects anomalies, it prevents starting. Monitor circuit failures sometimes blow the monitor fuse, which is a small ceramic fuse that protects against radiation leakage.
Never bypass monitor circuits or fuses because these safety systems prevent dangerous microwave exposure. Professional diagnosis identifies whether the monitor circuit or actual door switches have failed, and this distinction prevents unnecessary parts replacement.
Monitor circuit repairs cost $150 to $280 including diagnostic time, and this specialized troubleshooting requires authorized service.
11. Low Voltage at Outlet
Inadequate electrical supply voltage prevents proper microwave operation where the control board may function while high-power systems can’t activate. Test your outlet voltage under load using a multimeter, because readings below 110 volts indicate electrical problems.
Shared circuits with other appliances cause voltage drops that a dedicated 20-amp circuit eliminates. Loose outlet connections create high resistance that reduces available voltage, and an electrician can identify and repair these connection problems.
Electrical service upgrades cost $150 to $400 depending on the work required, and this infrastructure repair benefits all your connected appliances.
12. Software Corruption
Digital control boards run embedded software that occasionally corrupts, creating unpredictable behavior including start function failures. Complete power cycling clears many software glitches when you unplug for at least 5 minutes to discharge capacitors fully.
Factory reset procedures restore default programming as a comprehensive approach that tackles persistent software problems. Some control board corruptions require firmware reflashing by authorized service, which is a specialized procedure costing $100 to $150.
Software issues don’t indicate hardware failure. So while they’re frustrating, they usually resolve without parts replacement.

Door Switch Replacement Process
| Step | Action | Tools Needed | Difficulty | Time |
|---|---|---|---|---|
| 1 | Disconnect power | None | Easy | 1 min |
| 2 | Remove control panel | Phillips screwdriver | Moderate | 10 min |
| 3 | Access door switches | Phillips screwdriver | Moderate | 5 min |
| 4 | Test switch continuity | Multimeter | Moderate | 10 min |
| 5 | Remove bad switches | Phillips screwdriver | Easy | 5 min |
| 6 | Install new switches | Phillips screwdriver | Easy | 5 min |
| 7 | Test operation | None | Easy | 5 min |
| 8 | Reassemble panels | Phillips screwdriver | Moderate | 10 min |
Why Professional Diagnosis Helps
Technicians have specialized tools that measure switch timing and resistance accurately, and these instruments detect marginal switches that DIY testing misses. Door interlock systems are safety-critical, so professional installation ensures proper function and radiation protection.
Some door switch failures indicate underlying mechanical problems, and technicians identify and correct root causes that prevent repeat failures. Warranty coverage often applies to door switch issues, so authorized service preserves your warranty protection.
Professional switch replacement costs $80 to $180 total, which includes diagnosis, parts, and labor for complete repair.
When Your Whirlpool Microwave Has Power But Won’t Start
Power reaching your microwave without starting capability indicates specific component failures, and this narrow diagnostic window helps identify problems quickly. The display illuminating confirms low-voltage power supply function, so the issue exists in high-voltage systems or safety interlocks.
Systematic Diagnostic Sequence
Test every button on the control panel and document which buttons produce beeps and display changes. If only the start button fails, the issue is touchpad-specific since other buttons working proves the control board functions.
If no buttons produce any response, control lock is likely active, so look for a lock icon on the display. Attempt to set the clock or access settings menus to confirm control board processor functionality.
Listen for any sounds when pressing start because clicking indicates relay activation even if cooking doesn’t begin.
Understanding Power vs. Operation
Low-voltage circuits for display, control, and clock operate on 12 to 24 volts DC and draw minimal current. High-voltage circuits for the magnetron, turntable, and fan require 120 volts AC and draw substantial current during operation.
Separate power supply rails mean one system can fail while the other functions, which creates confusing partial operation. Thermal fuses protect high-voltage circuits specifically, so they can blow while leaving display circuits completely intact.
Understanding this architecture guides troubleshooting toward high-voltage components and safety interlocks rather than control systems.
Component Isolation Testing
Professionals disconnect components systematically to identify failures where removing suspect components reveals whether they cause system-wide shutdowns. Unplug the magnetron and attempt starting, because if other functions resume, the magnetron or its circuits are faulty.
Disconnect the turntable motor and retry since shorted motors sometimes prevent starting as a safety measure. Remove touchpad connections one at a time because control panel issues sometimes disable entire systems through signal interference.
This advanced testing requires technical knowledge, and improper disconnection risks additional damage.
When Your Whirlpool Microwave Beeps But Won’t Start
Beeping confirms the touchpad registers button presses and the control board processes your input. The failure occurs after successful signal reception, and this symptom pattern indicates safety interlocks preventing operation despite valid user commands.
What Beeping Tells You
Touchpad membrane switches successfully complete circuits where the conductive layers make proper contact when pressed. Ribbon cable connections between touchpad and control board are intact so signals successfully transmit.
The control board receives power and processes inputs correctly, which verifies processor functionality. However, safety verification sequences detect problems where the control board identifies conditions preventing safe operation.
Beeping without starting is actually the correct response to interlock failures, so the system works as designed by refusing unsafe operation.
Door Interlock as Primary Suspect
Door switches cause roughly 70% of beep-without-start scenarios, making them your most common culprit. The control board acknowledges start commands with beeps but detects door switches in open position, so it correctly refuses to proceed.
Testing door switches should be your immediate priority since this component causes the vast majority of these problems. Replace all three door switches simultaneously because one failed switch often damages adjacent switches through electrical stress.
Switch replacement resolves beeping-without-starting issues in most cases, and this $80 to $150 repair restores full functionality.

Thermal Protection Verification
Thermal fuses preventing start operations don’t usually generate beeps, but some models beep to acknowledge commands before checking thermal status. Test thermal fuses with a multimeter because these simple continuity checks definitively identify blown fuses.
Thermal cutoffs that reset after cooling create intermittent beeping-without-starting where the microwave works when cold but fails when warm. Improving ventilation resolves thermal cutoff activation through cleaning vents and filters while ensuring proper clearance around the unit.
Persistent thermal protection activation requires component replacement where one-time thermal fuses cost $5 to $10 while resettable cutoffs cost $30 to $60.
Control Board Verification
Control boards rarely fail in ways that produce beeps without starting because this symptom pattern suggests sensors rather than board failure. However, boards can develop relay failures where the control board beeps acknowledging commands but relays don’t close to provide magnetron power.
Professional testing measures relay coil activation and contact closure using specialized equipment. Relay replacement on control boards requires soldering skills that some repair specialists offer as component-level service.
Complete control board replacement costs $200 to $380, and this definitive repair resolves any board-related start failures.
How to Reset a Whirlpool Microwave That Won’t Start
Reset procedures address software glitches and control board confusion that prevent starting. These zero-cost solutions should come before any component replacement since roughly 40% of won’t-start issues resolve through proper resets.
Standard Power Cycle Reset
Unplug your Whirlpool microwave completely from the wall outlet because circuit breakers don’t provide adequate isolation. Wait exactly 5 minutes minimum so capacitors can discharge fully and volatile memory can clear.
While unplugged, press and hold the Start button for 10 seconds to drain residual power from control circuits. Plug back in and observe startup where the display should illuminate showing a flashing clock or 12:00.
Test starting immediately after reset by trying a brief 10-second cooking cycle to verify reset success.
Control Lock Deactivation Reset
Control lock is the most common cause of won’t-start complaints since this feature deliberately prevents starting. Press and hold “Stop/Cancel” for 3 seconds on most Whirlpool models while watching for lock icon disappearance.
Over-the-range models may require “Off” plus “Start” simultaneously for 3 seconds because model variations exist. The WMH31017HZ series uses “0” then “Cancel” within 2 seconds, and this unique sequence differs from standard models.
If correct sequences don’t unlock your microwave, perform a power cycle reset first, then immediately retry the unlock procedure.
Hard Reset with Extended Disconnect
When standard resets fail, extended disconnection forces a complete system reset through this aggressive approach that resolves stubborn glitches. Unplug from the wall and trip the circuit breaker to ensure complete electrical isolation.
Wait 30 minutes to 2 hours so extended time allows full electrical system discharge. Press all buttons multiple times while power is disconnected to discharge stored energy in control circuits.
Restore the circuit breaker first, then plug in to ensure clean power restoration through this proper sequence.
Factory Reset Procedure
Factory reset erases all settings and returns your microwave to original configuration, so use this for corrupted settings. Press and hold “Stop/Cancel” for 5 seconds, and some models will display “RESET” confirmation.
On models without automatic reset, press “Cancel” then “1-2-3” within 2 seconds to enter programming mode. Navigate to the reset option using number keys since different models use varied navigation schemes.
Confirm factory reset, and all custom programs will erase completely.
When Resets Don’t Help
Hardware failures don’t respond to reset procedures because blown fuses, failed switches, and damaged components require physical replacement. If reset restores function temporarily but problems return within hours, hardware is degrading and control boards or components need replacement.
Repeated reset requirements indicate underlying failures where professional diagnosis identifies specific failed components. Safety-related start failures rarely resolve through resets since door switch and thermal fuse issues need component replacement.
Don’t attempt unlimited reset variations hoping for success. Two or three reset methods are sufficient, and beyond that, hardware repair is necessary.
Common Questions
Why won’t my Whirlpool microwave start when I press the button?
Whirlpool microwaves that won’t start typically have defective door switches preventing safety interlock completion, blown thermal fuses from overheating, activated control lock features, or worn start button membrane switches. Check for a lock icon on the display first, then listen for three clicks when closing the door since missing clicks indicate door switch or latch problems requiring $80 to $180 repair.
What does it mean when my Whirlpool microwave says “open close door”?
This message indicates the control board detects door interlock problems where door switches report open status even with the door closed. Causes include failed door switches, misaligned latches preventing switch engagement, or wiring faults. Open and close the door firmly ten times, and if unsuccessful, door switch replacement costs $80 to $180 professionally.
How do you reset a Whirlpool microwave that won’t start?
Unplug your Whirlpool microwave for 5 minutes to perform a standard reset. Press and hold the Start button for 10 seconds while unplugged to drain residual power. To deactivate control lock, press and hold “Stop/Cancel” for 3 seconds. For factory reset, press “Cancel” then “1-2-3” within 2 seconds. If resets don’t restore starting, hardware failure exists.
Why does my Whirlpool microwave beep but not start?
Beeping confirms button press registration but safety interlocks prevent operation, which typically indicates door switch failures where the control board receives start commands but detects door switches in open position. Test by pressing firmly on the door while starting, and if this allows operation, door latch alignment or switch replacement is necessary, costing $80 to $180.
Why does my Whirlpool microwave have power but won’t start?
Power to displays proves low-voltage circuits function while the issue exists in high-voltage systems or safety interlocks. Check for control lock activation by looking for a lock icon, then test door closure by listening for three clicks. Verify the start button produces beeps since blown thermal fuses protecting high-voltage circuits prevent starting while displays remain powered.
How much does it cost to fix a Whirlpool microwave that won’t start?
Repair costs range from $0 for control lock deactivation to $400 for multiple component failures. Door switch replacement costs $80 to $180, thermal fuse replacement runs $90 to $180, control board replacement costs $200 to $380, and start button or touchpad replacement is $100 to $220. Built-in models add $50 to $100 due to access difficulty, so always try free reset procedures first.
Bottom Line
Most Whirlpool microwave start failures come from identifiable component issues and safety system activations that you can fix. Systematic troubleshooting helps you distinguish between simple control lock confusion, door interlock problems, thermal protection activation, and actual component failures.
The majority of issues resolve through door switch replacement, thermal fuse replacement, or simple reset procedures costing under $200. Understanding the safety verification sequence helps diagnose start failures effectively because the control board must confirm door closure, thermal protection status, and valid cooking parameters before allowing magnetron activation.
When any verification step fails, starting becomes impossible despite your microwave appearing functional. Professional diagnosis identifies specific failures and prevents expensive trial-and-error parts replacement.

Hi, I’m Barlgan! I created Repair Me Yourself to empower homeowners to tackle appliance repairs with confidence. From decoding error codes to fixing cooling issues, I break down complex repairs into simple, actionable steps that save you time and money.