Your Whirlpool microwave suddenly stops working, and you’re left wondering what went wrong. Maybe it refuses to heat food, displays confusing error messages, or operates erratically. These frustrating malfunctions disrupt your daily routine and leave you questioning whether repair or replacement makes sense.
Microwave problems range from simple fixes requiring just minutes to complex failures needing component replacement. Understanding systematic troubleshooting approaches empowers you to diagnose issues accurately before spending money unnecessarily.
Industry repair data shows that 82% of Whirlpool microwave problems stem from seven main issues. Door switch failures account for 28% of cases, while blown fuses cause 18%. Magnetron problems represent 16%, control board malfunctions 12%, and display issues 8%. Turntable and fan component failures combine for the remaining 10%.
Proper diagnosis enables targeted repairs costing just $15-$320 versus $200-$800 for full replacement. Better yet, DIY success rates sit at 76% across common problems, making repairs worth attempting.
Whirlpool Microwave Problems – Master Diagnostic Chart
| Problem Category | Key Symptoms | Quick Test | Most Common Cause | Typical Repair Cost |
|---|---|---|---|---|
| Complete power failure | No lights, no display, no response | Check outlet with another device | Blown fuse or circuit breaker | $5-$180 |
| Has power but won’t start | Display works, buttons respond, won’t run | Listen for door switch clicks | Failed door switch | $12-$75 |
| Runs but doesn’t heat | Turntable spins, fan runs, stays cold | Place cup of water, test heating | Magnetron or diode failure | $80-$350 |
| Display problems | Blank, dim, or garbled screen | Check if buttons still beep | Display module or fuse | $0-$150 |
| Door errors | “Door error” or won’t start | Close door slowly, count clicks | Door switch or latch misalignment | $15-$120 |
| Mechanical issues | No spinning, continuous fan | Observe during operation | Motor, coupler, or relay stuck | $5-$180 |
Understanding Whirlpool Microwave System Architecture
Whirlpool microwaves consist of interconnected systems that require coordinated operation for proper function. Understanding these relationships accelerates troubleshooting by revealing how single component failures create multiple symptoms. Each system depends on others, so problems often manifest in unexpected ways.
The power supply system converts standard 120V AC from your outlet into various voltages. High-voltage circuits power the magnetron that generates microwaves for heating food. Meanwhile, low-voltage circuits operate control boards, displays, and logic systems throughout the unit.
The safety interlock system prevents dangerous operation with open doors through multiple layers. Three door switches work together to ensure proper closure before allowing magnetron activation. This redundancy protects you from microwave radiation exposure during normal use.
The heating system includes the magnetron, high-voltage transformer, capacitor, and diode working as one unit. These components convert electrical energy into microwave radiation that heats your food. When any single component fails, the entire heating system stops functioning properly.
Control electronics manage all functions through sophisticated microprocessor-based boards. These systems interpret button inputs, monitor various sensors, control relays, and display information. The control board serves as the brain coordinating all microwave operations seamlessly.
Mechanical components include turntable motors, cooling fans, vent fans, and door latches. These physical systems support core microwave functions through movement and ventilation. They work quietly in the background ensuring proper operation and component protection.
Understanding which system contains problems guides your diagnostic approach significantly. Power problems require different testing than heating failures do entirely. Mechanical issues use visual observation, while electronic problems need multimeter testing for accurate diagnosis.
Whirlpool Microwave Not Starting
Your microwave shows no response when you press start despite appearing to receive power. This common problem has distinct diagnostic pathways depending on the specific symptoms you observe. Generally, here’s what to do when your Whirlpool microwave won’t start:
1. Verifying Actual Power Delivery
Before assuming microwave problems exist, confirm that electrical power reaches the unit properly. Many “broken” microwaves simply lack power from external issues beyond the appliance itself. This quick check takes just minutes but saves hours of unnecessary troubleshooting.
Test the wall outlet with another appliance like a lamp or phone charger. This verifies that the outlet actually works and supplies power correctly. Check your home’s circuit breaker panel next for any tripped breakers. Reset tripped breakers by pushing them fully to the off position first, then back on.
For hardwired installations, verify circuit breakers at the electrical panel serving that circuit. Over-the-range models often use dedicated circuits that might have tripped independently. Test outlet voltage with a multimeter (View on Amazon) if you have one available. You should read between 115-120V AC at standard outlets under normal conditions.
Inspect the power cord for any visible damage like fraying or burning. Damaged sections prevent proper power delivery even when the outlet works perfectly. External power problems account for about 15% of apparent microwave failures. These resolve without touching the microwave itself, saving significant time and money.
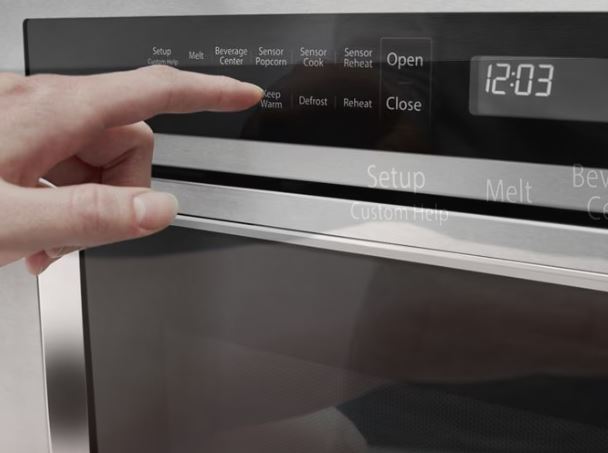
2. Door Switch Interlock System Testing
The safety interlock prevents operation with improperly closed doors through a sophisticated switch system. Failed microwave door switches represent the single most common cause of “won’t start” problems. Whirlpool microwaves use three door switches working together: primary, secondary, and monitor switches. All three must function correctly for the microwave to operate safely.
Identifying door switch problems:
Close the door slowly while listening carefully for distinct mechanical sounds. You should hear three distinct clicks as each switch engages in sequence. Missing clicks indicate switches that aren’t engaging properly with the door latch. Count the clicks carefully because the number tells you how many switches failed.
One click means two switches have failed completely and need replacement. Two clicks suggest that one switch has failed and requires attention. Watch the door latch mechanism through the door window during closure attempts. The latch hook should extend fully into the cavity, pressing all switch actuators.
Check door alignment by observing gaps around the perimeter when closed fully. Uneven gaps suggest hinge problems that prevent proper latch engagement with switches. Even perfectly functioning switches won’t work if the latch doesn’t reach them.
Testing door switches with a multimeter:
Unplug the microwave completely before accessing any internal components for safety. Remove outer cabinet panels to access door switch locations near the latch area. Set your multimeter to continuity (ohm) mode, which beeps when detecting electrical continuity.
Test each switch individually by manually pressing the actuators while measuring continuity. Primary and secondary switches show continuity when compressed but infinite resistance when released. Monitor switches behave oppositely, showing continuity when released and opening when compressed.
Replace failed door switches with exact part numbers for your specific model. Switches typically cost between $12-$35 each depending on the type. Installation takes approximately 30-45 minutes with proper tools and careful work.
3. Thermal Fuse and Line Fuse Diagnosis
Fuses protect microwaves from dangerous overcurrent and overheating conditions that could cause fires. Blown fuses cut all power immediately, preventing operation despite good power supply. The thermal fuse mounts near the magnetron to protect against overheating conditions. This one-time safety device blows permanently and requires complete replacement when triggered.
The line fuse protects the entire electrical system from power surges and short circuits. This fuse blows during power surges or when internal short circuits develop. Both fuses serve critical safety functions and should never be bypassed under any circumstances.
Testing and replacing fuses:
Locate fuses by removing the outer cabinet panels carefully. Thermal fuses typically sit near the magnetron assembly for effective temperature monitoring. Line fuses mount on control boards or in dedicated fuse holders. Test fuse continuity with a multimeter set to ohms or continuity mode.
Good fuses show zero resistance and provide a clear continuity beep. Blown fuses read infinite resistance and show no continuity at all. Examine glass fuses visually for additional confirmation of their condition. Blown fuses often show broken internal wires or blackened glass from the failure.
Replace blown fuses with components having identical amperage and voltage ratings. Using wrong fuses creates serious fire hazards or causes nuisance failures repeatedly. Investigate why fuses blew before reassembling the microwave completely. Blown fuses indicate real electrical problems that need addressing urgently.
Simple fuse replacement without proper diagnosis leads to repeated failures and frustration. Thermal fuses typically cost between $8-$15, while line fuses run $5-$12. Both components take approximately 15-30 minutes to replace with basic tools.
Also Read: Whirlpool Microwave Start Button Not Working? Quick DIY FIx!
Whirlpool Microwave Not Working But Has Power
The display illuminates normally and buttons respond when pressed, but the microwave won’t run cooking cycles. This specific symptom pattern indicates particular failure modes within the control system. Power reaches the unit, but something prevents the cooking cycle from initiating properly.
Here’s what to explain why your Whirlpool microwave isn’t working despite having power:
Control Board Relay Failures
Relays on the control board switch power to various components throughout the microwave. Stuck or failed relays prevent operation despite functioning control electronics and proper power delivery. The magnetron relay controls heating element power specifically through high-current switching.
A stuck-open relay prevents magnetron operation even when the control board signals “on” correctly. Testing relays requires accessing the control board by removing cabinet panels carefully. Visual inspection sometimes reveals burned or damaged relays with discolored contacts visible.
Listen for relay clicks when pressing the start button during operation attempts. Working relays produce audible clicking sounds during activation and deactivation cycles. Replace failed relays if they’re socketed and easily removable from the board. Relays typically cost between $8-$25 depending on the type and current rating.
Soldered relays require either control board replacement or advanced soldering skills to repair. Most homeowners should replace the entire control board when facing soldered relay failures.
Error Code Display Without Operation
Modern Whirlpool models display specific error codes when detecting problems during operation. These codes prevent operation until you resolve the underlying issues causing the errors. Common codes include door errors, sensor failures, and communication problems between components.
Each error code indicates specific component failures that need addressing before operation resumes. Consult the troubleshooting codes section later in this guide for detailed meanings. Clear error codes through proper resets after completing repairs successfully.
Simply fixing components doesn’t always clear stored error codes preventing further operation. The control board memory retains fault codes until you properly reset the system.
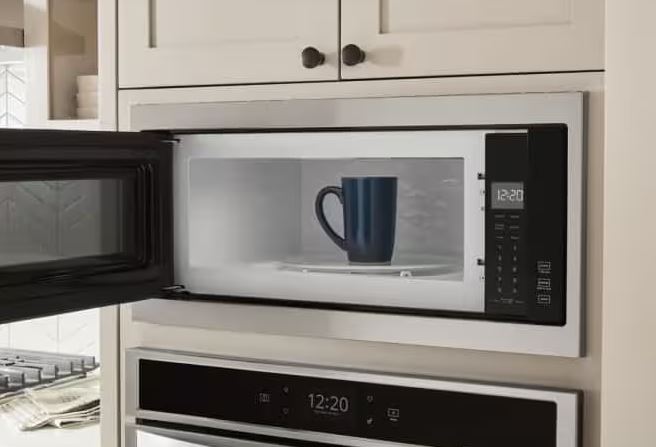
Whirlpool Microwave Not Heating Food
The microwave runs through complete cycles with the fan operating and turntable spinning normally. The timer counts down properly, but your food stays cold throughout. This symptom isolates problems to the heating system specifically rather than control issues.
You may need to perform the following when your Whirlpool microwave won’t heat your food:
Magnetron Function and Failure Testing
The magnetron generates microwave energy that actually heats your food through electromagnetic radiation. This vacuum tube component fails from age, improper use, or voltage problems. Magnetrons typically produce distinctive humming sounds during normal operation that you can hear.
Absence of this characteristic hum with fan noise still present indicates magnetron failure. The magnetron requires extremely high voltages to function, making it potentially dangerous to test.
Testing magnetron integrity:
WARNING: Discharge the high-voltage capacitor before testing any high-voltage components. This component stores lethal electrical charges even when the microwave is unplugged. Failure to discharge properly can result in severe injury or death.
Access the magnetron by carefully removing cabinet panels from the microwave. It appears as a large rectangular component with prominent cooling fins attached. Discharge the capacitor using an insulated screwdriver by shorting terminals to ground. Repeat this process several times to ensure complete discharge of stored energy.
Disconnect magnetron wires and thermal protector carefully, marking all connections for proper reassembly. Test filament resistance between the main terminals using a multimeter set to ohms. Readings should typically measure between 2-3 ohms for a functioning magnetron filament.
Test insulation by measuring resistance from the terminals to the magnetron case. Readings below 1 megohm indicate internal insulation breakdown and complete magnetron failure. Failed magnetrons require complete replacement rather than repair attempts.
DIY magnetron replacement costs between $80-$150 for parts alone. Professional service adds approximately $100-$200 in labor charges to the total cost.
Whirlpool Microwave Not Heating and Making Noise
Unusual sounds during heating attempts provide valuable diagnostic clues about specific problems. Different noises indicate particular component problems that need addressing. Understanding these sound patterns accelerates diagnosis significantly and prevents unnecessary part replacement.
Loud humming without any heating suggests high-voltage diode failure preventing proper magnetron operation. Buzzing combined with intermittent heating indicates a failing magnetron experiencing partial internal shorts. Repeated clicking sounds point to a relay attempting to engage but failing repeatedly.
Grinding or rattling noises suggest mechanical problems with the cooling fan or turntable drive. High-pitched squealing indicates magnetron cooling fan bearings failing or fan blade obstruction. Document sounds carefully by recording audio with your phone if possible.
These recordings provide valuable diagnostic information when consulting professionals or ordering parts online. Clear audio helps technicians identify problems remotely without unnecessary service calls.
High-Voltage Component Testing
| Component | Function | Failure Symptom | Test Method | Replacement Cost |
|---|---|---|---|---|
| High-voltage diode | Converts AC to DC | No heating or weak heating | Resistance test both directions | $15-$35 |
| High-voltage capacitor | Voltage doubler | No heating, loud humming | Capacitance test or substitution | $20-$45 |
| High-voltage transformer | Steps up voltage | Complete heating failure | Winding resistance test | $60-$120 |
| Thermal cutoff (magnetron) | Overheat protection | Intermittent heating failure | Continuity test | $8-$18 |
These critical components work together as a system powering the magnetron effectively. Test all components systematically when heating fails completely or partially. Multiple simultaneous failures occur frequently because stress affects all components similarly.
Replace components as complete sets when possible for best results. If the magnetron failed, the diode and capacitor experienced stress suggesting they’re nearing failure. Replacing all high-voltage components together prevents repeated failures and additional labor costs.
Whirlpool Microwave Fan Won’t Turn Off
A Whirlpool microwave fan running continuously after cooking ends wastes energy and creates constant annoying noise. This problem has specific causes that require targeted fixes rather than random troubleshooting. Understanding fan control systems helps you identify the root cause quickly.
Cooling Fan Stuck Relay Diagnosis
The internal cooling fan should run during cooking and for 5-10 minutes afterward. Extended operation beyond this period indicates stuck relays or failed temperature sensors. Access the control board and locate the cooling fan relay by consulting diagrams.
Tap the relay gently while the fan runs continuously to test for stuck contacts. If the fan stops momentarily when tapped, the relay contacts are stuck together. Replace socketed relays with identical parts matching the original specifications exactly.
Relays typically cost between $8-$25 depending on current rating and mounting style. For soldered relays that can’t be easily replaced, spray electronics contact cleaner carefully. Spray into the relay openings while working the relay, attempting to free stuck contacts.
Test the cavity temperature sensor if relay replacement doesn’t resolve the issue. Failed sensors reading artificially high temperatures keep cooling fans running continuously for protection. Temperature sensors typically cost between $25-$45 and must install in identical positions.
Sensor placement affects reading accuracy significantly, so maintain original mounting positions carefully.
Vent Fan Control Problems
External vent fans should stop immediately when you press the off button. Continuous operation suggests stuck vent relays or shorted fan control switches in the panel. Test fan control buttons through the membrane switch assembly using a multimeter.
Shorts in membrane contacts send continuous “fan on” signals to the control board. Replace membrane switch panels when fan buttons test as shorted electrically. Panels typically cost between $40-$90 depending on model complexity and button layout.
Individual button repair is impossible because of sealed membrane construction and design. Replace complete assemblies for reliable repairs that restore proper function. Disable automatic fan features temporarily if sensor malfunctions cause continuous unwanted operation.
Access settings menus and turn off automatic ventilation features as a temporary solution.
Whirlpool Microwave Reset Procedures
Resets clear temporary glitches, stored error codes, and restore default settings. Multiple reset methods exist for different situations and problem severities. Understanding when to use each reset type prevents unnecessary repairs.
Standard Power Cycle Reset
The basic reset disconnects power briefly to clear volatile memory and temporary configurations. This simple procedure resolves many random glitches without any component replacement.
Unplug the microwave from the wall outlet completely for hardwired power. For hardwired units, turn off the appropriate circuit breakers at your electrical panel. Wait exactly 5 minutes before reconnecting power to allow complete capacitor discharge.
Plug the unit back in or restore breaker power after the waiting period. The clock should flash, indicating a successful reset of the control system. Reprogram the clock and test all functions systematically to verify problem resolution.
Power cycles resolve approximately 30% of random operational glitches and stored error codes. This should always be your first troubleshooting step before disassembling anything.
Whirlpool Microwave Hard Reset
Extended resets perform deeper system initialization that clears stubborn problems. Use this method when basic resets don’t fix the issue completely. Unplug the microwave completely, removing all power sources including backup circuits.
Wait 15 full minutes to allow complete electronic discharge from all components. This extended duration is necessary to reset protection circuits properly. While the unit remains unplugged, press and hold the Start button for 30 seconds. This action drains residual charge from circuits and capacitors throughout the system.
Release the start button and wait another 2 minutes before reconnecting power. Restore power and test operation to verify the reset worked correctly. The display should show initial setup screens or clock setting prompts clearly.
Hard resets resolve control board software glitches and protection circuit lockouts effectively. They also clear problems caused by power surges and brief electrical anomalies.
Factory Reset Through Diagnostic Mode
Some models support factory resets that restore all settings to manufacturing defaults. This process erases custom preferences completely, returning the microwave to out-of-box condition. Enter diagnostic mode using model-specific button combinations that vary between series.
Common entry methods include pressing “1” and “5” simultaneously for 3 seconds. Another method involves holding “Cancel” and “0” together for 5 seconds. Some models require pressing “Clock” three times within 2 seconds to enter diagnostic mode.
Once inside diagnostic mode, navigate to reset functions using number pad buttons. Press “9” followed by “0” for comprehensive resets on most Whirlpool models. The microwave reboots automatically after factory resets complete the initialization process.
Reprogram all personal preferences and test functionality thoroughly after factory resets finish.
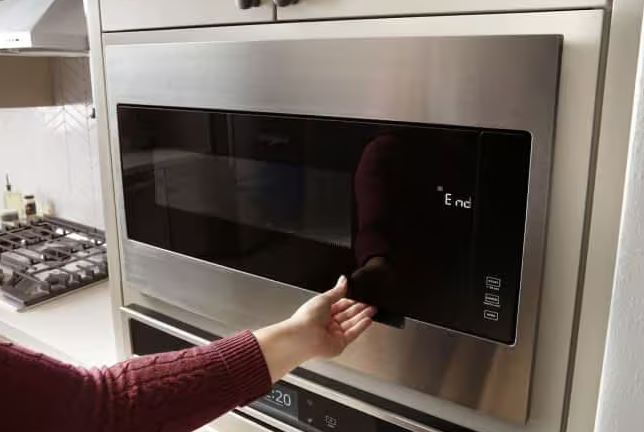
Whirlpool Microwave Door Error Problems
Door errors prevent operation entirely to protect against dangerous radiation exposure. These messages appear when door switches or latches fail to function properly. The safety interlock system is redundant by design, preventing operation unless everything aligns perfectly.
Open/Close Door Error Messages
“Open/Close Door,” “Door Error,” or “Check Door” messages indicate safety interlock system problems. The control board monitors all three door switches continuously during operation attempts. When switch states contradict expected patterns, error messages display immediately and prevent operation.
Diagnosing open/close door errors:
Close the door slowly while carefully observing the latch mechanism through the window. The latch hook should extend fully into the cavity, engaging all switch actuators. Listen for three distinct clicks during the closure process carefully.
Each audible click represents one switch engaging properly with the latch mechanism. Check door alignment using a straightedge placed against the door perimeter. Gaps exceeding 1/8 inch indicate hinge problems that affect proper switch engagement.
Inspect the door seal for tears, compression damage, or missing sections carefully. Damaged seals suggest door pressure issues that potentially affect switch activation force. These visual inspections often reveal obvious problems without requiring multimeter testing.
Whirlpool Microwave Not Working Open/Close Door:
This specific symptom means door switches test good individually but the control board doesn’t recognize closure. Check ribbon cable connections between door switches and the control board for looseness. These connections sometimes work loose from vibration and thermal cycling over time.
Test each door switch individually with a multimeter set to continuity mode. Replace any switches showing incorrect continuity readings during manual actuation testing. Adjust switch mounting positions if latches miss actuators during normal door closure.
Loosen mounting screws, close the door while holding switches in position, then tighten screws. This technique ensures proper alignment between latch hooks and switch actuators.
Door Latch and Alignment Issues
Misaligned doors change latch engagement angles significantly, preventing proper switch activation. Even with perfectly functional components, misalignment causes persistent door error messages. Grasp the door’s outer edge and lift gently to test for excessive movement.
Significant movement indicates worn hinges that require adjustment or complete replacement. Measure gaps between the door and frame at multiple points around the perimeter. Variations in gap measurements reveal alignment problems affecting latch engagement with switches.
Adjust door position by shimming hinge mounting points with thin washers. Place washers under hinges to raise door height slightly and improve alignment. Replace worn door latches showing visible cracks, wear marks, or deformation from use.
Latch hooks typically cost between $15-$35 depending on the model. Installation requires removing inner door panels to access mounting hardware properly.
Whirlpool Microwave Display Problems
Display issues affect usability significantly even when heating functions work perfectly. Whirlpool microwave display problems range from complete darkness to partial segment failures. Understanding display technology helps diagnose whether you need simple resets or component replacement.
Whirlpool Microwave Not Showing Time
The display stays completely blank or shows no clock information at all. This indicates specific display circuit failures rather than complete power loss. Check whether the display is completely dark or just missing the time digits.
Completely dark displays suggest blown fuses or failed display modules entirely. Test whether buttons still produce beeps when pressed during this condition. Beeping without display confirms display-specific problems rather than complete power system failure.
Fixing displays not showing time:
Check the display fuse on the control board first before replacing expensive components. This small fuse protects display circuits from surge damage during power events. Test fuse continuity with a multimeter set to ohms or continuity mode.
Replace blown fuses costing just $1-$15 for immediate restoration of display function. Reseat ribbon cables connecting displays to control boards by removing and reinserting them. Loose connections frequently prevent proper display function without any component damage.
Replace failed display modules when fuses test good and connections remain secure. LED displays typically cost between $60-$90, while LCD displays run $80-$150. The replacement process takes approximately 30-45 minutes with proper tools and careful work.
Dim, Flickering, or Partial Display Failures
Displays showing faint numbers, flickering intermittently, or missing segments indicate different problems. These symptoms require different diagnostic approaches than complete display failures do. Dim displays suggest failing backlights in LCD models or weak LEDs in LED displays.
This gradual dimming indicates approaching end-of-life and requires module replacement soon. Flickering displays point to loose connections or failing power supply capacitors on the board. Reseat all connections first before replacing any components unnecessarily.
Partial segment failures in LED displays show specific LED element burnout. Replace entire display modules because individual segment repair is impossible with sealed construction. The integrated design prevents component-level repairs of individual display elements.
Whirlpool Microwave Troubleshooting Codes
Error codes provide specific diagnostic information that pinpoints exact failures within systems. Understanding code meanings enables targeted repairs without random part replacement. Modern Whirlpool models display alphanumeric codes when internal diagnostics detect problems.
Common Whirlpool Error Code Reference
F1E4 – Shorted membrane switch panel requiring complete control panel replacement
F2E1 – Stuck key detected on control panel, often from debris or worn membrane
F3E2 – Cavity temperature sensor failure from probe damage or wiring issues
F6E8 – Communication error between control boards suggesting ribbon cable problems
F7E1 – Microwave relay circuit fault indicating control board problems
F8E5 – Door latch sensor malfunction from failed position sensors or misalignment
F9E0 – Cooling fan failure from motor burnout or obstructed blades
SPD2 – Humidity sensor malfunction preventing automatic cooking features
Clearing Error Codes After Repairs
Error codes persist in control board memory even after successful component replacement. Proper clearing prevents confusion about whether repairs actually worked correctly. Perform power cycles for 5-10 minutes after completing repairs to clear most codes.
Use diagnostic mode for stubborn codes that won’t clear through simple power cycling. Navigate to error clearing functions that erase stored fault history completely. Some codes require specific reset procedures documented in service manuals.
Consult manufacturer service documentation for model-specific code clearing methods when needed. Document all repairs photographically with before and after images for reference. These photos provide valuable references if codes recur or different problems develop.
Whirlpool Microwave Not Beeping
Sound notifications alert you to completed cycles and acknowledge button presses. Missing beeps create inconvenience despite continued functionality of all other features. This problem stems from either configuration issues or hardware failures.
Sound System Configuration Issues
Most Whirlpool models include adjustable sound settings that users can modify. Accidentally muting the system explains many “not beeping” complaints from users. Access sound settings through control panel menus by looking for “Options,” “Settings,” or “Sound.”
Try pressing “2” while holding “Cancel” for 3 seconds as a shortcut. This common combination toggles sound on and off across multiple model series. Cycle through volume settings if your model offers graduated levels rather than simple on/off.
You might be set to the lowest volume setting, which sounds nearly silent. Check your user manual for model-specific sound adjustment procedures if these methods don’t work.
Speaker Hardware Failures
If settings appear correct but sounds remain completely absent, the internal speaker has failed. These components rarely malfunction but do eventually wear out from age and use. Access the speaker by removing control panel housings and display assemblies carefully.
Speakers typically mount behind display assemblies in protected locations. Test speakers by applying 1.5V DC directly to terminals using a battery. Functioning speakers produce audible clicking sounds when voltage is applied intermittently.
Replace failed speakers with identical models matching impedance ratings exactly. Using speakers with different impedance ratings causes volume problems or control board damage. Speaker replacement typically costs between $15-$30 for the part alone.
Installation takes approximately 15-20 minutes with proper access and basic tools.
Whirlpool Microwave Not Spinning
Turntable rotation ensures even heating distribution throughout the cooking cavity. When rotation stops, food heats unevenly and cooking quality suffers dramatically. This problem typically involves simple mechanical components rather than complex electronics.
Turntable Coupler and Motor Issues
The turntable motor sits beneath the cavity floor, driving the glass tray through a coupler. Remove the glass tray and roller ring to inspect the coupler underneath. This three-pronged plastic hub wears or breaks from normal use over time.
Test motor operation by listening carefully during microwave operation cycles. You should hear a quiet motor humming that’s distinct from cooling fan noise. Check for obstructions blocking turntable movement by inspecting under the tray thoroughly.
Food debris accumulates under trays over time, creating friction that overloads motors. Clean the turntable support area thoroughly by removing roller rings completely. Wipe cavity floors with a damp cloth to remove all debris and buildup.
Replace worn couplers immediately because they only cost between $5-$10. New couplers restore smooth rotation and even heating distribution throughout the cavity. This simple repair takes just 5 minutes and requires no tools.
Turntable Motor Replacement
When motors fail completely, replacement becomes necessary rather than attempting repairs. These components don’t warrant repair attempts due to their sealed construction. Access motors by removing bottom panels or outer cabinets depending on your model.
Disconnect motor wire harnesses carefully, noting wire colors and connection types. Remove mounting screws holding motor assemblies, which typically attach with 2-3 screws. Install new motors while ensuring proper shaft alignment with the coupler mechanism.
Misalignment causes excessive noise and premature failure of the new motor. Reconnect wiring according to your notes and test operation before full reassembly. Turntables should rotate smoothly without binding or hesitation during operation.
Turntable motors typically cost between $25-$50 depending on model specifications. Replacement takes approximately 20-30 minutes with basic tools and proper access.
Systematic Whirlpool Microwave Problems Troubleshooting
Effective troubleshooting follows logical sequences rather than random part replacement strategies. This approach minimizes diagnostic time and prevents unnecessary repair costs. Understanding systematic methodology transforms frustrating problems into manageable diagnostic exercises.
Creating Symptom Priority Lists
Document all symptoms thoroughly before beginning any repair work whatsoever. Multiple symptoms often share common root causes, allowing simultaneous fixes. Primary symptoms directly prevent core functionality like no power, no heating, or door errors.
Address these critical issues first before tackling secondary problems. Secondary symptoms affect convenience without preventing basic operation entirely. Examples include no beeping, dim displays, or missing clock functions.
Address secondary issues after resolving primary problems successfully. Prioritize safety-affecting repairs immediately above all other considerations. Door interlock problems, exposed wiring, or burning smells require instant attention.
Elimination Testing Sequence
| Test Order | System to Check | Quick Test Method | Success Rate | Time Required |
|---|---|---|---|---|
| 1. External power | Outlet and breakers | Test outlet with another device | 15% find issues | 2-5 minutes |
| 2. Door switches | Safety interlocks | Listen for three distinct clicks | 28% find issues | 3-7 minutes |
| 3. Fuses | Thermal and line fuses | Continuity test with multimeter | 18% find issues | 10-15 minutes |
| 4. Display circuits | Fuses and connections | Visual inspection and voltage test | 8% find issues | 15-20 minutes |
| 5. Heating system | Magnetron and high-voltage | Component resistance testing | 16% find issues | 25-35 minutes |
| 6. Control board | Relays and circuits | Visual inspection and relay test | 12% find issues | 20-30 minutes |
Start with the simplest possible causes and progress systematically toward complex problems. This methodical approach prevents overlooking obvious issues while pursuing unlikely diagnoses. Document test results at each step using photos and notes for reference.
This information proves invaluable when consulting professionals or ordering replacement parts online.
Preventive Maintenance Best Practices
Regular maintenance prevents many common problems while extending microwave lifespan dramatically. These simple practices take minimal time but provide significant protection. Clean interior surfaces after every use to prevent buildup and contamination.
Wipe spills immediately before they carbonize into conductive paths that cause problems. Use only mild soap and water for cleaning, avoiding harsh chemicals. Inspect door seals monthly for damage, compression, or wear that affects sealing.
Replace damaged seals promptly to maintain proper door contact and switch engagement. Test door alignment quarterly by checking for even gaps around the perimeter. Adjust hinges early when slight sagging appears, preventing switch and latch wear.
Clean vent grilles weekly to maintain proper airflow through the cooling system. Blocked vents cause overheating that damages sensitive components prematurely and shortens lifespan. Vacuum thoroughly with brush attachments to remove accumulated dust and debris.
Verify grounding annually by testing wall outlets for proper ground connections. Poor grounding allows surges to damage control boards and display modules. Replace worn components proactively before they fail completely and damage other parts.
Don’t wait for complete failures that might cause secondary damage. Install quality surge protectors (View on Amazon) to protect microwaves from power surges effectively. Quality suppressors cost far less than repairs and prevent most catastrophic failures.
When Professional Service Becomes Essential
Some repairs exceed safe DIY capabilities and require professional technician involvement. Recognizing these scenarios prevents injuries and prevents additional damage from improper attempts. High-voltage component work requires proper training and specialized safety equipment.
Magnetron, transformer, and capacitor repairs risk electrocution even when the unit is unplugged. Recurring problems despite proper repairs indicate complex intermittent failures needing professional diagnosis. Professionals use advanced diagnostic equipment unavailable to most homeowners for troubleshooting.
Warranty considerations affect repair decisions significantly when coverage remains active. Opening sealed units voids remaining warranty coverage in most cases entirely. Always verify warranty status before attempting any DIY repairs on newer units.
Cost-benefit analysis matters critically when deciding between repair and replacement. When repair costs exceed 60% of replacement value, consider upgrading instead. Newer microwave models (View on Amazon) offer improved features, better energy efficiency, and modern conveniences.
Frequently Asked Questions
Why won’t my Whirlpool microwave start even though it has power?
Door switches have failed or the door isn’t closing properly to engage safety interlocks. Test by closing the door slowly and counting clicks carefully. You should hear three distinct sounds as each switch engages sequentially. If clicks are missing, test individual door switches with a multimeter. Replace failed switches costing between $12-$35 each for restored operation.
How do you reset a Whirlpool microwave?
Unplug the microwave for 5 minutes for basic resets or 15 minutes for deep resets. While unplugged, press and hold the start button for 30 seconds. This drains residual charge from circuits throughout the control system. Reconnect power and the microwave should reset, showing clock setup prompts. For factory resets, enter diagnostic mode and access reset functions.
Why does my Whirlpool microwave run but not heat food?
The magnetron has failed or high-voltage components aren’t working properly. Test the magnetron by listening for distinctive humming during operation attempts. Absence of humming indicates complete magnetron failure requiring replacement. Test magnetron filament resistance, which should read 2-3 ohms normally. Replace failed magnetrons costing between $80-$150 for DIY repairs.
What causes Whirlpool microwave door errors?
Failed door switches, misaligned door latches, or worn latch hooks prevent proper engagement. Close the door slowly while counting clicks to diagnose the issue. Three clicks indicate proper function of all safety interlock switches. Test each door switch individually with a multimeter for accurate diagnosis. Replace failed switches or adjust latch alignment to restore proper engagement.
How do I fix a Whirlpool microwave that won’t spin?
Replace the turntable coupler if it’s worn or broken from normal use. Couplers cost just $5-$10 and take only 5 minutes to replace. If the coupler looks good, test the turntable motor for proper operation. Replace failed motors costing between $25-$50 for the replacement part. Clean accumulated debris under the turntable that might block rotation completely.
Why is my Whirlpool microwave display not working?
Check the display fuse on the control board first before replacing components. Blown fuses cut all display power and require replacement for under $15. Reseat ribbon cables connecting the display to the control board carefully. If these simple fixes fail, replace the display module entirely. Costs range from $60-$150 depending on LED or LCD technology.
What do Whirlpool microwave error codes mean?
Error codes indicate specific component failures requiring targeted repairs. F1E4 means shorted control panel requiring replacement. F3E2 indicates temperature sensor problems needing sensor replacement. F8E5 signals door latch sensor issues requiring adjustment or replacement. SPD2 shows humidity sensor failure affecting automatic cooking features. Consult service documentation for your specific model since code meanings vary.
Master Your Whirlpool Microwave Repair
Troubleshooting transforms from overwhelming confusion into systematic problem-solving once you understand component relationships. Each symptom provides valuable clues that guide efficient diagnosis and understanding of why your Whirlpool microwave isn’t working properly or has failed. Most problems yield to repairs costing under $150 when you approach them logically.
These targeted repairs extend microwave lifespan beyond typical replacement timelines. Document everything about your microwave, including symptoms, test results, and repair procedures performed. This personal service history becomes invaluable for future problems or when helping others.
Your Whirlpool microwave represents essential kitchen infrastructure that deserves proper maintenance. Troubleshooting skills protect this investment while building valuable appliance repair capabilities. These abilities create independence from expensive service calls and build your confidence.
Each successful diagnosis makes future problems less daunting and more manageable through proven approaches.

Hi, I’m Barlgan! I created Repair Me Yourself to empower homeowners to tackle appliance repairs with confidence. From decoding error codes to fixing cooling issues, I break down complex repairs into simple, actionable steps that save you time and money.