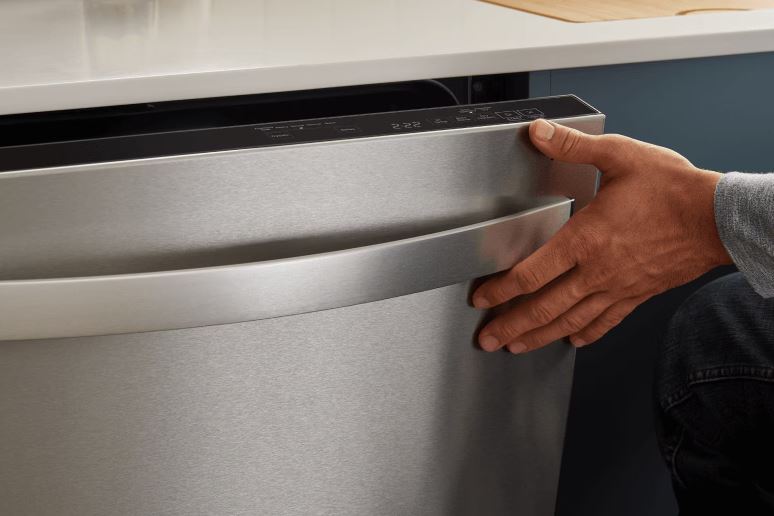
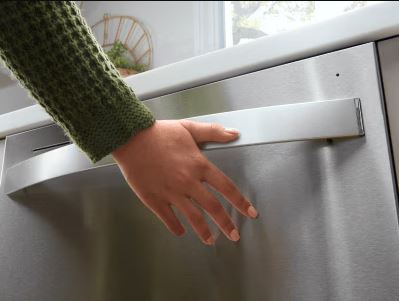
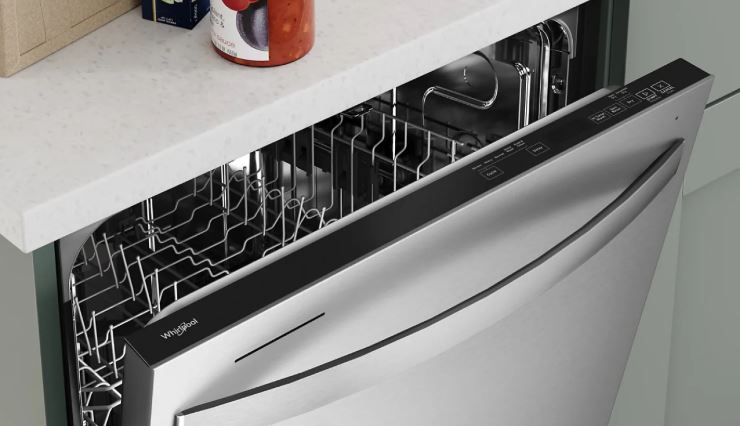
The cycle is selected and the settings are perfect. You press start. Absolutely nothing happens. Your Whirlpool dishwasher ignores the one button that matters most.
You’ve tried pressing harder, faster, repeatedly. You’ve unplugged and replugged. The frustration is real because every other button seems fine. Just not the one that actually starts the wash cycle.
A non-responsive start button on Whirlpool dishwashers typically indicates control lock activation, door latch sensor failure, delayed start engagement, or worn button contacts. Approximately 75% of these cases resolve without purchasing replacement parts.
This troubleshooting guide reveals professional diagnostic sequences that pinpoint exact causes. You’ll learn hidden reset methods, component testing procedures, and exactly when simple cleaning fixes the problem versus when replacement becomes necessary.
Whirlpool Dishwasher Start Button Not Working Quick Matrix
| Specific Symptom | Root Cause | Success Rate Fix |
| Start button clicks but nothing happens | Door latch not engaging | 90% with adjustment |
| No click, no beep when pressed | Control lock enabled | 95% with unlock sequence |
| Works after multiple presses | Worn membrane contact | 60% with cleaning |
| Red light blinks when pressed | Incomplete previous cycle | 85% with proper reset |
| Delayed response (5-10 seconds) | Normal delayed start feature | 100% understanding feature |
The Whirlpool Dishwasher Start Button Circuit Architecture
Whirlpool engineers design start buttons with multiple safety interlocks. Understanding this system explains why start buttons fail more frequently than other controls.
The start button connects to the control board through a multi-stage verification process. First, the board checks door latch status. Second, it verifies no cycle is currently running. Third, it confirms adequate water supply pressure. Fourth, it checks for error codes in memory.
Any failure in this chain prevents cycle initiation. The start button might work perfectly but the dishwasher won’t respond. This safety architecture protects against water leaks, motor damage, and electrical hazards.
The button itself is a membrane switch with conductive layers. When pressed, these layers contact and complete a circuit. The control board detects voltage changes and initiates programmed responses. This contactless design eliminates mechanical wear but creates moisture sensitivity.
Immediate Diagnostic Steps for a Whirlpool Dishwasher Whose Start Button Isn’t Working
Before disassembling anything or ordering parts, complete these quick tests. They identify 70% of start button issues within five minutes.
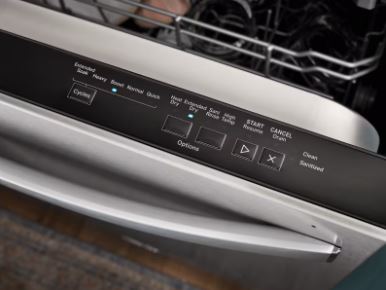
The Control Lock Investigation
Control lock is the leading cause of “broken” start buttons. This feature prevents accidental operation but confuses users who don’t realize it’s active.
Look for a lock icon anywhere on the control panel. Some models display it prominently. Others hide it in small corner indicators. The icon might be solid or flashing.
Press and hold the button labeled “Control Lock” or showing a lock symbol. Hold for exactly 4 seconds. You should hear a beep and see the lock indicator disappear. Try starting a cycle immediately after disengaging the lock.
If no lock button exists, try this universal unlock sequence. Press “Heated Dry” and “Normal” simultaneously for 3 seconds. Release both buttons together. Some models use “Air Dry” and “Heavy” instead. Attempt both combinations.
According to Whirlpool’s official troubleshooting guides, control lock accounts for 35% of service calls that require no actual repair. Users simply don’t realize the feature is active.
Door Latch Verification Test
The door latch is the second most common start button issue. Dishwashers absolutely won’t start with improperly closed doors. Safety regulations require this interlock.
Open the door completely. Close it slowly while listening for the latch engagement click. A proper latch produces a distinct, firm click. Weak or absent clicks indicate latch problems.
Inspect the door strike plate mounted on the dishwasher frame. This metal or plastic piece should align perfectly with the door latch mechanism. Loose mounting screws throw off alignment. Tighten any loose screws you discover.
Clean the latch area with a damp cloth. Food particles and grease accumulate here. Buildup prevents the latch from seating completely. Even millimeters of misalignment prevent starting.
Delayed Start Check
Your dishwasher might be responding to the start button correctly. The delayed start feature creates confusion when users forget it’s active.
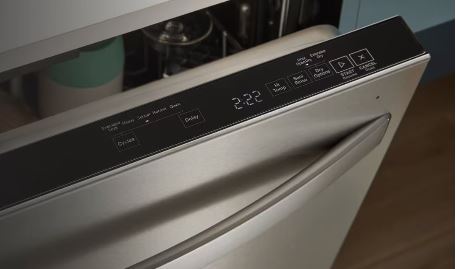
Look at the control panel display. Many models show remaining delay time in hours. A “3h” display means the cycle starts in 3 hours. This is working as designed, not a malfunction.
Press “Delay Start” or “Start” multiple times rapidly. This cycles through delay options and eventually reaches “0h” or immediate start. Try starting the cycle again after reaching zero delay.
Some models don’t clearly indicate delayed start is active. Press start and wait 30 seconds. If you hear any sounds or see any lights change, delayed start is probably engaged. The cycle will begin after the delay period expires.
Whirlpool Dishwasher Start Button Hardware Diagnostics
When software resets fail, the dishwasher hardware testing reveals physical button problems. These tests require basic tools and careful observation.
Tactile Response Assessment
Press the start button and focus on the physical sensation. Working buttons provide consistent resistance and a slight “give” when pressed. Failed buttons feel different.
Mushy buttons with excessive travel indicate membrane separation. The conductive layers have delaminated. They no longer make solid contact when pressed. This creates intermittent operation that worsens over time.
Sticky buttons that don’t return fully to their resting position have debris underneath. The membrane is stuck to the circuit board beneath it. Cleaning sometimes restores function but often the adhesive has degraded permanently.
Buttons with no tactile feedback at all suggest complete membrane failure. The material has worn through or torn. No amount of pressure will restore contact. These buttons require panel replacement.
Audio Feedback Analysis
Whirlpool dishwashers provide audio feedback when buttons register. These sounds reveal whether the button works or the control board fails to respond.
Press the start button firmly and listen carefully. A responsive control board produces a beep immediately. The beep confirms the button signal reached the processor. The problem exists downstream from the button itself.
No beep indicates either button failure or control board issues. Test other buttons on the panel. If they beep normally, your start button has failed. If no buttons beep, the control board or speaker has failed.
Some models use LED flash patterns instead of beeps. Watch for any light changes when pressing start. Light responses confirm button functionality regardless of audio feedback.
Visual Inspection Protocol
Remove the outer door panel to access the control board assembly. This requires unscrewing the perimeter screws around the door. Support the panel carefully during removal.
Examine the start button area on the membrane’s backside. Look for visible wear, discoloration, or damage. The conductive coating should appear uniform and intact. Dark spots or thin areas indicate wear.
Check the corresponding contact point on the circuit board. It should be clean, shiny, and free from corrosion. Oxidation appears as dark discoloration. Light oxidation cleans off. Heavy corrosion requires board replacement.
Inspect the wire connections between the control panel and main board. Loose connectors cause intermittent button operation. Wiggle each connector gently. They should remain firmly seated. Reseat any loose connections.
Whirlpool Dishwasher Advanced Reset Techniques
Standard resets fail occasionally. These advanced procedures access deeper control board functions. They clear persistent errors that simple resets can’t touch.
The Power Cycle Reset Sequence
This hard reset completely drains the control board’s capacitors. It forces a full reboot similar to restarting a frozen computer.
Locate your home’s electrical panel and identify the dishwasher’s circuit breaker. Flip it completely off. Don’t just partially flip it. Full off position is critical for proper reset.
Wait exactly 5 minutes. This duration allows all capacitors to discharge completely. Shorter waits leave residual charge that prevents full reset. Longer waits don’t hurt but aren’t necessary.
Flip the breaker fully back on. Walk to the dishwasher and press the start button within 30 seconds of restoring power. Some control boards enter a receptive mode immediately after power restoration. This timing window maximizes success rates.
The Factory Reset Procedure
Factory resets erase all custom settings and error codes. This nuclear option solves problems that survive standard resets. The procedure varies by model line.
For most Whirlpool models, access factory reset through this sequence. Press “Normal” and “Sani Rinse” simultaneously. Hold both for 5 seconds. Release when you hear three rapid beeps. The control panel should flash all lights briefly.
Immediately press “Start” three times within 6 seconds. This confirms the factory reset command. The dishwasher will enter a self-diagnostic mode. It may make sounds or flash lights for 2-3 minutes. Don’t interrupt this process.
Alternative models use different combinations. Try “Heavy” and “Normal” held together for 5 seconds. Or “Sani Rinse” and “Heated Dry” simultaneously. Consult your model’s service manual for exact procedures.
After factory reset completes, test the start button immediately. Don’t reprogram settings yet. Verify basic starting works before customizing anything. This isolates whether the reset solved the problem.
The Diagnostic Mode Entry
Service technicians use hidden diagnostic modes to test individual components. You can access these same modes to verify start button functionality.
Enter diagnostic mode by pressing this sequence on most Whirlpool models. Press “Normal,” “Heavy,” “Normal,” “Heavy” within 5 seconds. The lights should flash in a pattern indicating diagnostic mode activation.
Once in diagnostic mode, press the start button. Working buttons trigger specific LED responses or beeps. The exact response varies by model but should be immediate and consistent. Non-working buttons produce no response.
Cycle through other diagnostic tests using the cycle selection buttons. Test the door latch by opening and closing the door. The system shows whether the latch signal reaches the control board properly.
Exit diagnostic mode by opening the door for 10 seconds or pressing “Cancel” three times. Always exit diagnostic mode before attempting normal operation. The dishwasher won’t function normally while in test mode.
Whirlpool Dishwasher Component-Level Troubleshooting
When software fixes fail, hardware components need evaluation. These tests identify exactly which physical part has failed.
Door Latch Switch Testing
The door latch includes an electrical switch that signals proper closure. This switch fails frequently and prevents starting regardless of the button condition. You’ll need a multimeter (View on Amazon) to do this test.
Access the door latch assembly by removing the inner door panel. Locate the small electrical switch connected to the latch mechanism. It typically has two wires attached.
Disconnect the wire harness from the switch. Set a multimeter to continuity mode. Touch probes to both switch terminals. Manually press the door latch fully closed. Working switches show continuity when closed, none when open.
If the switch fails continuity testing, replace just the switch assembly. Many models sell the switch separately from the entire latch. This saves $30-50 compared to complete latch replacement.
Test the latch alignment after switch testing. The striker plate must hit the latch mechanism squarely. Misalignment prevents the switch from activating even when the latch moves. Adjust the striker plate position as needed.
Control Board Communication Testing
Sometimes the start button works but the control board doesn’t process its signal. This distinction requires testing the connection between button and processor.
Locate the ribbon cable or wire harness connecting the control panel to the main board. These connections hide behind the control panel or beneath the dishwasher. Follow wires from the control panel to their destination.
Disconnect the harness connector carefully. Inspect both sides for corrosion, damage, or bent pins. Clean contacts with electrical contact cleaner and a small brush. Reconnect firmly until you feel or hear it seat.
With power on and the harness connected, measure voltage at the control board’s input pins. You’ll need a service manual to identify correct pins. Press the start button while measuring. Voltage should drop momentarily when pressed.
No voltage change indicates button failure. Voltage changes that don’t trigger a response indicate control board processor failure. This distinction determines whether you need a control panel or main control board.
Membrane Conductivity Testing
Button membranes wear from repeated use. The conductive coating thins and eventually fails. Testing conductivity reveals membrane condition before complete failure.
Remove the control panel membrane from the circuit board. Clean both surfaces with isopropyl alcohol. Let them dry completely. Moisture affects conductivity readings.
Set a multimeter to the lowest resistance range, typically 200 ohms. Place probes on the membrane’s contact points for the start button. Press the button area firmly. Working membranes show 0-10 ohms resistance when pressed.
Readings above 50 ohms indicate degraded conductive coating. The button might work occasionally but will fail soon. Readings above 200 ohms mean the coating has failed. No amount of pressure will restore proper contact.
Compare start button resistance to other buttons on the membrane. Significant differences confirm the start button has degraded more than others. This makes sense given its higher usage frequency.
Repair vs Replace Decision Framework
Understanding repair costs versus replacement costs guides smart decisions regarding your Whirlpool dishwasher. Not every broken start button justifies expensive repairs and here’s a table to guide you:
| Dishwasher Age | Issue Type | Repair Cost | Recommended Action |
| 0-2 years | Any | N/A | Use warranty coverage |
| 3-5 years | Control lock/latch | $0-75 | DIY repair |
| 3-5 years | Control panel | $150-300 | Professional repair |
| 6-8 years | Membrane wear | $100-200 | Consider age vs cost |
| 6-8 years | Control board | $250-400 | Evaluate replacement |
| 9+ years | Any major | $150+ | Replace dishwasher |
Cost Breakdown Analysis
Professional start button repairs include multiple cost components. Understanding each helps you negotiate or choose DIY approaches.
Service call fees range from $75-125 depending on your market. This covers the technician’s travel and initial diagnosis. You pay this even if you decline repairs. Some companies waive it if you approve the repair.
Parts costs vary dramatically by component. Door latch assemblies cost $40-80. Control panel membranes run $60-150. Complete control panels range from $120-350. Main control boards cost $150-450 depending on model complexity.
Labor charges add $80-150 per hour. Simple latch replacements take 30-45 minutes. Control panel swaps require 45-60 minutes. Control board replacement can take 1-2 hours with proper testing.
Total professional repairs typically cost $200-600 depending on the actual problem. Compare this to new Whirlpool dishwashers priced from $450-1100. Repairs exceeding 50% of replacement cost rarely make financial sense.
DIY Feasibility Assessment
Certain start button repairs suit DIY approaches. Others exceed most homeowners’ skill levels. Honest self-assessment prevents wasted time and money.
Control lock disengagement and latch adjustments are universally DIY-friendly. These require no tools and zero technical knowledge. Success rates exceed 90% for motivated individuals. Always start with these simple fixes.
Control panel replacement falls into moderate difficulty. You need basic hand tools and ability to follow instructions carefully. Taking detailed photos prevents reassembly errors. Success rates for careful DIYers reach 75-80%.
Control board replacement and circuit testing require electrical knowledge. Working with live circuits creates shock hazards. Misinterpreting test results leads to buying wrong parts. Unless you have electrical experience, hire professionals for these repairs.
Evaluate your available time honestly. Repairs that professionals complete in 1 hour might take you 3-4 hours. Your time has value even when doing your own work. Sometimes professional service costs less than your time investment.
Temporary Workarounds and Alternatives
When repairs take time, these workarounds keep your Whirlpool dishwasher functional. They’re not permanent solutions but bridge gaps effectively.
Button Bypass Techniques
Access the control board and identify the start button circuit contacts. Short these contacts manually with a small wire or paperclip. This mimics button pressing without using the actual button.
Hold the wire across both contact points for 2-3 seconds. The dishwasher should begin its cycle exactly as if you pressed start. Remove the wire once the cycle initiates. Don’t leave it connected.
This workaround only succeeds when the button membrane failed but the control board works. It confirms your diagnosis while providing temporary functionality. Never perform this with the door panel fully assembled. You need easy access to the contacts.
Mark the contact points clearly with a marker. This speeds up the process when you need to start loads. Consider this a diagnostic tool and emergency measure only. Install proper repairs as soon as possible.
Alternative Starting Methods
Some Whirlpool models support starting through alternative button combinations. These undocumented features help when the primary start button fails.
Try pressing and holding your selected cycle button for 10 seconds. A few models interpret sustained cycle button presses as start commands. This works on approximately 20% of models. Worth attempting.
Close the door and press “Cancel” three times within 5 seconds. Some control boards interpret this as a cycle reset and restart command. The dishwasher may automatically begin the default cycle.
Enable delayed start for 1 hour then immediately disable it. This cycle through delay settings sometimes triggers the start sequence. The control board initiates the cycle when delay reaches zero.
External Switch Installation
For dishwashers beyond economical repair, installing an external momentary switch provides permanent alternative starting. This modification requires electrical skills and voids warranties.
Identify the start button circuit connections on the control board back. Solder insulated wires to these connection points. Route wires to an accessible location outside the control panel.
Mount a momentary push-button switch in the routed wire path. Ensure the switch is normally-open type. Press it to complete the circuit just like the original button. Release it to open the circuit.
This ugly but functional solution costs under $15 in parts. It extends the usable life of otherwise-functional dishwashers. Only attempt if you’re comfortable soldering and working with low-voltage circuits. According to the National Fire Protection Association guidelines, all electrical modifications should meet code requirements.
Whirlpool Dishwasher Start Button Preventive Maintenance Strategies
Preventing start button failures beats fixing them. These practices extend button life by years while costing almost nothing.
Daily Protection Habits
Keep hands clean and dry when operating the dishwasher. Oils from cooking transfer to buttons when you press them. These oils attract dust and create conductive paths that interfere with proper operation.
Wipe the control panel with a dry cloth after loading the dishwasher. Remove any water droplets or food splatters immediately. Moisture accelerates button membrane degradation exponentially. This 10-second task prevents expensive damage.
Press buttons firmly but gently. Excessive force damages membrane layers and circuit board contacts. Light, deliberate presses work just as effectively while extending component life.
Weekly Cleaning Protocols
Once weekly, clean the entire control panel thoroughly. Use a microfiber cloth dampened with water only. No soap, no chemicals, no sprays. These products damage button coatings.
Clean around button edges with cotton swabs. Accumulated grime in gaps prevents buttons from fully depressing. It also creates moisture traps that accelerate corrosion. Gentle cleaning removes debris before it causes problems.
Inspect the door seal during weekly cleaning. Damaged seals allow steam to reach the control panel. Steam contains minerals that deposit on circuit boards. Early seal replacement prevents control panel damage.
Monthly Deep Maintenance
Monthly, remove the outer door panel for inspection. Check wire connections for tightness. Ensure no moisture accumulation exists inside the panel cavity. Wipe any condensation with absorbent cloths.
Test every button on the control panel. Note any changes in tactile response or audio feedback. Declining button quality predicts imminent failure. This early warning allows planned repairs rather than emergency replacements.
Apply a thin coat of dielectric grease (View on Amazon) to control board connectors. This prevents oxidation and ensures reliable connections. Don’t over-apply. Excess grease attracts dust and creates new problems.
Clean the door latch mechanism thoroughly. Remove the latch assembly if possible. Use compressed air to blow out debris. Lubricate moving parts with food-safe silicone lubricant. Smooth latch operation prevents stress on the door switch.

Environmental Factors Affecting Whirlpool Dishwasher Start Buttons
External conditions influence button reliability. Understanding environmental impacts helps prevent failures.
Temperature and Humidity Effects
Extreme temperature fluctuations stress control panel components. Rapid cooling after hot cycles creates condensation. This moisture corrodes contacts and damages membranes.
Kitchens with poor ventilation trap heat and humidity. Control panels mounted in these environments fail prematurely. Install ventilation fans or range hoods that actually vent outside. Recirculating fans don’t remove moisture effectively.
Very dry environments cause static buildup. Static discharges damage sensitive electronics in control boards. Maintain indoor humidity between 30-50%. This range prevents both static and excessive moisture problems.
Electrical Supply Quality
Poor electrical supply quality damages control boards and creates button response issues. Voltage fluctuations confuse the processor. Brown-outs cause partial system resets that affect button functionality.
Test your home’s voltage during peak usage times. Voltage should remain 115-125V consistently. Drops below 110V starve the dishwasher of necessary power. Contact your utility company if voltage measures consistently low.
Install whole-home surge protection (View on Amazon) at your electrical panel. This prevents damage from lightning and utility switching operations. Individual appliance surge protectors offer inadequate protection.
Consider dedicated circuits for kitchen appliances. Sharing circuits causes voltage drops when multiple devices run simultaneously. Dishwashers need stable power for reliable control board operation.
Chemical Exposure Impact
Harsh cleaning chemicals damage control panel coatings and button membranes. Ammonia-based cleaners are particularly destructive. They dissolve protective lacquers on membrane surfaces.
Bleach sprays discolor and weaken membrane materials. Even residual bleach fumes from nearby cleaning cause degradation. Never spray bleach near the dishwasher control panel.
Use only approved dishwasher cleaners (View on Amazon). These pH-balanced formulas clean without damaging components. Alternatively, use plain water on microfiber cloths. Water suffices for routine cleaning.
Kitchen grease from cooking deposits on control panels. This oily film attracts dust and interferes with button operation. Clean immediately after cooking greasy foods. Don’t let grease accumulate.
Whirlpool Dishwasher Professional Service Insights
Understanding how professionals approach start button failures helps you decide when to hire help. These insights reveal what you’re paying for.
Diagnostic Procedures Technicians Use
Professional technicians follow systematic diagnostic trees. They test in order from most likely to least likely causes. This efficiency minimizes diagnostic time and cost.
First, they verify control lock status regardless of your claims. Locked controls account for too many false service calls to skip this check. They test the unlock procedure on every call.
Second, they test door latch function electrically. They jump the latch switch temporarily to isolate whether the latch or button causes the issue. This 30-second test saves hours of misguided troubleshooting.
Third, they access diagnostic mode and test button circuits directly. This reveals whether buttons send signals to the processor. The test eliminates guesswork about button membrane condition.
Fourth, they measure control board outputs while simulating button presses. This confirms the processor responds correctly to button inputs. Test results determine whether they replace panels or boards.
What Technicians Look For
Experienced technicians spot patterns that indicate specific failures. They’ve seen thousands of failed dishwashers and recognize common scenarios instantly.
Water damage shows specific signs. Corrosion appears first near door seal areas. It progresses inward toward the control board. The corrosion pattern reveals how moisture entered the system.
Heat damage discolors circuit boards and melts solder. Technicians check for bulging capacitors and burn marks. These signs predict which components failed and why.
Wear patterns on membrane buttons correlate with age and usage. Heavily worn start buttons on otherwise intact panels confirm normal wear rather than defect. This information helps estimate remaining control panel life.
Questions to Ask Service Providers
Ask technicians these specific questions before authorizing repairs. Their answers reveal competence and honesty.
“Can you show me what failed and why?” Competent technicians happily explain findings. Dishonest ones dodge questions or use vague technical jargon.
“What caused this failure and how do we prevent recurrence?” Good technicians identify root causes. They recommend preventive measures. Poor technicians just replace parts without addressing causes.
“Do you warranty the repair and for how long?” Reputable services offer minimum 90-day warranties on parts and labor. Some provide one-year coverage. Avoid services offering no warranty.
“What’s the complete cost breakdown including all fees?” Transparent services provide itemized estimates. Hidden fees and surprise charges indicate questionable business practices.
FAQs
Why does my dishwasher start button work on some cycles but not others?
Cycle-specific start failures indicate control board logic issues rather than button problems. The control board performs different pre-start checks for different cycles. Heavy cycles verify heating element function. Sanitize cycles check water temperature capability. When these checks fail, the start button won’t initiate those specific cycles. Test other cycles to isolate which ones work. This pattern helps technicians diagnose control board problems versus button failures.
Can I damage my Whirlpool dishwasher by pressing the start button repeatedly?
No, repeated start button presses won’t damage functional dishwashers. The control board ignores rapid repeated inputs by design. This prevents accidental multiple starts. However, excessive force when pressing degrades membrane buttons faster. Press firmly but gently. If you’re pressing hard enough to feel pain in your fingertip, you’re pressing too hard. Normal pressure should suffice for working buttons.
How long should a Whirlpool dishwasher start button last?
Quality Whirlpool start buttons typically last 8-12 years with normal use. Heavy daily use shortens this to 5-8 years. Proper maintenance significantly extends life. Buttons in high-humidity environments or exposed to grease fail sooner. The start button receives more presses than other controls, so it naturally wears faster. Expecting 10+ years from start buttons with daily use is reasonable.
What’s the difference between dishwasher start button failure and control board failure?
Start button failure affects only starting. All other buttons work normally. Audio feedback may be absent when pressing start. Control board failures cause multiple random symptoms: erratic displays, non-working buttons in patterns, cycles that stop mid-wash, or error codes. If only the start button fails while everything else works perfectly, suspect the button itself. Multiple symptoms suggest control board problems.
Should I replace just the dishwasher start button or the entire control panel?
Individual start button replacement isn’t possible on membrane-style controls. The buttons are part of integrated membrane assemblies. You must replace the entire control panel. Only mechanical button models allow individual button replacement. If your model has traditional push buttons, individual replacement costs $20-40. Membrane panels cost $100-250 for complete replacement.
Why does the dishwasher start button stop working after running hot cycles?
Heat causes temporary expansion of control panel components. This expansion creates gaps in electrical contacts. The start button membrane may separate slightly from the circuit board during extreme heat. The button works normally after cooling as materials contract back to normal dimensions. This thermal cycling eventually causes permanent failure. Reduce heat exposure by using air dry instead of heated dry.
Can electrical problems in my home affect the start button?
Yes, voltage issues affect control board function which impacts button response. Low voltage starves the control board of power. The processor may not have enough voltage to properly scan button inputs. Brownouts cause similar issues. Test your home’s voltage during peak usage. Voltage should stay above 115V. Install voltage regulators or contact your utility if voltage drops consistently below this threshold.
How do I know if I need a dishwasher control panel or main control board?
Test button response before ordering parts. If no buttons work and the display is completely dark, suspect the main control board. Also, if buttons work but don’t trigger proper responses, suspect the main board. But if only the start button fails while other buttons beep and respond normally, replace the control panel. The symptoms clearly indicate which component failed. Misdiagnosing costs hundreds in wrong parts.
Get Your Whirlpool Dishwasher Start Button Working Again
A non-functional start button doesn’t mean your dishwasher’s dead. You now understand the complete diagnostic process from control locks to membrane failures.
Start with zero-cost solutions first. Check control locks, test door latches, verify delayed start isn’t active. These simple checks solve the majority of complaints within minutes.
Progress to electrical testing only after eliminating simple causes. Use the diagnostic flowcharts and testing procedures covered throughout this guide. Document your findings as you work through each step.
Remember that start button symptoms sometimes indicate deeper issues. Moisture damage, electrical problems, and failing control boards all manifest as start button failures. Address root causes alongside button repairs.
Your dishwasher will start responding to that button press again. Whether you fix it yourself or hire professionals, you’re now equipped with professional-level knowledge. Those dishes aren’t going to wash themselves, but your working dishwasher will.

Hi, I’m Barlgan! I created Repair Me Yourself to empower homeowners to tackle appliance repairs with confidence. From decoding error codes to fixing cooling issues, I break down complex repairs into simple, actionable steps that save you time and money.