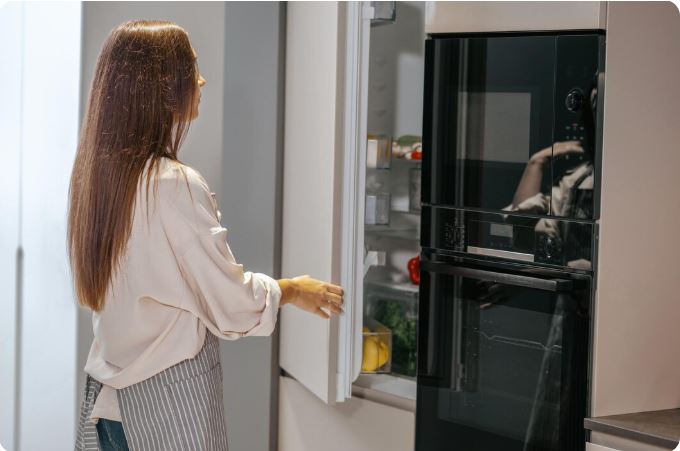
You open your refrigerator and notice water trickling down the back wall or pooling beneath your crisper drawers. This isn’t just inconvenient. A refrigerator leaking water inside back wall signals problems with your drainage or defrost system that require immediate attention to prevent food spoilage and appliance damage.
A refrigerator leaking water inside back wall typically stems from five primary issues: a clogged or frozen defrost drain preventing proper water flow, a malfunctioning defrost system creating excessive ice buildup, improper temperature settings causing abnormal frost accumulation, damaged or disconnected drain tubes allowing water to escape, or a faulty door seal permitting humid air entry.
Most of these problems have DIY solutions, though persistent issues may require professional diagnosis and repair. This troubleshooting guide walks you through identifying the exact cause of your interior leak, understanding why it happens, and implementing effective solutions. You’ll discover diagnostic methods, repair procedures, and preventive maintenance that keep your refrigerator functioning properly.

Quick Troubleshooting Guide for a Refrigerator Leaking Water Inside Back Wall
This table summarizes common causes and solutions for a refrigerator leaking water inside back wall, helping you identify and resolve your specific problem efficiently.
| Problem | Identifying Signs | Quick Fix | Professional Help Needed? |
|---|---|---|---|
| Clogged defrost drain | Water pooling inside, ice at drain hole | Flush with hot water, clear blockage | Usually no |
| Frozen defrost drain | Ice surrounding drain, water after defrost | Melt ice with warm water or dryer | No |
| Defrost system failure | Excessive frost, ice on back wall | Check heater and thermostat | Often yes |
| Wrong temperature settings | Heavy frost, ice buildup everywhere | Adjust to 37-40°F | No |
| Damaged drain tube | Water leaking behind panels | Replace or reconnect tube | Sometimes |
| Poor door seal | Frost patterns, warm air leaks | Replace gasket, adjust door | No |
Understanding Refrigerator Interior Water Leaks
Let’s take you through the normal water management process in your refrigerator, why back wall leaks develop, and what these leaks indicate about your appliance’s health.
The Normal Defrost and Drainage Process
Your refrigerator continuously removes moisture from the air to keep food fresh and prevent frost buildup. This moisture condenses on the coldest surface, typically the evaporator coils located behind the back wall.
Modern refrigerators use automatic defrost cycles that periodically warm these coils to melt accumulated frost. The resulting water should flow down channels on the back wall to a drain hole at the bottom. From there, it travels through a tube to a drain pan beneath the appliance where it evaporates.
When this system works properly, you never see water inside your refrigerator. Problems occur when any component in this drainage path fails or becomes obstructed.
Why Water Appears on the Back Wall
Water visibility on your back wall indicates the drainage system cannot handle the moisture your refrigerator produces. The water has nowhere to go, so it becomes visible as droplets, streams, or pools.
Temperature fluctuations worsen the problem. Each defrost cycle melts frost and creates water that should drain away. If drainage fails, water accumulates and may refreeze during cooling cycles, creating thick ice formations on the back wall.
The location of water provides diagnostic clues. Water near the top suggests heavy frost production. Water pooling at the bottom indicates the drain itself has failed. Understanding these patterns helps target your troubleshooting efforts effectively.
5 Root Causes of Refrigerator Leaking Water Inside Back Wall
Below are the five most common reasons for interior back wall leaks, along with detailed information to help you diagnose your specific issue.
1. Clogged Defrost Drain
The defrost drain hole sits at the bottom center of your refrigerator’s back wall. Food particles, ice crystals, and debris commonly lodge in this small opening, creating the most frequent cause of a refrigerator leaking water inside back wall.
When the drain clogs, water from melted frost has nowhere to flow. It backs up and runs down the back wall, eventually pooling under crisper drawers or along the bottom of the compartment. The problem worsens with each defrost cycle as more water accumulates.
Clogged drain symptoms include:
- Visible water or ice near bottom back wall
- Water pooling under vegetable drawers
- Ice formation around the drain hole
- Musty odors from stagnant water
Locate the drain hole by removing crisper drawers and looking at the back wall bottom. You may need to scrape away ice to find it. The opening is typically pencil-sized and may have a rubber grommet.
Use a turkey baster filled with hot water to flush the drain forcefully. For stubborn clogs, insert a flexible pipe cleaner (View on Amazon) or piece of wire to break up blockages. Avoid sharp objects that might puncture the drain tube.
2. Frozen Defrost Drain
Even without debris, defrost drains can freeze solid from excessive moisture or improper temperature cycling. A frozen drain acts like a clog, preventing water from flowing to the drain pan below.
Freezing occurs when water sits in the drain between defrost cycles. The next cooling cycle turns this standing water into ice that blocks the passage. Each cycle adds more ice until the drain becomes completely obstructed.
This problem frequently appears in high-humidity environments or when doors open frequently. The additional moisture entering your refrigerator overwhelms the defrost system’s capacity. Excess water remains in the drain long enough to freeze solid.
Check for ice by feeling around the drain area. A frozen drain feels cold and solid rather than open. You might see frost or ice crystals surrounding the opening.
Thaw a frozen drain by pouring warm water directly into it using a turkey baster. Continue until water flows freely through the drain. Alternatively, use a hair dryer on low heat, keeping it moving to avoid melting plastic components. Once thawed, flush with hot soapy water to ensure complete clearing.

3. Defrost System Failure
Your refrigerator’s automatic defrost system includes three key components: a timer or control board, a heating element, and a defrost thermostat. When any component fails, frost accumulates excessively on the evaporator coils and back wall.
The defrost heater normally melts frost at scheduled intervals. A failed heater allows frost to build up continuously. Eventually, this frost becomes so thick that it extends beyond the normal drainage channels, causing water to leak when partial melting occurs.
The defrost thermostat monitors evaporator temperature and controls heater operation. A stuck thermostat prevents the heater from activating, leading to the same excessive frost buildup. The defrost timer or control board triggers defrost cycles at appropriate intervals. Timer failure means defrost never occurs, allowing unlimited frost accumulation.
Defrost system failure indicators include:
- Thick ice coating on back wall
- Frost extending onto shelves or interior walls
- Reduced cooling efficiency
- Compressor running constantly
Testing defrost components requires electrical knowledge and a multimeter (View on Amazon). If you lack experience with electrical testing, call a technician. Incorrectly testing live circuits poses a risk of injury and component damage.
4. Wrong Temperature Settings
Temperature settings that are too cold cause excessive frost formation that overwhelms your drainage system. Many people mistakenly believe colder is always better, but temperatures below 35°F create problems.
Excessively cold settings make your refrigerator work harder and produce more frost. The defrost system struggles to keep up with the increased frost production. Water from overtaxed defrost cycles may not drain quickly enough, leading to visible leaks on the back wall.
Conversely, settings that are too warm cause frequent temperature fluctuations. Your refrigerator cycles on and off more often, creating condensation each time. This extra moisture adds to the drainage burden and can cause intermittent leaking.
Check your temperature settings and compare them to recommended levels. The ideal refrigerator temperature is 37-40°F. Use an appliance thermometer placed on a middle shelf to verify actual temperature rather than trusting the control dial alone.
Adjust settings gradually, allowing 24 hours between changes for temperature to stabilize. Monitor for improvements in frost formation and water accumulation. Proper temperature settings often resolve leaking without any physical repairs.
5. Damaged Drain Tube
The drain tube connects the drain hole in your refrigerator compartment to the drain pan beneath the appliance. This tube can crack, disconnect, or develop holes that allow water to leak inside your refrigerator or onto the floor.
Tubes deteriorate from age, becoming brittle and prone to cracking. Movement during cleaning or appliance relocation can disconnect tubes at connection points. Ice formation inside tubes sometimes splits them open.
A damaged tube allows water to escape before reaching the drain pan. Depending where the damage occurs, water might leak behind interior panels, under the refrigerator, or back into the compartment. This creates confusing symptoms that make diagnosis challenging.
Access to drain tubes typically requires removing panels inside or beneath your refrigerator. Consult your owner’s manual for specific disassembly instructions for your model. Look for water stains, cracks, or disconnected sections once you’ve accessed the tube.
Replace damaged tubes with manufacturer-specified parts. Generic tubing may not withstand the cold environment or fit connections properly. Ensure all connections seal tightly when reassembling to prevent future leaks.
6. Poor Door Seal
While door seals don’t directly cause drainage problems, they create conditions that lead to a refrigerator leaking water inside back wall. Damaged seals allow humid room air to enter continuously, dramatically increasing moisture inside your appliance.
This additional moisture condenses on cold surfaces, particularly the back wall. The drainage system designed for normal moisture levels cannot handle the excess. Water accumulates faster than it drains, becoming visible on walls and pooling at the bottom.
Gaps in door seals also cause temperature fluctuations that increase frost formation. Your refrigerator works harder to maintain temperature, running longer cycles that produce more condensation. The compounded effect creates multiple pathways for excess moisture.
Door seal problems show these signs:
- Frost patterns near door edges
- Condensation on interior door surfaces
- Gasket feels loose or damaged
- Visible gaps when door closes
- Refrigerator runs constantly
Test door seals using the dollar bill method. Close a bill in the door at multiple points around the perimeter. You should feel significant resistance when pulling it out. Easy removal indicates poor seal contact.
Clean seals thoroughly before assuming they need replacement. Dirt and debris prevent proper sealing. Use warm soapy water and dry completely. If cleaning doesn’t restore proper sealing, replace the entire gasket with a manufacturer-approved part
Step-by-Step Repair Process for a Refrigerator Leaking Water Inside Back Wall
The following are detailed instructions for fixing the most common causes of interior back wall leaks using readily available tools and materials.
Preparation and Safety
Empty your refrigerator completely or at least remove all items from affected areas. This gives you clear access and prevents food contamination during repairs.
Unplug your refrigerator before beginning any repair work. Even simple maintenance risks electrical shock if power remains connected. Place towels around your work area to catch water during drain clearing or ice melting.
Gather necessary tools before starting: turkey baster, flexible pipe cleaner or wire, towels, hair dryer (optional), funnel, and hot water. Having everything ready prevents repeated trips that extend repair time.
Clearing the Defrost Drain
Remove all crisper drawers and storage bins from the bottom of your refrigerator. Locate the drain hole at the center bottom of the back wall.
Clear away any visible ice using a plastic scraper. Avoid metal tools that might damage the drain opening or puncture tubes. Once you can see the drain hole, prepare to flush it thoroughly.
Fill a turkey baster with hot water mixed with a small amount of dish soap. Insert the baster tip into the drain hole and squeeze forcefully. The goal is to push any blockage through the drain tube.
Repeat flushing multiple times until water flows freely through the drain. You should hear water dripping into the drain pan beneath the refrigerator. If water backs up, the clog remains. Try inserting a flexible pipe cleaner to break up stubborn blockages.
For frozen drains, pour warm water into the hole and let it sit for several minutes. The warmth gradually melts ice. Alternatively, use a hair dryer on low heat directed at the drain area. Once thawed, flush thoroughly with hot soapy water.
Adjusting Temperature Settings
Locate your temperature control dial or digital display. Current settings should be visible or indicated by dial position.
Check actual temperature using an appliance thermometer placed on a middle shelf. Leave the thermometer for several hours to get an accurate reading. Compare this reading to your target temperature of 37-40°F.
If actual temperature reads below 35°F, adjust settings warmer by one notch on dial models or 2-3 degrees on digital models. If temperature exceeds 40°F, adjust slightly colder. Make small adjustments to avoid overcorrection.
Allow 24 hours after each adjustment for temperature to stabilize. Check the thermometer again and monitor for frost reduction on the back wall. Multiple small adjustments produce better results than one large change.
Replacing Door Seals
Order the correct replacement gasket (View on Amazon) using your refrigerator’s model number. Generic seals rarely fit properly and create future problems.
Remove the old gasket by pulling it away from the door. Most gaskets fit into a groove or attach with a retaining strip. Note how the old gasket mounts before completely removing it.
Clean the mounting surface thoroughly to remove any residue, mold, or debris. A clean surface ensures the new gasket adheres properly.
Install the new gasket starting at the top center and working around the perimeter. Press firmly to seat it fully in the groove or under the retaining strip. Some gaskets require screws that should be tightened gradually in sequence to prevent warping.
Close the door and check seal contact around the entire perimeter. Adjust as needed by repositioning the gasket or adjusting door alignment. Perform the dollar bill test at multiple points to verify proper sealing.
When to Call a Professional
Contact a qualified technician if problems persist after attempting basic repairs. Some issues exceed DIY capabilities and risk further damage without proper expertise.
Defrost system component testing and replacement require electrical knowledge and specialized tools. Compressor issues or refrigerant leaks demand professional attention due to EPA regulations. Internal panel removal in some models voids warranties without authorized service.
Recurring leaks despite multiple repair attempts indicate complex problems that need diagnostic equipment to identify accurately. Don’t continue attempting repairs that show no improvement.
Preventing Future Refrigerator Interior Leaks
Below are maintenance practices and habits that keep your refrigerator’s drainage system functioning properly and prevent interior water accumulation.
Monthly Maintenance Tasks
Flush your defrost drain monthly using hot water and dish soap. This prevents gradual debris accumulation that leads to clogs. The small time investment prevents hours of cleanup later.
Wipe down the back wall interior monthly to remove any frost or ice formation. Early removal prevents buildup that stresses the defrost system. Check during regular cleaning for any unusual water or ice patterns.
Inspect door seals monthly for damage, looseness, or debris. Clean them with mild soap and water. This simple task prevents the additional moisture that overloads drainage systems.
Proper Usage Habits
Minimize door opening duration and frequency. Each opening introduces humid air that increases condensation. Plan ahead to remove multiple items in single trips rather than repeated visits.
Avoid placing hot food directly in the refrigerator. Allow items to cool to room temperature first. Hot food creates excessive condensation that strains your drainage system unnecessarily.
Keep the refrigerator reasonably full without overcrowding. Items inside help maintain stable temperature and reduce temperature fluctuations when doors open. However, don’t block air vents or prevent proper air circulation.
Seasonal Considerations
Increase drain maintenance frequency during humid summer months. High humidity introduces more moisture that accumulates faster in your refrigerator. Monthly maintenance may need to become bi-weekly during peak humidity.
Monitor temperature settings seasonally as ambient kitchen temperature changes. Warmer kitchens may require slight temperature adjustment to maintain proper food storage conditions without creating excessive frost.
Use a kitchen dehumidifier (View on Amazon) during humid months if your area experiences consistently high humidity. Reducing ambient moisture decreases the amount entering your refrigerator with each door opening.
Fix Your Leak Today Before Food Spoils
Interior water leaks don’t resolve themselves and consistently worsen over time. Every day you ignore a refrigerator leaking water inside back wall increases your risk of food contamination, mold growth, and permanent appliance damage.
Start with the simplest solution by flushing your defrost drain with hot water. This five-minute task resolves the majority of interior leaks and requires no technical knowledge or special tools. Most homeowners can complete this fix during a commercial break.
If basic drain clearing doesn’t eliminate the leak within 24 hours, investigate other causes systematically. Check temperature settings, inspect door seals, and look for obvious damage. Taking methodical steps identifies problems efficiently without wasted effort or unnecessary part purchases.
Frequently Asked Questions
Is Water on the Refrigerator Back Wall Always a Serious Problem?
Small amounts of condensation on your back wall occasionally appear normal, especially during humid weather or after frequent door openings. The condensation should be minimal and disappear within a few hours as the cooling cycle removes moisture.
However, persistent water that pools at the bottom, forms ice, or appears in quantities large enough to run down the wall indicates a problem requiring attention. Don’t ignore sustained water accumulation hoping it will resolve itself.
Can I Use Bleach to Clean the Refrigerator Defrost Drain?
Diluted bleach can help sanitize a smelly drain and kill mold, but use it carefully. Mix one tablespoon of bleach with one cup of hot water. Flush this solution through the drain, then follow with several flushes of plain hot water to rinse completely.
Never use bleach at full strength, as it can damage plastic components in your drainage system. The hot water flush afterward prevents bleach from sitting in tubes where it might cause deterioration over time.
Why Does the Fridge Leak Happen Only Sometimes?
Intermittent leaking typically occurs because a partial blockage clears temporarily during defrost cycles. Water from heavy frost accumulation forces debris through the drain. The drain works until the next buildup causes another clog.
Alternatively, frozen drains may thaw during extended defrost cycles or warmer weather, allowing temporary drainage. The problem returns when conditions favor refreezing. Address intermittent leaks immediately rather than waiting for them to become constant.
How Do I Know If My Refrigerator Defrost System Failed?
Defrost system failure shows distinctive symptoms beyond simple water leaks. You’ll notice thick frost or ice coating the entire back wall, sometimes extending onto shelves. The refrigerator may run constantly without maintaining proper temperature.
Food freezes in the refrigerator compartment near the back wall while other areas stay warm. These combined symptoms strongly suggest defrost system problems requiring professional diagnosis. Don’t attempt defrost system repairs without electrical knowledge and proper testing equipment.
Should I Repair or Replace a Refrigerator with Interior Leaks?
Interior leaks caused by simple drain clogs warrant repair regardless of refrigerator age. The fix costs almost nothing and takes minutes. Even defrost system repairs make financial sense in appliances under 8 years old.
However, if your refrigerator is more than 12 years old and requires major defrost system work, consider replacement instead (View on Amazon). Factor in the improved energy efficiency of modern models when making your decision. Calculate potential energy savings over several years to determine the most economical choice.

Hi, I’m Barlgan! I created Repair Me Yourself to empower homeowners to tackle appliance repairs with confidence. From decoding error codes to fixing cooling issues, I break down complex repairs into simple, actionable steps that save you time and money.