Your Mitsubishi Mr Slim stopped working when you need it most. The remote does nothing. Or the unit runs but won’t cool your space. Maybe it’s making strange sounds or displaying error lights you don’t understand.
Mr Slim systems represent Mitsubishi’s commercial-grade ductless line known for exceptional reliability. I’ve serviced hundreds of these units in residential, office, and commercial settings across every configuration from single-zone MSZ units to complex multi-zone systems.
Mitsubishi Mr Slim troubleshooting follows systematic diagnostic protocols isolating power issues, refrigerant problems, component failures, and control system errors. Most problems are identifiable through symptom analysis, visual inspection, and basic testing. This manual provides step-by-step procedures for diagnosing and fixing common Mr Slim failures without professional service.
Mitsubishi Mr Slim System Components and Operation
Understanding Mr Slim architecture helps you troubleshoot effectively. These systems differ from basic residential units in important ways that impact diagnosis and repair.
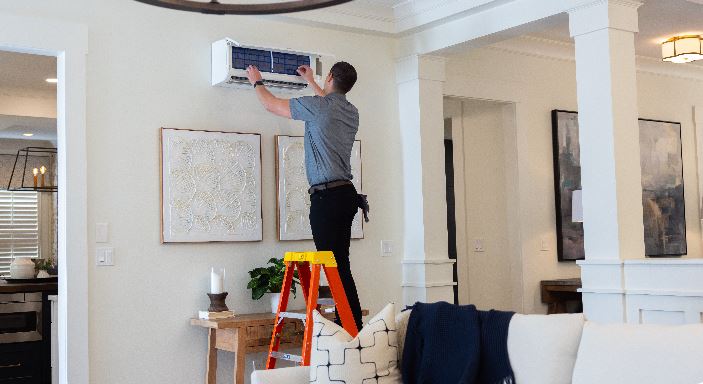
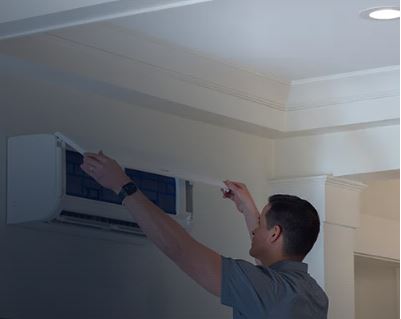
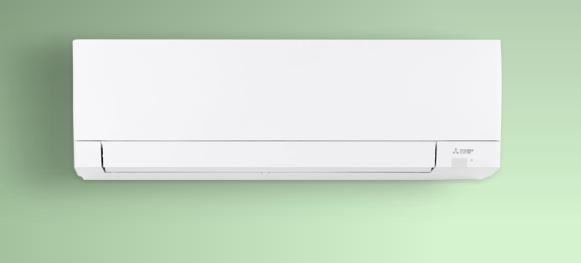
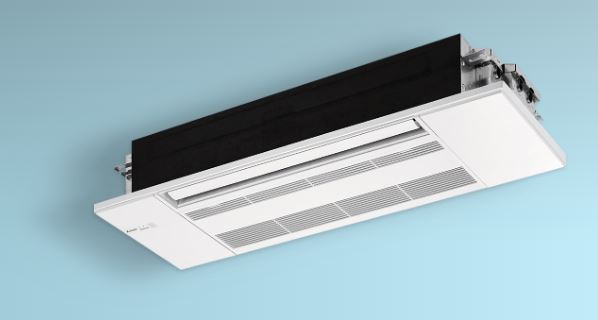
Mr Slim indoor units come in wall-mounted, ceiling cassette, ducted, and floor console configurations. Each type serves different applications but shares core components.
Outdoor condensing units handle refrigeration and heat exchange. These robust units withstand harsh commercial environments and extreme temperatures.
Communication between indoor and outdoor units happens through dedicated control wiring. This low-voltage wiring coordinates operation across multiple zones.
Refrigerant lines connect indoor and outdoor units completing the heat transfer circuit. Proper refrigerant charge is critical for performance.
Control systems in Mr Slim units are more sophisticated than residential systems. They include advanced diagnostics, scheduling capabilities, and multi-zone coordination.
Quick Mitsubishi Mr Slim Troubleshooting & Diagnostic
Use this chart to identify your problem and jump to the relevant troubleshooting section immediately.
| Symptom | LED Indicators | Sound Behavior | Most Likely Cause | Priority Level |
|---|---|---|---|---|
| Completely dead | No lights at all | Silent | Power supply failure | Critical |
| Powers on, no cooling | Normal lights | Fan runs, compressor silent | Compressor or refrigerant issue | High |
| Powers on, no heating | Normal lights | Outdoor unit silent | Reversing valve or defrost problem | High |
| Remote doesn’t work | Normal lights | Normal operation | Remote battery or pairing | Low |
| Runs continuously | Blinking operation light | Continuous compressor sound | Thermostat or sensor failure | Medium |
| Short cycling | Multiple blinking lights | Starts and stops frequently | Protection circuit activation | High |
| Fan works, no temp change | Normal operation light | Indoor fan only | Outdoor unit power or communication | High |
| Blinking error lights | Specific blink pattern | Varies | Multiple possible causes | Varies by code |
Mitsubishi Mr Slim Not Turning On
Complete power failure has straightforward diagnostic paths. Follow these steps methodically to identify power problems before assuming equipment failure.
Primary Electrical Supply Verification
Power problems cause the majority of “not turning on” situations. Start with the most basic checks before assuming equipment failure.
Check both circuit breakers dedicated to your Mr Slim system. Commercial installations often use separate breakers for indoor and outdoor units.
Breakers sometimes trip to middle positions that look normal. Flip each breaker fully OFF then back to ON position.
Verify voltage at the outdoor disconnect box. This safety switch near the outdoor unit sometimes gets turned off during maintenance.
Test outlet or junction box voltage with a multimeter (View on Amazon). You should read 208-230V depending on your installation specifications.
Check for GFCI protection that may have tripped. Some installations include ground fault protection cutting power when faults occur.
Inspect the power supply to each indoor unit in multi-zone systems. Each zone might have independent power requirements.
Look for emergency shut-off switches. Some installations include manual switches that previous technicians or occupants might have turned off.
Control Power and Transformer Testing
Mr Slim systems use transformers converting line voltage to control voltage. These transformers fail causing complete system shutdown.
Locate the transformer typically mounted in the outdoor unit or indoor air handler. These step down 230V to 12-24V for controls.
Measure voltage at transformer primary terminals with power on. You should read line voltage (208-230V AC).
Measure voltage at transformer secondary terminals. You should read 12-24V AC depending on your system design.
No secondary voltage despite proper primary voltage confirms transformer failure. Replace with an exact voltage and VA rating match.
Check transformer fusing. Many transformers include integral fuses protecting control circuits from shorts.
Test for short circuits on the control voltage side. Disconnected secondary wires should show no continuity to ground.
Verify control voltage reaches all components. Trace the 24V circuit confirming power at the control board, thermostat, and sensors.
Control Board Power Reception
Even with good supply voltage, control board failures prevent system startup. These boards are the system’s brain.
Remove the indoor unit’s front cover and access panel exposing the control board area.
Look for LED indicators on the control board itself. Most boards include status LEDs showing power reception.
Measure voltage at control board power input terminals. Compare readings to specifications in your service documentation.
Check for blown fuses on the control board. Small glass or ceramic fuses protect sensitive electronic components.
Inspect for visible damage. Burnt areas, bulging capacitors, or cracked traces indicate control board failure.
Smell for electrical burning odors. Burnt electronics produce distinctive smells confirming component damage.
Test the control board’s voltage regulator circuits. These provide stable voltage to microprocessors and logic circuits.
Manual Operation Testing
Mr Slim units include manual override switches for emergency operation and testing. These bypass remote control and thermostat systems.
Locate the manual operation button behind the front panel. This small switch forces the unit to run at default settings.
Press and hold the manual switch for 3-5 seconds. The unit should start regardless of remote or thermostat settings.
If manual operation works but normal control doesn’t, the problem lies in control circuits not the power supply.
Listen for compressor startup during manual operation. This confirms the compressor and outdoor unit receive power properly.
Manual operation failure with confirmed power supply indicates control board or component-level failures requiring repair.

Mitsubishi Mr Slim Not Cooling
Cooling failures occur even when the system appears to run normally. These problems require systematic diagnosis isolating refrigeration issues from other potential causes.
Verify Actual Cooling Performance
Distinguish between no cooling and insufficient cooling. These different conditions require different approaches.
Measure supply air temperature at the indoor unit’s discharge. Properly functioning systems produce air 15-20°F cooler than return air.
Temperature drops under 10°F indicate refrigeration problems. Zero temperature difference means complete refrigeration failure.
Check if the outdoor unit operates when cooling is called for. The compressor must run for refrigeration to occur.
Feel both refrigerant lines at service ports. The larger suction line should feel cold and possibly sweat. The smaller liquid line should feel warm.
Both lines at similar temperatures indicate refrigerant circulation problems. This suggests compressor failure or complete refrigerant loss.
Monitor system operation for 15 minutes. Some problems appear only after initial startup or under sustained load.
Diagnose Refrigerant-Related Problems
Refrigerant issues cause most cooling failures in systems that power up correctly. While repairs require professionals, you can diagnose them.
Look for frost or ice on indoor coils or refrigerant lines. Ice indicates either low refrigerant or severe airflow restriction.
Check for oil residue around fittings, joints, or service ports. Refrigerant leaks leave oily marks indicating leak locations.
Listen for hissing sounds near refrigerant connections. Significant leaks produce audible noise at the leak point.
Observe outdoor unit operation. The condenser fan should run and the unit should feel warm as heat is rejected.
Check system pressures if you have gauge access. Low pressures indicate refrigerant loss. High pressures suggest overcharge or airflow problems.
Note that refrigerant work requires EPA certification. DIY refrigerant service is illegal without proper licensing.
Mitsubishi Mr Slim Not Blowing Cold Air
This symptom indicates the unit runs but cooling output is inadequate or absent entirely.
Verify the system is actually in cooling mode. Check the remote and indoor unit display confirming cool mode selection.
Set temperature significantly below room temperature, at least 5°F lower. Small differentials might not trigger active cooling.
Check fan speed settings. Low fan speeds reduce cooling sensation even when the system works correctly.
Inspect air filters for severe blockage. Clogged filters prevent airflow reducing cooling effectiveness dramatically.
Clean the indoor evaporator coil. Dirty coils reduce heat transfer preventing proper cooling despite adequate refrigerant.
Verify all registers and louvers are fully open. Blocked or partially closed vents restrict airflow reducing cooling.
Check for proper refrigerant charge. Low refrigerant is the most common cause of “runs but doesn’t cool” complaints.
Address Compressor Operation Issues
The compressor is the refrigeration system’s heart. When it fails, cooling stops completely regardless of other components.
Listen carefully for compressor operation. Healthy compressors make steady humming without grinding, squealing, or banging.
Feel the compressor body temperature with the unit running. It should be warm to hot. Cool compressors aren’t operating.
Measure amp draw at the outdoor unit with a clamp meter. Zero amps confirms the compressor isn’t running.
Check compressor capacitor with a capacitance meter. Failed capacitors prevent starting despite adequate power supply.
Test compressor windings with a multimeter. Measure resistance between all three terminals. Readings should be relatively equal.
Infinite resistance indicates open windings. Zero resistance means shorted windings. Either condition requires compressor replacement.
Listen for clicking from the compressor contactor. Clicking without compressor startup indicates electrical problems or mechanical seizure.
Mitsubishi Mr Slim Compressor Not Working
Compressor failures require focused diagnosis. These expensive components justify thorough investigation before replacement decisions.
Electrical Supply to Compressor
Compressors need proper voltage and current to operate. Verify electrical supply before assuming mechanical failure.
Measure voltage at compressor terminals with the system calling for cooling. Should read 208-230V depending on system design.
Check all three legs in three-phase systems. Voltage imbalance exceeding 2% causes operational problems and premature failure.
Test the compressor contactor. This large relay supplies power to the compressor when energized.
Inspect contactor contacts for pitting, burning, or welding. Damaged contacts prevent proper compressor power delivery.
Measure inrush current during compressor startup. Excessive current indicates mechanical problems or failing start components.
Check overload protectors. These safety devices interrupt power when compressors overheat preventing catastrophic damage.
Verify the compressor capacitor provides proper boost during startup. Weak capacitors cause hard starting or complete failure.
Start Components and Protection Circuits
Compressors rely on several components for reliable starting and protection. These fail more frequently than compressors themselves.
Test the start capacitor providing initial torque for compressor startup. These fail regularly requiring periodic replacement.
Check the start relay switching the start capacitor in and out of the circuit. Failed relays prevent proper starting.
Inspect the run capacitor improving operating efficiency and reducing current draw. These degrade over time affecting performance.
Test all thermal overloads and safety switches. These interrupt power under fault conditions protecting expensive components.
Verify proper control board outputs. The board must energize the compressor contactor when cooling is demanded.
Check high and low pressure switches. These safety devices prevent operation under conditions that damage compressors.
Inspect crankcase heaters in cold climate installations. These prevent refrigerant migration into compressor oil during off cycles.
Mechanical Compressor Problems
Internal mechanical failures produce specific symptoms distinguishing them from electrical problems.
Listen for grinding or squealing sounds indicating bearing failure. Metal-on-metal contact produces distinctive high-pitched noise.
Check for compressor vibration exceeding normal operation. Excessive vibration suggests internal damage or mounting problems.
Feel compressor temperature under operation. Overheating beyond normal warmth indicates inefficient operation from internal problems.
Test for proper compressor rotation in three-phase systems. Reversed rotation prevents proper compression.
Look for oil foaming in the sight glass if equipped. Foaming indicates refrigerant boiling in the oil suggesting internal problems.
Monitor amp draw over extended operation. Current gradually increasing above nameplate ratings indicates developing mechanical problems.
Check for acid in the refrigerant system. Burnt compressors produce acid contaminating the entire system requiring thorough cleanup.
Mitsubishi Mr Slim Not Heating
Heat pump systems add complexity with reversing valves and defrost cycles. Winter operation requires different diagnostic approaches than cooling season troubleshooting.
Understand Heat Pump Operational Characteristics
Mr Slim heat pumps extract heat from outdoor air through refrigeration. This process has inherent limitations affecting winter performance.
Most Mr Slim models heat effectively to -13°F outdoor temperature. Below this threshold, capacity drops significantly.
Hyper-Heat models extend operation to -25°F maintaining better capacity than standard models in extreme cold.
Defrost cycles interrupt heating periodically when outdoor coils accumulate ice. The system reverses to cooling mode temporarily melting frost.
These defrost cycles are normal and necessary. They typically occur every 30-90 minutes depending on conditions.
Auxiliary heat supplements heat pump output in extreme cold. Some installations include electric resistance heat for backup.
Diagnose Heat Mode Failures
Heat mode troubleshooting identifies whether problems are mode-specific or affect overall system operation.
Switch to heat mode and set temperature 5°F above room temperature. Ensure heat mode is definitely selected.
Listen for outdoor unit startup. Heat mode requires outdoor unit operation just like cooling mode.
Feel air discharge from the indoor unit after 10 minutes. It should feel noticeably warm indicating proper heat mode operation.
Check for reversing valve click when switching modes. This solenoid valve changes refrigerant flow direction for heating.
Observe outdoor unit for excessive ice or frost. Heavy ice buildup indicates defrost cycle problems preventing proper operation.
Test heat mode at various outdoor temperatures. Performance should improve as outdoor temperature rises.
Monitor operation through a complete defrost cycle. Verify the system returns to heating after frost removal.
Mitsubishi Mr Slim Heat Not Working
Complete heat failure requires targeted diagnosis isolating the specific component preventing heat mode operation.
The reversing valve might be stuck in cooling position. This four-way valve directs refrigerant flow determining cooling or heating.
Exercise the reversing valve by switching between modes multiple times. Valves sometimes stick and free with repeated cycling.
Check the reversing valve solenoid coil. Measure resistance. Should be 200-500 ohms typically. Out-of-range readings indicate coil failure.
Apply voltage directly to the solenoid. Listen for the distinct whooshing sound indicating valve movement.
Verify refrigerant charge specifically in heat mode. Low refrigerant affects heating more severely than cooling.
Check outdoor temperature sensor accuracy. Incorrect readings prevent proper heat mode operation and defrost timing.
Test defrost control board operation. Failed defrost controls allow ice accumulation blocking airflow and preventing heating.
Mitsubishi Mr Slim Not Blowing Hot Air
This symptom indicates heat mode engages but output temperature remains inadequate for comfort.
Verify adequate heat pump capacity for current outdoor temperature. Capacity drops as outdoor temperature decreases.
Check that auxiliary heat activates if equipped. Electric backup heat should engage when outdoor temperature drops below design points.
Inspect outdoor coils for ice blockage. Even thin ice layers dramatically reduce heat transfer effectiveness.
Monitor defrost cycle frequency and duration. Excessively frequent or prolonged defrost cycles indicate problems needing attention.
Verify proper airflow at indoor unit. Restricted airflow reduces heat transfer even with proper refrigeration operation.
Check refrigerant superheat and subcooling in heat mode. Values outside specifications indicate charge or expansion device problems.
Test outdoor fan operation. The condenser fan must run in heat mode extracting heat from outdoor air.
Mitsubishi Mr Slim Troubleshooting No Heat: Systematic Approach
Complete heat loss requires comprehensive diagnosis eliminating potential causes methodically.
Start by confirming the system works correctly in cooling mode. This isolates heat-specific components from overall system problems.
Test manual heat operation if available. Some systems include test modes forcing heat operation bypassing normal controls.
Check that heat mode isn’t disabled in system settings. Commercial installations sometimes lock out heating for HVAC balance.
Verify all indoor units call for heat in multi-zone systems. Communication problems prevent proper zone coordination.
Inspect wiring between indoor and outdoor units. Communication wire damage prevents heat mode signal transmission.
Test control board heat mode outputs. Measure voltage at reversing valve and verify heat mode signals reach outdoor unit.
Consider refrigerant flow restrictions. Clogged filter driers or restriction devices affect heating more than cooling.
Mitsubishi Mr Slim Remote Not Working
Remote control problems frustrate users but usually have simple fixes. These issues rarely indicate serious system problems and can typically be resolved quickly.
Test Remote Control Functionality
Systematic remote testing determines whether the remote or receiver failed. This identifies the correct repair path.
Replace remote batteries with fresh high-quality batteries. Cheap batteries cause intermittent problems even when showing charge.
Test remote infrared transmission using a smartphone camera. Point the camera at the remote’s IR LED and press buttons.
Working remotes produce flashing visible on the phone screen. Cameras detect infrared light invisible to human eyes.
Try the remote at different distances from the receiver. Start very close, within 1 foot of the indoor unit.
Test with clear line-of-sight. Remove any objects between remote and receiver that might block infrared signals.
Clean the receiver window on the indoor unit. Dust or film coating the receiver prevents proper signal reception.
Verify the receiver LED blinks when receiving signals. This confirms the receiver sees transmissions even if not responding.
Mitsubishi Mr Slim Not Responding to Remote: Advanced Diagnosis
When basic remote troubleshooting doesn’t work, deeper issues exist requiring more investigation.
Check manual controls on the indoor unit. Most units include emergency operation buttons behind the front panel.
If manual controls work but remote doesn’t, the problem is definitely remote communication not overall control system failure.
Test a known-good remote from an identical Mr Slim unit. This isolates whether the remote or receiver failed.
Verify the remote is programmed for your specific indoor unit model. Some remotes require model-specific programming.
Check for interference from other infrared devices. LED lights, plasma TVs, or sunlight sometimes interfere with IR communication.
Inspect the receiver module on the control board. Failed receivers prevent all remote communication regardless of remote condition.
Test control board power specifically to the receiver circuit. Dead receiver circuits prevent communication despite working control boards.
Re-pair and Reprogram Remote Controls
Lost pairing between remote and indoor unit requires re-establishment of the wireless link for operation.
Remove all batteries from the remote for a full 60 seconds. This completely resets remote memory.
Press and hold Mode and Fan Speed buttons simultaneously for 5 seconds entering pairing mode.
Point the remote at the indoor unit from within 6 feet with clear line-of-sight. Press ON/OFF three times rapidly.
Watch for acknowledgment from the indoor unit. Most units beep or flash lights confirming successful pairing.
Test all remote functions after pairing. Temperature, mode selection, fan speed, and timer should all work correctly.
If pairing fails repeatedly, consult your specific model documentation. Pairing procedures vary across Mr Slim model generations.
Mitsubishi Mr Slim Not Working: General System Troubleshooting
Complete system failure with no obvious cause requires comprehensive diagnosis following a logical sequence. This systematic approach prevents wasted time on irrelevant testing.
Establish Baseline System Condition
Before diving into specific repairs, establish exactly what works and what doesn’t. This directs troubleshooting efficiently.
Document all symptoms comprehensively. Note sounds, lights, fan operation, and any error indicators.
Check if any system functions work at all. Partial function helps isolate failed components.
Verify recent changes or events. Power outages, storms, or maintenance work often correlate with failures.
Test in all operating modes. Problems affecting only certain modes point to mode-specific component failures.
Check all zones independently in multi-zone systems. Zone-specific problems indicate local issues not central equipment.
Record error codes and light patterns. These diagnostic indicators provide valuable troubleshooting information.
Photograph the installation for reference. Images help when consulting manuals or discussing problems with technicians.
Follow Logical Diagnostic Sequence
Systematic troubleshooting prevents wasted time on irrelevant testing. Follow this proven sequence for efficient diagnosis.
Step 1: Power Supply – Verify electricity reaches all components. Test breakers, disconnects, transformers, and control power.
Step 2: Control Systems – Confirm control boards receive power and function correctly. Check remotes, thermostats, and control wiring.
Step 3: Safety Circuits – Test all safety switches, overloads, and protection devices. These prevent operation under fault conditions.
Step 4: Component Operation – Verify individual components work correctly. Test fans, compressor, reversing valve, and sensors.
Step 5: Refrigeration System – Check refrigerant charge, pressures, and temperatures. This requires professional gauges typically.
Step 6: Communication – Verify indoor and outdoor units communicate properly. Test wiring and signal transmission.
Each step builds on previous findings. Don’t skip ahead. Follow the sequence for reliable results.
Mitsubishi Mr Slim Troubleshooting Blinking Light
Blinking lights communicate specific error codes identifying failed components or system problems. Learning to read these codes accelerates diagnosis significantly.
Decode Blink Patterns Accurately
Mr Slim systems use standardized blink codes across model lines. Accurate counting is essential for correct interpretation.
Observe the operation light through multiple complete cycles. Patterns repeat after brief pauses making them identifiable.
Count both the number of blinks and the timing between blinks. Both factors contribute to proper code identification.
Some systems use multiple lights in combination. Note which lights blink and their relationship to each other.
Record blink patterns with video on your smartphone. Reviewing footage helps count accurately without relying on memory.
Consult your specific model’s service manual for exact code definitions. Codes vary slightly across different Mr Slim generations.
Common Mr Slim Blink Code Meanings
These standard codes appear across most Mr Slim model lines with similar meanings.
1 slow blink every 3 seconds – Normal standby mode. Not an error. Indicates the unit is powered but not actively cooling or heating.
2 rapid blinks – Temperature sensor failure. Room sensor, heat exchanger sensor, or outdoor sensor reading outside specifications.
3 rapid blinks – Communication error between indoor and outdoor units. Wiring problems or control board issues.
4 rapid blinks – Indoor unit sensor problems. Specific to the indoor environment sensor or thermistor failure.
5 rapid blinks – Compressor protection activated. Overheating, overcurrent, or mechanical problems triggered safety shutdown.
6 rapid blinks – Indoor fan motor failure. Motor not responding to control signals or drawing excessive current.
7 rapid blinks – Outdoor fan motor failure. Condenser fan motor problems preventing proper heat rejection.
8+ rapid blinks – Multiple system failures or control board malfunction. Usually requires professional diagnosis.
Clear Error Codes After Repairs
Error codes persist even after fixing problems. Proper clearing confirms repairs succeeded and resets the system.
Turn off all power to the system for 5 minutes. Both indoor and outdoor units must be de-energized completely.
Restore power and immediately test the system. Monitor for at least 15 minutes confirming error codes don’t return.
If codes return immediately, the underlying problem wasn’t resolved. Additional diagnosis is necessary.
Use the control board’s reset button if power cycling doesn’t clear codes. This button typically requires a paperclip to access.
Some systems require specific reset sequences through the remote control. Check your manual for model-specific reset procedures.
Document which codes appeared and actions taken. This record helps if professional service becomes necessary.
Multi-Zone Mitsubishi Mr Slim Troubleshooting
Multi-zone Mr Slim installations add complexity requiring specialized troubleshooting approaches. Understanding how zones interact helps diagnose problems accurately.
Isolate Zone-Specific vs. System-Wide Problems
Determining whether problems affect one zone or the entire system directs troubleshooting appropriately.
Test each zone independently. Try operating just one zone at a time noting which zones work correctly.
Problems affecting all zones simultaneously indicate outdoor unit or main system issues.
Single zone failures point to that zone’s indoor unit, wiring, or refrigerant lines.
Multiple but not all zones failing suggests communication or power distribution problems.
Check zone control settings. Some problems result from configuration rather than equipment failure.
Verify each zone’s remote communicates with its specific indoor unit. Multi-zone systems sometimes experience cross-zone interference.
Communication Wiring in Multi-Zone Systems
Communication between multiple indoor units and the outdoor unit relies on properly functioning low-voltage wiring.
Inspect all wire connections at the outdoor unit’s terminal block. Loose connections cause intermittent communication failures.
Check wire routing throughout the building. Look for damage from rodents, construction, or environmental exposure.
Test communication voltage at each indoor unit. All units should receive proper control voltage.
Verify proper wire gauge was used during installation. Undersized wire causes voltage drop affecting communication.
Check for wire damage at penetration points through walls. Sharp edges sometimes cut through insulation over time.
Test for short circuits between communication wires. Shorts prevent proper data transmission between units.
Measure resistance along the entire communication circuit. Excessive resistance indicates poor connections or damaged wire.
Professional Service vs. DIY Decision Matrix
Knowing when to call professionals versus continuing DIY attempts prevents worsening problems and maintains safety.
| Problem Type | DIY Appropriate | Requires Professional | Reasoning |
|---|---|---|---|
| Filter cleaning | Yes | No | Simple maintenance anyone can perform |
| Power supply testing | Yes | Depends | Basic testing safe, repairs need electrician |
| Remote troubleshooting | Yes | No | No safety risks involved |
| Sensor replacement | Yes | No | Straightforward plug-and-play installation |
| Refrigerant work | No | Yes | EPA certification required by law |
| Compressor replacement | No | Yes | Complex and requires refrigerant handling |
| Control board replacement | Maybe | Recommended | Technical knowledge required for success |
| System installation | No | Yes | Multiple codes and certifications required |
| Gas leak repairs | No | Yes | Requires specialized equipment and licensing |
Preventing Future Mitsubishi Mr Slim Problems
Regular maintenance prevents most Mr Slim problems before they occur. Commercial systems require more frequent attention than residential units to maintain reliable operation.
Weekly Checks During Peak Usage
Commercial systems need frequent monitoring during heavy use seasons catching problems early.
Visually inspect all indoor units for proper operation. Listen for unusual sounds indicating developing problems.
Check that all remotes function correctly. Battery replacement prevents sudden control loss.
Verify airflow from all indoor units remains strong. Weakening airflow indicates developing filter or motor problems.
Observe outdoor unit operation. Ensure the fan runs smoothly without vibration or unusual noise.
Monitor system response to temperature changes. Sluggish response indicates control or sensor issues.
Monthly Comprehensive Maintenance
Monthly attention keeps commercial Mr Slim systems operating reliably year-round.
Clean or replace all air filters without exception. Commercial environments generate more dust requiring frequent filter service.
Inspect condensate drainage from all indoor units. Ensure water flows freely without backing up.
Check outdoor unit for debris accumulation. Clear leaves, paper, or other material from the unit.
Test all operating modes confirming proper function. Don’t discover broken heat mode when winter arrives.
Inspect all visible wire connections. Tighten loose terminals preventing intermittent operation.
Clean evaporator coils in high-dust environments. Use an effective coil cleaner (View on Amazon) and follow the product directions.
Quarterly Professional Service
Commercial Mr Slim systems benefit from quarterly professional maintenance preventing major failures.
Technicians measure refrigerant pressures and temperatures verifying correct system charge.
Electrical testing identifies developing problems in motors, capacitors, and control boards before failure.
Comprehensive performance testing under load reveals issues invisible during light operation.
Professional cleaning reaches inaccessible areas using specialized equipment.
Firmware updates resolve software bugs in newer smart-enabled systems.
Emergency Operation Procedures
When Mr Slim systems fail during extreme weather, emergency operation maintains minimum comfort while arranging repairs.
Manual Override Operation
Most Mr Slim units include manual operation modes forcing basic operation regardless of control problems.
Locate the manual operation button behind the front panel. Usually a small recessed switch.
Press and hold for 3-5 seconds. The unit should start at default settings ignoring remote and thermostat.
Manual mode typically runs at maximum cooling or heating with high fan speed.
This confirms the compressor and basic systems work isolating problems to control circuits.
Exit manual mode by turning off the system completely then restarting normally.
Temporary Workarounds During Repairs
While awaiting parts or professional service, these measures maintain acceptable conditions.
Use alternative zones if available. Shift occupancy to working zones while repairs proceed on others.
Adjust airflow manually if remote control fails. Change vane positions by hand achieving acceptable comfort.
Bypass failed thermostats temporarily using manual operation. Monitor temperatures manually preventing overcooling or overheating.
Close off problem zones in multi-zone systems. This prevents short cycling and improves performance in working zones.
Never bypass safety devices. These protect expensive equipment from catastrophic damage.

Also Read:
Frequently Asked Questions
Why won’t my Mitsubishi Mr Slim turn on after cleaning filters?
Filter removal and cleaning sometimes triggers safety switches or accidentally dislodges electrical connections inside the unit. First, ensure all filters are completely and properly seated in their tracks. Filters that aren’t fully inserted can trigger airflow safety switches preventing operation.
Next, verify the front panel is securely closed and all clips are properly engaged. Many Mr Slim units include safety interlocks that prevent operation when covers aren’t properly installed to protect users from moving parts. Check for any loose wire connections that may have been disturbed during filter removal.
The process of removing filters sometimes requires manipulating internal components in tight spaces, and wires can get nudged or pulled loose. After confirming proper reassembly, perform a complete system reset by turning off the circuit breaker for 5 full minutes, then restoring power. This clears any error codes that may have been triggered during the maintenance process.
If the unit still won’t start, carefully disassemble again and look for any components that weren’t returned to their exact original positions. Take photos during future filter cleaning to reference proper component positioning.
How do I know if my Mr Slim needs refrigerant?
Several clear symptoms indicate low refrigerant levels requiring professional attention. Poor cooling despite clean filters and proper airflow is the primary indicator. The system runs continuously but never reaches the set temperature. Ice formation on indoor evaporator coils or refrigerant lines signals refrigerant problems. Low refrigerant causes excessive temperature drops across the coil, freezing condensation instantly.
Check both refrigerant lines at the outdoor unit. The larger suction line should feel very cold and may sweat or frost slightly. The smaller liquid line should feel warm. If both lines are at similar temperatures or the suction line is only slightly cool, refrigerant levels are probably low. Listen for hissing or bubbling sounds near refrigerant connections indicating active leaks. Look for oily residue around fittings, joints, and service ports. Refrigerant and compressor oil mix in the system, so leaks leave telltale oily marks.
Understand that refrigerant doesn’t naturally deplete through normal operation. The system is sealed. Low levels always indicate leaks somewhere in the system. Simply adding refrigerant without finding and repairing leaks wastes money as the system will leak out again within weeks or months. Professional service with EPA certification is legally required for all refrigerant work including diagnosis, leak detection, recovery, and recharging.
Can I replace a Mr Slim control board myself?
Yes, if you’re comfortable with electronics and follow proper procedures, but control board replacement requires careful attention to detail. First, control boards are expensive, often $200-500 depending on the model. Get professional confirmation that the control board is actually faulty before purchasing a replacement.
Many symptoms blamed on control boards actually stem from sensors, wiring, or other cheaper components. Once you’ve confirmed the board needs replacement, document everything meticulously. Take multiple clear photos from different angles showing every wire connection before disconnecting anything. Label each wire with masking tape noting its terminal position.
Order the exact OEM replacement using your complete model number from the rating plate. Generic or “compatible” boards often don’t work properly with Mitsubishi’s proprietary systems. When removing the old board, carefully note any small jumpers or switches that may be set for specific configurations. Transfer these exact settings to the new board.
Mount the new board in exactly the same orientation and location as the old one. Reconnect wires one at a time, double-checking each connection against your photos. Ensure solid connections without forcing anything. After installation, power up and immediately test all functions through multiple modes. If the unit doesn’t operate correctly after board replacement, re-check every connection before concluding the new board is defective.
What causes Mr Slim units to short cycle repeatedly?
Short cycling, where the system starts and stops every few minutes without completing normal run cycles, has several common causes ranging from simple to complex. Dirty air filters are the most frequent culprit, causing airflow restriction that triggers temperature and pressure safety switches. Clean or replace filters first before investigating other causes.
Thermostat or temperature sensor failures make the system think target temperature is reached when it isn’t, causing premature shutdown followed by restart when temperature drifts. Test sensors with a multimeter comparing resistance readings to specifications.
Low refrigerant causes the evaporator to freeze, blocking airflow and triggering high-pressure shutdowns. Overcharge causes excessive head pressures to do the same. Oversized systems installed in spaces too small for their capacity reach temperature quickly and cycle excessively. This is a design problem not a failure but still causes short cycling.
How often should Mr Slim filters be cleaned in commercial settings?
Commercial environments demand much more frequent filter maintenance than residential applications. Clean filters monthly at absolute minimum in standard office or retail environments. High-traffic commercial spaces with significant dust sources like restaurants, manufacturing facilities, retail stores, or buildings near construction require weekly filter cleaning.
Establish a filter cleaning schedule based on your specific environment and monitor system performance. If the system struggles to maintain temperatures, check filters first before investigating other causes. Document filter cleaning in maintenance logs.
Some Mr Slim models include filter timer reminders that trigger indicator lights after programmed hours. Reset these after each cleaning so they provide accurate maintenance reminders.
Bringing Your Mr Slim Back to Full Operation
Most Mr Slim problems resolve through systematic troubleshooting following diagnostic protocols outlined in this manual. Start with simple checks before assuming complex failures.
Power and control issues cause the majority of service calls. Verify these basic systems thoroughly before diving into component-level diagnosis.
Document everything you observe and test. Comprehensive notes help professional technicians diagnose efficiently if DIY efforts don’t succeed completely.
Know your limitations. Some problems genuinely require professional expertise, specialized tools, and legal certifications beyond DIY capabilities.
Your Mr Slim system will return to reliable operation. Just follow the appropriate diagnostic path for your specific symptoms.

Hi, I’m Barlgan! I created Repair Me Yourself to empower homeowners to tackle appliance repairs with confidence. From decoding error codes to fixing cooling issues, I break down complex repairs into simple, actionable steps that save you time and money.