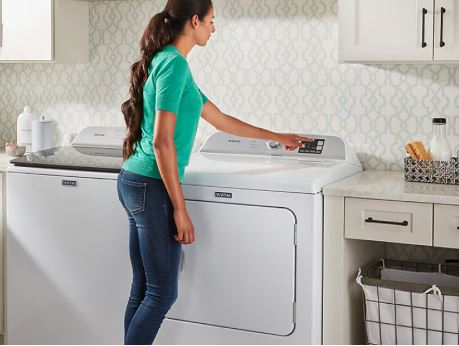
Your oversized loads were drying perfectly until this morning, when the Maytag Bravos XL dryer decided to quit cooperating. The extra-large drum that handles king-size comforters now sits idle, or worse, it tumbles cold for an hour, leaving everything soaking wet.
The XL model’s expanded capacity creates unique challenges compared to standard Bravos units. Heavier loads stress components differently, the larger drum requires more robust support systems, and the extended drying times expose any marginal component failures that smaller dryers might tolerate.
This Maytag Bravos XL dryer troubleshooting guide targets problems specific to the XL’s oversized design, from the reinforced suspension system to the high-output heating elements that frequently fail under sustained heavy-load operation.
Maytag Bravos XL dryer troubleshooting commonly involves accelerated wear on drum support rollers, premature thermal fuse failures from extended run times, heating element stress from continuous high-demand operation, and control board complications from the additional sensors required for proper XL performance. Most repairs take 45-120 minutes.
Quick Maytag Bravos XL Dryer Problem Diagnosis
| XL-Specific Symptom | Unique Cause in XL Models | Where to Start | Component Cost |
|---|---|---|---|
| Heavy thumping with large loads | Worn rear drum support or broken suspension springs | Check rear drum bearing and support bracket | $40-80 parts |
| Won’t heat on auto-dry but heats on timed | Moisture sensor recalibration needed | Clean sensors, check sensor wiring harness | $0-25 |
| Shuts off after 10-15 minutes with full load | High-limit thermostat cycling from overload | Reduce load size, verify airflow capacity | $15-30 |
| Front panel buttons unresponsive | Control board affected by heat rising from XL drum | Test control board, check heat shielding | $150-250 |
| Takes 3+ cycles for bulky items | Blower wheel inadequate for XL capacity | Upgrade to high-capacity blower, verify vent size | $50-90 |
| Drum rotates sluggishly with heavy loads | Motor strain or worn belt from XL weight | Test motor capacitor, measure belt tension | $30-120 |
Understanding Maytag Bravos XL Dryer Troubleshooting Problems
The XL designation means more than just a bigger drum since it represents engineering compromises that create predictable failure points. Standard Bravos dryers handle 7.0-7.4 cubic feet of capacity, while the XL models offer 7.4-8.8 cubic feet, nearly 20% more volume. This expansion strains every component in the drive train where the motor works harder to rotate the heavier drum, the belt stretches faster under increased load, and support rollers compress more with each revolution, accelerating wear.
The heating system faces continuous demand with XL loads. Where a standard load might need 40 minutes, an XL comforter requires 70-90 minutes, and this extended heating stresses the element, causing it to fail 30-40% earlier than in standard-capacity models. The thermal fuse sees sustained high temperatures rather than cycling on and off, leading to premature degradation.
The Bravos XL uses a beefier blower wheel and motor to move air through the larger drum volume. Despite this upgrade, many installations don’t have adequate vent capacity for the increased airflow. A 4-inch vent that worked fine for a standard dryer becomes marginal with the XL’s output, causing back-pressure to build, which leads to overheating and triggers safety shutdowns.
Control systems in XL models incorporate additional sensors to manage the increased complexity. More sensors mean more potential failure points, and the moisture sensing system particularly struggles since larger loads have more variation in moisture distribution, causing the control to misjudge drying completion. You’ll find the XL frequently shuts off while items remain damp in the center of the load.
One distinctive XL characteristic is the rear drum support, which uses a heavier-duty bearing assembly compared to standard models. This bearing carries substantially more weight and fails in unique ways. When it goes bad, you’ll hear deep thumping rather than the squealing typical of front roller failures.
Maytag Bravos XL Dryer Not Heating
No heat in an XL dryer often stems from components overwhelmed by the increased demand. Here’s what to do when your Maytag Bravos dryer won’t heat up:
1. Test the High-Output Heating Element
The Bravos XL uses a more powerful heating element rated at 5500-6500 watts compared to 4500-5000 watts in standard models. This higher wattage element generates more heat but also experiences greater thermal stress and fails more frequently.
Disconnect power and access the heating element through the rear panel. Remove the wire terminals and test resistance across the element, where XL elements typically show 8-12 ohms resistance when functional. Standard dryer elements show 10-40 ohms, so the XL’s lower reading reflects its higher wattage.
Infinite resistance indicates a broken element that must be replaced. Also test from each terminal to the metal housing where you should read infinite resistance. Any continuity means the element is grounding out through a hole in the housing.
Visual inspection reveals stress failures invisible to electrical testing. Look for sagging coils, discolored sections, or the coil touching the housing since the XL element’s higher heat output causes housing warping that standard elements rarely experience.
2. Check for Voltage Drop Under Load
The XL’s high wattage demands consistent 240V. Marginal wiring that barely served a standard dryer fails with the XL’s increased current draw, so use a multimeter to measure voltage at the heating element terminals while someone activates a heating cycle.
You should read 230-250V consistently. If voltage drops below 220V when heating engages, your home’s wiring or circuit breaker can’t handle the load, which requires an electrician to upgrade the circuit or repair loose connections at the breaker panel.
Check the terminal block inside the dryer where the power cord connects. XL models generate more heat at connection points due to higher current, and loose terminals create resistance that drops voltage and prevents proper heating. Tighten all terminal screws firmly and inspect for discoloration indicating overheating.
3. Diagnose Gas Valve Issues on XL Gas Models
Gas XL models use larger-capacity valve assemblies to provide adequate fuel for the high-output burner. These valves have two solenoid coils (one for burner startup and one for maintaining flame), and either coil can fail independently.
Test each coil’s resistance where they should read 1000-1500 ohms each. Outside this range indicates coil failure, so replace the entire valve assembly rather than individual coils since partial valve replacement often leads to gas leaks or improper combustion.
Watch the ignition sequence through the lint trap opening. The igniter should glow bright orange-white for 45-90 seconds before the valve clicks open, and XL igniters last only 3-5 years under heavy use compared to 5-8 years in standard models due to sustained operation.
4. Address Thermal Component Failures
The XL’s extended run times mean thermal fuses and thermostats spend more time at elevated temperatures. Standard thermal fuses rated for 280°F sometimes fail prematurely in XL applications, so some XL units use 290°F or 300°F fuses specifically designed for high-capacity operation.
Always replace thermal fuses with exact temperature-rated parts. Using a standard 280°F fuse in an XL model causes nuisance failures where the fuse blows protecting the dryer from perceived overheating, but it’s actually responding to the XL’s normal higher operating temperature.
Test the cycling thermostat mounted on the blower housing. This component should close (show continuity) at low temperatures and open as it heats, and a failed thermostat stuck in the open position prevents heating entirely.
Maytag Bravos XL Dryer Won’t Start
Starting failures in XL models involve both standard issues and capacity-specific complications. Do the following when Maytag Bravos XL dryer won’t start:
1. Verify Load-Sensing System
Some XL models incorporate load-sensing technology that prevents starting if the load is dangerously overweight. This safety feature protects the motor and drive system from damage, so if you’ve packed the drum completely full, the dryer may refuse to start.
Try running the dryer with a half load. If it starts normally with less weight, you’ve exceeded the capacity limit. The XL handles 8-8.8 cubic feet, but wet items weigh substantially more than dry items, so a drum filled with soaking-wet towels might exceed the motor’s safe load capacity.
Check the owner’s manual for weight limits, which are typically 20-25 pounds for a single load. Most people don’t weigh laundry, so use volume as a guide where the drum should be no more than 3/4 full when items are loosely loaded.
2. Test the Heavy-Duty Door Latch
The XL’s larger door uses a reinforced latch mechanism to handle the increased weight, and this latch wears differently than standard models. The strike plate that engages the door switch can bend or warp from repeated heavy door closures.
Inspect the strike plate alignment. When the door closes, the strike should align perfectly with the door switch, and misalignment prevents the switch from engaging, leaving the dryer unresponsive. Adjust the strike by loosening mounting screws and repositioning for proper contact.
Test the door switch itself with a multimeter. With the door closed, it should show continuity, while an open door should break continuity. Replace the switch if it fails to change states or feels loose and wobbly.
3. Examine the Start Circuit and Capacitor
The XL’s larger motor sometimes uses a start capacitor that standard models lack. This capacitor provides extra starting torque for the heavier drum, and a failed capacitor prevents the motor from starting even though everything else functions normally.
The start capacitor mounts near the motor, usually in a metal housing. Test it with a capacitor tester or multimeter with capacitance function, then compare the reading to the rated value printed on the capacitor body. More than 10% deviation indicates failure.
Capacitors can fail intermittently by working when cool but failing when hot. If the dryer starts fine in the morning but refuses to start after several loads, suspect a heat-sensitive capacitor.
4. Investigate Control Board Communication Errors
The XL’s additional sensors send more data to the control board. Communication errors between sensors and the board prevent starting as a safety measure, and error codes sometimes appear briefly on the display before clearing.
Inspect all wire harness connections to the control board and look for corrosion, loose pins, or damaged insulation. The moisture sensor harness particularly suffers from humidity exposure, so clean corroded connectors with electrical contact cleaner and ensure all connections click firmly into place.
Maytag Bravos XL Dryer Squealing
Squealing in XL models develops earlier and louder than in standard dryers due to increased weight and stress. Here’s what to do when your Maytag dryer makes a squealing or screeching sound:
1. Identify Roller Wear Patterns
The XL’s heavier drum accelerates roller wear by 30-40%. Front rollers develop flat spots from supporting the drum’s front weight plus loaded laundry, while rear rollers wear on the bearing surfaces rather than developing flat spots, creating a different sound signature.
Front roller squealing is rhythmic and matches drum rotation speed. Rear bearing squealing is constant and doesn’t vary with drum speed, so listen carefully to distinguish which rollers need attention.
2. Replace Front Support Rollers
Access front rollers through the open front panel where they mount on a shaft attached to the front bulkhead. Remove the drum to access the roller shaft, which requires help due to the XL’s weight.
The roller shaft typically has a spring clip or E-clip at each end. Remove these clips and slide the shaft out, bringing both rollers with it, then inspect the rollers for flat spots, rough surfaces, or damaged bearings.
Install new rollers by sliding them onto the shaft and ensure they spin freely before reassembly. The XL uses wider rollers (typically 2 inches) compared to standard models (1.5 inches) to distribute weight better, so don’t substitute standard rollers since they’ll fail rapidly.
3. Service the Rear Drum Support Bearing
The rear bearing assembly is unique to XL models and critical for proper operation. This bearing mounts at the drum’s back and supports substantial weight, and when it fails, you’ll hear deep thumping or grinding from the dryer’s rear.
Remove the rear panel to access the bearing. It’s a sealed unit that can’t be lubricated, so replacement is the only fix. Unbolt the bearing assembly from the cabinet back while noting the exact position for reinstallation.
Install the new bearing assembly ensuring perfect alignment since misalignment causes premature wear and continued noise. The drum should rotate smoothly without wobbling when properly installed.
4. Inspect the Heavy-Duty Idler Pulley
The XL uses a larger idler pulley with heavy-duty bearing to handle increased belt tension from the heavier drum, and this pulley wears faster than standard-capacity equivalents.
Release belt tension by pushing the idler arm toward the motor, then spin the pulley by hand. It should rotate completely freely without resistance, roughness, or noise, and any drag or grinding indicates bearing failure.
Replace the entire idler assembly including the spring. The XL’s spring is under more tension than standard models and weakens over time, and a weak spring can’t maintain proper belt tension, causing slippage and squealing.
Maytag Bravos XL Dryer Thermal Fuse Problems
Thermal fuses fail more frequently in XL models due to extended run times and higher sustained temperatures.
Understand XL Thermal Fuse Specifications
The XL often uses two separate thermal fuses (one on the heating element assembly and another on the blower housing), while standard models typically have just one. This redundant protection prevents overheating from the high-output heating system.
Verify which fuse(s) your specific XL model uses by checking both locations: the heating element canister and the blower housing. Both must show continuity for proper operation since one blown fuse shuts down the entire dryer.
XL thermal fuses are rated 290-300°F versus 280°F in standard models. This higher rating accommodates the XL’s normal operating temperature, and installing a standard 280°F fuse causes repeated nuisance failures.
Test Both Thermal Fuse Locations
Access the heating element fuse through the rear panel, disconnect one wire terminal and test for continuity. No continuity means the fuse is blown and requires replacement.
The blower housing fuse may be accessible from the front or rear depending on your model year. Remove the fuse and test it the same way, marking each fuse location as you test to avoid confusion.
Identify Root Causes of Repeated Failures
If thermal fuses blow repeatedly, you have an underlying problem causing overheating. The XL’s high capacity makes it particularly sensitive to vent restrictions, where even moderate blockages that a standard dryer tolerates cause XL overheating.
Measure your vent run length including equivalent feet for elbows (5 feet per 90-degree turn). The XL requires shorter, more direct venting than standard models with a maximum recommended length of 20-25 feet versus 30-35 feet for standard capacity.
Check that your vent diameter matches the XL’s output. Many installations use 4-inch ducting, but the XL performs better with 5-inch or 6-inch vents for long runs since the increased airflow volume needs larger ducts to maintain proper velocity.
Clean the blower wheel thoroughly since lint accumulation on the blower reduces airflow efficiency by 40-50% in XL models. Remove the blower wheel and clean between every blade with a vacuum and soft brush.
Maytag Bravos XL Dryer Not Drying Completely
Incomplete drying frustrates XL owners more than any other issue because the whole point is handling large loads efficiently. Try these tips when your Maytag Bravos XL dryer won’t dry clothes:
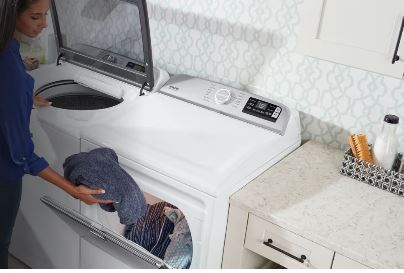
1. Adjust Loading Techniques for XL Capacity
The XL’s large drum tempts users to overfill it. Counter-intuitively, overfilling causes worse drying performance than proper loading since items need space to tumble and expose all surfaces to airflow.
Load the drum to no more than 3/4 capacity. This seems wasteful of the XL’s size, but it’s necessary for proper tumbling action since tightly packed items don’t move, creating wet pockets that never dry.
Separate loads by fabric weight. Don’t mix heavy towels with lightweight sheets since they dry at different rates, and the moisture sensors can’t compensate for extreme variation in a single load.
2. Verify Moisture Sensor Calibration
The XL uses more sophisticated moisture sensing than standard models to handle varied load compositions. These sensors require periodic recalibration, especially after power outages or if you notice consistent premature cycle endings.
Clean the sensor strips with rubbing alcohol every two weeks in heavy-use households. Fabric softener buildup is worse with XL loads because more items pass over the sensors.
Some XL models have a sensor recalibration mode accessed through a hidden button sequence. Consult your service manual for the specific procedure for your model year since recalibration takes 5-10 minutes and dramatically improves auto-dry performance.
3. Measure Actual Drying Time Requirements
Time your drying cycles with a stopwatch. The XL should dry a typical full load (drum 3/4 full) in 40-55 minutes on auto-dry normal setting. If cycles run longer than 70 minutes or end before 30 minutes, you have sensor or airflow problems.
Short cycles with damp clothes mean sensor issues, while long cycles suggest weak airflow or heating problems. Use this timing information to guide troubleshooting toward the correct system.
4. Optimize Airflow for XL Requirements
The XL moves 225-275 CFM of air through the drum compared to 180-220 CFM in standard models. Your vent system must handle this increased volume, so measure airflow at the exterior vent with an anemometer or simple bag test.
Hold a large garbage bag loosely over the exterior vent and time how long it takes to fill completely. The bag should inflate in 3-5 seconds, and longer fill times indicate inadequate airflow requiring vent cleaning or routing improvements.
Consider upgrading to rigid metal ducting (View on Amazon) if you’re currently using semi-rigid. The smoother interior surface reduces friction and improves airflow by 15-20%, and for the XL’s high volume, this improvement is significant.
Complete Maytag Bravos XL Dryer Disassembly
Accessing XL components requires careful disassembly due to the larger, heavier components.
Safety Preparations
Unplug the dryer completely and shut off gas supply if applicable. Move the dryer away from the wall for rear access and have a helper available since XL panels and the drum itself weigh significantly more than standard models. Wear work gloves to protect against sharp edges.
Gather tools including Phillips screwdriver, putty knife, 1/4-inch nut driver, work light, and camera or phone for documentation. Take photos at each disassembly step since the extra sensors and wiring in XL models make reassembly more complex.
Remove the Top Panel
Locate the two screws inside the lint trap opening and remove these screws completely. At the front corners, insert a putty knife between the top and front panels about 2 inches from each corner, then push inward while lifting the top. Spring clips will release with firm pressure.
The XL’s top panel is substantially heavier than standard models, so support it carefully as it lifts. Prop it against the wall behind the dryer or have your helper hold it, being careful not to stress any wires connecting the top-mounted control panel.
Detach the Front Panel
With the top raised, remove the two screws securing the front panel (typically located one on each side of the drum opening). On XL models, there may be additional screws along the bottom edge, so check carefully before attempting to remove the panel.
Disconnect the door switch wiring harness. Most XL models use a connector that simply unplugs, while some older versions require removing individual wire terminals with a small flat-blade screwdriver.
Lift the front panel up slightly to unhook it from bottom retention tabs. The panel tilts forward and away, so set it aside carefully since the larger XL panel is awkward to handle.
Access the Drum and Belt System
With front and top panels removed, you can see the drum, belt routing, and support roller system. The XL drum is significantly heavier, so don’t attempt to lift it alone. Support the drum from underneath before removing any belt or roller components.
To remove the drum completely, disconnect the belt by releasing tension on the idler pulley, then lift the drum’s front edge up and out of the cabinet. You’ll need help since the XL drum weighs 35-50 pounds empty, more if lint has accumulated.
Remove Rear Panel for Heating Element Access
The heating element, blower, and rear drum support are accessible from the back. Remove all screws around the rear panel perimeter, noting that some XL models have 12-15 screws compared to 6-8 on standard models due to the larger panel size.
Lift the panel away and set it aside. You now have access to the heating element canister, thermal fuses, thermostats, blower housing, and rear drum bearing assembly.
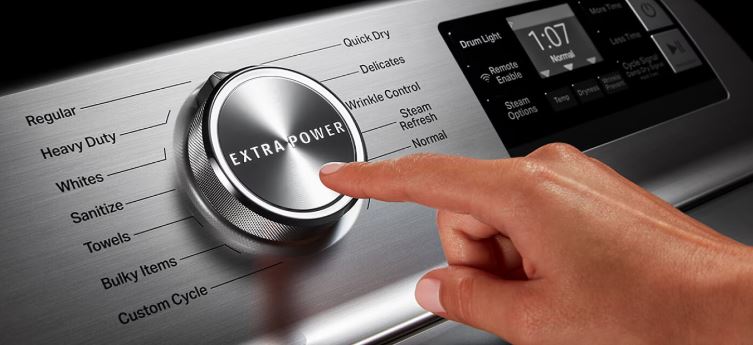
How to Reset Your Maytag Bravos XL Dryer
The XL’s complex control system benefits from regular resets to clear accumulated errors. Here are your options for resetting a Maytag Bravos XL dryer:
Perform Complete Power Cycle Reset
Unplug the XL dryer from the wall outlet for exactly 3 minutes. The XL’s control system uses more capacitors than standard models due to additional sensors, and these require longer discharge time where 2 minutes is insufficient.
After 3 minutes, plug back in and wait 45 seconds before attempting operation. The control board runs through an extended initialization checking all sensors, and you may hear multiple relay clicks or see the display flash various codes briefly. This is normal.
Test the dryer with a small load (3-4 towels) on a timed cycle rather than auto-dry. This confirms basic heating and tumbling work before testing the more complex moisture sensing system.
Access XL Factory Reset Mode
Some XL models have a factory reset that clears custom settings and sensor calibrations. Enter this mode by pressing and holding “Steam” + “Delicate” + “Extra Dry” simultaneously for 8 seconds with the dryer plugged in but not running.
All display lights should flash rapidly indicating reset mode entry. Release the buttons, and the dryer resets to factory defaults over the next 20-30 seconds. You’ll need to reprogram any custom preferences after this reset.
Not all model years support factory reset. If the button combination doesn’t trigger flashing lights, your model lacks this feature, so perform the power cycle reset instead.
Reset Individual Sensor Systems
If the moisture sensor seems faulty but other systems work fine, perform a sensor-specific reset. Start a timed dry cycle for 5 minutes, then while it runs, press and hold “More Dry” + “Less Dry” simultaneously for 5 seconds. This forces sensor recalibration without full control board reset.
The cycle will complete its 5 minutes. Afterward, run an auto-dry cycle with a damp test load, and the sensors should now read moisture accurately.
Clear Persistent Error Codes
XL models display alphanumeric error codes for specific failures. Common codes include “PF” (power failure), “AF” (restricted airflow), and “L2” (low line voltage). Some codes auto-clear after conditions resolve, while others persist until manually cleared.
After fixing the underlying problem, perform a power cycle reset to clear the code memory. If a code returns immediately after reset, the problem wasn’t actually fixed, so continue troubleshooting that specific system.
Write down error codes before they disappear since the XL’s control system sometimes displays codes for just 3-5 seconds, but the information guides troubleshooting even after the code clears.
Advanced Maytag Bravos XL Dryer Troubleshooting
Some XL problems require understanding the model’s unique engineering.
Diagnose Motor Stress and Overheating
The XL motor works significantly harder than standard-capacity motors. Under continuous heavy-load use, motor windings can overheat triggering thermal protection, and the dryer stops mid-cycle with no error code.
Feel the motor housing after a shutdown. If it’s too hot to touch comfortably (above 150°F), the motor is overheating, which indicates overloading, failed motor cooling fan, or worn motor bearings.
Reduce load sizes for several cycles. If the motor no longer overheats, you were exceeding capacity. If overheating continues with light loads, the motor or its cooling system needs repair.
Address Control Board Heat Damage
The XL generates more interior heat than standard models, and this heat rises to the control board mounted in the top panel. Over years of operation, sustained heat degrades the board’s electronic components.
Signs of heat damage include intermittent button response, display dimming, random cycle changes, or complete board failure after the dryer has been running for 20+ minutes. The board works fine when cool but fails as it heats up.
Improve control board cooling by ensuring adequate room ventilation. Don’t install the XL in enclosed closets without ventilation, and consider adding a small computer fan to improve air circulation if overheating is chronic.
Replace heat-damaged control boards rather than attempting repair. Temperature-stressed circuit boards develop multiple component failures that cascade over time.
When to Call for Professional Help
Some XL repairs exceed DIY capabilities due to weight and complexity. That includes:
Drum Bearing Replacement – Requires special tools and techniques for the XL’s heavy drum. The bearing must be pressed into position with proper alignment, and improper installation causes rapid failure.
Motor Replacement – Involves electrical connections beyond typical DIY comfort levels. The motor’s higher current capacity requires proper wire sizing and grounding, and incorrect installation creates fire hazards.
Gas Valve Work – Always requires certified technicians. The XL’s higher-capacity gas valve uses multiple safety interlocks that must be tested after installation, and only licensed gas technicians should perform this work.
Cost-Benefit Analysis – XL dryer repairs cost 15-25% more than standard models due to larger, more expensive parts. A heating element runs $70-120 for XL versus $40-80 for standard, while drum rollers cost $60-100 versus $40-60. Calculate repair costs against replacement value since the XL typically costs $800-1200 new. If repairs exceed $400, consider replacement, especially if the dryer is 10+ years old and multiple components show wear.
Check out decent new dryers on Amazon!
Preventive Maintenance for Maytag Bravos XL Dryer Longevity
The XL’s increased capacity and power demand more frequent maintenance.
Every Load
- Clean the lint screen before every single load (the XL generates 30-40% more lint than standard models). Preferably use a clothes dryer lint brush (View on Amazon)
Weekly
- Check the exterior vent for adequate airflow
- Verify the door closes properly and the latch engages firmly
Monthly
- Remove and wash the lint screen with hot soapy water
- Clean moisture sensor strips with rubbing alcohol
- Vacuum around and behind the dryer
Quarterly
- Disconnect and thoroughly clean the entire vent system from dryer to exterior
- Inspect the drum seal around the door opening
- Check all four drum support rollers by listening during operation
Annually
- Remove front panel and vacuum all interior lint accumulation
- Test all thermal safety devices for proper operation
- Inspect and test the drive belt for glazing, cracking, or elongation
Frequently Asked Questions
Why does my Maytag Bravos XL dryer take so much longer to dry than my old standard dryer?
Larger loads contain more moisture that must be removed. The XL is designed for heavier loads but still operates on the same physics where air must pass through more fabric. Ensure you’re not overfilling beyond 3/4 capacity, and also verify your vent system can handle the XL’s increased airflow since inadequate venting extends cycle times dramatically.
Can I use the same vent ducting I had for my previous smaller dryer?
It depends on the vent length and diameter. The XL requires shorter, more direct venting than standard models. If your previous setup was marginal (long runs, multiple turns), it won’t adequately serve the XL. Upgrade to larger diameter ducting or reroute for a shorter path to prevent overheating and poor performance.
How often should I replace drum rollers on the Bravos XL?
Heavy-use XL dryers need roller replacement every 6-8 years versus 8-12 years for standard models. The increased weight accelerates wear, so replace all four rollers simultaneously when squealing develops since waiting causes bearing seizure that damages the drum surface and cabinet brackets.
What’s the maximum load weight for the Bravos XL?
Most XL models handle 22-27 pounds per load. Remember that wet items weigh 2-3 times their dry weight, so a 10-pound dry comforter weighs 25-30 pounds when saturated. Fill the drum no more than 3/4 full and never pack items tightly since they need space to tumble properly.
Why does my XL shut off after running for just 10-15 minutes?
This indicates thermal protection activating from overheating. Check your vent system immediately since severe restrictions cause rapid overheating in XL models. Also verify you’re not exceeding load capacity, and the high-limit thermostat cycles off to protect components from sustained overtemperature conditions.
Is the thermal fuse different in XL models versus standard Bravos dryers?
Yes, the XL typically uses 290-300°F thermal fuses rated for higher operating temperatures. Installing a standard 280°F fuse causes nuisance failures, so always verify the temperature rating stamped on your original fuse and replace with the exact specification.
Can I repair just the rear drum bearing or must I replace the entire assembly?
The rear bearing assembly is a sealed unit that cannot be serviced, so replacement is required when it fails. Don’t attempt to lubricate or repair it since this doesn’t work and creates fire hazards from lubricant dripping onto heating elements.
Why do moisture sensors seem less accurate in my XL than my previous dryer?
The XL’s larger loads have more moisture variation throughout the mass. Items at the drum’s center dry slower than items at the edges, and the sensors can only sample moisture at specific points. This is inherent to large-capacity dryers. Cleaning sensors regularly and using proper load sizes minimizes the issue but doesn’t eliminate it entirely.
Maximize Your Maytag Bravos XL Dryer Investment Through 2026
The Maytag Bravos XL represents a significant investment in laundry capacity and convenience. Understanding its unique maintenance requirements and failure patterns keeps it operating efficiently for 15+ years.
The XL’s extra capacity comes with extra responsibility including more frequent vent cleaning, careful load management, and prompt attention to squealing or performance changes. Most XL problems stem from users treating it like a standard-capacity dryer when it demands more attention to airflow and component stress. Master these XL-specific needs, and your oversized loads will dry perfectly cycle after cycle, year after year.

Hi, I’m Barlgan! I created Repair Me Yourself to empower homeowners to tackle appliance repairs with confidence. From decoding error codes to fixing cooling issues, I break down complex repairs into simple, actionable steps that save you time and money.