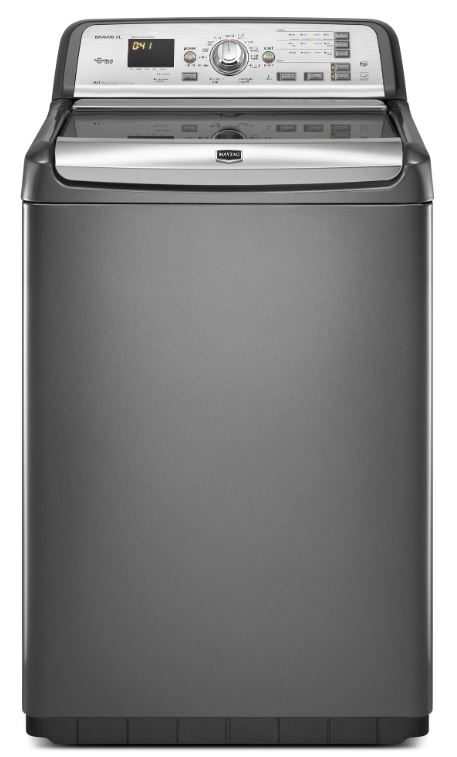
Wet clothes sitting in a motionless drum represent laundry day’s most frustrating nightmare. Your Maytag Bravos completed the wash cycle without issue, drained the water perfectly, but now refuses to spin—leaving your load soaking wet and heavy enough to challenge your back when lifting.
This maddening problem transforms a simple chore into a troubleshooting marathon as you wonder whether a minor adjustment or major repair lies ahead. The Bravos washer’s sophisticated electronic controls, multiple safety interlocks, and mechanical drive system create numerous potential failure points where spin cycles can halt.
Yet most causes prove surprisingly straightforward to diagnose and fix without professional intervention or wallet-draining service calls.
Maytag Bravos washers fail to spin due to lid lock malfunctions preventing safety engagement, unbalanced loads triggering automatic shutdowns, drive belt slippage or breakage, faulty door switches, clogged drain pumps causing cycle interruption, worn motor couplings, control board errors, shift actuator failures, or suspension rod problems. Most no-spin issues stem from simple load distribution problems or lid mechanism faults requiring minimal repair skill, though motor and transmission failures demand professional service.
Maytag Bravos No-Spin Quick Diagnosis Reference
| Symptom Pattern | Most Likely Cause | Difficulty Level | Typical Repair Cost |
| Lid won’t lock, no spin | Lid lock assembly failure | Easy | $45-80 DIY, $150-250 pro |
| Spins with empty tub only | Load imbalance detection | Very Easy | $0 (reload properly) |
| Agitates but won’t spin | Lid switch or actuator fault | Moderate | $30-90 DIY, $180-300 pro |
| No agitation, no spin | Drive belt broken | Moderate | $25-50 DIY, $150-250 pro |
| Sounds like spinning but doesn’t | Motor coupling failure | Moderate | $20-35 DIY, $180-280 pro |
| Water remains in tub | Drain pump clogged | Easy | $0-60 DIY, $120-200 pro |
| Intermittent spin failure | Control board glitch | Hard | $150-300 DIY, $350-550 pro |
| Tries to spin then stops | Suspension or shock issue | Moderate | $60-150 DIY, $200-400 pro |
Understanding Maytag Bravos Spin Cycle Operation
The spin cycle represents the most mechanically demanding phase of your washing machine’s operation. Understanding normal function reveals where failures occur.
Maytag Bravos washers use direct-drive or belt-driven systems depending on model year. Both configurations require multiple components working in synchronized harmony.
The spin cycle begins only after successful completion of drain operations. Water must evacuate completely before spinning starts preventing catastrophic imbalance.
Safety interlocks verify conditions before engaging spin mode. The lid must lock securely. The load must achieve acceptable balance. Water level must read empty.
Once safety checks pass, the control board signals the motor. Drive mechanisms engage transmitting rotational force to the wash basket.
The basket accelerates gradually through progressive speed stages. Initial slow rotation redistributes loads. Final high-speed spinning extracts maximum water.
Modern Bravos models include automatic load sensing. The machine detects imbalance and pauses attempting redistribution before resuming spinning.
When any component in this sequence fails, spinning stops. The washer may display error codes or simply refuse to progress beyond certain cycle points.
Load Distribution and Balance Issues
The simplest and most common cause of spin failure involves how you loaded the machine. Proper distribution prevents most no-spin problems.
Unbalanced Load Detection System
Maytag Bravos washers incorporate sophisticated balance detection preventing damage from excessive vibration.
Sensors monitor basket movement during initial spin acceleration. Excessive wobble triggers automatic shutdown protecting mechanical components.
The machine attempts redistribution automatically. It adds water, agitates briefly, drains again, then retries spinning.
After three to five redistribution attempts, the washer gives up. The cycle ends with clothes still soaking wet.
Single heavy items cause most balance problems. Comforters, bath mats, and blankets absorb enormous water weight concentrating on one basket side.
Waterlogged items stick together forming immobile clumps. The washer can’t redistribute these masses regardless of water addition and agitation.
Small loads also create balance difficulties. Insufficient items mean nothing counterbalances heavy pieces during rotation.
Proper Loading Techniques
Correct loading prevents balance-related spin failures before they occur.
Mix heavy and light items in every load. Combine towels with lighter clothing distributing weight evenly.
Avoid washing single bulky items alone. Add several towels or other absorbent items balancing the load.
Load items loosely around the agitator or basket perimeter. Don’t pack items tightly preventing natural distribution.
Fill the basket adequately without overloading. Capacity should reach 60-80% of maximum allowing movement.
Distribute items manually before starting cycles. Arrange heavy items opposite each other balancing weight.
Use appropriate cycle settings for load sizes. Select correct water levels matching the actual load volume.
When spin failure occurs, manually redistribute items. Remove half the load if necessary running two smaller cycles.
Shake out tangled items separating twisted clothing. Clumped items can’t balance regardless of machine efforts.
Testing Load Balance Theory
Determine whether load distribution causes your spin failure through simple testing.
Remove all items from the washer. Run a complete spin cycle with an empty basket.
If spinning occurs normally, load distribution was your problem. No repairs are needed—just better loading practices.
Try a small balanced load of similar items. Six identical bath towels provide good test conditions.
Successful spinning with uniform loads confirms balance sensitivity. Adjust future loading habits preventing recurrence.
Lid Lock Assembly Problems
Persistent spin failure with empty or small balanced loads indicates actual mechanical problems requiring repair.
The lid lock mechanism represents the most common mechanical failure preventing Bravos spin cycles.
How Lid Lock Systems Work
Safety regulations require lid locks on top-loading washers. These prevent access to spinning baskets preventing injuries.
The lid lock assembly contains a motorized actuator. This mechanism extends a pin physically locking the lid closed.
A switch confirms successful locking. The control board receives this confirmation before allowing spin cycle initiation.
The entire sequence takes 3-5 seconds. You’ll hear clicking or mechanical sounds as the lock engages.
Failed lid locks prevent cycle progression. The washer won’t spin if it can’t verify secure lid closure.
Diagnosing Lid Lock Failures
Several symptoms indicate lid lock assembly problems.
The lid won’t lock when you close it. No clicking sounds occur and the lid moves freely.
Error codes appear on the display. Common Bravos lid lock codes include “LID” or “F5E2” depending on model.
The washer starts the cycle but stops before spinning. It completes washing and draining but refuses final spin.
You hear repeated clicking sounds. The lock mechanism attempts engagement but fails repeatedly.
The lid feels loose even when supposedly locked. Insufficient engagement prevents the switch from confirming lock status.
Testing Lid Lock Function
Manual testing identifies whether the lid lock assembly functions properly.
Start a wash cycle and close the lid. Listen carefully for lock engagement sounds.
Try gently lifting the lid after locking should occur. Properly functioning locks prevent lid opening during cycles.
Inspect the lid strike plate. This metal piece on the lid inserts into the lock mechanism.
Check for misalignment or damage. Bent strike plates don’t engage locks properly causing detection failures.
Examine the lid lock assembly itself. Located under the washer top or on the cabinet side depending on model.
Look for broken plastic components or damaged wiring. Physical damage prevents proper operation.
Use a multimeter testing switch continuity. With lid closed and locked, the switch should show continuity.
Replacing Lid Lock Assembly
Lid lock replacement ranks among the easiest Bravos repairs.
Purchase the correct replacement part. Maytag part numbers vary by model—verify compatibility before ordering.
Disconnect power completely. Unplug the machine preventing electrical hazards during repair.
Access the lid lock assembly. On most Bravos models, lift the top panel or remove side access panels.
The lock mounts with two or three screws. Photograph wire connections before disconnecting anything.
Disconnect wire harness from the lock assembly. Most use simple plug connectors requiring no tools.
Remove mounting screws and extract the old lock assembly. Compare with the new part confirming correct replacement.
Install the new assembly reversing removal steps. Ensure proper wire connections using your reference photo.
Test operation before fully reassembling. Close the lid and start a cycle verifying lock engagement.
Drive Belt Inspection and Replacement
Belt-driven Bravos models depend on this critical component. Belt failure stops spinning completely.
Belt Wear Patterns
Drive belts deteriorate gradually through normal use. Several wear patterns indicate replacement necessity.
Cracks across belt width appear as rubber ages. These perpendicular fractures weaken structural integrity.
Glazing creates shiny smooth belt surfaces. Lost grip reduces friction between belt and pulleys.
Fraying edges indicate misalignment problems. The belt contacts pulley edges wearing fibers away.
Stretching increases belt length. Excessive length prevents adequate tension maintaining proper grip.
Chunks missing from belt surfaces indicate catastrophic failure. Pieces breaking off render belts useless.
Accessing and Inspecting Belt
Belt inspection requires accessing the washer’s drive system.
Unplug the washer and turn off water supplies. Pull the machine away from walls providing working space.
Remove the front panel or cabinet depending on model design. Bravos washers vary in access approaches.
Locate the drive belt connecting motor to transmission pulleys. It loops around multiple pulleys creating drive system.
Inspect the belt visually for damage. Look for all wear patterns described above.
Try moving the belt by hand. Excessive slack indicates stretching or improper tension.
Rotate the motor pulley checking belt tracking. The belt should remain centered not riding pulley edges.
Belt Replacement Procedure
Replacing drive belts requires patience but no special tools.
Purchase the correct OEM belt. Generic belts may not match exact specifications causing problems.
Photograph belt routing before removal. Multiple pulleys create complex paths requiring documentation.
Release tension by moving the motor or idler pulley. Most systems use spring-loaded tensioners.
Slide the old belt off pulleys. Maneuver carefully around obstructions navigating tight spaces.
Compare old and new belts confirming correct replacement. Length and width should match exactly.
Route the new belt following your reference photos. Ensure proper pulley engagement at all points.
Verify belt tension after installation. Proper tension allows 1/2 inch deflection when pressed firmly.
Rotate pulleys manually confirming smooth operation. The belt should track centered without riding edges.
Motor Coupling Failure
Direct-drive Bravos models use motor couplings connecting motors directly to transmissions. These couplings fail predictably.
Understanding Motor Coupling Function
The motor coupling bridges the motor shaft to the transmission input shaft. This flexible connection transmits rotational power.
Rubber or plastic elements absorb shock protecting both motor and transmission. These components wear from repeated stress.
Failed couplings allow motor operation without transmitting power. The motor runs but the basket remains stationary.
You’ll hear motor sounds without corresponding basket movement. This distinctive symptom immediately suggests coupling failure.
Diagnosing Coupling Problems
Several diagnostic indicators point toward coupling failures.
The motor hums or runs during spin cycle attempts. You hear electrical sounds and motor operation.
The wash basket doesn’t rotate despite motor operation. Agitation fails along with spinning.
Broken rubber pieces appear in the tub. Coupling fragments wash upward during fill cycles.
Burning rubber smell emerges during operation. Friction from slipping coupling generates heat and odor.
Replacing Motor Coupling
Coupling replacement requires significant disassembly but remains DIY-feasible.
Order the correct coupling kit for your specific Bravos model. These are model-specific requiring exact matches.
Disconnect power and water supplies. Drain any remaining water from the tub completely.
Remove the cabinet panels accessing internal components. This typically involves multiple screws around the cabinet perimeter.
Drain and remove the wash tub. Couplings sit beneath tubs requiring complete tub removal for access.
Disconnect the motor mounting bolts. The motor must separate from the transmission accessing the coupling.
Remove the failed coupling from both motor and transmission shafts. Note the orientation and positioning carefully.
Clean coupling mounting surfaces removing all debris. Old rubber residue must be cleaned completely.
Install the new coupling following manufacturer instructions. Proper alignment prevents premature failure.
Reassemble the transmission and motor connection. Ensure proper engagement before tightening mounting hardware.
Reassemble the washer testing operation before final panel installation. Verify proper spinning eliminating reassembly errors.
Drain System Issues Preventing Spin
Water remaining in the tub prevents spin cycle engagement. Drainage problems manifest as spin failures.
Drain Pump Problems
The drain pump evacuates water before spinning begins. Pump failures leave water in the tub.
Clogged pump impellers reduce pumping efficiency. Lint, coins, or small objects lodge in pump housing.
Failed pump motors can’t generate pressure. Electrical failures or bearing seizure stop pumping.
Loose or damaged pump connections leak water. The pump operates but water doesn’t reach drain hoses.
Checking Drain Pump Function
Systematic drain pump testing identifies problems.
Start a drain cycle manually. Most Bravos models allow drain-only operation through control panel.
Listen for pump motor operation. The pump produces distinctive humming or whirring sounds.
Check for water evacuation. Observe whether water flows from drain hose during pump operation.
No water flow despite pump sounds indicates clogged impeller or obstructed hoses.
Pump silence during drain cycles suggests electrical problems or motor failure.
Cleaning Drain Pump Filter
Most pump problems stem from clogs requiring simple cleaning.
Locate the drain pump access on your Bravos model. Some models have front access panels.
Place towels beneath the pump area. Water will spill when opening access catching it prevents mess.
Remove the pump filter or clean-out plug. Turn counterclockwise releasing the filter assembly.
Flush the filter under running water. Remove all accumulated lint and debris thoroughly.
Inspect the pump impeller through the filter opening. Remove any objects blocking rotation.
Reinstall the filter ensuring proper seating. Tighten securely preventing leaks during operation.
Test drain operation confirming restored function. Run a drain cycle verifying complete water removal.
Lid Switch and Strike Issues
Beyond lid locks, mechanical lid switches provide control signals. These simpler switches fail differently than lock assemblies.
Lid Switch Function
Lid switches detect whether the lid is closed. They send signals to control boards confirming safe conditions.
Older Bravos models use mechanical switches. Newer versions integrate switches into lid lock assemblies.
Failed lid switches report “open” status even with closed lids. The washer refuses to spin believing the lid is up.
Switch contacts wear from repeated cycling. Oxidation or mechanical wear prevents proper electrical contact.
Testing Lid Switches
Multimeter (View on Amazon) testing reveals switch condition accurately.
Access the lid switch by removing the top panel. The switch typically mounts near the lid hinge.
Disconnect the switch wire harness. Test continuity between switch terminals using a multimeter.
Manually activate the switch by pressing the actuator. Continuity should change when the switch activates.
Worn switches show no continuity change or intermittent connections. Replace these faulty components.
Lid Strike Alignment
Even functioning switches fail if lid strikes don’t contact them properly.
Inspect the lid strike plate or actuator. This component on the lid presses the switch when closing.
Check for bent or damaged strike components. Improper shape prevents adequate switch activation.
Verify strike alignment with the switch. The strike must contact the switch squarely when the lid closes.
Adjust strike position if possible. Some models allow minor repositioning correcting alignment issues.
Replace damaged strikes ensuring proper switch engagement. Correct strike-to-switch contact ensures reliable operation.

Shift Actuator Problems
The shift actuator switches between agitation and spin modes. This component controls transmission operation.
Actuator Function and Failure
Shift actuators receive control board signals determining operational mode. They physically shift transmission mechanisms.
Agitation mode uses slower rotational speeds with direction reversals. Spinning uses high-speed single-direction rotation.
Failed actuators can’t complete mode transitions. The washer agitates successfully but can’t shift into spin mode.
Mechanical binding prevents actuator movement. Electrical failures stop actuator motor operation.
Diagnosing Shift Actuator Issues
Specific symptoms indicate actuator problems rather than other failures.
The washer completes wash and rinse cycles normally. Agitation occurs without problems.
Drainage completes successfully. Water evacuates fully from the tub.
The spin cycle begins but the basket doesn’t accelerate. You hear attempts but no rotation occurs.
Error codes may appear. Bravos models display specific actuator fault codes like “F7E1” or similar.
Unusual clicking or mechanical sounds occur during spin attempts. The actuator tries to engage but fails.
Actuator Testing and Replacement
Testing actuator function requires some technical knowledge.
Access the shift actuator beneath the washer. It typically mounts on or near the transmission.
Disconnect wire harness from the actuator. Test resistance across terminals using a multimeter.
Compare readings to service manual specifications. Out-of-range values indicate actuator failure.
Listen for actuator operation during spin cycle initiation. Working actuators produce audible mechanical sounds.
Replacement involves disconnecting old actuator mounting. Remove mounting screws and wire connections.
Install new actuator ensuring proper orientation. Mounting position affects mechanical engagement with transmission.
Reconnect electrical connections and test operation. Verify successful mode switching before completing reassembly.
Control Board Malfunctions
Electronic control boards orchestrate all washer functions. Board failures create mysterious operational problems.
Control Board Failure Patterns
Control boards fail through various mechanisms creating diverse symptoms.
Component burnout from power surges damages specific board circuits. Individual functions fail while others work normally.
Moisture intrusion corrodes board traces. Laundry room humidity gradually attacks electronic components.
Solder joint failures disconnect components from circuitry. Temperature cycling causes expansion and contraction loosening connections.
Software glitches create erratic behavior. Rare corrupted code causes unpredictable operational anomalies.
Identifying Control Board Problems
Control board issues display distinctive characteristics.
Multiple unrelated systems malfunction simultaneously. Combinations of failures suggest centralized control problems.
Error codes appear that don’t match observed symptoms. The board reports problems that don’t physically exist.
Resetting the washer temporarily restores function. Problems return after several cycles indicating electronic faults.
The control panel behaves erratically. Displays flicker, buttons don’t respond predictably, or random cycles start.
Substitute testing eliminates all mechanical causes. When every physical component tests good, electronics remain.
Control Board Reset Procedures
Software glitches sometimes clear through reset procedures.
Unplug the washer for 5 minutes minimum. This completely discharges capacitors resetting board memory.
Press and hold the start button for 30 seconds while unplugged. This further drains residual charges.
Plug the washer back in and attempt normal operation. Many electronic glitches clear through full resets.
Enter diagnostic mode if problems persist. Run automatic diagnostics checking all systems systematically.
Control Board Replacement Considerations
Control boards represent expensive repairs requiring careful consideration.
New OEM control boards cost $150-350 depending on model. Add professional installation raising total costs to $350-550.
Verify board failure before purchasing replacements. These components aren’t returnable after installation.
Consider machine age and overall condition. Board replacement on 10+ year old washers may not make economic sense.
Rebuilt control boards offer cost savings. Refurbished units cost 30-50% less than new with warranties.
Professional diagnosis provides certainty. Technicians definitively confirm board failures preventing unnecessary replacement.
Suspension and Shock Absorber Issues
Suspension components control basket movement during spinning. Failures create safety shutdowns preventing spin cycles.
Suspension System Purpose
Suspension rods or springs suspend the wash basket. They allow necessary movement while controlling excessive motion.
Shock absorbers dampen basket oscillation. These hydraulic components absorb energy from spin cycle vibration.
Together, these systems maintain basket stability. Proper function prevents cabinet contact and excessive vibration.
Failed suspension allows excessive basket movement. The control board detects this instability shutting down spin cycles.
Diagnosing Suspension Problems
Observable symptoms reveal suspension system failures.
The wash basket sits lower than normal. Broken suspension components no longer support basket weight.
Excessive noise occurs during agitation. The basket contacts cabinet components creating banging sounds.
The washer violently shakes during spin attempts. Failed shocks can’t control oscillation.
The machine walks across the floor. Inadequate vibration control creates movement force.
Visual inspection reveals obvious damage. Broken rods, detached springs, or leaking shocks show clearly.
Testing Suspension Components
Manual testing assesses suspension condition.
Lift the wash basket edge testing suspension resistance. Proper systems resist firmly returning basket smoothly.
Failed suspension offers minimal resistance. The basket moves excessively under light force.
Push down on basket corners individually. All corners should resist equally indicating balanced suspension.
Uneven resistance suggests individual component failures. Replace failed components restoring balanced support.
Inspect shock absorbers for hydraulic leaks. Fluid on shock bodies indicates seal failure.
Suspension Component Replacement
Replacing suspension components requires some mechanical aptitude.
Order correct replacement parts for your specific Bravos model. Suspension designs vary significantly between model years.
Access components by tipping the washer. Suspension rods and shocks mount beneath the wash tub.
Remove cabinet panels if necessary. Some models require panel removal accessing mounting points.
Relieve tension on suspension components carefully. Compressed springs and loaded rods contain significant force.
Remove old components noting exact positioning. Proper installation requires matching original configuration.
Install new suspension components ensuring correct mounting. Improper installation prevents proper function.
Replace all suspension components simultaneously. Mixing old and new creates unbalanced suspension.
Test operation after replacement. Run spin cycles verifying smooth quiet operation.
Motor and Transmission Problems
Motor and transmission failures represent the most serious spin cycle problems requiring professional assessment. Here’s what to know:
Motor Failure Indicators
Drive motors convert electrical energy into mechanical rotation. Several failure modes exist.
Complete motor silence during spin cycles indicates total failure. No sound suggests electrical or mechanical seizure.
Humming without rotation suggests capacitor problems. The motor attempts starting but can’t generate adequate torque.
Burning smells during operation indicate overheating. Electrical short circuits or bearing failures generate heat.
Intermittent operation suggests thermal cutouts triggering. Overheating motors shut down until cooling occurs.
Transmission Issues
Transmissions convert motor rotation into appropriate basket speeds. Internal failures prevent proper operation.
Grinding sounds during operation reveal damaged gears. Internal components wear or break preventing smooth rotation.
The basket rotates but won’t reach spin speed. Transmission slippage prevents adequate acceleration.
Leaking oil beneath the washer indicates seal failure. Transmission fluid loss causes rapid internal damage.
Professional Assessment Necessity
Motor and transmission repairs require specialized knowledge and tools.
Diagnostic testing needs equipment beyond typical household tools. Professional technicians possess necessary meters and diagnostic devices.
Repair costs often approach replacement value. Motors and transmissions cost $300-600 with installation.
Consider machine age before expensive repairs. Replacing 8-10 year old washers often makes better economic sense.
Warranties may cover certain failures. Check coverage before authorizing expensive repairs.
Systematic Troubleshooting Approach
Effective diagnosis follows logical sequences eliminating possibilities systematically.
Start with simplest potential causes. Check load distribution before assuming mechanical failures.
Verify power supply adequacy. Ensure the washer receives proper voltage and circuit breakers haven’t tripped.
Run diagnostic mode to identify error codes. Maytag Bravos diagnostic mode pinpoints many problems quickly.
Test components individually isolating failure points. Work through electrical and mechanical systems methodically.
Document observations and test results. Records prevent confusion and duplicate efforts.
Research error codes thoroughly. Manufacturer documentation explains specific code meanings and recommended actions.
Attempt recommended solutions sequentially. Follow logical repair progression from simple to complex.
Verify fixes before concluding repairs. Test multiple cycles confirming sustained proper operation.
When to Call Professional Service
Certain situations warrant professional appliance repair rather than DIY attempts.
Complex electrical diagnostics exceed typical homeowner capabilities. Control board and motor circuit testing requires specialized knowledge.
Major component replacement approaching machine value suggests replacement consideration. Professional assessment helps make informed decisions.
Warranty coverage mandates authorized service. DIY repairs void remaining warranty protection.
Safety concerns about electrical or mechanical hazards justify professional help. Technicians have training managing these risks.
Time constraints prevent extended troubleshooting. Professionals diagnose problems faster through experience.
Multiple failed repair attempts suggest missed diagnosis. Fresh expert perspective identifies overlooked problems.
Preventive Maintenance
Regular maintenance prevents many spin cycle failures before they occur.
Clean the washer monthly using appropriate cleaning products. This prevents residue buildup affecting mechanical components.
Inspect hoses and connections quarterly. Early detection of wear prevents failures.
Level the washer properly during installation. Proper leveling reduces mechanical stress.
Avoid overloading consistently. Operating within capacity specifications extends component life.
Use appropriate detergent types (View on Amazon) and quantities. Excess suds accelerate component wear.
Leave the lid open between cycles. Moisture evaporation prevents corrosion and mildew.
Address small problems immediately. Minor issues become major failures when ignored.
Frequently Asked Questions
Why does my Maytag Bravos agitate but not spin?
This symptom pattern typically indicates lid lock failure, shift actuator problems, or drive belt issues. The washer completes low-speed agitation but can’t engage high-speed spinning. Check lid lock engagement first, then inspect belt condition. Shift actuator failure prevents mode transition from agitation to spinning.
How do I reset my Maytag Bravos when it won’t spin?
Unplug the washer for 5-10 minutes allowing complete electrical discharge. Press and hold START for 30 seconds while unplugged draining capacitors. Reconnect power and run diagnostic mode testing all systems. Many electronic glitches clear through full resets without requiring repairs.
What does it mean when my Bravos drains but won’t spin?
Successful drainage with spin failure indicates the pump works but spinning mechanism doesn’t. Check lid lock engagement, drive belt condition, and load balance. The machine must verify secure lid closure and acceptable balance before spinning. Mechanical drive failures also prevent spinning despite proper drainage.
Can I fix a Maytag Bravos that won’t spin myself?
Many no-spin problems require only basic tools and moderate skills. Lid lock replacement, belt installation, and load redistribution are DIY-friendly. However, control board replacement, transmission repairs, and complex electrical diagnosis need professional expertise. Start with simple checks before attempting complex repairs.
Why won’t my Bravos spin even when empty?
Spin failure with empty tub eliminates load balance as the cause. Check lid lock function, drive belt condition, and motor operation. Run diagnostic mode identifying specific error codes. Empty-tub failures indicate actual mechanical or electrical problems requiring component repair or replacement.
How much does it cost to repair a Maytag Bravos that won’t spin?
Repair costs range from $0 for load redistribution to $600+ for transmission replacement. Lid locks run $45-80 DIY or $150-250 professionally. Drive belts cost $25-50 DIY or $150-250 installed. Control boards reach $150-300 DIY or $350-550 professionally. Motor and transmission repairs cost $300-600 including labor.
Is it worth repairing an old Maytag Bravos that won’t spin?
Consider machine age, repair cost, and overall condition. Repairs under $200 on machines less than 7 years old make economic sense. Expensive repairs exceeding $400 on washers over 10 years warrant replacement consideration. Simple fixes like lid locks justify repair regardless of age.
Restoring Your Spin Cycle
A Maytag Bravos refusing to spin doesn’t necessarily mean expensive repairs or immediate replacement. Most spin failures trace to straightforward causes requiring minimal intervention.
Start troubleshooting with load redistribution. This zero-cost solution fixes 30-40% of reported spin problems immediately.
Progress to lid lock inspection when balance isn’t the issue. This common failure point requires basic repair skills and modest parts investment.
Drive belt condition deserves attention on belt-driven models. Visual inspection reveals most belt problems quickly.
Drain system problems prevent spinning indirectly. Ensure complete water evacuation before suspecting mechanical failures.
Systematic diagnosis prevents wasted effort on wrong repairs. Work through logical sequences eliminating possibilities methodically.
Know when professional assessment becomes necessary. Complex electrical problems and major mechanical failures exceed most DIY capabilities.
Consider machine age and repair economics. Sometimes replacement provides better value than expensive repairs.
Your Maytag Bravos washer contains quality components designed for years of reliable service. Most spin failures represent temporary setbacks rather than terminal machine death.
Armed with proper knowledge and systematic approach, you’ll restore proper spinning operation—whether through simple adjustments or targeted component replacement.

Hi, I’m Barlgan! I created Repair Me Yourself to empower homeowners to tackle appliance repairs with confidence. From decoding error codes to fixing cooling issues, I break down complex repairs into simple, actionable steps that save you time and money.