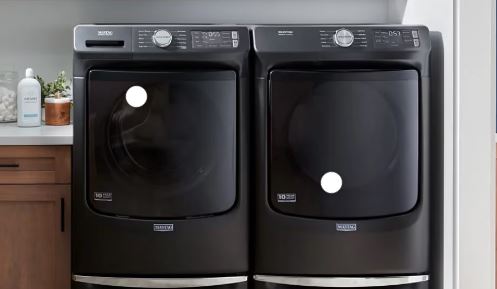
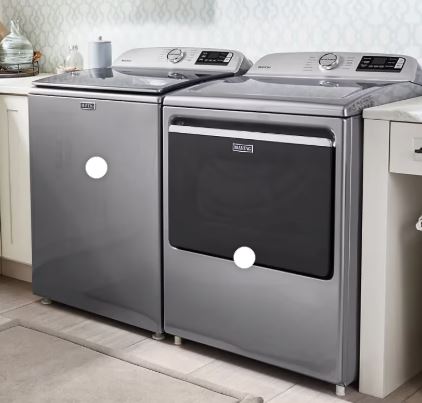
Your Maytag Bravos dryer was working perfectly yesterday, and now it won’t even acknowledge you pressed the start button. Or maybe it runs through cycles but leaves everything damp and wrinkled. The Bravos series earned a reputation for durability, but specific failure patterns emerge after 5-7 years of regular use.
Understanding these predictable weak points helps you fix problems quickly without expensive service calls. This guide targets the actual issues Bravos owners face most often, including sudden shutdowns, mysterious squealing noises, intermittent heating, and that frustrating combination where everything seems fine except your clothes stay wet.
Quick Maytag Bravos Dryer Troubleshooting Chart
| Specific Symptom | Root Cause Category | Diagnostic Starting Point | Typical Repair Time |
|---|---|---|---|
| Starts then stops after 5 minutes | Thermal cutoff switch triggered | Clean entire vent system, test thermal cutoff | 45-60 minutes |
| Loud squealing during operation | Worn drum support rollers | Remove front panel, inspect all 4 rollers | 60-90 minutes |
| Powers on but won’t start cycle | Failed door switch or broken belt | Test door switch continuity, check belt tension | 20-40 minutes |
| Runs cold throughout cycle | Heating element failure or gas valve issue | Test element continuity, verify gas flow | 30-60 minutes |
| Shuts off randomly mid-cycle | Overheating protection or control board glitch | Check vent restriction, perform reset sequence | 30-90 minutes |
| Takes 2-3 cycles to dry normal load | Weak airflow or faulty moisture sensors | Measure vent airflow, clean sensor strips | 45-75 minutes |
Recognizing Common Maytag Bravos Dryer Problems
The Bravos line spans multiple years with subtle variations that affect troubleshooting approaches. Early Bravos models (2006-2010) used mechanical timers and simpler control systems that fail predictably through worn-out timers, broken door switches, and thermal components that blow from age.
Later Bravos models (2011-2016) incorporated electronic controls with moisture sensors and digital displays, and these versions suffer from sensor malfunctions and control board failures that earlier models never experienced.
One distinctive Bravos characteristic is the drum support system. Unlike many competitors that use front rollers only, the Bravos uses four rollers with two in front and two in the rear. This design distributes weight better but means more components that can fail, and when rollers wear, the characteristic squealing starts softly and gradually worsens over weeks.
The Bravos heating system is robust but sensitive to airflow restrictions. The thermal cutoff switch trips more readily than other brands’ equivalents, and this conservative design prevents fires but also means the dryer shuts down completely from relatively minor vent restrictions. You’ll find this switch mounted on the blower housing as a small disc with two wire terminals and a reset button.
Control board problems manifest as erratic behavior rather than complete failure. The dryer might work perfectly for weeks then refuse to start, only to work again hours later, or specific cycles function while others don’t respond. These intermittent issues point to cold solder joints on the control board or corroded wire harness connections.
Maytag Bravos Dryer Won’t Start
A completely unresponsive dryer requires methodical diagnosis to avoid replacing parts unnecessarily. Here’s what to do when your Maytag Bravos dryer won’t start:
1. Confirm Basic Power Supply
Before dismantling anything, verify the obvious issues. Check that the circuit breaker didn’t trip since the Bravos uses a 240V circuit with 30-amp service. Both poles of the breaker must be firmly in the “on” position, and a partially tripped breaker looks normal but breaks the circuit.
Test the outlet with a voltage tester or multimeter. You should measure approximately 240V between the two hot terminals. If you measure only 120V, one leg of the circuit has failed either at the breaker or in the wiring. This allows the control panel lights to work (they run on 120V) but prevents the motor and heating from functioning.
Inspect the power cord where it connects to the dryer’s terminal block. Unplug the dryer and remove the rear access panel to check the terminal block for burn marks or loose screws. Tighten all connections firmly since loose terminals create resistance that prevents proper operation.
2. Test the Door Switch Assembly
The Bravos door switch is a common failure point after 5+ years. This switch prevents the dryer from starting unless the door is securely closed, and it’s located in the door frame where the door latch makes contact.
Open the door and manually press the door switch with your finger or a screwdriver while listening for a distinct click. No click indicates a broken switch mechanism. With the door closed, test the switch with a multimeter set to continuity mode. It should show continuity (closed circuit) when pressed and open circuit when released.
Replace the entire door switch assembly if it fails either test. This is a $15-25 part that takes 10 minutes to swap out, and you shouldn’t attempt to repair broken switch housings since they’re molded plastic that cracks from age.
3. Examine the Thermal Cutoff Switch
The thermal cutoff (different from the thermal fuse) prevents operation when the dryer overheats. It mounts on the blower housing as a red button switch, and unlike thermal fuses that permanently fail, the thermal cutoff can be reset by pressing the button.
Access the thermal cutoff by removing the lower front panel and looking for a small red or black button protruding slightly from the housing. Press it firmly and you should hear a click. If it doesn’t click, the switch is already in the closed position and isn’t your problem.
Test the thermal cutoff with a multimeter. It should show continuity when reset and at room temperature. If it trips immediately upon testing or shows no continuity even after pressing the reset button, replace it.
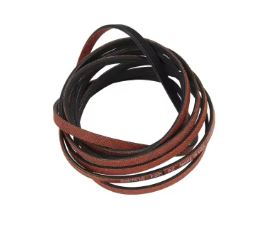
4. Investigate the Drive Belt
A broken belt prevents the motor from starting on some Bravos models. The motor control board senses load, and without belt resistance, it won’t engage. This is less common but worth checking if other tests pass.
Open the dryer door and try rotating the drum by hand. It should turn with moderate resistance, and if it spins freely with almost no resistance, the belt is broken or has fallen off the pulleys. You’ll need to remove the front panel to confirm and replace the belt.
Maytag Bravos Dryer Not Heating
Heat failure is the most reported Bravos issue, especially in units 6-10 years old. Here are the basics for troubleshooting a Maytag Bravos dryer that won’t heat up:
1. Electric Model Heating System Diagnosis
Electric Bravos dryers use a heating element assembly housed in a metal canister. This element consists of a coiled resistance wire that glows red-hot during operation, and the wire can break from thermal cycling over years of use.
Testing the Maytag Bravos Dryer Heating Element
Heating element problems account for 40% of “no heat” complaints.
Access the Heating Element Assembly
For most Bravos models, the heating element sits inside a canister accessible through the rear panel. Unplug the dryer and pull it away from the wall, then remove the screws around the rear panel perimeter and lift the panel away.
The heating element canister is the rectangular metal housing approximately 4 inches wide and 12 inches long. It has wire terminals on one end and sometimes a grounding strap. Take a photo before disconnecting anything.
Perform Electrical Tests
Disconnect the wires from the element terminals and use a multimeter (View on Amazon) set to resistance (ohms) mode. Touch the probes to the two-element terminals, and a functional element shows 10-40 ohms resistance. Infinite resistance (multimeter shows “OL” or doesn’t beep) means the element wire broke.
Also test for grounding by touching one probe to an element terminal and the other to the metal housing. You should read infinite resistance, and any continuity between the element and housing means the element is shorting out and must be replaced.
Inspect for Physical Damage
Visually examine the element housing for holes or cracks. Shine a flashlight inside through the terminal opening, and the element coil should be intact with no obvious breaks. If you see the coil touching the housing through a hole, that’s your problem since the element is shorting to ground.
Look for signs of overheating like discolored metal, warped housing, or melted insulation on wires. These indicate the dryer operated with restricted airflow, causing excessive temperatures. You’ll need to address the airflow problem and replace the element.
Replace the Heating Element
Remove the screws or clips securing the element housing to the dryer cabinet. Disconnect any remaining wires and remove the housing, then transfer the thermal fuse and high-limit thermostat from the old housing to the new one (if they’re good). These components often mount to the housing with metal clips.
Install the new element assembly in reverse order. Ensure all wire connections are tight and the housing is securely mounted, then test for proper operation before reassembling panels.
2. Gas Model Ignition System Checks
Gas Bravos models require proper gas flow and functioning ignition systems. The igniter glows orange-white hot for 30-60 seconds before the gas valve opens. If the igniter glows but gas never ignites, the valve coils have failed or the flame sensor is dirty.
Watch the ignition sequence through the lint trap opening. The igniter should glow brightly, and you’ll hear the gas valve click, followed immediately by ignition. If the igniter glows weakly or not at all, replace it since igniters weaken with age until they can’t generate enough heat to open the valve.
Clean the flame sensor if the dryer lights briefly then shuts off. This metal rod extends into the flame path and must detect heat to keep the valve open. Gently wipe it with fine sandpaper or a soft cloth to remove oxidation.
Heating Component Reference:
| Component | Testing Procedure | Failure Indicator | Replacement Cost |
|---|---|---|---|
| Heating element (electric) | Multimeter resistance test | Infinite ohms or visibly broken coil | $40-80 |
| Thermal fuse | Continuity test at room temp | No continuity (open circuit) | $8-15 |
| Thermal cutoff switch | Continuity test, manual reset | Won’t reset or no continuity when reset | $15-30 |
| Igniter (gas) | Visual observation during start | No glow or weak orange glow | $30-50 |
| Gas valve coils (gas) | Resistance test each coil | Outside 1000-1500 ohm range | $80-150 |
3. Check High-Limit Thermostat
The high-limit thermostat cycles the heating element on and off to maintain proper temperature. It should show continuity at room temperature and open (no continuity) when heated above its rated temperature (usually 250-280°F).
A stuck-open high-limit prevents heating even when all other components function perfectly. Test it with a multimeter at room temperature, and if it shows no continuity when cool, it has failed in the open position and requires replacement.
4. Verify Proper Voltage at the Heating Element
Even with a good element, heating won’t occur without proper voltage. Use a multimeter to test voltage at the element’s wire terminals while someone starts a heating cycle. You should measure 240V when the control calls for heat, and lower voltage indicates wiring problems or control board failure.
Check voltage at multiple points in the circuit to isolate where power loss occurs. Start at the terminal block, then the thermal fuse, then the high-limit thermostat, and finally the element itself.
Maytag Bravos Dryer Not Drying Efficiently
Insufficient drying despite proper heating points to airflow or sensor issues. Here’s what to do when your Maytag Bravos dryer won’t dry clothes:
1. Measure Exhaust Vent Performance
Inadequate airflow is the leading cause of poor drying performance. The Bravos requires strong, consistent airflow to remove moisture, and restricted vents trap humid air in the drum, making effective drying impossible.
Perform a simple airflow test by holding your hand near the exterior vent while the dryer runs. You should feel strong, steady airflow that’s difficult to block with your palm. Weak airflow that you can easily stop with your hand indicates serious restrictions.
Use a vent airflow meter if available since these inexpensive tools measure exact airflow in cubic feet per minute. The Bravos needs at least 200 CFM for efficient operation, and lower readings mean you need immediate vent cleaning.
Calculate your total vent length including equivalent feet for elbows. Each 90-degree turn adds 5 feet of equivalent length. If your total exceeds 35 feet, consider rerouting for a shorter path or upgrading to larger diameter ducting.
2. Clean Moisture Sensor Strips
The Bravos auto-dry feature depends on moisture sensors, which are two metal strips mounted inside the drum opening or on the back wall. These sensors detect moisture by measuring electrical conductivity between them, where wet clothes complete the circuit and dry clothes don’t.
Fabric softener, detergent residue, and hard water minerals coat these sensors over time. The coating insulates them from moisture, causing premature cycle endings where your clothes feel damp but the dryer “thinks” they’re dry.
Clean sensor strips every 2-3 weeks using rubbing alcohol on a soft cloth. Rub firmly to remove all film, and this simple maintenance step solves “not drying” complaints in 60% of cases where the heating system works properly.
3. Inspect the Blower Wheel and Housing
The blower wheel creates the airflow that carries moisture out of the drum. Lint accumulation on the wheel blades dramatically reduces efficiency, and a partially blocked wheel creates weak airflow that can’t dry clothes properly.
Access the blower by removing the front panel and drum. The wheel is a plastic fan visible behind the lint trap area, and you should remove any lint wrapped around the hub or caked between blades. Also check that the wheel isn’t cracked or loose on its shaft since damaged blowers can’t generate adequate airflow.
Clean the blower housing thoroughly while you have access. Lint accumulates in corners and blocks passages that direct air through the drum.
Maytag Bravos Dryer Squealing Noises
Squealing indicates worn rotating components that need replacement soon, and here’s how to go about it:
Identify the Squeal Source
The Bravos squealing typically comes from drum support rollers or the idler pulley. Determining which component makes the noise guides repair priority. Rollers create a rhythmic squeal that matches drum rotation speed, while the idler pulley produces a constant high-pitched squeal that doesn’t vary.
Remove the front panel to expose the drum and support system. Manually rotate the drum slowly while listening so you can hear exactly where the squeal originates. Also check each roller by hand and spin them individually to feel for roughness or binding.
Inspect All Four Drum Support Rollers
The Bravos uses two front rollers and two rear rollers supporting the drum. Front rollers mount on the front bulkhead and are easily accessible, while rear rollers attach to a bracket at the drum’s back and require more disassembly to reach.
Look for rollers with flat spots, rough surfaces, or visible wear. Good rollers spin smoothly and quietly, while bad rollers feel rough, bind up, or have visible damage. Replace all four rollers simultaneously even if only one appears bad since they wear at similar rates, and replacing just one leaves the others to fail soon.
Drum roller replacement requires removing the front panel and often the drum itself (depending on whether you’re replacing front or rear rollers). This is a moderate-skill repair taking 60-90 minutes with basic hand tools.
Check the Idler Pulley Assembly
The spring-loaded idler pulley maintains belt tension and commonly develops bearing problems. A seized or rough pulley creates constant squealing that worsens as the dryer heats up (metal expands, binding increases).
Remove the front panel and locate the idler pulley, which is the small wheel the belt wraps under to maintain tension. Lift the idler arm to release belt tension and spin the pulley by hand. It should rotate freely and silently, and any resistance, grinding, or noise means bearing failure.
Replace the entire idler pulley assembly rather than attempting to repair bearings. The complete assembly costs $15-30 and includes the pulley, bearing, and mounting bracket.
Address Drive Belt Squealing
A worn or glazed belt sometimes creates squealing as it slips on the pulleys. This is less common than roller problems but worth checking if you’ve ruled out other sources. Inspect the belt for glazing (shiny, hardened surface), cracking, or fraying.
A properly functioning belt shows slight fiber texture and no shiny spots. Replace dryer belts (View on Amazon) that look smooth and glazed since they’ve hardened from heat and will slip during operation.
Maytag Bravos Dryer Belt Replacement
Belt replacement is a common DIY repair that saves $150-200 in service costs.
Gather Required Tools and Parts
You’ll need a Phillips screwdriver, putty knife or paint scraper, work gloves, and the replacement belt. Purchase an OEM Maytag belt that matches your exact model number since generic belts may be slightly different lengths, causing slippage or premature wear.
Order belts from appliance parts suppliers rather than big-box stores for better prices and OEM quality. Expect to pay $15-30 for the genuine part.
Remove the Front Panel
Unplug the dryer completely before starting. Open the door and locate the two Phillips screws hidden inside the door opening, one on each side. Remove these screws and set them aside.
Use a putty knife to release the clips holding the top panel. Slide the knife between the top and front panels about 2 inches from each corner, push in while lifting the top, and it will pop up on spring clips. Lift the top and prop it against the wall behind the dryer.
Remove the two screws securing the front panel (now visible with the top open). Lift the front panel slightly and pull it forward to unhook it from bottom tabs, then disconnect the door switch wires before fully removing the panel.
Install the New Belt
With the front panel removed, you can see the drum, belt path, and pulley system. Reach underneath the drum and pull out the old belt while noting how it wraps around the drum, under the idler pulley, and around the motor pulley. Take a photo for reference.
Loop the new belt around the drum with the ribbed side against the drum surface. The smooth side should face outward. Reach underneath and route the belt under the idler pulley and around the motor pulley. You may need to manually pull the idler arm to create slack for the belt to slip onto the motor pulley.
Rotate the drum several revolutions by hand to ensure the belt tracks properly and doesn’t slip off pulleys. The belt should sit centered on all pulleys without rubbing the housing.
Reassemble and Test
Reconnect the door switch wires to the front panel and position the front panel to hook the bottom tabs into their slots. Push the panel against the cabinet and install the two mounting screws, then lower the top panel and press down firmly until the spring clips engage with audible clicks.
Replace the two screws inside the door opening. Plug in the dryer and run a test cycle with no load, listening for any unusual noises and verifying the drum rotates smoothly. Then test with a small load to ensure proper operation under load.
Maytag Bravos Dryer Stopped Working Suddenly
Sudden complete failure suggests specific failure modes requiring targeted diagnosis. Here are likely reasons why a Maytag Bravos dryer stops working unexpectedly:
1. Power Supply Failure
If the dryer shows absolutely no signs of life with no lights, no sounds, and no display, suspect total power loss. Test the outlet with another appliance or voltage tester, and verify both legs of the 240V circuit are present. One open leg provides 120V for control but not enough for motor operation.
Check the main control board fuse if your model has one. This small automotive-style fuse protects the control board from power surges, and a blown fuse leaves the dryer completely dead. Replace with an exact match (same amperage rating).
2. Control Board Sudden Failure
Control boards occasionally fail catastrophically from power surges, component aging, or moisture exposure. Failed boards sometimes show visible damage like burned components, capacitors with bulging tops, or burnt areas on the circuit board.
Remove the control panel and visually inspect the main control board for any signs of damage. If you find burned components, the board needs replacement. Before replacing an expensive control board though, verify all wire harness connections are clean and tight since sometimes what appears as board failure is actually a corroded connector preventing proper signal flow.
3. Emergency Shutoff Activation
The Bravos includes multiple safety systems that immediately shut down operation. The thermal cutoff trips from overheating, the door switch prevents operation when open, and the belt switch (on some models) stops the motor if the belt breaks.
Systematically test each safety device. The thermal cutoff should show continuity when cool and properly reset, while the door switch should close the circuit when the door latches. Any switch showing open circuit when it should be closed prevents operation.
4. Moisture or Environmental Damage
Dryers in damp basements or laundry rooms sometimes suffer moisture-related failures. Water vapor enters the control panel through small gaps, corroding circuit boards and wire connections. Rust on wire terminals creates resistance that prevents proper current flow.
Inspect all wire connections for corrosion and clean corroded terminals with electrical contact cleaner and a wire brush. Consider moving the dryer to a drier location or improving room ventilation if moisture is an ongoing issue.
How to Reset Your Maytag Bravos Dryer
Resetting your Maytag Bravos dryer clears temporary glitches and error conditions. Here’s how to go about it:
Standard Reset Procedure
The most effective reset is a complete power cycle. Unplug the dryer from the wall outlet for exactly 2 minutes. This duration allows all capacitors to fully discharge and the control board memory to clear completely. For hardwired installations, switch off the dedicated circuit breaker.
After 2 minutes, restore power and wait 30 seconds before attempting any operation. The control board goes through an initialization sequence where you might hear relays clicking or see the display flash. This indicates successful reset.
Perform this reset after any unusual behavior like error codes, unresponsive controls, or cycles that won’t start. The reset won’t fix mechanical problems but resolves control board glitches about 70% of the time.
Control Panel Reset Sequence
Some Bravos models respond to a specific button combination that forces a control board reset without unplugging. With the dryer plugged in but off, press and hold “Steam” and “Wrinkle Prevent” simultaneously for 5 seconds. All lights should flash indicating reset mode.
If your model lacks these buttons, try “Extra Dry” and “Delicate” instead. The exact combination varies by year, so consult your user manual for model-specific reset procedures.
Clear Error Codes
Error codes indicate specific problems the control detected. Simply resetting doesn’t fix the underlying issue, but it clears the code from memory so you can test whether your repair worked. After fixing the actual problem, perform a power cycle reset to clear the code.
Some codes auto-clear after the condition resolves, while others persist until manually cleared. Persistent codes usually indicate sensors or switches that need replacement rather than temporary conditions.
Thermal Cutoff Manual Reset
If the thermal cutoff switch triggered, you must manually reset it regardless of control board resets. Press the red button on the thermal cutoff switch firmly until you hear it click. This mechanical reset is separate from electronic control resets.
Only reset the thermal cutoff after you’ve identified and fixed whatever caused overheating. Repeatedly resetting without addressing root causes leads to component damage or fire risk.
Also Read: Maytag Gas Dryer Troubleshooting Guide
FAQs on Maytag Bravos Dryer Troubleshooting
Why does my Bravos dryer run for 5 minutes then shut off?
This indicates the thermal cutoff switch triggered from overheating. Clean your entire exhaust vent system immediately since this is usually caused by severe lint blockage. After cleaning, manually reset the thermal cutoff by pressing the red button on the blower housing. The dryer should then run normally.
How long should a Maytag Bravos dryer last?
With proper maintenance, expect 12-18 years of service. The motor and drum assembly are exceptionally durable, while heating elements typically need replacement once every 7-10 years. Drum rollers wear out every 8-12 years depending on usage frequency. Regular vent cleaning is the single biggest factor in longevity.
Can I replace just one drum roller or must I replace all four?
Always replace all four rollers simultaneously. They wear at similar rates, and replacing just one leaves three worn rollers that will fail soon. You’ll end up repeating the labor-intensive disassembly within months. The rollers are inexpensive, so buy a complete kit and replace all four at once.
What causes the Bravos dryer to smell like burning?
Burning smells come from lint accumulation near the heating element or motor. Immediately stop using the dryer and unplug it, then remove the front panel and vacuum all visible lint. Check that lint isn’t wrapped around the motor or touching the heating element. Clean the entire vent system before operating again.
Why do my clothes come out wrinkled and still damp?
Damp, wrinkled clothes indicate the dryer is shutting off prematurely. The moisture sensors likely have residue coating them, causing false “dry” readings. Clean the sensor strips thoroughly with rubbing alcohol, and also verify your vent system flows freely since restricted airflow causes similar symptoms.
Is it worth repairing a 10-year-old Bravos dryer?
For simple repairs under $150 (belt, rollers, thermal fuse), absolutely yes. For expensive repairs exceeding $300 (control board, motor, drum replacement), calculate carefully. The Bravos is built to last 15+ years, so at 10 years you likely have 5+ years of useful life remaining, making major repairs economically sensible.
What’s the difference between the thermal fuse and thermal cutoff?
The thermal fuse is a one-time sacrificial device that permanently fails open when temperatures exceed safe limits and must be replaced after blowing. The thermal cutoff is a resettable button-style switch that can be manually reset after triggering. Both protect against overheating but function differently.
Can I run the dryer if it’s squealing?
You can, but shouldn’t for extended periods. Squealing indicates worn rollers or bearings that will eventually seize completely. Continuing to run the dryer accelerates wear on related components where the motor works harder, the belt wears faster, and you risk catastrophic bearing failure that damages the drum. Address squealing within 1-2 weeks for best results.
Keep Your Maytag Bravos Dryer Running Through 2026 and Beyond
The Maytag Bravos earned its reputation for reliability, but even the best appliances need attention after years of service. Most failures follow predictable patterns you can address with basic tools and moderate mechanical aptitude.
Focus on preventive maintenance since quarterly vent cleaning and annual internal inspection prevent 80% of emergency repairs. When problems arise, diagnose systematically rather than randomly replacing parts. That methodical approach identifies root causes quickly, saving time and money while getting your laundry routine back to normal.

Hi, I’m Barlgan! I created Repair Me Yourself to empower homeowners to tackle appliance repairs with confidence. From decoding error codes to fixing cooling issues, I break down complex repairs into simple, actionable steps that save you time and money.