Your laundry routine hits a wall when your LG dryer suddenly displays an unfamiliar error code and refuses to run. Is d80 something you can fix yourself, or does it require a technician? Does tE1 mean your dryer is broken beyond repair? And why is your dryer flashing numbers and letters you’ve never seen before after years of trouble-free operation?
LG dryers use sophisticated diagnostic systems that pinpoint exact failures rather than leaving you guessing. Unlike older dryers that simply stopped working without explanation, LG’s error codes tell you precisely what’s wrong, whether it’s a clogged vent threatening fire safety, a failed temperature sensor affecting heating, or a simple door latch that needs adjustment. This precision helps you make informed decisions about repairs, costs, and whether issues are urgent safety concerns or minor inconveniences.
This comprehensive guide decodes every LG dryer symbol and error code you might encounter in 2026, explaining what each one means in plain language, providing step-by-step troubleshooting instructions, and helping you determine when you can fix problems yourself versus when professional service is necessary.
You’ll learn why some errors, like d90, demand immediate action while others, like PF, require nothing more than pressing a button. Whether your dryer is brand new or has been faithfully serving your household for years, understanding these error codes empowers you to respond appropriately and keep your dryer running safely and efficiently.
Understanding LG Dryer Error Code System
Before diving into specific error codes, understanding how LG structures its diagnostic system helps you interpret what any code is telling you about your dryer’s condition.
How LG Dryer Error Codes Are Structured
LG uses an alphanumeric system that combines letters with numbers to create precise diagnostic codes. This isn’t random. The structure follows logical patterns that make codes easier to understand once you know the system.
The letter component typically identifies which system or component is experiencing problems. Codes starting with “d” relate to ductwork, doors, or drainage issues. Codes beginning with “t” indicate temperature sensor problems. An “H” at the start points to heating system failures. “L” suggests mechanical or motor issues. “P” codes involve power supply concerns.
The number component provides additional specificity about the exact failure within that system. For example, tE1 and tE2 are both temperature errors, but tE1 specifically indicates the inlet thermistor has failed while tE2 points to the exhaust thermistor. This distinction helps technicians (and informed owners) zero in on the exact component needing attention.
Why LG’s system is more precise than competitors becomes clear when you compare it to older dryers that might just stop working or display a generic “check service” light. LG’s codes eliminate guesswork. Instead of a technician spending an hour diagnosing which of six possible temperature sensors failed, the tE1 code immediately identifies the inlet thermistor as the culprit. This precision saves diagnostic time, reduces service costs, and helps you research solutions before calling for help.
How Error Codes Display on Different LG Dryer Models
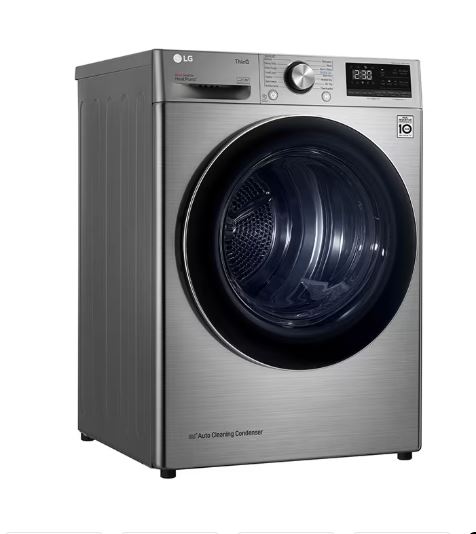
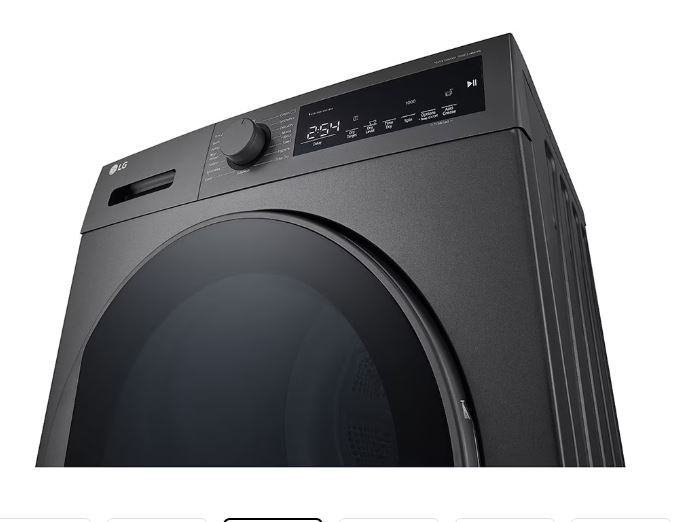
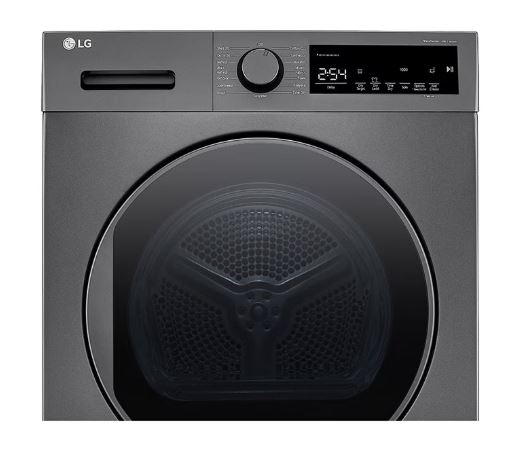
Digital display models show error codes as clear text directly on the control panel screen. You’ll see “d80” or “tE1” spelled out in easy-to-read characters. These displays make error identification straightforward with no interpretation needed.
LED indicator models without digital text displays communicate errors through blinking light patterns. The method works like Morse code for appliances. Specific indicator lights blink in sequences that correspond to different error codes.
Decoding blink patterns without digital display requires counting carefully. A light might blink three times, pause, then blink two more times. This pattern corresponds to a specific error code. Your dryer’s manual includes a chart translating blink patterns into error meanings. Count the blinks in each sequence, note the pattern, and match it to the chart.
Some LG dryers combine both approaches, using LED lights to indicate general problems while displaying specific codes on small digital readouts.
Where to find error code reference on your dryer:
Most LG dryers include a quick reference sticker inside the lint filter housing or behind the access panel. This lists the most common error codes and basic meanings. For complete error code listings, consult your user manual or download it from LG’s support website using your model number.
Error Code Categories Overview
Understanding the major categories helps you immediately assess severity when an error appears.
Airflow and ventilation errors (d codes like d80, d90, d95) indicate vent system restrictions. These range from moderate blockages to critical fire hazards. They’re among the most common errors and often the most urgent from a safety standpoint.
Temperature sensor errors (tE codes such as tE1, tE2, tE4) signal that sensors measuring air temperature have failed or are providing readings outside normal parameters. These prevent proper heating control and typically require component replacement.
Door and mechanical errors (dE, LE) relate to physical components. Door errors mean the safety interlock can’t verify the door is closed. Motor errors indicate the drum won’t turn or is encountering excessive resistance.
Heating system errors (HE, HS, F0) point to problems with the components that generate heat. These might be heating elements, gas igniters, thermal fuses, or control circuits that activate heating.
Power and control errors (PS, FO, CE) involve electrical supply issues or internal control board communication failures. These range from simple power fluctuations you can reset to serious electronic malfunctions requiring board replacement.
Non-error notifications (PF, CL) aren’t actually problems but informational messages. PF tells you power was interrupted. CL indicates Child Lock is active. Neither requires troubleshooting.
Using Smart Diagnosis for LG Dryer Error Codes
How Smart Diagnosis enhances error understanding goes far beyond the basic code displayed on your dryer. When you run Smart Diagnosis through the LG ThinQ app, the system analyzes dozens of parameters and provides context the simple error code alone can’t convey.
Accessing detailed troubleshooting through ThinQ app requires just a few steps. Open the app, select your dryer from connected devices, tap Smart Diagnosis, then follow the prompts. You’ll press and hold specific buttons on the dryer (usually Temp and Time together for 3 seconds) to activate diagnostic mode.
Diagnostic tone system explanation: Your dryer plays a series of high-pitched tones encoding detailed status information. These tones communicate sensor readings, component test results, cycle history, error frequency, and environmental conditions. The ThinQ app’s microphone captures these tones and decodes them within seconds.
What additional info Smart Diagnosis provides beyond codes includes when the error first occurred, how many times it’s appeared, what cycle was running when it triggered, whether related secondary issues exist, and crucially, whether the problem is DIY-fixable or requires professional service. It might also reveal contributing factors like improper installation, incorrect settings, or environmental conditions affecting performance.
For example, a d80 vent blockage code is straightforward. But Smart Diagnosis might additionally tell you the blockage developed gradually over six weeks, airflow has decreased 35% from baseline, and the restriction is likely in the exterior vent rather than the hose based on pressure readings. This added context helps you target your cleaning efforts effectively.
LG Dryer Airflow and Ventilation Error Codes
The d-series error codes represent LG’s Flow Sense technology in action. These errors are simultaneously among the most common and most important you’ll encounter.
LG Dryer d80 Error Code: 80% Vent Blockage
What d80 means in practical terms is that your dryer’s airflow monitoring system has detected significant restriction in the exhaust path. Only 20% of normal airflow is getting through. This isn’t a minor concern to address eventually. It’s a developing fire hazard that needs attention within hours or days, not weeks.
Restricted airflow forces your dryer to work much harder and run much longer to dry clothes. Lint accumulates faster when airflow is poor, creating a dangerous cycle where blockages worsen rapidly. The U.S. Consumer Product Safety Commission attributes thousands of residential fires annually to dryer vent blockages, making this error code a serious safety warning.
Common Causes of d80
Lint accumulation in vent hose is the most frequent culprit. The flexible or rigid duct connecting your dryer to the wall exhaust naturally collects lint over time. Even with diligent filter cleaning, some lint escapes into the vent system. After months or years, this buildup restricts airflow enough to trigger d80.
Exterior vent flap stuck or blocked happens more often than people realize. The flap that covers your exterior vent opening prevents cold air, rain, and pests from entering when the dryer isn’t running. These flaps can stick closed from rust, get blocked by debris, or become home to bird nests or wasp colonies. A stuck flap completely blocks exhaust even if the internal ductwork is clean.
Long vent runs with too many bends create natural restriction points where lint accumulates preferentially. Building codes typically limit dryer vents to 25 feet of straight run, with deductions for each 90-degree elbow. Long or convoluted vent paths struggle to maintain adequate airflow and clog faster than short, straight runs.
Crushed or kinked flexible ductwork occurs when dryers get pushed too close to walls. The flexible aluminum or foil duct compresses, dramatically reducing the cross-sectional area air can flow through. A severely kinked hose can block 70-80% of airflow by itself.
Bird nests or rodent blockages in exterior vent are seasonal problems that can appear suddenly. Birds find dryer vents attractive nesting spots because they’re warm, protected, and elevated. A nest can completely block the vent opening within days. Mice and rats occasionally enter through exterior vents and build nests in the ductwork.
Step-by-Step Fix for d80
Step 1: Check exterior vent opening for airflow
Go outside to where your dryer vent exits the building. Have someone start the dryer inside while you feel the exterior opening. You should sense strong, warm airflow pushing out. If airflow is weak or nonexistent, you’ve confirmed a blockage exists.
Inspect the vent flap. It should open freely when the dryer runs. Look for visible lint accumulation around the opening. Check for nests, leaves, or other debris blocking the vent.
Step 2: Disconnect and inspect vent hose
Unplug the dryer completely. Pull it away from the wall to access the back panel. Loosen the clamp securing the vent hose to the dryer’s exhaust port and remove the hose.
Look inside both the hose and the dryer’s exhaust port. Shine a flashlight down the length of the hose. Heavy lint accumulation appears as thick, fuzzy coating on the interior walls or complete blockages in certain sections.
Step 3: Clean lint from hose and ductwork
For light buildup, shake the hose vigorously outside to dislodge loose lint. For moderate accumulation, use a dryer vent cleaning brush (a long, flexible brush designed specifically for this purpose. Insert it into the hose and rotate while pushing through to scrub walls clean.
For severe blockages or long duct runs, consider a dryer vent cleaning kit with extendable rods that let you reach the entire length. Work from both the dryer end and the exterior opening if possible.
Step 4: Use vent cleaning brush for deep cleaning
A proper vent cleaning brush (View on Amazon) has stiff bristles and a flexible shaft that navigates bends in ductwork. Insert it from the dryer end, push through while rotating, then pull back while continuing to rotate. This scrubs the entire interior circumference.
Repeat this process multiple times, withdrawing accumulated lint between passes. For rigid metal ductwork inside walls, you may need longer brush extensions or professional equipment to reach the full distance.
Step 5: Check for proper vent hose installation
When reconnecting, verify you’re using appropriate materials. Rigid or semi-rigid metal ductwork is best. Flexible aluminum is acceptable for short runs. Never use plastic, vinyl, or accordion-style foil ducts as these violate fire codes and clog quickly.
Ensure the hose diameter matches the dryer’s exhaust port (typically 4 inches). Secure connections with metal clamps, not duct tape which deteriorates from heat. Avoid compressing or kinking the hose.
Step 6: Verify exterior vent flap opens freely
After reassembly, run the dryer and go outside to verify strong airflow through the exterior opening. The vent flap should open easily from air pressure. If it’s stiff or sticky, clean the hinge mechanism or replace the flap assembly.
Make sure no obstructions block the opening. Trim back vegetation that might restrict airflow or trap lint around the vent.
Step 7: Test dryer to confirm alert clears
Run a complete drying cycle with a normal load. The Flow Sense system recalibrates during operation, measuring actual airflow and pressure. If cleaning was successful, the d80 code should not reappear and any Flow Sense indicator bars should decrease or disappear.
If d80 returns immediately, you haven’t fully resolved the restriction. Recheck your work, looking for blockages you might have missed or ductwork problems requiring different solutions.
When d80 Becomes Urgent
Never ignore 80% blockage warnings even if the dryer still seems to work. The warning exists because conditions have reached a point where fire risk is statistically significant and efficiency has degraded substantially.
Fire risk increases significantly at this level because restricted airflow causes excessive heat buildup. Lint is highly flammable. When hot air can’t escape efficiently, temperatures inside the vent system rise. If temperatures reach lint’s ignition point (approximately 450-500°F), ignition can occur. Fires often start inside vent systems, not just in the dryer itself.
Dryer efficiency drops 40-50% with 80% restriction. Your dryer runs much longer to achieve the same drying results, or clothes don’t fully dry even on extended cycles. This wastes energy, increases utility bills, and causes unnecessary wear on the dryer.
Operating costs increase substantially when efficiency plummets. A load that should dry in 40 minutes might take 90 minutes or multiple cycles. Over weeks and months, this energy waste adds hundreds of dollars to operating costs, far exceeding the cost of proper vent cleaning.
Preventing Future d80 Errors
Clean lint filter before every load without exception. This simple habit prevents the majority of lint from ever entering the vent system. Make it as automatic as closing the dryer door.
Professional vent cleaning annually provides thorough cleaning beyond what most homeowners can achieve with consumer tools. Professionals have specialized equipment including powerful vacuum systems and rotating brush systems that clean ductwork inside walls and long runs completely.
Use rigid metal ductwork (View on Amazon) over flexible options wherever possible. Rigid metal ductwork has smooth interior surfaces that resist lint accumulation. The rigid structure prevents crushing and kinking. It also withstands heat better and lasts longer than flexible alternatives.
Minimize vent run length and bends during installation. The shorter and straighter your vent path, the better airflow and the slower lint accumulation. If you’re installing a new dryer or renovating, prioritize vent routing that minimizes distance and eliminates unnecessary turns.
Monthly exterior vent checks take two minutes but catch developing problems early. Once a month, run your dryer and check the exterior vent. Strong airflow means the system is healthy. Weak airflow signals developing restrictions before they reach critical d80 levels.
LG Dryer d90 Error Code: 90% Vent Blockage
What d90 means is that your vent system has progressed from significantly blocked (d80) to critically blocked. Only 10% of normal airflow remains. This represents an emergency condition requiring immediate action before using the dryer again.
Why d90 Is More Serious Than d80
Only 10% normal airflow remaining means the vent system is nearly completely obstructed. Visualize trying to breathe through a straw. That’s what your dryer is experiencing. Air can barely move, and what does move carries almost no moisture away.
Extreme fire hazard level exists at 90% restriction. Heat buildup reaches dangerous levels quickly. The combination of inadequate cooling, excessive heat, and lint accumulation creates ideal ignition conditions. Using a dryer showing d90 is genuinely risky.
Dryer may disable heating at this level on some LG models. As a safety measure, the control system prevents the heating element or gas burner from activating when restriction reaches critical levels. The dryer might tumble but won’t heat, making it effectively non-functional until you resolve the blockage.
Clothes won’t dry properly even if dryer runs because moisture-laden air has nowhere to go. Without airflow to carry water vapor away, clothes just tumble in humid air that can’t absorb more moisture. You’ll find loads taking three times normal duration or ending still damp regardless of cycle length.
Immediate Actions for d90
Stop using dryer immediately the moment d90 appears. Don’t finish “just one more load.” Don’t assume it’ll be fine for another day. The safety risk is real and immediate.
Perform comprehensive vent cleaning following all the steps outlined in the d80 section but with even more thoroughness. At 90% blockage, you’re dealing with severe accumulation that requires aggressive cleaning.
Inspect entire vent path end-to-end rather than assuming the blockage is in the obvious spots. Check the hose, the wall ductwork, the exterior vent, and anywhere else lint could accumulate. Don’t stop at the first blockage you find. Multiple restrictions often exist in severely clogged systems.
Check for hidden blockages in walls that aren’t accessible without specialized equipment. If you’ve cleaned accessible areas thoroughly but d90 persists, the blockage may be in ductwork running through walls, ceilings, or crawlspaces. This situation typically requires professional cleaning with specialized tools.
d90 Troubleshooting Checklist
Work through this systematic checklist to ensure comprehensive cleaning:
- [ ] Exterior vent completely clear – Flap opens freely, no visible obstructions, strong airflow when dryer runs
- [ ] Vent hose free of lint buildup – Interior walls clean, no compressed sections, full diameter maintained throughout
- [ ] No kinks or crushing in ductwork – Flexible sections expand fully, no crushing behind dryer, dryer positioned to prevent hose compression
- [ ] Proper vent hose diameter (4 inches) – Matches dryer exhaust port, no reducers or adapters restricting flow
- [ ] Vent run within code limits – Total length under 25 feet equivalent (deduct 5 feet per 90-degree elbow)
- [ ] All connections sealed properly – Metal clamps secure, no gaps allowing air leakage, connections don’t restrict flow
If every checklist item passes but d90 persists, you likely have a blockage in inaccessible ductwork requiring professional service.
LG Dryer d95 Error Code: 95% Vent Blockage
What d95 means is that your vent system has reached maximum restriction. This is LG’s highest Flow Sense alert level, indicating nearly complete blockage with catastrophic airflow failure.
Why d95 Triggers Dryer Protection
Nearly complete airflow stoppage means the vent might as well be capped shut. Air movement is negligible. The dryer cannot function under these conditions.
Overheating protection activated shuts down heating to prevent internal temperatures from reaching dangerous levels. Running a dryer with 95% restriction would cause extreme heat buildup potentially damaging the dryer itself or igniting lint.
Prevents potential fire ignition by refusing to operate in unsafe conditions. This forced shutdown frustrates users who just want their laundry done but exists for valid safety reasons. The dryer is protecting your home.
LG’s maximum safety alert level represents the highest restriction Flow Sense can detect. There’s no d96 or d97. At d95, you’ve reached the point where continued operation creates genuine danger that LG’s safety systems won’t permit.
Complete Vent System Restoration for d95
Professional cleaning strongly recommended when restriction reaches 95%. DIY cleaning might not be sufficient. Professionals have equipment including high-powered vacuums, rotary brush systems on extendable rods, and inspection cameras that let them verify complete cleaning of areas you can’t reach.
DIY requires thorough inspection of entire system if you choose to tackle it yourself. You must verify cleanliness of every foot of ductwork, not just the accessible portions. Half measures won’t resolve 95% blockage.
May need ductwork replacement if damaged in extreme cases. Flexible ductwork that’s compressed or deteriorated, rigid ducts with separated joints, or systems with design flaws preventing adequate cleaning sometimes require replacement rather than just cleaning.
Check for structural vent issues like crushed ducts inside walls from construction damage, improperly installed ductwork with excessive length or bends, or vent terminations that violate building codes. Sometimes d95 reveals installation problems that cleaning alone won’t fix.
After Clearing d95
Run test cycle to verify Flow Sense reset once you believe cleaning is complete. Use a normal load and let it run a complete cycle. Monitor the control panel for any return of error codes.
Monitor first few cycles for recurrence closely. If d95 returns quickly, you haven’t fully addressed the problem. Additional cleaning or professional assessment is needed.
Schedule regular maintenance to prevent return immediately. If your vent system reached 95% blockage once, it’s prone to recurring issues. Establish a strict maintenance schedule: monthly filter cleaning, quarterly vent checks, and professional annual cleaning minimum.
Consider vent system upgrade if chronic issues persist. Some home layouts make proper dryer venting nearly impossible with standard approaches. Long runs, multiple stories, or complex routing sometimes require vent system redesign, dryer relocation, or alternative venting solutions like condensing dryers.
Comparing d80 vs. d90 vs. d95 Severity
Understanding the progression helps you assess urgency appropriately:
| Error Code | Blockage Level | Fire Risk | Performance Impact | Action Timeline | Typical Response |
|---|---|---|---|---|---|
| d80 | 80% restricted | Elevated | 40-50% efficiency loss | Clean within 24 hours | DIY cleaning usually successful |
| d90 | 90% restricted | High | 70-80% efficiency loss | Stop use, clean immediately | Thorough DIY or professional |
| d95 | 95%+ restricted | Critical | Nearly non-functional | Emergency cleaning required | Professional recommended |
The jump from d80 to d90 represents accelerating danger. The further jump to d95 indicates conditions have reached crisis levels.
Flow Sense System Deep Dive
How LG measures airflow restriction involves pressure sensors that monitor the difference between air pressure inside the dryer and ambient pressure. Normal airflow creates expected pressure differential. As the vent blocks, pressure inside the dryer increases because air can’t escape efficiently.
Pressure sensor technology explained: The sensor measures this pressure change in real-time throughout every cycle. The control board compares current readings to baseline values stored in memory. When pressure exceeds certain thresholds corresponding to 80%, 90%, or 95% restriction, the appropriate d-code triggers.
Why Flow Sense is LG’s key safety feature becomes clear when you consider that most dryer fires result from vent blockages that users had no way of knowing about until fire occurred. Flow Sense provides quantifiable early warning, telling you exactly how restricted your vent is before conditions become truly dangerous.
Accuracy of Flow Sense detection is quite reliable. The system accounts for variables like load size, fabric type, and ambient conditions. It’s measuring actual physical pressure, not making assumptions based on cycle time or temperature.
Can Flow Sense give false positives?
Rarely, but it’s possible. Extremely long vent runs near code limits might trigger warnings even when clean. Crushed vent hoses from installation errors can cause alerts without lint accumulation. High-efficiency homes with makeup air issues occasionally see false alerts. However, genuine blockages cause the vast majority of Flow Sense warnings. Always investigate rather than assuming it’s wrong.
LG Dryer Temperature Sensor Error Codes
Temperature sensors are critical components that measure air temperature at various points in the drying process. When these fail, your dryer can’t regulate heat properly, leading to inconsistent drying or complete heating failure.
LG Dryer tE1 Error Code: Inlet Thermistor Failure
What tE1 indicates is that the thermistor measuring incoming air temperature has failed, is disconnected, or is providing readings that fall outside acceptable parameters. The dryer’s control board can’t determine inlet air temperature, making proper heat regulation impossible.
How Inlet Thermistor Works
The inlet thermistor measures incoming air temperature as ambient air enters the dryer before heating occurs. This baseline measurement helps the control board determine how much heating is needed to reach the target temperature.
It sends data to the control board continuously throughout the drying cycle. The thermistor is essentially a temperature-sensitive resistor. Its electrical resistance changes with temperature. The control board measures this resistance and converts it to temperature readings.
Enables proper heat regulation by providing one of several temperature data points the control system uses. Without accurate inlet temperature data, the control board can’t make informed decisions about heating element activation or gas valve operation.
Critical for all heated cycles means tE1 effectively disables any cycle requiring heat. The control board won’t activate heating when it can’t monitor temperatures properly. This is a safety measure preventing overheating or other temperature-related problems.
Symptoms Accompanying tE1
Dryer won’t heat properly is the most obvious symptom. Heated cycles may not start, or they start but heating doesn’t engage. Clothes tumble in ambient-temperature air indefinitely without ever warming up.
Cycle times erratic because the control board can’t properly estimate drying duration without functioning temperature sensors. Time remaining estimates become unreliable or the cycle just runs indefinitely.
No Heat/Air Fluff may still work since these cycles don’t require temperature sensing. They use room-temperature air, so thermistor failure doesn’t affect their basic operation. If Air Fluff works but Normal doesn’t, that’s a strong indicator of temperature sensor issues.
Temperature inconsistency might occur if the sensor is intermittently failing rather than completely dead. The dryer might heat sporadically, produce inconsistent results cycle to cycle, or shut off heating unpredictably during cycles.
DIY Troubleshooting tE1
Verify dryer has proper power first before assuming component failure. Electric dryers require 240 volts. If only one leg of the circuit is active (delivering just 120V), the dryer runs but won’t heat. Check the circuit breaker to ensure both sides are on. Flip both breakers completely off then back on to reset them properly.
Check for loose thermistor connections if you’re comfortable opening the dryer cabinet. The thermistor connects to the control board via wire connectors. Vibration can shake these loose over time. Unplug the dryer, access the thermistor location (consult your model’s service manual), and verify connections are tight.
Reset dryer completely by unplugging for 10 full minutes. This allows all capacitors to discharge and the control board to reset completely. Sometimes tE1 appears from temporary sensor communication glitches rather than actual sensor failure. A thorough reset occasionally clears these.
Test with Air Fluff cycle to verify the dryer otherwise functions normally. If Air Fluff runs fine but heated cycles immediately show tE1, you’ve confirmed the issue is truly temperature-related rather than a broader control board or power problem.
When tE1 Requires Professional Service
Error persists after reset indicates genuine thermistor failure rather than a temporary communication glitch. Once you’ve reset thoroughly and checked obvious issues, persistent tE1 means replacement is needed.
No visible connection issues when you inspect wiring suggests the thermistor element itself has failed internally. These components eventually wear out from repeated heating and cooling cycles over years of use.
Thermistor replacement is the definitive solution. The part itself costs $20-40 in most cases. However, accessing it requires partial dryer disassembly. You must remove panels, navigate wiring, and sometimes remove the drum or other components to reach the thermistor mounting location.
Typical cost $150-250 covers the thermistor, labor for disassembly and reassembly, testing to verify the fix worked, and the service call. Some models allow easier thermistor access, reducing labor costs. Others require extensive disassembly, increasing the bill.
LG Dryer tE2 Error Code: Exhaust Thermistor Error
tE2 is essentially the same as tE1 but for a different sensor. The exhaust thermistor monitors the temperature of the air leaving the dryer, rather than the air entering it. Failure prevents proper temperature regulation just as tE1 does.
tE2 vs. tE1 Differences
tE1 monitors incoming air before it’s heated. This sensor sits in the airflow path near where ambient air enters the heating chamber.
tE2 monitors exhaust air after it’s passed through the drum and picked up moisture from clothes. This sensor typically mounts in the exhaust duct before air exits to the vent system.
Both prevent proper temperature control because the dryer needs both data points for optimal operation. The control board compares inlet and exhaust temperatures to understand heating efficiency, moisture removal rate, and whether temperatures are within safe operating ranges.
Require similar repair approaches since both are thermistor components with similar failure modes. The diagnostic process, troubleshooting steps, and ultimate repair (thermistor replacement) are nearly identical between tE1 and tE2.
Troubleshooting tE2
Same basic steps as tE1 apply. Check power supply, verify circuit breakers, reset the dryer completely, test with non-heated cycles, and inspect wiring connections if accessible.
Check the exhaust duct area for sensor access. The tE2 thermistor typically mounts on or near the exhaust duct. On some models, you can access it by removing a rear panel. On others, it requires more extensive disassembly.
Verify no overheating caused sensor damage by checking for signs of heat damage around the exhaust area. Prolonged operation with severely restricted vents can cause excessive heat that damages thermistors. If you find heat damage, address the vent restriction before replacing the sensor, or the new sensor will fail quickly too.
Professional replacement typically needed for the same reasons as tE1. While the thermistor itself is inexpensive, accessing it requires technical knowledge and appropriate tools. Most owners find professional service more practical than attempting DIY thermistor replacement.
LG Dryer tE4 Error Code: Duct Sensor Malfunction
What tE4 indicates is a failure of the internal duct temperature sensor, which is distinct from the inlet (tE1) and exhaust (tE2) thermistors. This sensor monitors temperature within the dryer’s internal ductwork before air exits to the external vent system.
Causes of tE4
Sensor contamination from lint can interfere with accurate temperature sensing. Unlike the drum moisture sensors that intentionally contact clothes, duct sensors should be isolated from direct lint exposure. However, in dryers with poor airflow or excessive lint bypass, contamination can occur.
Failed sensor component due to age or manufacturing defect means the thermistor element itself has broken down. Like all electronic components, thermistors have finite lifespans and eventually fail.
Wiring connection issues develop from vibration loosening connectors or from heat degrading wire insulation over time. The duct area experiences temperature cycling that can stress electrical connections.
Overheating damage to sensor happens when vent restrictions cause temperatures to exceed design limits. The sensor itself can be damaged by the excessive heat it’s trying to measure.
Resolving tE4
Clean internal lint from accessible areas as a first step. Remove the lint filter and vacuum the filter housing cavity thoroughly. If you can access the blower housing or internal ductwork (varies by model), clean visible lint accumulation there.
Check sensor wiring if accessible by inspecting for loose connections, damaged insulation, or signs of heat stress. Reconnect any loose terminals securely. Look for wires with blackened, melted, or brittle insulation indicating heat damage.
Usually requires professional diagnosis because the tE4 sensor location varies significantly between models and often requires partial dryer disassembly to access. Technicians have model-specific service information showing exact sensor locations and proper testing procedures.
May indicate deeper airflow problems if tE4 appears alongside vent blockage codes or recurring overheating issues. Sometimes the sensor failure is a symptom rather than the root problem. Addressing underlying airflow restrictions prevents repeat sensor failures.
LG Dryer Temperature Error Code Comparison
| Error Code | Sensor Location | Primary Function | Affects What | DIY Fix Likelihood |
|---|---|---|---|---|
| tE1 | Inlet air path | Measures incoming air temp | Heat regulation baseline | Low – replacement usually needed |
| tE2 | Exhaust duct | Measures outgoing air temp | Heating efficiency monitoring | Low – replacement usually needed |
| tE4 | Internal ductwork | Monitors internal duct temp | Internal airflow temperature | Medium – sometimes cleaning helps |
All three prevent proper heated operation but Air Fluff/No Heat cycles typically still function.
LG Dryer Heating System Error Codes
Heating errors prevent your dryer from generating the warmth needed to evaporate moisture from clothes. These range from simple fixes like blown fuses to complex control board failures.
LG Dryer HE Error Code: Heater Circuit Malfunction
What HE means is that the dryer has detected a problem in the heating circuit preventing heat generation. This could be a failed heating element, broken thermal safety device, control relay failure, or wiring issue anywhere in the heating path.
Common HE Error Causes
Failed heating element is the most common cause on electric dryers. The heating element is a coiled resistance wire that glows red-hot when electricity flows through it. Over years of heating and cooling cycles, this wire can break internally, develop shorts, or degrade to the point of failure.
Blown thermal fuse acts as a one-time safety device. When the dryer overheats (usually from vent restrictions), the thermal fuse blows to permanently cut power to the heating circuit. This prevents fires but also requires fuse replacement before heating will work again.
Broken high-limit thermostat is another thermal safety device, though unlike thermal fuses, high-limit thermostats should reset when the dryer cools. If one fails in the open position, it permanently interrupts the heating circuit.
Control board heating relay failure means the electronic switch on the control board that activates heating has failed. The relay might be stuck open (never allowing heating) or stuck closed (continuously heating, though other safeties usually prevent this from causing HE).
Wiring issues in heating circuit include broken wires, corroded connections, or terminals that have loosened from vibration. Any break in the electrical path prevents current from flowing through the heating element.
Electric Dryer HE Troubleshooting
Verify 240V power at outlet using a multimeter if you’re comfortable with electrical testing. Electric dryer outlets have four terminals (on modern installations) or three terminals (older installations). You should measure approximately 240V between the two hot terminals and approximately 120V from each hot terminal to neutral or ground.
Check circuit breaker carefully. Electric dryers use double-pole breakers. Both sides must be on. Sometimes one leg trips while the other stays on, providing 120V instead of 240V. The dryer runs (motor and controls work on 120V) but won’t heat (element needs 240V).
Flip both breaker switches completely off, then back on. Don’t just toggle them. Full off-and-on cycling ensures proper reset.
Test with a multimeter (View on Amazon) if experienced – by checking continuity through the heating element and thermal safety devices. This requires accessing internal components and understanding proper testing procedures. If you have experience with appliance electrical troubleshooting, you can test the heating element for continuity (should show 10-50 ohms typically) and test thermal devices (should show continuity when cool).
Look for tripped thermal cutoffs visually. Some dryers have accessible thermal fuses or high-limit thermostats you can inspect. Look for blown fuses (broken wire visible through the casing) or thermostats that have tripped.
Gas Dryer HE Troubleshooting
Check gas supply valve open first. The gas supply shut-off valve (typically located behind or beside the dryer) must be fully open. Trace the gas line from the dryer back to the nearest valve and confirm it’s in the open position.
Verify igniter glows during startup by watching through the dryer door (or accessing the burner area if your model allows) when you start a heated cycle. The igniter should glow bright orange for 30-60 seconds. If it glows but gas doesn’t ignite, the gas valve may be faulty. If it doesn’t glow at all, the igniter itself has failed.
Listen for gas valve clicking as another diagnostic clue. You should hear distinct clicks as the gas valve solenoids activate. No clicking suggests electrical problems preventing valve operation.
Ensure flame sensor is clean on models equipped with them. The flame sensor confirms ignition occurred. If it’s dirty or malfunctioning, it might shut off gas flow even when ignition is successful.
HE Repair Difficulty
Element replacement: Moderate DIY for those comfortable with appliance repair. You must disconnect power, access the heating element housing (usually rear access on electric dryers), disconnect wiring, remove the old element, install the new one, reconnect wiring, and test. It’s not complicated but requires confidence working with electrical components.
Thermal fuse replacement: Easy DIY once you locate the fuse. These are inexpensive ($10-20) and mount with simple push-on wire terminals or screw connections. The challenge is finding them (locations vary widely by model) rather than the actual replacement procedure.
Control board issues: Professional service is almost always required. Control boards (View on Amazon) require proper diagnosis to confirm they’re actually the problem. Replacing a control board is technically straightforward but expensive to get wrong if you misdiagnosed the issue.
Gas system repairs: Professional recommended due to safety concerns. Working with gas appliances requires understanding gas safety, proper leak testing, and regulatory requirements. Most jurisdictions require licensed technicians for gas appliance repairs.
LG Dryer HS Error Code: Humidity Sensor Failure
What HS indicates is that the humidity sensor measuring water vapor in exhaust air has failed or is providing readings the control board considers invalid. This sensor works alongside drum moisture sensors to optimize drying.
How Humidity Sensor Works
Measures water vapor in exhaust air using a hygroscopic element that changes electrical properties based on humidity levels. As wet clothes release moisture, exhaust air carries higher humidity. The sensor detects this and sends data to the control board.
Complements drum moisture sensors by providing a different measurement approach. Drum sensors detect moisture through electrical conductivity. The humidity sensor measures airborne moisture. Together, they give the control board a complete picture of drying progress.
Helps determine when clothes are dry by tracking humidity decrease over time. As moisture evaporates and exhausts, humidity levels drop. When exhaust humidity approaches ambient levels, clothes are dry.
Critical for LoopSense systems on premium LG models. LoopSense uses both drum sensors and humidity sensing to achieve superior accuracy. Humidity sensor failure degrades LoopSense performance significantly.
HS Troubleshooting Steps
Step 1: Locate humidity sensor using your dryer’s service manual. Sensor location varies by model. It’s typically mounted in the exhaust duct path where it can sample outgoing air.
Step 2: Clean sensor with rubbing alcohol carefully. Use a soft cloth or cotton swab dampened with isopropyl alcohol (70% or higher). Gently wipe the sensor element to remove any lint, residue, or contamination. Let it air dry completely before testing.
Step 3: Remove lint/residue buildup from the area surrounding the sensor. Even if the sensor element is clean, accumulation nearby can affect airflow past the sensor and cause erroneous readings.
Step 4: Check sensor wiring connections for security. The sensor connects to the control board via wire harness. Verify connections are seated fully with no corrosion or damage visible.
Step 5: Test after cleaning with sensor cycle by running a cycle that uses Sensor Dry. If HS clears and the cycle completes normally, cleaning solved the problem. If HS reappears, replacement is likely needed.
When Cleaning Doesn’t Fix HS
Sensor element failed internally from age or contamination damage. The hygroscopic element can degrade over time, especially if exposed to excessive heat or chemical residues from dryer sheets.
Requires sensor assembly replacement as a complete unit. You typically can’t replace just the sensing element. The entire sensor assembly (element plus mounting bracket and wiring) gets replaced.
Professional service recommended because sensor access and replacement procedures vary significantly by model. Some sensors are easily accessible. Others require extensive disassembly to reach.
Cost typically $100-200 parts and labor for humidity sensor replacement. The sensor itself runs $30-60. Labor adds to the total depending on accessibility and your local service rates.
HS Workaround
Use Timed Dry instead of Sensor Dry as a temporary solution. Select specific drying times (40 minutes, 60 minutes, etc.) rather than relying on automatic sensor operation.
Manually select drying duration based on load size and wetness. Small loads might need 30-40 minutes. Large loads of towels might take 60-90 minutes. You’ll learn appropriate times through trial and error.
Less efficient but functional because timed drying doesn’t adapt to actual dryness. You might over-dry (wasting energy) or under-dry (requiring additional time). But it keeps the dryer operational while you arrange sensor repair.
Temporary solution until repair makes the dryer usable during the days or weeks between when HS appears and when you can schedule professional service.
LG Dryer F0/FO Error Code: Faulty Heater Relay
What F0 means (letter F, number zero) is that the heating relay on the main control board has failed. This relay is an electronic switch that controls power to the heating element or gas valve. When it fails, the control board can’t activate heating even if all other components function perfectly.
Why F0 Is Serious
Requires control board repair or replacement rather than a simple component swap. The relay is soldered to the control board, not a plug-in component. Repair requires electronics skills. Replacement means buying an entire control board assembly.
Not a simple component swap like replacing a heating element or thermal fuse. Control boards are complex electronics with model-specific programming. You must order the exact correct board for your dryer model.
Expensive repair typically $200-400 with most of the cost in the control board itself ($150-300) plus labor for installation and testing. This is one of the pricier dryer repairs.
May indicate broader control board issues because relay failure can result from power surges, overheating, or manufacturing defects that might affect other board components. Sometimes F0 is just the first symptom of a control board with multiple developing problems.
F0 Troubleshooting Attempts
Complete power reset by unplugging for 10-15 minutes minimum. This allows all residual charge to dissipate. Sometimes F0 results from control board lockup rather than actual relay failure. A thorough reset occasionally clears it.
Check for loose control board connections if you’re comfortable opening the dryer and accessing the control board. Verify the main wiring harness connecting to the board is firmly seated. Check for any wire connectors that may have vibrated loose.
Verify no visible burn marks on board by visual inspection. If you see blackened areas, melted plastic, or burn marks on the control board, replacement is definitely necessary. These signs indicate electrical damage beyond simple relay failure.
Test other dryer functions to assess overall control board health. If everything else works normally and only heating fails, that’s consistent with isolated relay failure. If multiple functions are erratic, the entire control board may be failing.
F0 Repair Realities
DIY control board replacement possible but challenging for those with technical aptitude. You must correctly identify your dryer model, order the matching control board, disconnect all wiring (photographing connections first helps), mount the new board, reconnect everything properly, and test.
Requires correct replacement board for model which means absolutely verifying your model number and ordering the precise board specified for that model. Control boards aren’t interchangeable between models even within the same series.
Professional service usually most practical because technicians can verify diagnosis, order parts correctly, perform installation, and provide warranty on the repair. The peace of mind often justifies the additional labor cost.
Consider dryer age versus repair cost seriously when F0 appears on older dryers. If your dryer is 10+ years old and control board replacement costs $350-450, that’s approaching half the cost of a new dryer. Evaluate whether repair makes economic sense versus replacement.
Check out the newest dryers on Amazon!
LG Dryer Door and Mechanical Error Codes
These errors relate to physical components and mechanical systems rather than sensors or electronics. Many are fixable with basic tools and patience.
LG Dryer dE Error Code: Door Error
What dE means is that the dryer’s safety interlock system can’t verify the door is properly closed and latched. The dryer won’t start (or will stop mid-cycle) when this error appears because running with an open door creates safety hazards during drum rotation and heating.
Common dE Causes
Something caught in door seal is remarkably common. Socks, underwear, fabric corners, or even lint can wedge between the door and the seal, preventing the door from closing flush. The latch might engage, but the door switch doesn’t activate properly.
Door latch worn or damaged from thousands of opening and closing cycles. The plastic latch mechanism on the door can develop cracks, wear down, or break entirely. A worn latch doesn’t engage the strike plate positively.
Door strike misaligned on the dryer body. The strike is the catch that the door latch hooks into. If mounting screws loosen or if the strike plate bends from impact, alignment shifts. The latch can’t engage properly even when the door closes.
Door switch electrical failure means the mechanical switch that detects door closure has failed. The door might close and latch perfectly, but the electrical signal never reaches the control board. The dryer thinks the door is open.
Warped door not closing flush happens on older dryers or those that have experienced rough handling. The door panel can warp slightly, preventing even contact with the seal around the entire perimeter. Part of the door makes contact but other areas gap.
Step-by-Step dE Troubleshooting
Step 1: Open door completely and leave it open while you work. This gives you full access to inspect all door components.
Step 2: Inspect door seal for obstructions by running your hand around the entire door opening. Feel for anything caught in the seal. Check the hinge side particularly as items can migrate there during tumbling. Remove anything you find.
Step 3: Close door firmly until click heard after clearing obstructions. You should hear and feel a distinct click as the latch engages the strike. If there’s no click, the latch isn’t catching properly.
Step 4: Check door latch engagement visually by slowly closing the door while watching the latch mechanism. The latch should extend from the door and hook into the strike positively. If it’s not engaging fully or seems to miss the strike, you’ve identified the problem area.
Step 5: Inspect strike plate for damage by examining it closely. Look for bent metal, loose mounting screws, or signs of wear. The strike should be firmly mounted and properly shaped to catch the latch.
Step 6: Test door switch (advanced) if you have a multimeter and some electrical knowledge. Access the door switch (location varies by model), disconnect it, and test for continuity. With the door latch simulated closed position, the switch should show continuity. Open position should show no continuity (open circuit).
When dE Indicates Switch Failure
Door physically closes but error persists is the telltale sign of switch failure rather than mechanical latch problems. Everything looks right, the door latches firmly, but dE still appears.
No clicking sound when door closes from the switch area suggests the switch mechanism isn’t actuating. You might hear the latch click but not the secondary click of the electrical switch engaging.
Switch replacement needed involves accessing the switch assembly (behind the dryer front panel on most models), disconnecting the wiring, removing mounting screws, installing the new switch, and reassembling. Cost ranges from $50-100 for parts and labor.
dE2 Variant
Specific door switch error on some models uses dE2 to distinguish between mechanical door closure issues (dE) and confirmed electrical switch failure (dE2). Not all LG models make this distinction.
Indicates switch stuck or failed rather than latch alignment problems. dE2 tells you specifically that the electrical component has problems.
Similar troubleshooting to dE but with focus on the electrical switch component. You can skip mechanical checks and proceed directly to switch testing and replacement.
LG Dryer LE Error Code: Motor Locked/Drum Won’t Turn
What LE indicates is that the dryer’s motor control system has detected excessive resistance to drum rotation or complete inability to turn the drum. This prevents normal operation and triggers LE to protect the motor from damage.
Immediate LE Checks
Step 1: Unplug dryer completely for safety before attempting any inspection. Never work on the dryer with power connected when checking mechanical components.
Step 2: Manually rotate drum through door by reaching inside and turning the drum by hand. It should rotate with moderate, even resistance. Complete freedom (spinning too easily) suggests a broken belt. Inability to turn at all indicates jamming.
Step 3: Check for jammed items between drum and housing by rotating the drum and listening for scraping, clicking, or grinding sounds. Small items like coins, underwires from bras, buttons, or pens can wedge between the drum and outer housing.
Step 4: Inspect drum belt if accessible by tilting the dryer and looking underneath or removing an access panel (model-dependent). The belt should be intact, properly positioned on pulleys, and show reasonable tension.
Step 5: Look for seized bearings by checking if the drum rotates smoothly without binding or rough spots. Bearings allow the drum to rotate on its support structure. Failed bearings create resistance or complete seizure.
LE Causes – Mechanical
Item wedged in drum mechanism is surprisingly common. Small objects fall through the drum perforations and lodge in the space between the drum and housing. As the drum rotates, these items jam against stationary components.
Broken or slipped drum belt means the motor can’t turn the drum. The belt connects the motor pulley to the drum. When it breaks or slips off, the motor spins freely but the drum stays still. The control board detects this mismatch and triggers LE.
Failed drum support rollers create excessive resistance. The drum rides on support rollers (usually rear-mounted). When roller bearings seize from age or lack of lubrication, drum rotation becomes very difficult.
Seized drum bearings either at the rear roller mounts or front drum support prevent smooth rotation. The motor strains against this resistance, drawing excessive current that triggers LE.
Foreign object in blower wheel doesn’t directly stop the drum but can seize the motor. If something jams the blower fan on the motor shaft, the motor can’t turn at all. With the motor locked, the drum can’t rotate.
LE Causes – Electrical
Motor failure from worn brushes (on brush-type motors), shorted windings, or bearing seizure within the motor itself. The motor physically can’t turn regardless of what you do mechanically.
Motor capacitor failure on motors that use capacitors to start or run. A failed capacitor prevents the motor from developing starting torque or running efficiently. The motor hums but doesn’t turn.
Control board motor control circuit failed means the electronic controls that operate the motor aren’t working. Power isn’t reaching the motor properly even though the motor itself is fine.
Wiring issues to motor include broken wires, corroded connections, or terminals that have worked loose. Without electrical connection, the motor can’t run.
When LE Requires Service
Drum spins freely but LE persists after mechanical checks. This indicates electrical problems (motor, capacitor, control board, or wiring) rather than mechanical jamming.
No obvious obstructions found during thorough inspection. If you’ve checked everywhere you can access and found nothing blocking the drum, the problem is likely internal.
Motor sounds abnormal when you briefly power the dryer. Humming without turning, grinding noises, or complete silence all suggest motor problems requiring professional diagnosis.
Belt replacement is technically DIY-possible but involves significant disassembly. You must remove the front or top panel, release belt tension, remove the old belt, install the new belt correctly around pulleys, and reassemble. Many owners prefer professional service for belt replacement.
LE Repair Costs
Belt replacement: $75-150 including parts and labor. Belts cost $15-30. Labor varies based on how accessible the belt is on your particular model.
Motor replacement: $200-350 for the motor assembly plus installation labor. Motors are expensive parts, and replacement requires disconnecting multiple electrical connections and mounting hardware.
Bearing replacement: $150-300 depending on which bearings failed and accessibility. Rear drum support rollers are often easier to replace than front drum bearings which may require more extensive disassembly.
Professional diagnosis fee: $75-100 typically, though this usually applies toward the repair if you proceed with service. Diagnosis identifies exactly which component failed, preventing unnecessary part replacement.
LG Dryer OE Error Code: Over-Dry Protection
What OE means is that the dryer has run significantly longer than normal without detecting expected moisture reduction. This triggers a protective shutdown to prevent excessive drying damage to fabrics.
Why OE Appears
Sensors not detecting moisture reduction is the primary trigger. The dryer expects moisture levels to decrease over time as water evaporates. If sensor readings show persistent moisture without improvement, the control board concludes something is wrong.
Incorrect cycle for load type can confuse the sensors. Using Delicate cycle for heavy towels or Normal cycle for waterproof jackets gives the sensors behavior they don’t expect, potentially triggering OE.
Sensor contamination from fabric softener residue or mineral deposits prevents accurate moisture detection. The sensors can’t “feel” moisture properly, so they continue reading clothes as wet even when they’re dry.
Heating system not working properly means clothes never actually dry. Without heat, moisture evaporates slowly or not at all. The cycle runs indefinitely until OE triggers.
Resolving OE
Clean moisture sensor bars inside the drum thoroughly. Locate the sensor bars (two metal strips, usually stainless steel, mounted inside the drum opening). Wipe with a cloth dampened with rubbing alcohol to remove invisible residue.
Select appropriate cycle for load by matching fabric type and weight to cycle design. Don’t use Sensor Dry for items that don’t work with moisture sensing (waterproof items, rubber-backed mats, etc.).
Check heating system functionality by verifying the dryer produces heat during cycles. If no heat is generated, troubleshoot HE errors or other heating problems before addressing OE.
Use Timed Dry if sensors problematic as a workaround. Timed Dry doesn’t rely on moisture sensors, so sensor contamination or malfunction won’t affect it. This lets you dry clothes while you resolve sensor issues.
LG Dryer Power and Control Error Codes
These errors involve the electrical supply to your dryer or the internal control systems that operate it. They range from minor power glitches to serious electronic failures.
LG Dryer PS Error Code: Power Supply Issue
What PS indicates is that the dryer has detected voltage fluctuations, power surges, or inconsistent electrical supply that could damage sensitive electronic components. The dryer shuts down and displays PS to protect itself.
Common PS Triggers
Storm-related power issues are frequent PS causes. Lightning strikes near power lines, transformer problems during storms, or utility equipment issues create voltage spikes and dips that home appliances detect.
Utility company voltage problems happen occasionally during high-demand periods, equipment maintenance, or infrastructure failures. Power might fluctuate between acceptable and unacceptable levels repeatedly.
Large appliance cycling on the same circuit or electrical panel leg can cause voltage dips. When your central air conditioning, electric water heater, or other major appliance starts, it draws substantial current. This momentary load can drop voltage enough to trigger PS on sensitive appliances.
Inadequate home electrical capacity shows up as PS when multiple high-draw devices operate simultaneously. Older homes with 100-amp service or homes with undersized wiring for current appliance loads experience voltage dips under load.
Weak or failing circuit breaker doesn’t trip completely but develops high resistance that causes voltage drop under load. The breaker still appears on but doesn’t maintain full voltage delivery.
Clearing PS Error
Unplug dryer 5 minutes to perform a reset. This gives the control board time to fully discharge and clear the PS error from memory.
Check circuit breaker position even if it appears on. Circuit breakers can trip partially, landing in a middle position between fully on and fully off. Flip the breaker completely off, then back on to reset it properly.
Verify outlet voltage if possible using a multimeter. Electric dryers should receive 240V±10%. Gas dryers need 120V. Voltage outside these ranges causes PS errors.
Reset and test by running a cycle. If PS was triggered by a temporary voltage event (like a lightning strike two blocks away), the reset clears it and the dryer operates normally afterward.
Preventing PS Errors
Use surge protector rated for dryers to guard against voltage spikes. Not all surge protectors handle the high current demands of dryers. Look for units specifically rated for large appliances with appropriate amperage capacity.
Dedicated dryer circuit recommended eliminates shared-circuit voltage dips. Dryers should have their own circuit without other devices sharing the load. This prevents voltage drop when the dryer operates simultaneously with other appliances.
Address home electrical issues if PS appears frequently. Recurring PS errors indicate genuine electrical supply problems requiring electrician diagnosis. Issues might include undersized service entrance, loose connections at the panel, or circuit breaker deterioration.
Monitor during storm season if your area has unstable power during storms. Consider unplugging the dryer during severe weather to prevent surge damage rather than relying solely on surge protection.
LG Dryer PF Error Code: Power Failure
What PF means is simply that electrical power was interrupted while a cycle was running. This is informational, not diagnostic. The dryer is telling you “the cycle didn’t complete because power failed,” not identifying a malfunction.
Why PF Appears
Brief power outage of even a few seconds triggers PF. Utility company switching operations, transformer issues, or tree branches touching lines can cause momentary outages that interrupt cycles.
Circuit breaker tripped mid-cycle from overload, short circuit, or breaker malfunction. If the dryer’s circuit breaker trips during operation, PF appears when power restores.
Someone unplugged dryer either intentionally or accidentally during a cycle. Moving the dryer for cleaning and dislodging the plug creates the same result as a power failure.
Electrical service interruption during cycle running. This could be intentional (utility maintenance) or unintentional (equipment failure, weather damage).
Clearing PF
Simply press any button on the control panel. PF clears immediately since it’s not identifying a problem requiring resolution.
Restart cycle if needed by selecting your desired program and pressing Start. The dryer functions normally. PF was just a notification about why the previous cycle didn’t finish.
No troubleshooting required unless PF appears without you knowing about any power interruption. Unexpected PF might indicate intermittent electrical issues worth investigating.
Monitor for frequent occurrences because recurring PF without known power outages suggests electrical supply instability or loose connections. If you see PF multiple times weekly without corresponding power events, have an electrician check your dryer’s electrical connection.
LG Dryer CE Error Code: Current Error
What CE indicates is that the dryer’s control system has detected electrical current flow that exceeds safe parameters. This overcurrent condition triggers protective shutdown to prevent electrical fires or component damage.
CE Safety Function
Prevents electrical fire by shutting down before excessive current creates dangerous heat in wiring or components. Overcurrent causes wires to heat. Sustained overcurrent can ignite insulation or nearby materials.
Protects control board from damage caused by current surges. Electronic components have maximum current ratings. Exceeding these ratings destroys semiconductors and integrated circuits.
Indicates component failure somewhere drawing excessive current. CE doesn’t tell you which component, but it confirms something is pulling more current than it should.
CE Professional Diagnosis Needed
Requires electrical testing using specialized equipment to measure current draw of individual components. A technician can isolate circuits and measure current to identify which component is faulty.
Identifies which component failed through systematic testing. The motor, heating element, control board, or other components might be the culprit. Proper diagnosis prevents replacing wrong parts.
Not safe for DIY unless experienced with electrical troubleshooting. Identifying overcurrent sources requires understanding electrical circuits, proper use of testing equipment, and ability to work safely with live circuits.
Typical cost $150-300 for diagnosis and repair. CE diagnosis takes longer than simple component replacement, increasing labor costs. Parts costs vary depending on which component is drawing excessive current.
LG Dryer FO Error Code: Control Communication Error
What FO means is that the main control board and user interface board can’t communicate properly. These two boards exchange information constantly during operation. When that communication fails, FO appears.
FO Troubleshooting
Check ribbon cable connections between the control board and display/interface board. A ribbon cable (flat multi-conductor cable) usually connects these boards. It can work loose from vibration, or individual conductors can break from repeated flexing.
Look for visible board damage on both boards. Check for burn marks, discolored components, cracked circuit board material, or other signs of damage. Visible damage indicates the board needs replacement.
Complete power reset attempt by unplugging for 10-15 minutes. Sometimes FO results from communication lockup rather than hardware failure. A thorough reset re-establishes communication.
Usually requires board replacement when FO persists after resetting and checking connections. Either the main control board, user interface board, or both have failed. Determining which requires testing or replacement trial.
LG Dryer Smart Diagnosis and Error Code Analysis
LG’s Smart Diagnosis feature transforms error codes from simple alerts into comprehensive diagnostic reports that guide you toward solutions.
Using Smart Diagnosis for Detailed LG Dryer Error Information
Beyond basic error codes, Smart Diagnosis analyzes dozens of parameters invisible to users. While your display shows “tE1,” Smart Diagnosis knows when the error first appeared, how many cycles have run since, whether related anomalies exist, what operating conditions were present when it failed, and whether patterns suggest underlying causes beyond the immediate error.
How to run Smart Diagnosis starts in the LG ThinQ app. Open the app, select your dryer from connected devices, and tap the Smart Diagnosis option. Follow the on-screen instructions which tell you to press and hold specific buttons on the dryer (typically Temp and Time buttons together for 3 seconds).
The dryer enters diagnostic mode and plays a series of high-pitched data tones. Hold your smartphone close to the dryer (within 6 inches of the control panel) while these tones play. The app’s microphone captures them and processes the encoded data.
Within 10-20 seconds, the app displays comprehensive findings including the primary error, contributing factors, recommended actions, and service guidance.
What Smart Diagnosis reveals includes:
- Primary error code with detailed explanation
- Secondary issues that might not trigger separate error codes but affect performance
- Cycle history showing what was happening when the error occurred
- Component-specific failures identifying exactly which part needs attention
- Estimated repair difficulty rated as DIY-friendly, moderate, or professional required
Error Code Context
When error first occurred helps assess whether it’s a new development or long-standing issue you’ve been ignoring. Recent errors might be fixable with simple interventions. Errors that have persisted for weeks suggest component failure.
How many times it’s appeared indicates whether it’s intermittent (appearing occasionally, suggesting loose connections or borderline components) or consistent (appearing every cycle, suggesting definite failure).
What cycle was running when the error triggered can reveal patterns. If HS only appears on sensor dry cycles but not timed cycles, that confirms it’s truly the humidity sensor. If LE only happens on heavy loads, that suggests motor or belt strain issues.
Load conditions when error triggered includes whether the drum was full or light, what type of fabric was being dried, and how wet clothes were. This context helps identify user-fixable issues like overloading versus mechanical failures.
Advanced Troubleshooting Guidance
Step-by-step fix instructions walk you through repair procedures when the app determines the issue is DIY-appropriate. Instructions include images, videos, and detailed text explaining each step.
Video tutorials for common errors demonstrate repairs visually. Watching a technician replace a thermal fuse or clean sensors makes the process less intimidating than reading static instructions.
Parts identification and ordering features help you find the exact right part for your specific model. The app knows your dryer’s model number and can link directly to genuine LG parts or approved aftermarket alternatives.
Service scheduling if needed lets you book professional service through the app when Smart Diagnosis determines repair is beyond DIY scope. The diagnostic data transfers to the technician so they arrive prepared with likely needed parts.
Smart Diagnosis Limitations
Requires ThinQ-enabled model, meaning older LG dryers without Wi-Fi connectivity can’t use this feature. Only models from approximately 2016 onward have ThinQ compatibility.
Needs strong smartphone microphone to capture diagnostic tones. Phone cases or screen protectors sometimes muffle the microphone. Remove the case if the app has trouble hearing the tones.
Internet connection required because the app processes diagnostic data in the cloud. Without internet, the app can’t decode the tones into actionable information.
Can’t fix mechanical issues remotely obviously. Smart Diagnosis helps identify problems, but you still need to physically perform repairs or have a technician do so.
LG Dryer Error Code Troubleshooting Tree
Knowing when to handle repairs yourself versus calling professionals saves time and money while preventing the frustration of attempting repairs beyond your capability.
When to DIY vs. Call for Service
DIY-Friendly Error Codes that most homeowners can address:
d80, d90, d95 – Vent cleaning requires no technical knowledge, just thoroughness and the right tools (vent cleaning brush, vacuum). Safety is straightforward as long as you disconnect power first.
dE – Door adjustments involve mechanical components you can see and manipulate. Replacing a door latch or strike is simple with basic tools.
PS, PF – Power resets require no repair knowledge. These are often self-resolving or require only circuit breaker attention.
HS – Sensor cleaning attempts are low-risk. The worst outcome is cleaning doesn’t help and you still need service. But many HS errors resolve with proper sensor cleaning.
Filter-related issues – Cleaning the lint filter, filter housing, and accessible internal areas requires only diligence.
Professional Service Recommended for these errors:
tE1, tE2, tE4 – Sensor replacement requires accessing internal components, working with wiring, and having proper replacement parts. Incorrect installation can damage control boards.
LE – Motor and mechanical issues require diagnosis skills to identify which component failed, then technical ability to replace motors, belts, bearings, or drum supports.
HE, F0 – Heating system and control board errors involve electrical troubleshooting and expensive parts. Misdiagnosis costs hundreds in unnecessary parts.
CE, FO – Electrical and control issues require expertise with circuits, proper testing equipment, and understanding of control system architecture.
Persistent errors after DIY attempts – If you’ve tried recommended fixes and the error returns, professional diagnosis is needed to identify non-obvious causes.
Cost-Benefit Analysis for LG Dryer Repairs
Making smart repair decisions requires comparing LG dryer repair costs to replacement costs and considering dryer age.
Repair vs. Replace Considerations:
| Factor | Favor Repair | Favor Replace |
|---|---|---|
| Dryer age under 5 years | Almost always repair unless catastrophic failure | Only if multiple expensive repairs needed simultaneously |
| Dryer age 5-10 years | Repair if cost under $300 | Replace if repair exceeds 50% of new dryer cost |
| Dryer age 10+ years | Only if repair under $150 | Usually replace unless very simple fix |
| Error code type | Simple DIY errors always repair | Major component failures on old dryers consider replacing |
| Dryer performance before error | If worked perfectly, repair worthwhile | If had ongoing issues, replacement opportunity |
Typical Repair Cost Ranges to inform your decisions:
- Vent cleaning (DIY): $0-50 for cleaning brush if you don’t own one
- Vent cleaning (professional): $100-200 for thorough service
- Sensor replacement: $150-250 parts and labor
- Heating element: $200-300 including installation
- Motor replacement: $250-400 for motor and labor
- Control board: $300-500 for board and installation
- Drum support/bearings: $200-350 depending on extent
Compare these costs to new dryer prices ($400-800 for basic models, $800-1,500 for premium) and factor in your dryer’s age to make informed decisions.
Step-by-Step Error Resolution Framework
Follow this systematic approach for any error:
Step 1: Note exact error code
Write it down or photograph the display. Exact codes matter (tE1 vs tE2 vs tE4).
Step 2: Check this guide for meaning
Understand what the code indicates before attempting fixes.
Step 3: Attempt basic troubleshooting
Try the recommended DIY steps appropriate for that error.
Step 4: Run Smart Diagnosis if available
Get deeper analysis beyond the basic code.
Step 5: Decide DIY vs professional
Be honest about your skills and tool availability.
Step 6: Complete repair or schedule service
Either fix it yourself or arrange professional help.
Step 7: Test thoroughly after repair
Run complete cycles to verify the fix worked.
Step 8: Monitor for recurrence
If the error returns, you didn’t fully resolve the underlying cause.
Preventing Common LG Dryer Errors
Consistent maintenance prevents the majority of errors from appearing in the first place.
Maintenance Schedule to Avoid Errors
Daily:
- Clean lint filter before every single load without exception
Weekly:
- Check exterior vent for strong airflow while dryer runs
- Inspect door seal for damage or items caught in it
Monthly:
- Deep clean lint filter with warm soapy water, rinse, dry completely
- Vacuum behind and under dryer to remove accumulated lint
- Check vent hose for kinks or crushing
- Clean moisture sensor bars with rubbing alcohol
Quarterly:
- Inspect vent hose interior for lint buildup
- Check all visible electrical connections are secure
- Test door latch function for positive engagement
- Vacuum lint from blower housing (if accessible)
Annually:
- Professional vent cleaning for thorough ductwork service
- Comprehensive dryer inspection of all components
- Check drum support rollers for wear
- Verify heating element condition (electric dryers)
- Inspect gas valve and igniter (gas dryers)
Best Practices to Minimize Errors
Proper loading:
- Don’t overload the dryer drum beyond 3/4 full
- Distribute clothes evenly around the drum
- Separate heavy items from lightweight items
- Always check pockets for foreign objects before loading
Cycle selection:
- Choose heat settings appropriate for fabric type
- Use Sensor Dry when possible for efficiency
- Don’t use Speed Dry for large or very wet loads
- Follow fabric care labels on clothing
Ventilation maintenance:
- Use rigid metal ductwork wherever possible
- Minimize total vent run length (under 25 feet ideal)
- Reduce number of 90-degree bends
- Keep exterior vent opening clear of obstructions
Electrical protection:
- Dedicated circuit for dryer prevents voltage fluctuations
- Proper voltage (240V for electric, 120V for gas)
- Surge protector rated for dryer amperage
- Check connections periodically for corrosion or looseness
LG Dryer Error Code Quick Reference Charts
Complete LG Dryer Error Code Table
| Error Code | System | What It Means | Urgency Level | DIY Fixable? | Typical Cost |
|---|---|---|---|---|---|
| d80 | Ventilation | 80% airflow blockage | High – 24hrs | Yes | $0-50 DIY |
| d90 | Ventilation | 90% airflow blockage | Critical – immediate | Yes | $100-200 pro |
| d95 | Ventilation | 95% airflow blockage | Emergency | Yes/Professional | $100-200 pro |
| tE1 | Temperature | Inlet sensor failed | Medium | Rarely | $150-250 |
| tE2 | Temperature | Exhaust sensor failed | Medium | Rarely | $150-250 |
| tE4 | Temperature | Duct sensor error | Medium | Sometimes | $150-250 |
| HE | Heating | Heater malfunction | High | Sometimes | $200-300 |
| HS | Sensor | Humidity sensor failed | Medium | Try cleaning | $100-200 |
| F0/FO | Control | Heater relay failed | High | No | $300-500 |
| dE/dE2 | Door | Door not closed/switch | Medium | Usually | $50-150 |
| LE | Motor | Drum won’t turn | High | Sometimes | $150-400 |
| OE | Protection | Over-dry protection | Low | Yes | $0 |
| PS | Power | Power surge/fluctuation | Low | Reset only | $0 |
| PF | Power | Power failure (info) | None | N/A | $0 |
| CE | Electrical | Current overcurrent | High | No | $150-300 |
| CL | Settings | Child lock active | None | Deactivate | $0 |
LG Dryer Error Code Severity Guide
Critical – Address Immediately (Safety Risk):
- d90, d95 – Fire hazard from severe vent blockage
- HE with no heat – Potential gas valve issues on gas dryers
High Priority – Address Within 24 Hours:
- d80 – Fire risk developing
- tE errors – Dryer non-functional for heated cycles
- LE – Mechanical failure, potential damage to components
- CE – Electrical safety concern
Medium Priority – Address Within a Week:
- HS – Affects efficiency and sensor dry accuracy
- dE – Dryer won’t run but no immediate danger
- F0 – Dryer non-functional for heating
Low Priority – Address When Convenient:
- PF – Informational only, press to clear
- CL – Not an error, just deactivate child lock
- OE – Protection feature, use timed dry temporarily
- PS after clearing – Monitor but dryer functions
Frequently Asked Questions
What does d80 mean on my LG dryer and should I worry?
The d80 code indicates your dryer’s Flow Sense system has detected 80% airflow restriction in your vent system, meaning lint buildup or blockages are severely limiting exhaust and creating fire hazards that require immediate attention.
You should clean your entire vent system within 24 hours, starting with the lint filter and vent hose, then checking the exterior vent opening and all ductwork between the dryer and exterior for accumulated lint.
While the dryer may still operate with d80 showing, fire risk increases significantly at this blockage level and efficiency drops 40-50%, making immediate cleaning both a safety priority and an energy-saving measure.
How do I fix d90 error code on my LG dryer?
The d90 error indicates critical 90% vent blockage requiring immediate comprehensive cleaning of your entire exhaust system before operating the dryer again, as this restriction level creates extreme fire hazards and prevents clothes from drying properly.
Start by disconnecting the dryer, thoroughly cleaning the vent hose and all accessible ductwork with a dryer vent brush, checking the exterior vent flap opens freely, and removing all lint accumulation from the dryer exhaust port to the exterior opening.
If you’ve cleaned thoroughly but d90 persists, you likely have blockages in wall-mounted ductwork requiring professional vent cleaning services with specialized equipment to reach inaccessible areas.
What’s the difference between tE1 and tE2?
The tE1 error indicates the inlet air thermistor (measuring temperature of incoming air before heating) has failed, while tE2 signals the exhaust thermistor (measuring outgoing air temperature after heating) has malfunctioned, both preventing proper temperature regulation but monitoring different points in the airflow path.
Both errors produce similar symptoms including inability to heat properly and erratic cycle times, and both typically require thermistor replacement by a professional as these sensors are internal components that fail from age or heat damage.
The distinction helps technicians identify exactly which sensor needs replacement without time-consuming diagnosis, though troubleshooting approaches are nearly identical with power verification, connection checks, and complete reset attempts before concluding sensor replacement is needed.
Can I still use my dryer with a d95 error?
You should not use your dryer with d95 showing because this indicates 95% airflow blockage creating critical fire hazards, and many LG models automatically disable heating at this restriction level as a safety measure to prevent dangerous overheating that could ignite accumulated lint.
The dryer may tumble without heating, but running it won’t dry clothes and risks damaging the motor or blower from strain caused by extreme pressure buildup when air cannot exhaust properly.
Clear the d95 error by performing thorough vent system cleaning or hiring professional vent cleaning services before resuming dryer use, as attempting to operate with near-complete blockage presents genuine danger that LG’s safety systems are specifically designed to prevent.
How much does it cost to fix LE error on LG dryer?
LE error repair costs vary from $75-400 depending on the underlying cause, with belt replacement typically costing $75-150, drum support roller or bearing replacement running $150-300, and motor replacement reaching $250-400 including parts and labor.
Professional diagnosis (usually $75-100) identifies whether the drum won’t turn due to broken belt, seized bearings, jammed drum, or failed motor, preventing unnecessary part replacement and ensuring the correct repair.
Before calling for service, check if items are jammed between the drum and housing and verify the drum rotates freely by hand, as simple obstructions you can remove yourself account for some LE errors and cost nothing to fix.
Will cleaning sensors fix HS error on my dryer?
Cleaning the humidity sensor with rubbing alcohol resolves many HS errors when lint or residue contamination interferes with accurate moisture detection, making this worth attempting before assuming sensor replacement is needed.
Locate the humidity sensor in your dryer’s exhaust duct area (consult your manual for exact position), gently clean the sensing element with a soft cloth or cotton swab dampened with isopropyl alcohol, and test with a sensor dry cycle after the sensor dries completely.
If HS persists after thorough cleaning, the sensor element has likely failed internally and requires replacement ($100-200 professionally), though you can temporarily work around HS by using Timed Dry cycles that don’t rely on humidity sensing until you arrange repair.
Why does my LG dryer keep showing PS error?
Recurring PS errors indicate your dryer is experiencing repeated voltage fluctuations or power quality issues from electrical supply problems, large appliance cycling on shared circuits, utility company power instability, or failing circuit breakers that need investigation beyond simple resets.
While occasional PS during storms is normal and clears with a reset, frequent PS errors (several per week) suggest genuine electrical issues requiring an electrician to verify your dryer receives stable voltage, check for loose connections at the outlet or panel, test the circuit breaker’s condition, and ensure adequate electrical capacity for your dryer’s demands.
Installing a surge protector rated for dryer amperage (View on Amazon) provides some protection, but addressing underlying electrical problems prevents recurring PS errors and protects your dryer’s electronics from damage.
Is PF code on a dryer something to worry about?
PF is purely informational telling you that power was interrupted while a cycle was running, not indicating any malfunction or problem with the dryer itself, and clears by simply pressing any button on the control panel.
This code appears after brief outages, tripped circuit breakers, or if someone unplugged the dryer mid-cycle, requiring no troubleshooting unless PF appears repeatedly without your knowledge of power interruptions.
If you see PF frequently without corresponding known outages, this suggests investigating your electrical supply for loose connections or intermittent circuit breaker problems, but the PF code itself indicates the dryer is functioning correctly and simply reporting an external power event.
Read Also:
Conclusion
LG dryer error codes transform mysterious malfunctions into specific, actionable diagnoses that guide you toward appropriate solutions. From the critical safety warnings of d80-d95 vent blockage codes to the component-specific precision of tE1 versus tE2 sensor failures, understanding these codes empowers you to respond appropriately, whether that means grabbing a vent brush or scheduling professional service.
The most important takeaway is recognizing which errors demand immediate action and which allow scheduled repair. Vent blockage codes are safety-critical, fire prevention warnings that require urgent response regardless of whether the dryer still seems to work. Temperature and heating errors make the dryer non-functional but don’t present immediate danger. Power notifications like PF require nothing more than acknowledgment.
Smart Diagnosis elevates error codes from simple alerts to comprehensive troubleshooting sessions when you have a ThinQ-enabled model. Use this feature before calling for service to get detailed guidance, repair instructions, and professional recommendations based on sophisticated analysis unavailable through the basic error code alone.

Hi, I’m Barlgan! I created Repair Me Yourself to empower homeowners to tackle appliance repairs with confidence. From decoding error codes to fixing cooling issues, I break down complex repairs into simple, actionable steps that save you time and money.