Your KitchenAid microwave runs through its cycle perfectly—turntable spinning, fan humming, timer counting down—but your food comes out ice cold. For a premium appliance brand known for reliability and performance, a heating failure feels especially frustrating.
KitchenAid microwaves that run but don’t heat typically suffer from magnetron failure, defective high-voltage diodes, blown high-voltage capacitors, or damaged door interlock switches. Built-in models additionally experience unique thermal management issues due to their enclosed installation, causing premature component failure compared to freestanding units.
KitchenAid microwaves use sophisticated components and unique design configurations that require model-specific troubleshooting approaches. This Kitchenaid microwave troubleshooting guide addresses heating issues across KitchenAid’s entire microwave lineup, from countertop models to high-end built-in installations, with proven solutions that restore your appliance’s heating capability.
KitchenAid Microwave Heating Failure Overview
| Component Failure | Occurrence Rate | Built-In vs. Countertop | Typical Repair Cost | DIY Feasibility |
| Magnetron burnout | 38% | Higher in built-ins | $250-$400 | No |
| High-voltage diode | 24% | Equal across types | $120-$220 | No |
| Door switch assembly | 16% | Higher in built-ins | $80-$150 | Moderate |
| Capacitor failure | 12% | Higher in built-ins | $150-$280 | No |
| Thermal cutoff | 6% | Much higher in built-ins | $100-$180 | No |
| Control board | 4% | Equal across types | $280-$450 | No |
Why Is My KitchenAid Microwave Not Heating?
KitchenAid microwaves share Whirlpool Corporation’s engineering but incorporate premium components designed for longevity. Despite superior build quality, heating failures still occur predictably.
The magnetron generates electromagnetic waves at precisely 2.45 gigahertz. This frequency excites water molecules in food, creating friction that produces heat. Without functional magnetron operation, you essentially have an expensive rotating display case.
KitchenAid’s design philosophy prioritizes aesthetic integration over accessibility. Components are more tightly packaged than budget brands, making DIY repairs challenging even for experienced technicians.
Built-in KitchenAid models face unique thermal stress. Cabinet enclosures trap heat that freestanding units dissipate easily. This concentrated thermal load accelerates component degradation significantly.
Understanding KitchenAid’s Premium Architecture
KitchenAid microwaves use commercial-grade magnetrons rated for extended duty cycles. These components cost 40% more than standard residential magnetrons but offer superior reliability.
The high-voltage power supply in KitchenAid units operates at tighter tolerances. This precision electrical control provides consistent heating but makes the system vulnerable to voltage fluctuations.
Door interlock systems on KitchenAid models use stainless steel contacts rather than plated brass. This premium material choice resists corrosion but requires precise alignment.
Built-in models integrate with ventilation systems differently than over-the-range units. The exhaust pathway affects thermal management and component longevity dramatically.
The 10 Reasons for a KitchenAid Microwave Not Heating
One of these ten reasons could be the reason your KitchenAid microwave won’t heat food:
1. Magnetron Thermal Overload
KitchenAid magnetrons include integral thermal protection that’s more sensitive than competitors. This protector trips at lower temperatures to preserve component life.
Built-in installations compound this issue. Cabinet heat buildup causes protective shutdowns even during normal operation.
The thermal protector resets after cooling but repeated cycling indicates inadequate ventilation. Address airflow before replacing the magnetron.
Listen during operation—a healthy magnetron produces steady low-frequency humming. Silence or intermittent buzzing indicates impending failure.
Magnetron replacement on KitchenAid models requires OEM parts. Aftermarket magnetrons lack the precise specifications KitchenAid’s control systems expect.
2. High-Voltage Diode Degradation
KitchenAid uses fast-recovery diodes rated for higher frequencies. These premium components fail differently than standard microwave diodes.
Symptoms include progressively weaker heating over weeks before complete failure. Food takes noticeably longer to heat as diode performance degrades.
The diode works with the capacitor to double voltage supplied to the magnetron. Partial diode failure reduces this voltage multiplication effect.
A failing diode often produces a distinctive burning electrical smell. This acrid odor warns of impending complete failure.
Testing requires specialized equipment—multimeters alone can’t properly evaluate high-voltage diode condition. Professional diagnosis prevents incorrect part replacement.
3. Built-In Model Ventilation Restrictions
Built-in KitchenAid microwaves depend entirely on designed airflow paths. Blocked vents cause rapid thermal fuse failures.
Cabinet installations must maintain minimum clearance specifications. Even 1/4 inch less than specified dramatically impacts cooling efficiency.
Check that cabinet doors don’t block side or rear vents. Common remodeling mistakes obstruct original ventilation designs.
Microwave-specific cabinets include ventilation channels. Using standard cabinets without these features guarantees premature component failure.
Infrared thermometer testing reveals hot spots indicating poor ventilation. Surface temperatures above 140°F indicate insufficient airflow.
4. Door Switch Assembly Failure
KitchenAid’s heavy stainless steel doors stress interlock switches more than plastic-doored competitors. Switch fatigue accelerates with door weight.
Built-in models mounted at eye level experience different door swing dynamics. The horizontal opening path creates unique stress patterns.
Three switches work in series—primary, secondary, and monitor. All three must close completely before the magnetron receives power.
Worn door hinges cause misalignment that prevents proper switch engagement. Replace hinges simultaneously with switches to prevent recurrence.
Switch replacement requires careful attention to mounting alignment. Improper positioning creates safety hazards including radiation leakage.
5. Capacitor Voltage Breakdown
High-voltage capacitors in KitchenAid microwaves store up to 5,000 volts. This massive charge remains lethal even hours after unplugging.
Capacitor failure manifests as loud humming or buzzing during operation. The unit tries to function but can’t sustain proper voltage.
Built-in models experience faster capacitor degradation. Higher ambient temperatures accelerate dielectric material breakdown.
Visual inspection sometimes reveals bulging capacitor cases. This physical deformation indicates internal failure requiring immediate replacement.
Never attempt capacitor replacement without proper discharge tools. Professional technicians use grounded discharge sticks rated for high voltage work.
6. Thermal Fuse Activation
KitchenAid places thermal fuses strategically throughout the microwave. Multiple fuses protect different components independently.
The magnetron thermal fuse blows at 165°C to prevent fire hazards. Once blown, this one-time device must be replaced.
Built-in installations blow thermal fuses 3x more frequently than countertop models. Cabinet heat accumulation triggers these safety devices prematurely.
Simply replacing blown fuses without addressing root causes wastes money. Identify why overheating occurred before reassembly.
Thermal fuse testing requires multimeter continuity checks. Infinite resistance indicates a blown fuse requiring replacement.
7. Control Board Power Supply Failure
KitchenAid control boards include isolated power supplies for display versus cooking functions. These can fail independently.
The display may function perfectly while high-voltage circuits receive no control signals. This creates heating failure with normal appearance.
Micro-cracks in solder joints cause intermittent connection failures. Thermal cycling from years of use creates these invisible defects.
Built-in model control boards endure harsher thermal environments. Higher operating temperatures accelerate solder joint fatigue.
Control board replacement requires exact model matching. KitchenAid uses model-specific firmware that won’t function across different series.
8. Waveguide Arcing Damage
The waveguide channels microwave energy from the magnetron to the cooking cavity. Damage here prevents heating despite functional components.
KitchenAid’s stainless steel interiors resist damage better than painted cavities. However, the waveguide cover still requires protection.
Food splatter and grease on the waveguide cover cause arcing. This electrical discharge damages the cover and potentially the magnetron.
Replacement waveguide covers cost $12-$25 for KitchenAid models. This simple repair prevents catastrophic magnetron failure.
Clean the waveguide area thoroughly before installing new covers. Residual debris causes immediate repeat failures.
9. Insufficient Line Voltage
KitchenAid’s precision electronics require stable 120V power. Voltage drops below 110V prevent proper magnetron operation.
Built-in installations sometimes share circuits with other appliances. Running multiple devices simultaneously causes voltage sags.
The microwave detects insufficient voltage and refuses to operate the magnetron. This protection prevents component damage from low-voltage conditions.
Test outlet voltage with a multimeter during operation attempts. Consistent voltage below 115V requires electrical service.
Dedicated 20-amp circuits eliminate voltage drop issues. This electrical upgrade costs $200-$400 but solves problems permanently.
10. Inverter Board Failure (Select Models)
Some KitchenAid models use inverter technology rather than traditional transformers. These systems fail uniquely compared to conventional designs.
Inverter boards provide variable power through pulse-width modulation. When they fail, heating becomes weak or completely absent.
The KMCC5015G and KMBS104E series use inverter systems. These models require specialized diagnostic procedures.
Inverter board replacement costs $220-$380 for parts alone. Add professional installation labor of $120-$180.
Inverter systems offer superior heating consistency when working. They’re worth repairing on premium built-in installations.
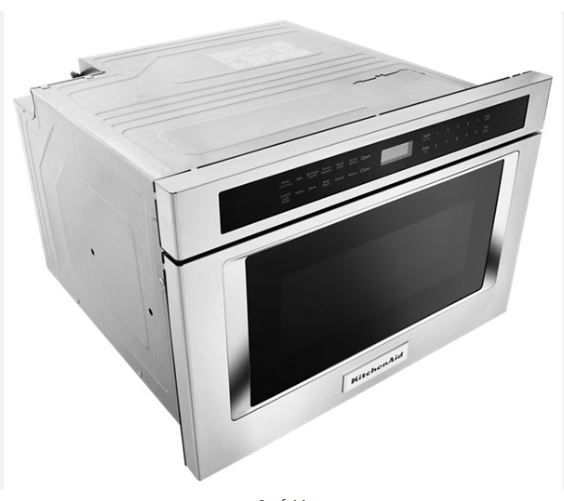
KitchenAid Built-In Microwave Not Heating
Built-in KitchenAid microwaves represent significant investments costing $1,500-$3,500. Their heating failures deserve comprehensive troubleshooting before replacement consideration.
Cabinet enclosures create thermal environments 15-25°F hotter than freestanding units. This concentrated heat dramatically impacts component longevity.
Models KMBP100E, KMBS104E, and KMCC5015G show higher-than-average thermal fuse failures. The built-in configuration accelerates protective device activation.
Combination microwave-convection units experience even more thermal stress. The convection heating element raises ambient temperatures further.
Built-In Installation Impact on Components
| Component | Freestanding Lifespan | Built-In Lifespan | Failure Rate Increase | Primary Cause |
| Magnetron | 10-12 years | 7-9 years | +30% | Thermal stress |
| Capacitor | 9-11 years | 6-8 years | +40% | Heat degradation |
| Thermal fuses | 8-10 years | 4-6 years | +60% | Frequent activation |
| Control board | 10-12 years | 8-10 years | +25% | Higher temps |
| Door switches | 8-10 years | 6-8 years | +30% | Door weight |
Ventilation Requirements for Built-Ins
KitchenAid specifies minimum 1-inch clearance on non-door sides. Many installations violate these critical requirements.
The rear ventilation opening must align with cabinet vent channels. Misalignment creates dead air pockets that trap heat.
Side clearances allow convection cooling. Built-in cabinets must provide these clearances through proper dimensional design.
Bottom ventilation is often overlooked during installation. Some models draw cooling air from below—blocked bottoms cause overheating.
Annual inspection should verify all ventilation paths remain clear. Remodeling or adjacent cabinet additions sometimes block original designs.
Trim Kit Considerations
KitchenAid trim kits create finished appearances but affect airflow. Improper trim installation blocks critical ventilation openings.
The MK2220A trim kit fits multiple models but requires careful installation. Instructions specify exact mounting positions for ventilation compatibility.
Some installers incorrectly seal trim kit gaps with caulk. These gaps are intentional ventilation paths—sealing causes component failures.
Aftermarket trim kits may not maintain proper clearances. Always use KitchenAid OEM trim kits designed for specific models.
Custom trim work must respect ventilation requirements. Aesthetic choices that block airflow create expensive repair scenarios.
Temperature Monitoring for Built-Ins
Install a probe thermometer in the cabinet space adjacent to the microwave. Monitor temperatures during operation.
Cabinet temperatures exceeding 120°F indicate inadequate ventilation. Address airflow issues before components fail.
Infrared cameras reveal hot spots invisible to visual inspection. Professional energy auditors can perform thermal imaging.
Document baseline temperatures when the microwave is new. Compare against current readings to identify degrading ventilation.
Seasonal temperature changes affect built-in performance. Summer operation may trigger thermal protection while winter operation succeeds.
Diagnostic Procedures for KitchenAid Microwaves
KitchenAid’s premium construction requires systematic diagnosis. Here’s how to go about it when your KitchenAid microwave isn’t working as it should:
Accessing Diagnostic Mode
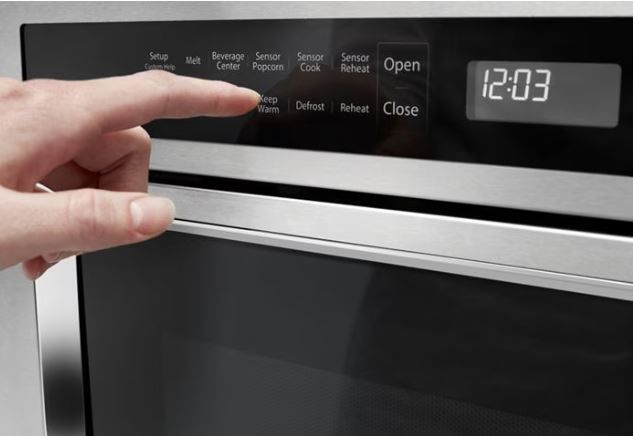
Press “Stop/Clear” followed by “1-2-3” within 2 seconds. The display enters test mode showing component status.
Diagnostic codes appear as alphanumeric combinations. “E1” indicates control board communication failures, “E3” shows thermal sensor issues.
Test individual components by pressing numbered buttons. “5” tests magnetron function, “6” tests a turntable motor.
Record all error codes before exiting diagnostic mode. These codes guide technicians toward specific failures.
Exit by pressing “Stop/Clear” or removing power. Normal operation resumes after diagnostic mode exit.
Door Switch Testing Sequence
Remove the control panel to access door switches. Three switches mount near the latch mechanism.
Use a multimeter (View on Amazon) in continuity mode. Press each switch manually while measuring resistance.
Functional switches show zero ohms when closed, infinite ohms when open. Any deviation indicates switch failure.
Test all three switches even if only one seems problematic. Failed switches often damage adjacent switches through electrical stress.
Replace the complete switch assembly rather than individual switches. This prevents callback failures within weeks.
Magnetron Function Testing
Professional testing measures magnetron current draw. Proper operation requires 10-15 amps during cooking cycles.
Clamp meters around power supply wires show real-time current consumption. No current draw indicates magnetron or power supply failure.
The magnetron should produce a consistent low hum. Rattling, buzzing, or silence indicates internal failure.
Measure filament resistance across magnetron terminals. Readings should match specifications in the service manual.
High-voltage testing requires specialized equipment. Don’t attempt voltage measurements without proper training and tools.
Professional Repair vs. DIY Assessment
| Repair Type | Required Skills | Special Tools Needed | Risk Level | Recommended Approach |
| Waveguide cover | Basic | Screwdriver | Very low | DIY |
| Door switch | Intermediate | Multimeter | Low-moderate | DIY if experienced |
| Thermal fuse | Intermediate | Multimeter, discharge tool | Moderate | Professional |
| Magnetron | Advanced | High-voltage equipment | Very high | Professional only |
| Capacitor | Advanced | Discharge equipment | Extreme | Professional only |
| Control board | Intermediate | Multimeter | Moderate | Professional |
Repair Cost Analysis for KitchenAid Models
Understanding cost structures helps evaluate repair decisions.
Parts Cost Breakdown
OEM KitchenAid magnetrons cost $120-$180. Generic replacements are available for $60-$90 but may not meet specifications.
High-voltage diodes range from $18-$35 for genuine parts. This small component requires professional installation.
Capacitors cost $40-$80 depending on capacity ratings. Never substitute lower-rated components.
Door switch assemblies run $45-$75 for complete sets. Individual switches cost $12-$18 each.
Control boards represent the highest expense at $280-$450. Only authorized service centers access these components.
Labor Cost Considerations
Diagnostic fees range from $85-$150. This fee typically applies toward repairs if you proceed.
Standard repairs take 1-2 hours at $90-$140 per hour. Built-in models add 30-60 minutes due to access challenges.
Emergency or weekend service carries premium rates. Expect 50-100% surcharges for non-business hour calls.
Warranty service through authorized centers costs the same for parts. Labor rates may be standardized under warranty terms.
Independent technicians often charge less but use aftermarket parts. Weigh cost savings against potential quality compromises.
When Replacement Makes Sense
Countertop KitchenAid models under $400 rarely justify repairs over $200. Component quality makes replacement more economical.
Built-in units costing $1,500+ justify repairs up to $600-$800. Installation labor makes replacement significantly more expensive.
Models over 10 years old face cascading component failures. Fixing one issue often reveals additional problems.
Calculate total repair costs including future probable failures. If projections exceed 60% of replacement cost, consider upgrading.
Energy efficiency improvements in new models offset some replacement costs. Modern microwaves (View on Amazon) use 20-30% less power.
Preventive Maintenance for KitchenAid Microwaves
Regular maintenance extends component life significantly.
Monthly Maintenance Tasks
Clean the interior thoroughly after every 15-20 uses. Food residue causes arcing that damages components.
Wipe the door seal with damp cloth monthly. Debris here prevents proper door closure.
Test door closing action for smooth operation. Binding or resistance indicates hinge wear requiring attention.
Verify all control buttons respond with appropriate beeps. Deteriorating controls warn of developing failures.
Run empty cavity inspection. Look for arcing marks, discoloration, or damage requiring attention.
Quarterly Maintenance Schedule
Remove and clean turntable support and guide roller. Accumulated grease causes motor strain.
Inspect door switches by listening for three distinct clicks. Missing clicks indicate alignment issues.
Clean ventilation grilles with vacuum and soft brush. Dust accumulation reduces cooling efficiency.
Test outlet voltage during operation. Voltage drops warn of electrical issues requiring correction.
Examine power cord and plug for damage. Fraying or loose connections create fire hazards.
Annual Professional Inspection
Schedule preventive maintenance with authorized service. Technicians identify developing issues before failures occur.
High-voltage system testing catches degrading components. Early replacement prevents cascade failures.
Thermal imaging reveals hot spots indicating poor ventilation. Corrective action prevents thermal damage.
Door alignment verification prevents switch wear. Adjustment adds years to switch component life.
Deep cleaning of internal components removes accumulated debris. Professional disassembly accesses unreachable areas.
Understanding KitchenAid Microwave Warranty Coverage
KitchenAid provides different warranty tiers across product lines.
Standard Limited Warranty
One-year full coverage includes parts and labor. This warranty covers manufacturing defects comprehensively.
The magnetron receives an extended 5-year limited warranty. This covers parts only—labor remains customer responsibility after year 1.
Control boards are covered for 1 year only. Extended coverage requires separate purchase.
Cosmetic damage and normal wear are explicitly excluded. Review complete terms in your owner’s manual.
Warranty registration activates coverage. Complete registration within 30 days of purchase.
Extended Warranty Options
KitchenAid offers extended service plans through their service network. Coverage extends up to 5 additional years.
Plans cost $150-$350 depending on coverage length. Calculate expected repair probability against premium costs.
Extended warranties typically exclude “consumable” items. Thermal fuses and switches may not be covered.
Third-party warranty companies offer competitive pricing. Read terms carefully—coverage often contains significant exclusions.
Credit card purchase protection may extend manufacturer warranty. Check cardholder benefits before buying separate coverage.
Finding Qualified KitchenAid Microwave Service
Proper service requires brand-specific expertise.
Authorized Service Centers
Locate authorized service through KitchenAid’s website service locator. Enter your zip code for nearby options.
Authorized centers use genuine OEM parts exclusively. This ensures proper specifications and warranty protection.
Technicians receive factory training on KitchenAid systems. Their expertise prevents misdiagnosis and incorrect repairs.
Service records remain in KitchenAid’s database. This documentation helps with future warranty claims.
Authorized service costs more but provides peace of mind. The premium pays for expertise and genuine parts.
Independent Appliance Repair
Independent shops often charge 20-30% less than authorized service. They use aftermarket parts to reduce costs.
Verify technician experience specifically with KitchenAid microwaves. Not all technicians understand premium appliances.
Request parts manufacturer information. Quality aftermarket components perform adequately despite lower costs.
Check online reviews focusing on microwave repair competence. General appliance knowledge doesn’t guarantee microwave expertise.
Independent service voids remaining manufacturer warranty. Consider warranty status before choosing a repair source.
Also Read: How to Reset a KitchenAid Microwave
Frequently Asked Questions
Why is my KitchenAid microwave not heating food properly?
Weak or absent heating in KitchenAid microwaves typically indicates magnetron failure, high-voltage diode degradation, or blown capacitors. The magnetron generates electromagnetic waves that heat food—when it fails, no heating occurs despite normal operation appearance. Built-in models experience this more frequently due to thermal stress from cabinet enclosures.
How long should a KitchenAid microwave last before heating issues develop?
KitchenAid countertop microwaves typically provide 10-12 years before major heating component failures. Built-in models experience heating issues after 7-9 years due to harsher thermal environments. Regular maintenance and proper ventilation extend lifespan significantly. Premium components justify repair rather than replacement for most failures.
Can I replace a KitchenAid microwave magnetron myself?
Magnetron replacement requires professional service due to lethal high-voltage hazards. Capacitors store up to 5,000 volts that remain dangerous days after unplugging. Professional technicians use specialized discharge tools and safety procedures. DIY attempts risk electrocution and create liability if radiation leakage results from improper installation.
Why does my built-in KitchenAid microwave overheat and stop heating?
Built-in installations trap heat in cabinet enclosures, causing thermal fuses and cutoffs to activate. Verify minimum clearance specifications are met on all sides. Clean ventilation paths and ensure cabinet vents align with microwave openings. Blocked ventilation is the primary cause of thermal protection activation in built-in units.
How much does it cost to fix a KitchenAid microwave that won’t heat?
Repair costs range from $150-$400 depending on the failed component and model type. Magnetron replacement costs $250-$400 including labor. High-voltage diode repair runs $120-$220. Door switch replacement costs $80-$150. Built-in models add $50-$100 in labor due to access complexity. Diagnostic fees of $85-$150 typically apply toward repairs.
Is it worth repairing a KitchenAid built-in microwave?
Built-in KitchenAid microwaves costing $1,500-$3,500 justify repairs up to $800. Installation labor for new units adds $300-$600 to replacement costs. For units under 8 years old, repair is economically sensible. Consider replacement if repairs exceed 60% of new unit cost including installation.
Restore Your KitchenAid’s Premium Performance
KitchenAid microwave heating failures stem from identifiable component issues that professional diagnosis resolves efficiently. Built-in models face unique thermal challenges requiring special attention to ventilation and installation specifications. Understanding your model’s specific architecture helps you make informed repair decisions.
Whether you own a countertop, over-the-range, or built-in KitchenAid microwave, proper diagnosis distinguishes between simple fixes and major component replacement. The brand’s premium construction justifies professional repair for most scenarios, especially for built-in installations where replacement involves significant additional costs beyond the appliance itself.

Hi, I’m Barlgan! I created Repair Me Yourself to empower homeowners to tackle appliance repairs with confidence. From decoding error codes to fixing cooling issues, I break down complex repairs into simple, actionable steps that save you time and money.