Standing water in your Kenmore washer after a cycle stops your laundry routine cold. Clothes emerge soaking wet and heavy, impossible to transfer to the dryer.
Drainage problems are among the most common washer complaints. The good news is most causes have straightforward fixes you can handle yourself.
Kenmore washer troubleshooting not draining requires checking the drain hose for kinks and blockages, cleaning the drain pump filter, testing the drain pump motor, and inspecting the lid lock assembly. Most drainage failures stem from clogged filters, jammed pump impellers, or kinked hoses rather than expensive component failures, making these among the most cost-effective washer repairs homeowners can perform with basic tools.
Key Takeaways
Before diving into repairs, understand how your washer drains water. This knowledge helps you troubleshoot more effectively.
- The drainage system has several key components working together. When any part fails, water stays trapped.
- Your washer’s control board signals the drain pump to activate. The pump pulls water from the tub through an internal filter.
- Water flows through the pump impeller and exits via the drain hose. The hose carries water to your standpipe or utility sink.
- Proper drainage depends on clear pathways, working pumps, and correct hose positioning. Problems in any area prevent water from leaving the tub.
- Some models also require the lid lock to confirm before draining. This prevents operation with an open lid.
Kenmore Washer Not Draining Quick Troubleshooting Guide
| Symptom | Most Likely Cause | Check This First | Typical Fix |
|---|---|---|---|
| No drainage at all | Clogged pump filter, kinked hose | Clean filter, check hose | Clear blockage |
| Slow drainage | Partial pump blockage | Check pump impeller | Remove debris |
| Drainage with noise | Jammed pump, foreign object | Listen to pump location | Clear obstruction |
| No drainage and no spin | Lid lock failure | Test lid lock | Replace lid lock |
| Intermittent drainage | Loose connections, partial clogs | Check all connections | Secure connections |
| Drainage but won’t spin | Separate spin issue | Test after drainage | Address spin system |
| Error code with water | Control board issue | Note exact code | Follow code guidance |
Initial Kenmore Washer Drainage Problem Assessment
Start with simple observations before disassembling anything. These checks narrow down the problem quickly.
Look at how much water remains in the tub. A completely full tub suggests total drainage failure.
A small amount of standing water might be normal residual water. Some models leave 1-2 inches after draining.
Listen when the washer tries to drain. You should hear the pump motor attempting to run.
Note any error codes displayed. These pinpoint specific component failures.
Quick Visual Inspection
Check the drain hose where it enters the standpipe. Make sure it’s not pushed too far down.
The hose should insert only 4-6 inches into the standpipe. Deeper insertion creates airlock problems.
Look along the entire hose length for visible kinks. Sharp bends completely block water flow.
Verify the standpipe height. Proper height is 39-96 inches from floor to where hose enters.
Pull the washer away from the wall. Sometimes pushing it back crushes the drain hose.
Listening for Pump Operation
Start a drain cycle or spin cycle. Listen carefully at the bottom front of the washer.
A working pump makes a distinct humming or buzzing sound. This tells you the motor receives power.
Complete silence means no power reaches the pump. Check electrical connections and control board.
Grinding, rattling, or squealing sounds indicate a jammed or damaged pump. Something blocks the impeller.
Loud noise followed by silence suggests the pump tried to run but shut off. This points to jam or overload.
Kenmore Top Load Washer Not Draining – Troubleshooting
Top load Kenmore washers share common drainage issues. The solutions work across most model years.
Start the troubleshooting with the easiest fixes before moving to complex repairs.
Cleaning the Drain Pump Filter
Most top load Kenmore washers have an accessible drain pump filter. This catches debris before it reaches the pump.
Locate the filter access panel at the bottom front. Some models hide it behind the lower kick panel.
Place towels underneath before opening. Expect water to spill when you remove the filter.
Have a shallow pan ready. Use a paint roller tray or cookie sheet to catch water.
Removing the Filter
Turn the filter cap counterclockwise slowly. Water begins draining immediately from the opening.
Let water drain into your pan. Pause and empty the pan if it fills up.
Continue turning until the cap comes free. Pull the filter straight out.
Inspect the filter for trapped items. Hair, lint, coins, buttons, and small clothing items accumulate here.
Remove all debris. Rinse the filter thoroughly under running water.
Use an old toothbrush to scrub stubborn buildup. Soap residue and minerals create sticky deposits.
Checking Behind the Filter
Shine a flashlight into the filter housing. Look for items that bypassed the filter.
Sometimes small socks or underwear get past the filter. These block the pump inlet.
Remove any visible obstructions. Use needle-nose pliers if items are stuck.
Feel for the pump impeller just beyond the filter opening. Try spinning it with your finger.
The impeller should rotate freely with slight resistance. If it won’t move, something jams it.
Inspecting and Clearing the Drain Hose
The drain hose carries water from pump to standpipe. Blockages here prevent proper drainage.
Start by checking for external kinks. Straighten any crimped sections you find.
Remove the hose from the standpipe. Check inside the pipe itself for clogs.
Disconnect the hose from the washer. Most use spring clamps or screw clamps.
Flushing the Hose
Take the hose to a utility sink or outdoor faucet. Flush it thoroughly with hot water.
Water should flow freely through the hose. Restricted flow indicates a blockage inside.
Use a plumber’s snake for stubborn clogs. Push it through the hose to dislodge stuck items.
Small items like coins, bobby pins, and buttons commonly lodge in drain hoses. Shake the hose to hear items rattling.
Reinstalling Properly
Reconnect the hose to the washer. Ensure the clamp seats properly over the connection.
Insert the hose into the standpipe. Stop at 4-6 inches depth.
Create a gentle arc in the hose. Avoid sharp bends that restrict flow.
Secure the hose so it won’t kink when you push the washer back. Use zip ties if necessary.
Testing the Lid Lock
Top load washers won’t drain or spin without proper lid lock operation. This safety feature protects users.
Close the lid and start a cycle. Listen for the lid lock clicking.
The click should occur within 2-3 seconds. No click means the lock isn’t engaging.
Watch the lid lock indicator light. It should illuminate when locked.
If you hear a click but no light, the sensor failed. The mechanism works but the control board doesn’t receive confirmation.
Replace the lid lock (View on Amazon) if it fails these tests. The part costs $35-65 and takes 20 minutes to install.
Kenmore Front Load Washer Not Draining or Spinning
Front load models have similar drainage issues but with different access points. The repair approach varies slightly. Front load washers typically have easier filter access than top loaders. Here’s a quick approach to troubleshooting a Kenmore washer that won’t drain or spin:
Accessing the Front Load Filter
Look for the small access door at the bottom right front. This covers the filter.
Place towels on the floor underneath. More water spills from front loaders due to their design.
Open the access door by pulling or pressing the release. The filter cap should be visible.
Some models have a small drain tube next to the filter. Pull this tube and uncap it to drain water first.
Let water drain into a pan. This reduces the mess when removing the filter.
Cleaning Front Load Filters
Turn the filter cap counterclockwise. It typically requires a quarter turn to release.
Pull the filter straight out once it turns freely. Expect more water to spill.
Front load filters trap more debris than top load filters. Hair wraps around these filters extensively.
Remove all accumulated hair, lint, and items. Clean thoroughly with a brush.
Check the filter housing for trapped items. Look for small socks or undergarments stuck inside.
Inspect the rubber seal on the filter cap. Replace the filter if this seal is damaged.
Front Load Door Lock Issues
Front loaders require a secure door lock before draining or spinning. A failed lock stops all operation.
Listen for the door lock engaging when you close the door. You should hear a distinct mechanical click.
Try to open the door immediately after closing. It should be locked firmly.
Check the door catch on the door itself. This plastic piece hooks into the lock mechanism.
Replace the door catch if it’s broken or loose. This causes lock engagement failures.
Test the door lock electrically if clicking occurs but washing doesn’t start. The lock might engage mechanically but fail electrically.
Front Load Drain Pump Access
Front load pumps are typically more accessible than top load pumps. Most sit behind the front panel.
Remove the lower front panel to access the pump. This usually requires removing screws along the bottom.
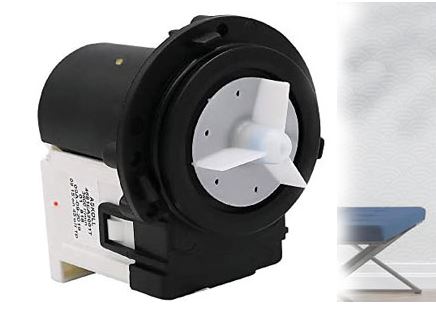
Locate the pump assembly. It’s a circular component with hoses attached.
Check hose connections at the pump. Make sure clamps are tight and hoses are fully seated.
Kenmore Washer Drain Pump Replacement
When testing confirms drain pump failure, replacement is straightforward. Most homeowners can complete this repair.
New drain pumps (View on Amazon) cost $35-80 depending on model. This beats a $150-300 service call.
When to Replace vs. Clean
Clean the pump if it’s jammed with debris but otherwise intact. Removing obstructions often restores function.
Replace the pump if the motor doesn’t run at all when powered. The motor windings have failed.
Replace pumps making grinding noises even after cleaning. The bearings or impeller are damaged.
Replace pumps with cracked housings. Cracks cause leaks and reduce pump efficiency.
Replace pumps that run but don’t move water. The impeller has broken off inside.
Purchasing the Correct Pump
Match your washer’s model number exactly. Pumps vary between model years.
The model number appears on a sticker inside the lid or on the back panel. Write down the complete number.
Purchase from appliance parts suppliers.
Verify the pump has the correct inlet and outlet port configuration. Port positions must match your hoses.
Removing the Old Pump
Unplug the washer completely. Turn off the water supply valves.
Drain as much water as possible before starting. Use the filter drain method described earlier.
Access the pump from the bottom front on most models. Tilt the washer back carefully for better access.
Remove any panels blocking pump access. Keep track of screws for reassembly.
Disconnecting Pump Connections
Locate the two hoses connected to the pump. One comes from the tub, one goes to the drain hose.
Use pliers to compress spring clamps. Slide the clamps away from connection points.
Pull hoses off the pump ports. Expect water to spill from the hoses.
Disconnect the electrical wire harness. Press the release tab and pull straight out.
Removing Mounting Hardware
Remove screws or clips holding the pump. Most pumps use 2-3 mounting screws.
Some pumps twist and pull out. Others lift straight out after removing screws.
Note the pump’s orientation. Install the new pump in the same position.
Pull the old pump free. Drain any water from the pump housing into your pan.
Installing the New Pump
Position the new pump exactly as the old one sat. Align mounting holes properly.
Insert and tighten mounting screws. Don’t overtighten plastic housings or you’ll crack them.
Reconnect hoses to pump ports. Push hoses on firmly until fully seated.
Slide hose clamps back into position. Ensure they sit directly over the connection points.
Connect the electrical wire harness. Push until the connector clicks into place.
Testing the New Pump
Reinstall any panels you removed. Set the washer back on all four feet.
Plug in the washer. Turn on water supply.
Run a short rinse cycle. Watch the pump area carefully for leaks.
If water drains normally without leaks, the repair succeeded. Your Kenmore washer troubleshooting not draining problem is solved.
Kenmore 500 Washer Not Draining
The series 500 has specific quirks related to drainage. These models share common failure points.
Series 500 washers use a shift actuator that affects drainage indirectly.
Shift Actuator Impact on Drainage
The shift actuator moves the transmission between modes. If it fails, the washer may not reach the drain cycle.
Listen during the sensing phase. You should hear clicking or whirring from the actuator.
Complete silence suggests actuator failure. The washer gets stuck and never reaches draining.
Replace failed shift actuators (View on Amazon). These cost $45-75 and take 45 minutes to install.
Series 500 Common Blockage Points
Series 500 models trap items in specific locations. Check these areas first.
The pump inlet on these washers catches coins easily. Remove the filter and check the pump inlet carefully.
The drain hose connection point tends to accumulate lint. Disconnect and clean this area.
Some series 500 models have a coin trap separate from the pump filter. Check your manual for location.
Control Board Issues in Series 500
Series 500 control boards sometimes fail to signal the drain pump. The pump works but never receives power.
Test for power at the pump during drain cycles. Use a multimeter to check for voltage.
If no power reaches a working pump, the control board has failed. This requires board replacement.
Control boards cost $150-250. Verify this diagnosis before ordering.
Kenmore Washer Not Draining Making Noise
Noise during drainage attempts pinpoints specific problems. Different sounds indicate different failures.
Listen carefully to identify what you’re hearing.
Identifying Drainage Noises
Humming or buzzing means the pump motor runs. The impeller is jammed or blocked.
Grinding sounds indicate something hard caught in the impeller. Coins or plastic pieces commonly cause this.
Rattling suggests loose parts inside the pump. The impeller may have broken loose from the motor shaft.
Squealing or screeching points to bearing failure. The pump bearings are worn out.
Clicking sounds might come from the pump trying to start but failing. The motor is seized or overloaded.
Troubleshooting by Sound
For humming without drainage, remove the filter. Check the impeller for blockages.
Manually spin the impeller. It should rotate freely with slight resistance.
If the impeller won’t turn, something jams it. Remove the obstruction.
For grinding noises, expect to find foreign objects. Coins and buttons commonly get stuck.
Remove the pump for thorough inspection if you can’t clear the jam through the filter opening.
For squealing or rattling, plan on pump replacement. These sounds indicate mechanical damage.
Common Objects Causing Noise
Coins create loud grinding noises. They wedge between the impeller and housing.
Bra underwires scrape against plastic. They bend around the impeller.
Bobby pins and paperclips rattle inside the pump. They’re small enough to bypass the filter.
Small rocks from pockets grind against pump components. They damage impellers quickly.
Plastic items like pen caps crack and jam in tight spaces. They’re hard to remove once stuck.

Advanced Kenmore Washer Drainage Troubleshooting
For problems that persist after basic troubleshooting, try these advanced techniques.
These require more technical knowledge and tools.
Testing Pump Electrical Function
Use a multimeter (View on Amazon) to verify the pump receives power during drain cycles. Set the meter to AC voltage.
Access the pump and disconnect the wire harness. The pump must be unplugged for safety.
Reconnect power to the washer. Don’t touch any electrical connections.
Start a drain cycle. Carefully test voltage at the pump connector with the meter probes.
You should read approximately 120 volts AC. No voltage means the control board isn’t signaling the pump.
If voltage is present but the pump doesn’t run, the pump motor has failed. Replace the pump.
Checking Pressure Switch Function
The pressure switch tells the control board when water has drained. A stuck switch reports false information.
The switch connects to the tub via a small air tube. As water drains, air pressure decreases.
Remove the air tube from the pressure switch. Blow through it gently.
You should feel minimal resistance. Blockages prevent accurate pressure sensing.
Flush blocked tubes with warm water. Soap residue and minerals commonly clog these tubes.
Test the pressure switch by blowing into it. You should hear it click as pressure changes.
Replace switches that don’t click. These cost $25-45.
Control Board Diagnosis
Control boards rarely fail but can cause drainage problems. Test other components first.
Look for visible damage on the control board. Access it by removing the top or back panel.
Check for burn marks, bulging capacitors, or corrosion. These indicate board failure.
Water damage commonly kills control boards. Even small leaks can drip onto electronics.
Test the board’s ability to send power to the pump. Use the voltage test described earlier.
If the board doesn’t send power during drain cycles, it needs replacement. Kenmore washer control boards (View on Amazon) cost $110-250.
Preventing Future Kenmore Washer Drainage Problems
Regular maintenance prevents most Kenmore washer troubleshooting not draining issues. Simple habits keep your washer running smoothly.
These tasks take minimal time and prevent expensive repairs.
Monthly Maintenance Tasks
Clean the drain pump filter every month. This single task prevents the majority of drainage problems.
Check pockets before washing clothes. Empty all coins, tissues, and small items.
Run a washer cleaning cycle. Use washer cleaner or white vinegar to dissolve buildup.
Inspect the drain hose for kinks. Straighten any bent sections you find.
What Not to Wash
Never wash items with loose buttons or decorations. These break off and clog drains.
Avoid washing heavily soiled items with excessive sand or dirt. Rinse these items first outdoors.
Don’t wash pet bedding without removing excess hair. Use a lint roller first.
Check baby clothes for small socks or mittens. These slip through holes in the tub and jam pumps.
Remove all items from pockets. Coins, tissues, and small toys cause most pump blockages.
Proper Loading Practices
Don’t overload the washer. Clothes need space to move freely.
Overloading strains the pump. Excess weight makes drainage harder.
Zip all zippers before washing. Open zippers catch other items and pull them into the pump.
Turn jeans and heavy items inside out. This protects buttons and rivets from falling off.
Use mesh laundry bags (View on Amazon) for delicates. This prevents small items from escaping.
Frequently Asked Questions
Why won’t my Kenmore washer drain at all?
Complete drainage failure usually means a clogged pump filter or kinked drain hose. These are the two most common causes.
Start by cleaning the drain pump filter. Remove all hair, lint, and trapped items.
Check the drain hose for kinks along its entire length. Straighten any crimped sections.
If both are clear, test the drain pump. Listen for the motor running during drain cycles.
No sound means the pump isn’t receiving power or has failed. Test electrical connections and the pump motor.
How much does it cost to fix a Kenmore washer that won’t drain?
DIY repairs cost $0-80 depending on the problem. Cleaning a clogged filter costs nothing.
A new drain pump runs $35-80. Drain hoses cost $15-25 if replacement is needed.
Professional repairs cost $150-300 including labor. Service calls start at $75-100.
Most drainage problems are DIY-friendly. You save significantly by doing repairs yourself.
Complex electrical problems might justify professional diagnosis. Consider the cost against your technical comfort level.
Can I manually drain my Kenmore washer?
Yes, several methods work for manual drainage. The filter drain method is easiest.
Open the drain pump filter slowly. Let water drain into pans.
Lower the drain hose below tub level. Gravity pulls water out.
Use the drain tube if your front loader has one. This is designed for emergency drainage.
Siphoning works but requires starting the flow by mouth. Use a long tube or hose.
What causes a drain pump to fail?
Pumps fail from worn bearings after years of use. Normal wear eventually breaks down mechanical parts.
Foreign objects damage impellers and jam motors. Coins and small items are the main culprits.
Running the pump dry damages seals and bearings. This happens when drain hoses are kinked.
Power surges burn out pump motors. Electrical spikes damage motor windings.
Hard water deposits build up inside pumps. Minerals restrict water flow and strain motors.
How long should a Kenmore drain pump last?
Drain pumps typically last 5-8 years with normal use. Heavy use shortens this lifespan.
Proper maintenance extends pump life. Regular filter cleaning prevents jams and strain.
Hard water areas see shorter pump life. Mineral buildup damages pump components faster.
Quality of original parts affects lifespan. OEM pumps generally last longer than cheap replacements.
Why does my washer drain slowly?
Slow drainage indicates a partial blockage. The pump works but water flow is restricted.
The pump filter is partially clogged. Clean it thoroughly.
The drain hose has a partial blockage. Remove and flush the hose.
The pump impeller is partially jammed. Hair wrapped around it slows rotation.
Failing pumps lose power gradually. The motor runs but pumps less effectively.
Can I use Drano in my washing machine?
Never use drain cleaners like Drano in your washer. These harsh chemicals damage rubber seals and plastic components.
Drain cleaners don’t effectively clear washer blockages anyway. Lint and fabric don’t dissolve in chemicals.
Use mechanical cleaning methods. Remove the filter and manually clear debris.
For stubborn clogs, use a plumber’s snake. This physically removes blockages without chemicals.
Vinegar safely dissolves soap residue and mineral buildup. Use it in cleaning cycles.
How often should I clean my washer’s drain filter?
Clean the drain pump filter every month under normal use. This prevents most drainage problems.
Increase cleaning frequency to every two weeks if you wash pet bedding. Hair clogs filters quickly.
Clean after washing heavily soiled items. Excess dirt and debris accumulate faster.
Check the filter anytime drainage slows. Don’t wait for complete failure.
Set a monthly calendar reminder. Regular maintenance prevents emergency repairs.
Also Read:
- How to Fix a Kenmore Washer That Fills With Water Then Stops
- Kenmore Series 600 Washing Machine Troubleshooting Guide
- Kenmore Series 500 Washer Troubleshooting Guide
When to Call a Professional
Some Kenmore washer troubleshooting not draining situations require expert help. Know when to call for assistance.
Call a technician if you’ve tried all basic fixes without success. You might be missing something in diagnosis..
Ask about their experience with Kenmore washers as familiarity speeds diagnosis and repair.
Restoring Proper Drainage
Kenmore washer troubleshooting not draining problems often have simple solutions. Most causes stem from clogged filters or kinked hoses.
Start with the drain pump filter. This single check solves 60% of drainage issues.
Inspect the drain hose for kinks and blockages. Straighten or clear any restrictions.
Test the drain pump operation. Replace pumps that don’t run or make grinding noises.
Check the lid lock if drainage works but spinning doesn’t happen. The lock prevents spinning for safety.
With systematic troubleshooting and basic repair skills, you can resolve most drainage problems yourself. You’ll save hundreds in service calls while getting your washer working quickly.
Regular maintenance prevents future drainage issues. Clean the filter monthly, check hoses quarterly, and empty pockets before washing to keep your Kenmore draining properly for years.

Hi, I’m Barlgan! I created Repair Me Yourself to empower homeowners to tackle appliance repairs with confidence. From decoding error codes to fixing cooling issues, I break down complex repairs into simple, actionable steps that save you time and money.