Your Kenmore washer starts normally and fills with water as expected. Then everything halts without warning. The washer sits idle with water in the tub. No agitation begins, no further action occurs.
A Kenmore washer fills with water then stops due to a failed lid switch, malfunctioning timer or control board, defective water level pressure switch, or stuck shift actuator. After filling, the washer must receive confirmation signals from multiple sensors before advancing to the wash cycle, and any component failure in this safety chain prevents cycle progression, leaving clothes soaking in standing water.
Understanding the Fill-to-Wash Transition by a Kenmore Washer
Your washer goes through specific steps between filling and washing. Understanding this sequence helps you diagnose where things fail.
The control system signals the water inlet valve to open. Water flows into the tub.
A pressure switch monitors water level through an air tube. As water rises, air pressure increases in this tube.
When the correct level is reached, the pressure switch signals the control board. The board then closes the inlet valve.
Next, the lid switch must confirm the lid is closed. This safety feature prevents operation with an open lid.
On some models, a shift actuator moves the transmission into wash mode. This mechanical positioning must complete successfully.
Finally, the timer or control board energizes the motor. The wash cycle begins.
Any failure in this sequence causes the washer to stop after filling. Each component plays a critical role.
Quick Fix Guide for a Kenmore Washer That Fills with Water Then Stops
| Model Series | Most Common Cause | Unique Considerations | Quick Test |
|---|---|---|---|
| All top load models | Lid switch failure | Varies by age and design | Listen for lid click |
| Series 500 | Shift actuator failure | Direct drive with actuator | Listen during fill for clicking |
| Series 400 | Timer motor failure | Mechanical timer design | Check for timer ticking |
| Elite models | Control board glitch | Electronic controls | Try reset procedure |
| Series 80 | Motor coupling partial failure | Direct drive classic design | Check for motor sound |
| Series 70 | Lid switch or timer | Older mechanical system | Test switch continuity |
| Series 100 | Water level switch | Basic mechanical design | Test pressure switch |
| Model 110 | Lid switch most common | Long production run | Replace switch first |
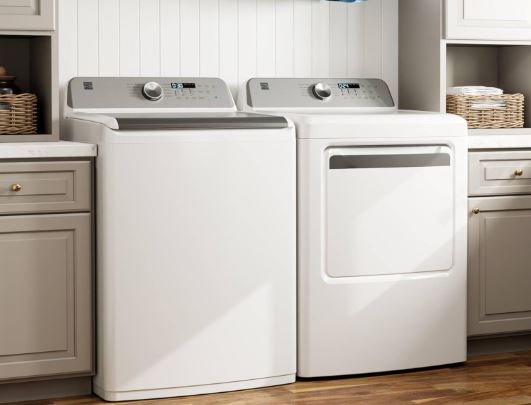
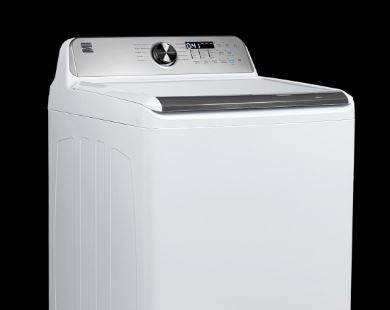
Kenmore Washer Fills with Water Then Stops Top Load
Top load Kenmore washers share common components across model lines. The fill-then-stop problem manifests similarly regardless of specific series.
Start with universal checks that apply to all top load models.
Lid Switch Verification
The lid switch is the single most common cause across all top load models. This safety device prevents operation with an open lid.
After filling, the washer checks the lid switch before starting agitation. A failed switch never sends the “ready” signal.
Close the lid and listen carefully. You should hear a distinct mechanical click.
Some models click loudly, others produce a subtle sound. Any click confirms mechanical engagement.
Watch for a lid lock indicator light if your model has one. The light should illuminate when the switch engages.
Testing Lid Switch Operation
Locate the lid switch on the washer frame. It’s typically near where the lid meets the body.
Press the switch manually with a screwdriver while someone watches the control panel. Any response confirms the switch can signal.
Use a multimeter (View on Amazon) set to check for continuity. Disconnect the switch wires for accurate testing.
With the lid closed position, you should read near-zero ohms. With the lid open, you should read infinite resistance.
Replace switches that fail this test. These cost $15-40 depending on the model.
Timer and Control Board Issues
The timer must advance from fill to wash mode. A stuck timer leaves the washer waiting indefinitely.
Listen for the timer motor ticking during fill. This subtle sound indicates the timer is advancing through cycles.
No ticking means the timer motor has failed. The washer sits at whatever position it reached when filling completed.
Electronic control boards can freeze or malfunction. They might successfully manage filling but fail to initiate washing.
Try a complete reset before assuming control failure. Unplug for 60 seconds, then test again.
Water Level Pressure Switch
The pressure switch tells the control board when the proper water level is reached. A stuck switch provides false information.
If the switch fails in the “filling” position, the control board thinks water is still entering. It waits for a fill signal that never changes.
The switch connects to an air tube running to the bottom of the tub. This tube must be clear for accurate sensing.
Remove the air tube and blow through it. You should feel minimal resistance.
Clogs from soap residue and mineral deposits prevent accurate pressure transmission. Or worse, they could be the reason your Kenmore washer won’t drain. Flush clogged tubes with warm water.
Test the pressure switch by blowing into it while checking continuity. It should click and change state with pressure changes.
Kenmore 500 Washer Fills with Water Then Stops
Most Kenmore washing machines use specific components not found in other models, and the 500 series is no exception. Understanding these unique features helps to troubleshoot a Kenmore 500 series.
This series primarily uses shift actuators for mode selection.
Shift Actuator Problems
The shift actuator physically moves the transmission between fill, wash, and spin modes. A failed actuator leaves the transmission in neutral.
Listen during the fill cycle. You should hear clicking or whirring sounds from the actuator after filling completes.
Complete silence from the actuator area suggests failure. The transmission never receives the signal to engage wash mode.
The actuator sits on top of the transmission. Access requires removing the cabinet.
Testing the Shift Actuator
Remove the cabinet by unscrewing retaining clips. The actuator is visible on the transmission top.
Check the wire harness connection. Push it firmly to ensure proper seating.
Listen closely when manually advancing the timer. The actuator should produce mechanical sounds.
If the actuator is completely silent, it has failed. Replace it with a new unit.
Shift actuators (View on Amazon) cost $17-40. Installation takes 45-60 minutes for most DIYers.
Series 500 Lid Switch Location
Series 500 models position the lid switch differently than other models. Finding it requires knowing where to look.
The switch typically mounts on the left side of the frame. Look near the top rim where the lid closes.
Some 500 models use magnetic lid switches. These don’t click audibly like mechanical switches.
Test magnetic switches with a multimeter. Approach a magnet to the switch while checking continuity changes.
Control Board Communication
Series 500 models with electronic controls can experience communication failures. The board completes filling but doesn’t signal the next step.
Check all wire harness connections between the control board and actuator. Loose connections prevent proper signaling.
Look for water damage on the control board. Even small amounts of moisture cause malfunctions.
Try a factory reset using the button combination for your specific model. This clears corrupted software.
Kenmore 400 Washer Fills with Water Then Stops
The 400 series represents older mechanical timer technology. These washers use straightforward components that rarely computerize.
Troubleshooting focuses on mechanical and electrical basics.
Mechanical Timer Diagnosis
The 400 series relies heavily on the mechanical timer. This component advances through cycle phases based on an internal motor.
The timer motor must continue running after fill completes. It advances contacts to the wash position.
Listen for the timer ticking. Place your ear near the control panel during the fill cycle.
A healthy timer produces steady, rhythmic ticking. This sound should continue throughout all cycles.
If ticking stops after filling completes, the timer motor has failed. The timer got stuck at the fill phase.
Timer Motor Testing
Access the timer by removing the control panel. Usually two or three screws hold the panel.
Locate the small timer motor on the back of the timer assembly. It’s a compact component with two wires.
Test the timer motor with a multimeter. Check for continuity across the motor terminals.
The motor should show resistance between 2000-3000 ohms. Infinite resistance indicates motor failure.
Replace the entire timer assembly if the motor fails. Timer motors aren’t sold separately.
Timers cost $60-120 for series 400 models. Installation requires careful wire documentation.
Series 400 Water Level Control
The 400 series uses a simpler water level control system. A mechanical pressure switch handles all level sensing.
This switch can stick in one position. If stuck in “filling” mode, the control never receives the “ready” signal.
Remove the pressure switch from its mounting. It’s usually near the control panel area.
Blow into the pressure port while listening. You should hear a distinct mechanical click.
Test continuity while blowing. The switch should change states with pressure application.
Replace switches that don’t click or change continuity. These cost $25-45.
Motor Starting Circuit
The 400 series motor circuit is straightforward. After the timer advances, it simply energizes the motor.
If everything else checks out but the motor doesn’t start, the starting circuit has failed. This includes the motor capacitor and centrifugal switch.
Test the motor capacitor with a capacitance meter (View on Amazon). Compare the reading to the capacitor’s rated value.
Replace capacitors reading more than 10% outside tolerance. These cost $15-35.
Kenmore Elite Washer Fills with Water Then Stops
Elite models feature advanced electronic controls. These sophisticated systems provide additional diagnostic information but introduce more potential failure points.
Start by checking for error codes.
Error Code Analysis
Elite washers display error codes when problems occur. These codes pinpoint specific failures.
Watch the display after filling stops. Any code that appears provides valuable diagnostic information.
Common codes related to this symptom include those for lid lock failures, motor problems, and communication errors.
Consult your owner’s manual for code meanings. Each code relates to a specific component or system.
Address the component the code identifies. Don’t ignore error codes hoping the problem resolves itself.
Electronic Lid Lock System
Elite models use electronic door locks. These are more complex than simple mechanical switches.
The lock must physically engage and electronically confirm engagement. Both actions must succeed for cycles to proceed.
Listen for the lock engaging. You should hear a distinct mechanical sound when closing the lid.
Watch for the lid lock indicator. The light should illuminate when the lock confirms engagement.
Electronic Lock Troubleshooting
If you hear the lock engage but washing doesn’t start, the electrical confirmation failed. The mechanism works but the sensor doesn’t.
Check the wire connections at the lock assembly. Corrosion prevents proper signal transmission.
Test the lock electrically with a multimeter. It should show continuity changes when locked and unlocked.
Replace electronic lid lock assemblies showing incorrect electrical behavior. These cost $40-80.
Elite Control Board Reset
Elite control boards benefit from proper reset procedures. These clear software glitches that cause unusual behavior.
Turn off the washer completely. Unplug from the wall outlet.
Wait 60 full seconds. This allows the board to fully discharge.
Press and hold the Start button while plugging back in. Continue holding for 5 seconds after power returns.
This forces a complete system reset. The board should return to default operation.
Communication Error Diagnosis
Elite washers use multiple circuit boards that communicate. The main control board and user interface board exchange signals.
Communication failures prevent cycle progression. The boards can’t coordinate to advance past filling.
Check the ribbon cable connecting these boards. Ensure both ends seat properly in their connectors.
Look for damaged ribbon cables. Tears or cuts in the cable prevent proper signal transmission.
Replace damaged ribbon cables. These cost $20-40 and install in minutes.
Kenmore 80 Series Washer Fills with Water Then Stops
The 80 series represents a classic reliable design. These washers use proven mechanical systems with minimal electronics.
Troubleshooting follows straightforward mechanical principles.
Motor Coupling Inspection
The 80 series uses a direct-drive motor coupling. This rubber and plastic component can fail partially.
A partially failed coupling might work during low-torque filling but fail when agitation torque is required. The washer fills but can’t begin agitating.
Listen for the motor running after filling completes. If you hear the motor but see no drum movement, suspect the coupling.
Look under the washer for white or black plastic fragments. These are broken coupling pieces.
Remove the cabinet to inspect the coupling directly. Look for cracks or missing rubber sections.
Replace couplings showing any damage. Don’t wait for complete failure.
Motor couplings cost $10-25. Installation takes 30-45 minutes.
Series 80 Lid Switch Design
The 80 series uses a sturdy mechanical lid switch. These are generally reliable but do wear out.
The switch location varies slightly by production year. Check near both the front and rear lid hinge areas.
Later 80 series models moved the switch to the front. Earlier models placed it at the rear.
Test using the standard continuity method. Replace switches failing the test.
Timer Advancement
The 80 series mechanical timer must advance from fill to wash. A stuck timer is a common failure on older units.
These timers have been running for 20-30 years on many washers. Internal contacts corrode or motors fail.
Try manually advancing the timer after filling. Turn the dial to a wash position.
If manual advancement makes washing start, the timer motor failed. It can’t advance automatically.
Replace the timer assembly. These cost $60-100 for 80 series models.
Kenmore 70 Series Washer Fills with Water Then Stops
The 70 series predates many modern features. These simple washers use basic mechanical components throughout.
Diagnosis focuses on fundamentals without complex electronics.
Basic Mechanical Components
The 70 series uses a mechanical timer, simple lid switch, and basic pressure switch. All three must function for cycles to proceed.
Test each component individually. Don’t assume anything works based on age.
The lid switch is the most likely failure. Test it first before moving to other components.
The timer motor is second most likely. Listen for ticking to confirm timer advancement.
The pressure switch rarely fails but can stick. Test it if other components check out.
Drive System Verification
Some 70 series models use drive belts. A broken belt prevents agitation even after successful filling.
The motor runs during fill operation but the belt must engage for washing. A broken belt means no power transmission.
Remove the cabinet and visually inspect the belt. Look for cracks, fraying, or complete breaks.
Replace broken or worn belts. These cost $15-30 and install in 30 minutes.
Motor Starting Components
The 70 series motor requires a starting capacitor and centrifugal switch. These help the motor begin rotation.
If the motor doesn’t start after filling, test these components. The motor hums but doesn’t turn.
Replace failed capacitors and check the centrifugal switch operation. These repairs cost $15-50.
Kenmore Series 100 Washer Fills with Water Then Stops
The series 100 represents entry-level design philosophy. These washers prioritize simplicity and reliability over features.
Troubleshooting is straightforward with fewer components to check.
Water Level Switch Focus
Series 100 models rely heavily on a simple pressure switch for water level sensing. This switch is more critical than in other models.
A stuck pressure switch is the most common cause of fill-then-stop behavior in series 100 washers.
Remove the air tube and inspect it for clogs. These tubes block more easily in basic models.
Flush the tube thoroughly. Use warm water to dissolve soap residue.
Test the pressure switch thoroughly. Replace if it doesn’t click or change continuity with pressure.
Basic Lid Switch Testing
The series 100 lid switch is as simple as they come. A basic mechanical switch with minimal complexity.
These switches are highly reliable but do eventually wear out after years of use.
Test continuity with the lid closed and open. Replace switches showing incorrect readings.
Series 100 lid switches cost $15-25. Installation takes 10-15 minutes.
Timer Simplicity
Series 100 timers are less complex than higher series models. Fewer cycles mean fewer potential failure points.
The timer must still advance from fill to wash. Listen for the ticking sound confirming advancement.
Replace timer assemblies that don’t tick or don’t advance to wash after filling completes.
Kenmore 110 Washer Fills with Water Then Stops
The 110 series has the longest production run of any Kenmore model. Decades of manufacturing means significant variation between model years.
Identify your specific production year for targeted troubleshooting.
Early vs. Late 110 Models
Early 110 models from the 1980s-1990s use purely mechanical controls. These follow straightforward troubleshooting paths.
Late 110 models from the 2000s-2010s incorporate electronic controls. These require different diagnostic approaches.
Check your model’s full number. The digits after “110” indicate the specific variation and production year.
Most Common 110 Series Failures
Across all production years, the lid switch fails most frequently. This component sees heavy use and wears out.
Test the lid switch first regardless of model year. This quick check solves the majority of cases.
The motor coupling is second most common. This applies primarily to direct-drive 110 models.
Timers and control boards rank third. These are more expensive repairs requiring careful diagnosis.
110 Series Reset Procedures
Reset procedures vary dramatically across the long production run. Mechanical timer models and electronic models use different methods.
For mechanical models, simply unplug for 60 seconds. This clears any temporary issues.
For electronic models, use the button combination specific to your model year. Check the owner’s manual for exact procedures.
Common reset combinations include holding Start + Signal or pressing cycle selector sequences.
Shift Actuator in Later 110 Models
Some later 110 models incorporated shift actuators. These weren’t present in early models.
If your model has an actuator, test it using the methods described in the series 500 section. The components function identically.
Listen for actuator operation after filling completes. Replace units that remain silent.
Systematic Diagnostic Approach
Follow this testing sequence regardless of model series. Start with the most common failures and progress to less likely causes.
This systematic approach prevents unnecessary part replacement.
Step 1: Lid Switch Test
This is always the first test. Close the lid and listen for the click.
Test continuity with a multimeter. Replace switches failing the test.
This quick check solves 40-50% of fill-then-stop problems. Don’t skip this step.
Step 2: Manually Advance Timer
After filling stops, manually turn the timer dial to a wash position. Pull out the knob or press Start.
If washing begins, the timer motor failed. It can’t advance automatically.
If nothing happens, continue testing other components. The timer advancement isn’t the problem.
Step 3: Check for Motor Sound
Listen carefully after filling completes. Do you hear any motor sound at all?
A running motor with no drum movement suggests coupling or belt failure. A silent motor indicates electrical issues.
This distinction dramatically narrows the problem scope.
Step 4: Water Level Switch Test
Remove the air tube from the pressure switch. Blow through it to check for clogs.
Test the switch itself for proper clicking and continuity changes. Replace faulty switches.
Step 5: Control Board or Timer Replacement
If all components test correctly, the control board or timer assembly has failed internally. These coordinate cycle advancement.
This is the most expensive repair. Verify thoroughly before ordering these parts. Remember, sometimes, it makes more sense to replace your Kenmore washer with a more modern and newer choice (View on Amazon) than incur costly repairs on an old model.
Preventive Maintenance
Regular maintenance prevents many causes of fill-then-stop failures. Simple habits extend component life significantly.
These tasks take minimal time and prevent frustration.
| Task | Frequency | Benefit |
|---|---|---|
| Test lid switch | Monthly | Catch wear before failure |
| Clean pressure tube | Every 6 months | Prevent clogs |
| Check timer operation | Quarterly | Notice timing issues early |
| Inspect wire connections | Annually | Prevent loose connections |
| Run cleaning cycle | Monthly | Reduce buildup affecting sensors |
Also Read:
- Why Kenmore Washer Model 10 Won’t Spin & (its Fix)
- Why Kenmore 80 Series Washer Won’t Spin (Fixed)
- How to Troubleshoot a Kenmore HE Top-Load Washer
- Kenmore Series 600 Washer Troubleshooting Guide
Frequently Asked Questions
Why does my Kenmore washer stop after filling?
The most common cause is a failed lid switch. After filling, the washer checks if the lid is closed before starting agitation.
A broken lid switch never sends the “ready” signal. The washer waits indefinitely for confirmation that never comes.
Test your lid switch by listening for a click and checking continuity. Replace switches that fail testing.
Other causes include stuck timers, failed shift actuators, and defective pressure switches. Test these if the lid switch checks out.
How do I know if my lid switch is bad?
Close the lid and listen for a mechanical click. No click suggests switch failure.
Test continuity with a multimeter. With the lid closed, you should read near-zero ohms.
Watch for lid lock indicator lights on models with electronic locks. The light should illuminate when locked.
If the switch doesn’t click or show proper continuity, it has failed. Replace it with a new switch.
Can I bypass the lid switch temporarily?
Technically yes, but this is extremely dangerous. The lid switch prevents high-speed spinning with an open lid.
Bypassing this safety feature risks severe injury. Objects or limbs could enter a spinning washer.
Never operate a washer with a bypassed lid switch. Replace the switch instead for safe operation.
How much does it cost to fix this problem?
DIY repairs cost $10-120 depending on the failed component. Lid switches cost $15-40, motor couplings run $10-25, and timers cost $60-120.
Shift actuators cost $45-80. Control boards are most expensive at $150-250.
Professional repairs run $150-350 including labor. Service calls start at $75-100 before parts and work.
Most causes are DIY-fixable. You save significantly doing repairs yourself.
Why does my timer not advance?
The timer motor has failed. This small motor inside the timer assembly advances contacts through cycle phases.
Without a working motor, the timer stays stuck at whatever position it reached. It can’t progress automatically.
Listen for timer ticking during operation. No ticking sound confirms motor failure.
Replace the entire timer assembly. Timer motors aren’t sold separately from the complete unit.
What if the washer still doesn’t work after replacing the lid switch?
Test the next most common component, which is typically the timer or shift actuator depending on your model.
Check all wire connections. Loose connections prevent proper component communication.
Try a complete system reset. Unplug for 60 seconds, then test again.
If multiple components test correctly, the control board has likely failed. This requires professional diagnosis or board replacement.
Can a clogged pressure tube cause this?
Yes, a blocked pressure switch air tube prevents accurate water level sensing. The switch thinks water is still filling.
The control board never receives the signal that filling is complete. It waits indefinitely.
Remove the air tube and blow through it. You should feel minimal resistance.
Flush clogged tubes with warm water. Soap residue and minerals commonly block these tubes.
How long should a lid switch last?
Lid switches typically last 10-15 years with normal use. Heavy use or forceful lid closing shortens lifespan.
These are wear items that eventually fail. The contacts inside wear down from repeated cycles.
Some washers go through multiple lid switches during their lifetime. This is normal, not premature failure.
Replace switches when they fail testing. Don’t wait for complete failure.
When Professional Help Makes Sense
Some situations warrant calling a technician. Know when expert diagnosis saves time and prevents mistakes.
If you’ve tested all accessible components without finding the problem, professional equipment helps. Technicians have specialized testers.
Control board diagnosis benefits from professional experience. These expensive parts require verification before replacement.
If you’re uncomfortable with electrical testing, hire help. Your safety matters more than saving money.
Warranty coverage makes this decision easy. Always use warranty service when coverage applies.
Resolving the Fill-Then-Stop Problem
A Kenmore washer fills with water then stops for specific, diagnosable reasons. The systematic approach in this guide helps identify the cause.
Start with the lid switch regardless of model. This simple test solves nearly half of all cases.
Check the timer or shift actuator next. These components must function for cycle progression.
Test the pressure switch and its air tube. Clogs and switch failures prevent proper operation.
With basic tools and systematic testing, you can diagnose and fix most fill-then-stop problems. You’ll save hundreds in service calls while gaining valuable repair skills that apply to future problems.

Hi, I’m Barlgan! I created Repair Me Yourself to empower homeowners to tackle appliance repairs with confidence. From decoding error codes to fixing cooling issues, I break down complex repairs into simple, actionable steps that save you time and money.