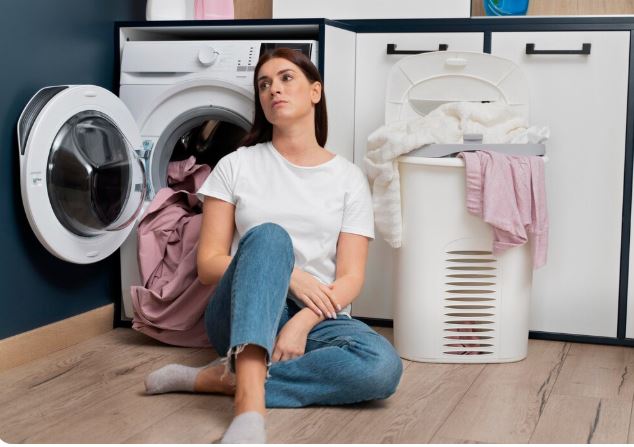
Your Kenmore series 600 washer is built to handle heavy loads and daily use. When it stops working properly, your entire household routine gets disrupted. The good news is most problems have simple solutions. You can fix many issues yourself without waiting days for a technician.
Kenmore series 600 washer troubleshooting requires understanding common failure points including the motor control unit, lid lock mechanism, drain system, and sensor networks. Most issues trace back to worn mechanical parts, failed sensors, or control board glitches that can be diagnosed through systematic testing and resolved with basic repair skills and affordable replacement parts.
Key Takeaways:
- Understanding your Kenmore series 600 helps you troubleshoot it effectively. This model has specific features and common weak points.
- The series 600 uses electronic controls with multiple sensors. These sensors communicate with the main control board constantly.
- When sensors fail or lose connection, the washer stops working. The control board won’t operate without proper feedback.
- Safety comes first in any repair situation. Always unplug the washer before touching any internal components.
- Keep your phone handy to photograph wire connections. This helps during reassembly when you can’t remember where things go.
- Write down any error codes or unusual symptoms. These details guide your repair process.
Quick Kenmore Series 600 Washer Troubleshooting Reference
| Issue | Main Cause | First Check | Common Solution |
|---|---|---|---|
| Won’t turn on | Power supply, control board | Test outlet, check circuit breaker | Restore power or replace board |
| Won’t start cycle | Lid lock, door switch | Listen for lock click | Replace lid lock assembly |
| Stuck on sensing | Shift actuator, load sensor | Listen for actuator noise | Replace shift actuator |
| Not spinning | Motor coupling, drive belt | Check for burning smell | Replace worn components |
| Error codes showing | Various component failures | Record code pattern | Address specific component |
| Won’t drain | Clogged pump, blocked hose | Check drain path | Clear blockage or replace pump |
| Strange noises | Worn bearings, loose parts | Identify when noise occurs | Tighten or replace parts |
Common Kenmore Series Washer Problems and Their Troubleshooting
Kenmore Series 600 Washer Won’t Turn On
A completely dead washer with no lights or sounds indicates a power problem. This differs from a washer that has power but won’t start.
Most “won’t turn on” issues have nothing to do with the washer itself. External power problems are responsible.
Here are the key steps when a Kenmore 600 washer won’t turn on:
Verifying Electrical Power
Check the simplest things first. These account for half of all service calls.
Plug a lamp into the same outlet. If the lamp works, the outlet has power.
If nothing works in that outlet, check your home’s circuit breaker panel. Look for a tripped breaker.
Washer circuits can trip from power surges or overloads. Reset the breaker by switching it fully off, then back on.
Testing Outlet Voltage
Use a multimeter (View on Amazon) to verify proper voltage. Set the meter to AC voltage mode.
Insert the probes into the outlet slots. You should read 115-125 volts.
Readings below 110 volts indicate voltage problems. This requires an electrician, not appliance repair.
Test both the hot and neutral slots against ground. Both readings should be similar.
Examining the Power Cord
Inspect the entire cord from plug to washer. Look for cuts, burns, or damaged insulation.
Wiggle the cord where it enters the washer. Watch the control panel for any flicker of lights.
If lights flicker during wiggling, the internal connection has loosened. This requires cord replacement or internal connector repair.
Never use electrical tape to patch damaged cords. Replace the entire cord for safety.
Control Board Power Issues
The main control board distributes power to all washer systems. A failed board leaves the washer completely dead.
Before condemning the board, verify power is reaching it. Check the main wire harness connections.
Remove the top panel to access the control board. Look for the main power connector.
Press firmly on all connectors to ensure proper seating. Loose connections cause intermittent power problems.
Signs of Control Board Failure
Look for visible damage on the circuit board. Burn marks indicate electrical damage.
Bulging or leaking capacitors suggest board failure. These cylindrical components should be flat on top.
Corrosion from water damage shorts out circuits. Even small amounts of moisture cause problems.
A burning smell when you open the washer points to electrical component failure. This typically means board replacement.
Thermal Fuse Problems
The thermal fuse protects the washer from electrical fires. If the motor or control board overheats, this fuse blows.
A blown thermal fuse cuts all power to the washer. It’s a one-time safety device that must be replaced.
The fuse is usually located on the control board or near the motor. Check your model’s specific location.
Test the fuse with a multimeter set to continuity. A good fuse shows near-zero resistance.
Infinite resistance means the fuse is blown. Replace it and investigate what caused overheating.

Kenmore Series 600 Washer Won’t Start Cycle
When your Kenmore series 600 washer troubleshooting reveals the control panel lights up but nothing happens when you press Start, focus on safety interlocks and switches.
The washer has multiple safety systems. All must confirm before the cycle begins.
Lid Lock Assembly Testing
The lid lock is the most common reason washers won’t start. This safety feature prevents operation with an open lid.
When you press Start, listen carefully. You should hear a distinct click within 2-3 seconds.
This click confirms the lock engaged mechanically. The indicator light should also illuminate.
No click means the lock mechanism failed. The solenoid that moves the locking pin has broken.
How to Test the Lid Lock
Close the lid firmly. Press the Start button and watch the lid lock light.
If the light comes on but you hear no click, the sensor works but the mechanism failed. This still requires lock replacement.
If nothing happens at all, check the lock’s wire connection. Remove the top panel and locate the lock assembly.
Disconnect and reconnect the wire harness. Sometimes corrosion prevents proper connection.
Test the lock with a multimeter. With the lid closed and locked, you should have continuity across the lock terminals.
Replacing a Faulty Lid Lock
Unplug the washer completely. Open the lid and find the lock on the washer frame.
Remove two screws holding the lock assembly. Disconnect the wire harness by pressing the release tab.
Install the new lock in the same position. Connect the wiring and test before reassembling panels.
Lid locks cost $35-65 depending on the specific series 600 model. Installation takes 15-20 minutes.
Start Button and Control Panel Failures
The Start button itself can wear out from thousands of presses. Internal contacts fail to make proper connection.
Try pressing Start multiple times. If the washer occasionally responds after several attempts, the start button is failing.
Unfortunately, you typically can’t replace just the button. The entire control panel or user interface board needs replacement.
Control panels cost $80-150. Consider this against the age and condition of your washer.
Water Inlet Valve Pre-Check
Some Kenmore series 600 models check water supply before starting. If the inlet valve doesn’t confirm water availability, the cycle won’t begin.
Make sure both hot and cold water supply valves are fully open. Turn them counterclockwise until they stop.
Listen when you press Start. You should hear water beginning to enter within 10 seconds.
Complete silence means no power is reaching the inlet valve. This suggests a control board or wiring problem.
How to Reset Kenmore Series 600 Washing Machine
Resetting clears temporary errors and recalibrates the control system. This simple procedure fixes many Kenmore series 600 washer troubleshooting problems.
Always attempt a reset before ordering parts. It costs nothing and takes just minutes.
Standard Reset Procedure
The basic reset works for most glitches and minor errors. Follow these steps exactly.
Press and hold the Start/Pause button for 5 seconds. Some models require holding for 7 seconds.
Unplug the washer from the wall outlet. Don’t use the circuit breaker for this step.
Wait 60 full seconds before plugging back in. This allows all capacitors to discharge completely.
Residual electrical charge can prevent proper resets. The full minute is important.
Plug the washer back in. Wait 30 seconds for the control board to initialize.
The control panel lights will flash briefly as the system restarts. This is normal.
Advanced Control Panel Reset
For stubborn problems, perform a master reset through button combinations. This accesses deeper system functions.
Turn the washer completely off. Wait for all indicator lights to go dark.
Turn the cycle selector to Normal wash. Within 6 seconds, you need to execute a specific sequence.
Press these buttons in order: Heavy Duty, Normal, Heavy Duty, Normal. Some model years use different sequences.
All lights should illuminate when successful. The washer enters a diagnostic reset mode.
Press Start to complete the reset. The washer may drain any standing water.
Factory Default Reset
A factory reset erases all custom settings and returns the washer to original operation. This solves persistent software glitches.
Hold down three buttons simultaneously. The exact buttons vary by model year.
Common combinations include: Signal + Soil Level + Temp, or Prewash + Extra Rinse + Delay Start.
Hold the buttons for 3-5 seconds. The display will flash or all lights will turn on.
Release the buttons. The washer processes the factory reset and clears all memory.
This reset deletes any custom cycles or preferences you’ve programmed. You’ll need to set those up again.
What to Do When Resets Fail
If three reset attempts don’t resolve the issue, you have a hardware problem. Software resets can’t fix broken components.
Document the symptoms before and after resetting. Note any changes in behavior.
Move on to testing specific components. The reset attempts helped rule out simple software issues.
Check for error codes that reappear immediately. These codes point to the failed component.

Kenmore 600 Series Washer Repair Manual
Having access to your model’s repair manual makes Kenmore series 600 washer troubleshooting much easier. These manuals contain specific diagrams and part numbers.
Official manuals are available from several sources. You don’t need to pay high prices for this information.
Finding Your Model Number
The model number is essential for getting the correct manual. It’s typically located in one of three places.
Check inside the washer lid. Many models have a sticker with the model and serial numbers.
Look on the back panel near the top. A metal plate or sticker shows model information.
Some models have the number on the control panel frame. You might need to open the panel to see it.
The model number format is usually 110.XXXXX followed by more digits. Write down the entire number.
Free Manual Sources
Sears Parts Direct offers free manual downloads. Search by your model number on their website.
The manufacturer’s website sometimes provides manual PDFs. Look in the support or downloads section.
Appliance repair forums often share manuals. Members upload copies for others to use.
Local libraries sometimes have appliance manual collections. Check with your library’s reference department.
Understanding Manual Sections
Repair manuals contain several useful sections. Familiarize yourself with the layout.
The wiring diagram shows all electrical connections. This helps trace circuits when troubleshooting electrical problems.
The exploded parts view displays how components fit together. Use this during disassembly and reassembly.
The troubleshooting flowchart guides diagnosis. Follow the decision tree to identify problems.
Part numbers for every component appear in the parts list. Order exact replacements using these numbers.
Using Service Bulletins
Manufacturers issue service bulletins for known problems. These bulletins describe common failures and fixes.
Search online for “Kenmore series 600 service bulletins” plus your specific model number. You might find official fix procedures.
Appliance repair forums discuss bulletin contents. Technicians share information about widespread issues.
Some problems have free fixes or recalls. Service bulletins tell you if your model qualifies.
Kenmore Series 600 Washer Error Codes
Your washer communicates specific problems through error codes. Understanding these codes accelerates Kenmore series 600 washer troubleshooting significantly.
Different code formats exist depending on model year. Some show letters and numbers, others use flashing lights.
Common Error Code Meanings
The series 600 uses several error code systems. Here are the most frequent codes.
F or E Code Errors
F1 or E1 indicates a control board communication failure. The main board and user interface can’t communicate properly.
Check the ribbon cable connecting these boards. Reseat both ends of the cable firmly.
F2 or E2 means a stuck or shorted key on the control panel. A button is registering as constantly pressed.
Try pressing each button firmly several times. Sometimes stuck buttons release with manipulation.
F5 or E5 signals a door/lid lock error. The lock isn’t engaging or confirming properly.
Test the lid lock as described earlier. This is one of the most common error codes.
F7 or E7 indicates a motor speed sensor failure. The control board can’t detect motor RPM.
This usually means motor replacement. The sensor is built into the motor assembly.
F8 or E8 means a water overflow condition. The pressure switch detected too much water.
Check the pressure switch and its air tube. A stuck inlet valve can also cause this.
F9 or E9 signals a drainage timeout. Water isn’t draining within the expected timeframe.
Check the drain hose and pump. Clogs are the most common cause.
Light Pattern Error Codes
Older series 600 models without digital displays use flashing lights. Count the flashes to identify the error.
The wash light flashes in groups. A pause separates each group of flashes.
For example, three flashes, pause, two flashes indicates error 3-2. Write down the pattern.
Consult your manual for specific meanings. Different model years assign different meanings to patterns.
Clearing Error Codes
Some codes clear automatically when you fix the problem. Others require manual clearing.
Try a standard reset first. Unplug for 60 seconds, then plug back in.
If the code returns immediately, the problem still exists. The washer is telling you something is genuinely wrong.
Enter diagnostic mode to see additional codes. Sometimes multiple problems exist and only the first displays.
Don’t keep clearing codes without fixing the underlying problem. The washer is protecting itself from damage.
When Error Codes Don’t Help
Sometimes the washer malfunctions without displaying any error code. This makes diagnosis harder.
The control board may not recognize the problem. It knows something is wrong but can’t identify what.
In these cases, use systematic testing. Work through common failure points one by one.
Enter diagnostic mode to test components individually. This often reveals problems the automatic system missed.
Kenmore Series 600 Washer Not Spinning
A washer that fills and agitates but won’t spin leaves clothes soaking wet. This is one of the most common Kenmore series 600 washer troubleshooting complaints.
Several components can prevent spinning. The good news is that most are relatively easy to fix, and here’s how to go about it:
Motor Coupling Inspection
The motor coupling connects the motor shaft to the transmission. This plastic and rubber part absorbs startup shock.
Normal wear breaks down the coupling over time. It eventually cracks or breaks completely.
When the coupling fails, the motor runs but the drum doesn’t rotate. You’ll hear the motor during the spin cycle.
Check underneath the washer for broken plastic pieces. These are fragments of the failed coupling.
Replacing the Motor Coupling
Remove the cabinet to access the motor and transmission. The coupling sits between these components.
Disconnect the motor by removing mounting bolts. Slide the motor back to expose the coupling.
Remove the broken coupling pieces. Clean the motor shaft and transmission input shaft.
Install the new coupling. Ensure it seats properly on both shafts.
Reassemble the motor mount. Test the washer with a small load.
Motor couplings cost $12-25. The repair takes 30-45 minutes.
Drive Belt Issues
Belt-drive series 600 models can develop belt problems. A broken or loose belt prevents spinning.
The motor runs normally but the drum doesn’t move. A slipping belt causes weak spinning that doesn’t extract water.
Access the belt by removing the back panel. Inspect it for cracks, fraying, or glazing.
A glazed belt appears shiny and smooth. This belt slips on the pulleys during high-speed spinning.
Checking Belt Condition
Press on the belt between pulleys. It should deflect about 1/2 inch with firm pressure.
Too loose means the belt is stretched. Too tight puts excessive strain on motor bearings.
Look for cracks across the belt width. These indicate the rubber is deteriorating.
Frayed edges suggest misaligned pulleys. Check pulley alignment before installing a new belt.
Replace any belt showing wear signs. Waiting for complete failure leaves you with a pile of wet clothes.
Lid Lock Preventing Spin
The washer won’t spin unless the lid lock confirms secure closure. This is a critical safety feature.
The machine might fill and wash normally. When spin time arrives, nothing happens.
Listen for the lid lock clicking before the spin cycle. No click means the lock isn’t engaging.
The indicator light should illuminate when locked. Light on with no click means sensor failure.
Test and replace the lid lock using the procedure described earlier. This fixes many spin problems.
Transmission or Clutch Problems
The transmission or clutch assembly can fail internally. These are more complex repairs.
You’ll hear the motor running during spin attempts. The drum either doesn’t move or barely turns.
A burning smell during spin attempts indicates clutch slippage. The clutch pads are worn out.
Grinding noises point to transmission bearing failure. This requires significant repair expertise.
These repairs often cost $200-400 in parts alone. Consider the washer’s age before proceeding.
Kenmore Series 600 Washer Stuck on Sensing
When your Kenmore series 600 washer troubleshooting identifies a sensing problem, you’re dealing with load detection or position sensor failures.
The sensing cycle should take 2-4 minutes. If it exceeds 8 minutes, something has failed.
Understanding Sensing Functions
During sensing, the washer performs multiple tasks. It determines load size and fabric type.
Water fills to a preset level. The pressure switch monitors this fill.
The shift actuator moves the transmission into sensing position. Small agitation movements test the load.
Sensors feed data to the control board. The board analyzes everything and sets wash parameters.
If any sensor fails, the washer stays stuck. It won’t proceed without complete information.
Shift Actuator Failure
The shift actuator is the most common cause of sensing failures. This component fails frequently in series 600 washers.
Listen carefully during the sensing phase. You should hear clicking or whirring from the actuator.
Complete silence means the actuator isn’t getting power or has failed. Clicking without movement indicates stripped gears.
Testing the Shift Actuator
Access the actuator by removing the cabinet back panel. It mounts on top of the transmission.
Check the wire harness connection first. Push it in firmly to ensure proper seating.
Remove the actuator mounting bolts. Inspect the plastic drive gears for damage.
White plastic shavings indicate gear stripping. The gears can no longer move the transmission.
Replace the actuator if you see any damage. This part costs $45-75.
Water Level Pressure Switch
The pressure switch tells the control board when proper water level is reached. It uses an air tube connected to the tub.
A clogged air tube prevents accurate sensing. The washer doesn’t know if it has enough water.
Remove the air tube and blow through it. You should feel minimal resistance.
If blocked, flush the tube with warm water. Soap residue and minerals commonly build up inside.
Test the pressure switch by blowing into it while checking for an audible click. No click means switch failure.
Replace the pressure switch if it doesn’t respond. These cost $25-45.
Load Balance Sensor Problems
The series 600 uses sensors to detect severe load imbalances. These prevent spin cycle damage.
If sensors malfunction, they report false imbalances. The washer stays in sensing trying to resolve the problem.
Try redistributing the load manually. Remove items and reload them evenly around the drum.
Don’t wash single heavy items alone. Add towels or similar items for balance.
If redistribution doesn’t help, the balance sensors or suspension system has problems. This requires professional diagnosis.
Kenmore Series 600 Washer Water Problems
Water issues prevent proper washer operation. These problems are common in Kenmore series 600 washer troubleshooting.
The machine needs correct water flow for all cycles. Insufficient or excessive water causes errors.
Kenmore Series 600 Washer Won’t Fill
If your Kenmore washer starts filling with water and then stops, check that the water supply valves are fully open. They should turn easily counterclockwise.
Remove the inlet hoses and inspect the inlet valve screens. These fine mesh screens catch sediment.
Clogged screens restrict water flow. Clean them with an old toothbrush under running water.
Test the inlet valve electrically. Each solenoid should read 500-1500 ohms on a multimeter.
Replace the inlet valve if solenoids test bad. The valve costs $35-60.
Kenmore Series 600 Washer Overfills
An overfilling washer indicates a stuck inlet valve or failed pressure switch. Water keeps flowing even after the proper level.
The inlet valve should close when the control board stops sending power. Mineral deposits can prevent complete closure.
Water trickles in even when the washer is off. This points directly to a stuck inlet valve.
Replace the inlet valve to fix overfilling problems. Don’t try to repair the valve itself.
A faulty pressure switch might also send false readings. Test it as described earlier.
Poor Water Pressure
Low water pressure causes slow filling and timeout errors. The washer thinks something is wrong.
Turn on a nearby faucet while the washer fills. Watch if the faucet flow significantly decreases.
If the faucet slows to a trickle, you have a supply pressure problem. The washer and faucet compete for limited water.
Check your home’s main water pressure. It should be at least 20 PSI for proper washer operation.
Contact a plumber if you have consistent low pressure. This isn’t a washer problem.
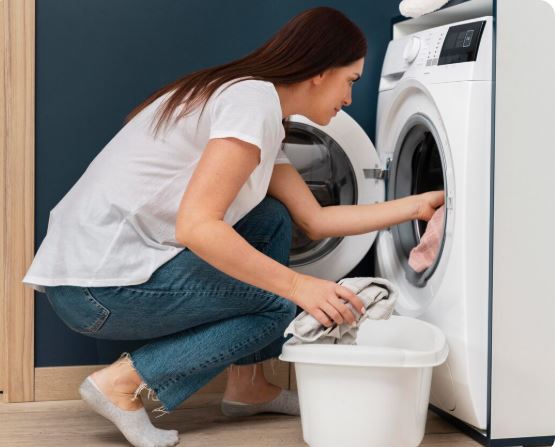
Kenmore Series 600 Washer Drainage Issues
Proper drainage is essential for cycle completion. Standing water ruins clothes and creates odors.
Drainage problems are among the easiest repairs in Kenmore series 600 washer troubleshooting. Here’s how to go about it when your Kenmore washer is not draining:
Checking the Drain Hose
Inspect the entire drain hose length. Look for kinks, crimps, or crushing.
The hose should maintain a gentle arc without sharp bends. Severe bends restrict water flow.
Verify proper standpipe height. The drain hose should enter at 39-96 inches above floor level.
Too low creates siphoning problems. Too high prevents effective drainage.
The hose should insert 4-6 inches into the standpipe. Don’t push it all the way to the bottom.
Cleaning the Drain Pump
Access the drain pump filter through the small panel at the bottom front. Some models hide it behind the kick panel.
Place towels underneath before opening. Residual water will spill out.
Turn the filter cap counterclockwise. Pull out the filter and remove trapped debris.
Hair, coins, and small items commonly clog this filter. Clean it thoroughly under running water.
Reinstall the filter and turn clockwise until tight. Test the washer with a drain cycle.
Testing the Drain Pump
If the hose is clear and filter clean, test the pump itself. Listen during the drain cycle.
You should hear the pump motor running. A humming or buzzing sound is normal.
Complete silence means no power is reaching the pump. This suggests wiring or control board problems.
Grinding noises indicate a failed pump bearing. The pump needs replacement.
Drain pump (View on Amazon) installation takes 30-45 minutes.
Kenmore Series 600 Washer Noise Troubleshooting
Strange sounds during operation indicate mechanical problems. The type and timing of noise help identify the cause.
Different noises point to different components in Kenmore series 600 washer troubleshooting.
Grinding or Scraping Sounds
Metal-on-metal grinding suggests bearing failure. This gets progressively louder over time.
Manually rotate the drum with the washer off. It should turn smoothly with slight resistance.
Grinding or rough rotation confirms bearing problems. This is a complex and expensive repair.
Scraping sounds might indicate foreign objects between the inner basket and outer tub. Coins and bra wires commonly get stuck here.
Squealing or Screeching
High-pitched squealing points to belt or pulley problems. The belt is slipping or a pulley bearing has dried out.
Check the drive belt for glazing. A shiny belt surface causes squealing.
Spin the motor pulley by hand. It should rotate freely without noise.
Dry or damaged bearings in the pulley cause screeching. Replace the pulley assembly.
Thumping or Banging
Loud thumping indicates load imbalance or suspension problems. The tub is hitting the cabinet.
Pause the cycle and redistribute the load. Heavy items should mix with lighter ones.
Check that the washer sits level. Use a bubble level and adjust the feet.
Inspect suspension rods and springs for damage. Worn suspension allows excessive tub movement.
Kenmore Series 600 Preventive Maintenance
Regular maintenance prevents most Kenmore series 600 washer troubleshooting situations. Simple tasks extend your washer’s lifespan significantly.
These maintenance items take minimal time and effort. They’re far easier than emergency repairs.
| Task | Schedule | Duration | Prevents |
|---|---|---|---|
| Clean drain filter | Monthly | 5 minutes | Drainage failures |
| Inspect inlet screens | Every 6 months | 10 minutes | Fill problems |
| Check hose connections | Every 6 months | 10 minutes | Leaks and floods |
| Test lid lock | Quarterly | 2 minutes | Start failures |
| Run tub clean cycle | Monthly | 1 hour | Odors and buildup |
| Verify level position | After moving | 5 minutes | Vibration damage |
| Inspect belts (if equipped) | Annually | 15 minutes | Spin failures |
Monthly Maintenance
Run a cleaning cycle using washer cleaner or white vinegar. This removes detergent residue and mildew.
Leave the lid open between loads. Air circulation prevents mold growth.
Wipe down the lid seal and gasket. Remove any visible hair, lint, or debris.
Clean the drain pump filter. This single task prevents most drainage problems.
Quarterly Tasks
Test the lid lock operation. Ensure it clicks and locks every time.
Inspect visible hoses for cracks or bulges. Early detection prevents floods.
Check that the washer remains level. Vibration can shift the feet over time.
Listen for new or unusual sounds. Catching problems early prevents major failures.
Proper Detergent Usage
Always use HE detergent (View on Amazon) in your series 600. Regular detergent creates excessive suds.
Too many suds interfere with sensors. The washer can’t operate correctly through foam.
Follow dosing instructions on the detergent package. More soap doesn’t mean cleaner clothes.
If you see suds remaining after the final rinse, cut your detergent amount in half. You’re using too much.
Frequently Asked Questions
How long should a Kenmore series 600 washer last?
Kenmore series 600 washers typically last 10-15 years with proper maintenance. Some well-maintained units operate for 18-20 years.
Lifespan depends on usage frequency, water quality, maintenance practices, and load sizes. Overloading significantly shortens washer life.
Hard water areas experience more component failures. Mineral deposits damage valves, pumps, and heating elements faster.
Regular maintenance and prompt repairs extend operational life. Addressing problems early prevents cascading failures.
Is the Kenmore series 600 a good washer?
The series 600 is considered a reliable mid-range washer. It offers good capacity and features at a reasonable price.
Common strengths include durability, parts availability, and relatively easy repairs. Most homeowners can handle basic fixes.
Known weak points include the shift actuator and lid lock. These fail more frequently than other components.
Overall, it’s a solid performer when maintained properly. Many owners report 12-15 years of trouble-free operation.
Can I fix my Kenmore series 600 washer myself?
Most repairs are DIY-friendly for people with basic mechanical skills. You need common tools like screwdrivers, pliers, and a multimeter.
Simple repairs include lid lock, inlet valve, drain pump, and motor coupling replacement. These take 20-60 minutes.
More complex repairs like bearings or transmission work require advanced skills. Consider professional help for these.
Always unplug the washer before starting any repair. Electrical safety is critical and non-negotiable.
Where can I buy Kenmore series 600 replacement parts?
Parts are widely available from multiple sources. Sears Parts Direct is the official parts supplier.
Amazon carries most common Kenmore washer parts. Prices are often competitive with direct sources.
Local appliance parts stores stock frequently replaced items. They can also order less common parts.
Online appliance part retailers offer comprehensive inventories. Compare prices across multiple sites before ordering.
Why does my Kenmore series 600 vibrate excessively?
Excessive vibration stems from load imbalance, unlevel positioning, or worn suspension components. The drum moves too much during spinning.
Redistribute the load evenly around the drum. Don’t wash single heavy items alone.
Check that the washer sits perfectly level. Adjust the leveling feet using a bubble level.
Inspect suspension rods and springs for wear. Damaged suspension allows excessive tub movement.
Verify that shipping bolts were removed. These secure the tub during transport and must come out before use.
What causes the Kenmore series 600 to leak water?
Leaks originate from hoses, pumps, inlet valves, or internal seals. Identifying the source requires careful inspection.
Tighten all hose connections at the back of the washer. Check that rubber washers are present and intact.
Inspect the drain pump for cracks. Plastic pump housings crack from age or impact.
Look around the door seal for water. A torn or loose seal allows water escape during agitation.
Check underneath for puddles after cycles. This reveals whether water leaks during fill, wash, or drain.
How much does Kenmore series 600 repair cost?
DIY repair costs range from $15-75 for common parts. Lid locks run $35-65, drain pumps cost $35-70, and motor couplings are $12-25.
Professional repairs cost $150-350 including labor. Service calls start at $75-125 before any parts or work.
Control board replacement is most expensive at $150-250 for parts plus $100-150 labor. Always verify board failure first.
Bearing replacement costs $300-500 total. On older washers, this approaches new washer prices.
Should I repair or replace my Kenmore series 600?
Repair makes financial sense if the washer is less than 8 years old. These machines typically last 10-15 years.
For washers over 10 years old, weigh total repair costs. If repairs exceed $300-400, replacement might be smarter.
Simple repairs like lid locks or pumps are worth doing at any age. These extend life significantly for minimal cost.
Expensive repairs like bearings or control boards on old machines may not be worthwhile. Compare repair costs to new washer prices.
When Professional Help Is Needed
Some Kenmore series 600 washer troubleshooting situations exceed DIY capabilities. Knowing when to call for help saves time and prevents damage.
Complex electrical diagnosis benefits from professional test equipment. Technicians pinpoint problems faster and more accurately.
Bearing replacement requires significant disassembly and specialty tools. This repair is beyond most homeowners’ capabilities.
If you’ve replaced multiple parts without solving the problem, get a professional opinion. You might be missing something in diagnosis.
Warranty coverage affects this decision. Always use warranty service instead of attempting DIY repairs when coverage applies.
Get quotes from at least three service providers. Prices vary significantly between companies.
Ask about their specific experience with Kenmore series 600 washers. Familiarity speeds diagnosis and repair.
Keeping Your Washer Running
Effective Kenmore series 600 washer troubleshooting combines knowledge, patience, and systematic approach. Most problems have straightforward solutions.
Start with simple checks like power supply, lid lock operation, and basic resets. These solve many issues immediately.
Use error codes and diagnostic mode to identify specific failures. Let the washer tell you what’s wrong.
Replace only components that fail testing. Random part replacement wastes money and rarely solves problems.
Regular maintenance prevents the majority of failures. A few minutes monthly saves hours of troubleshooting later.
With the information in this guide, you can diagnose and repair most series 600 problems. You’ll save hundreds in service calls while keeping your washer operating reliably for years.

Hi, I’m Barlgan! I created Repair Me Yourself to empower homeowners to tackle appliance repairs with confidence. From decoding error codes to fixing cooling issues, I break down complex repairs into simple, actionable steps that save you time and money.