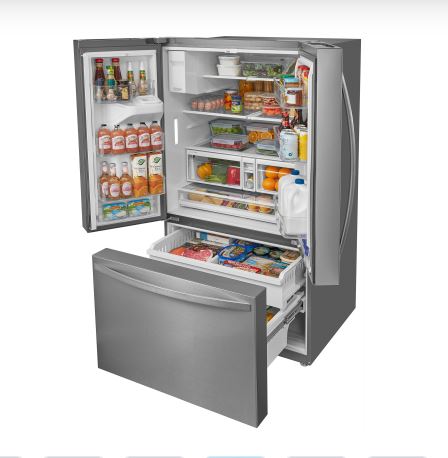
Your Kenmore 795 refrigerator was working perfectly until the ice maker stopped. Now you’re dealing with no ice production, leaking water, or strange noises.
You’ve reset it multiple times, checked the water line, and even Googled solutions at 2 AM. But the problem persists, and you’re wondering if you need a costly repair or replacement.
The Kenmore 795 series is known for quality, but ice maker issues are surprisingly common. Whether you own the Elite model or a standard 795, these problems share similar causes and solutions.
Kenmore refrigerator 795 ice maker problems typically stem from frozen water lines, faulty water inlet valves, defective ice maker assemblies, improper temperature settings, or clogged water filters. The 795 series, including Elite models, experiences specific issues like leaking ice makers due to cracked water supply tubes, ice maker module failures, and frozen fill tubes. Most problems can be diagnosed and fixed at home with basic tools, though some require professional intervention or complete ice maker replacement.
This guide walks you through every common Kenmore 795 ice maker problem, from simple fixes to complex repairs. You’ll learn specific troubleshooting steps for your model, understand when to replace components versus the entire ice maker assembly, and discover preventive measures.
Whether you’re dealing with leaks, no ice production, or inconsistent performance, you’ll know exactly what to do.
Quick Kenmore Refrigerator 795 Ice Maker Problem Diagnostic Guide
| Symptom | Most Likely Cause | Quick Fix | Cost Estimate |
|---|---|---|---|
| No ice production at all | Frozen water line or bad inlet valve | Thaw line, replace valve | $0-60 |
| Ice maker leaking water | Cracked fill tube or loose connections | Replace fill tube, tighten fittings | $15-40 |
| Small or hollow ice cubes | Low water pressure or clogged filter | Replace filter, check pressure | $25-50 |
| Ice maker making noise but no ice | Failed ice maker module | Replace ice maker assembly | $80-150 |
| Slow ice production | Temperature too high or dirty condenser | Adjust temp, clean coils | $0 |
| Ice dispenser not working | Broken dispenser motor or switch | Replace dispenser components | $50-200 |
| Ice clumping or sticking together | Freezer temperature fluctuations | Check door seal, adjust temp | $0-60 |
| Water dispenser works, ice maker doesn’t | Ice maker module or switch failure | Replace ice maker assembly | $80-150 |
Why Kenmore Refrigerator 795 Ice Makers Fail: Understanding Common Problems
The Kenmore 795 series, manufactured primarily by LG for Sears, has specific design characteristics that make certain ice maker problems more common. Understanding these patterns helps you diagnose issues faster and make better repair decisions.
Kenmore 795 refrigerators use modular ice maker assemblies that combine the ice mold, ejector mechanism, and control module in one unit. When any component within this assembly fails, the entire unit often requires replacement rather than individual part repair.
The 795 series ice makers are particularly sensitive to water pressure issues. The design requires consistent 20-40 PSI water pressure for proper filling.
Lower pressure results in small cubes or incomplete fills. Higher pressure can cause overflow and leaking.
Temperature control problems affect 795 ice makers more than other brands. The freezer must maintain 0-5°F consistently.
Temperatures above 10°F slow ice production dramatically. Temperatures below -10°F can freeze the water supply line solid.
Here’s what the data shows: approximately 40% of Kenmore 795 ice maker complaints involve water supply issues (frozen lines, inlet valve failures). About 30% relate to the ice maker module itself failing.
The remaining 30% split between temperature problems, dispenser mechanism failures, and user error.
Kenmore Elite 795 models have additional complexity with features like dual ice makers and crushed ice options.
These systems have more failure points—dispenser motors, solenoids, and control boards can all malfunction independently.
Kenmore Refrigerator 795 Ice Maker Problem Troubleshooting: Step-by-Step Diagnosis
Let’s systematically diagnose your Kenmore 795 ice maker problem from the simplest issues to the most complex. Follow these steps in order for efficient troubleshooting.
Step 1: Verify Ice Maker Power and Control Settings
The most basic issues are often overlooked. Start by confirming your ice maker is actually turned on and set correctly.
How to check:
Locate the ice maker on/off switch. In 795 models, this is usually a wire bail arm above the ice bin or a sliding switch on the ice maker body.
Make sure the arm is down (on position) or the switch is in the ON position. Check your refrigerator’s control panel for ice maker settings.
Some 795 models have digital controls with ice maker on/off buttons. Verify the ice maker isn’t in “cleaning mode” or disabled through the control panel.
The fix:
If the ice maker was off, turn it on and wait 24 hours for ice production to begin. The ice maker needs time to fill, freeze, and harvest its first batch.
If controls seem responsive but no ice appears after 24 hours, move on to the next steps.
Step 2: Inspect Water Supply and Connections
Water supply issues cause the majority of Kenmore 795 ice maker problems. A complete inspection takes 10-15 minutes and requires no tools.
How to check:
Look behind your refrigerator and find the water supply line. It’s usually a 1/4″ copper or plastic tube connected to your home’s plumbing.
Verify the water shut-off valve is fully open (handle parallel to the pipe). Check for kinks, pinches, or damage in the supply line.
Test water pressure by dispensing water from the door. If water flows steadily and fills a cup in 6-8 seconds, pressure is adequate.
Open your freezer and locate the ice maker. Look for ice buildup around the fill tube (the small tube that supplies water to the ice mold).
The fix:
If the shut-off valve was closed, open it fully and wait 24 hours. For kinked supply lines, straighten them carefully without cracking copper tubes.
If the fill tube has ice buildup, you have a frozen water line. Unplug the refrigerator and use a hair dryer on low heat to thaw the tube (takes 15-30 minutes).
Never use high heat—it can crack plastic components. Once thawed, the freezer may be running too cold (see temperature adjustment below).
Step 3: Test the Water Inlet Valve
The water inlet valve controls water flow to your ice maker. When it fails, you get no water delivery even if everything else works correctly.
How to check:
Unplug your refrigerator for safety. Pull it away from the wall and remove the lower rear access panel.
Find the water inlet valve (where the water line connects at the back bottom). Look for visible leaks, mineral buildup, or corrosion.
Use a multimeter (View on Amazon) to test the valve solenoid. Set the multimeter to measure resistance (ohms).
Disconnect the wire harness from the valve and test across the solenoid terminals. You should read 200-500 ohms.
Infinite resistance means the solenoid is open and failed. Zero resistance means it’s shorted.
The fix:
If the inlet valve tests bad, replacement is straightforward. The part costs $40-60 for Kenmore 795 models.
Shut off the water supply at the valve behind the fridge. Disconnect the water line using a wrench (place a towel underneath to catch water).
Unplug the electrical connector, remove the mounting screws, and pull out the old valve. Install the new valve in reverse order, making sure connections are tight.
Open the water supply and check for leaks before pushing the fridge back.
Step 4: Check Freezer Temperature Settings
Improper temperature is a silent ice maker killer. The freezer must maintain the correct temperature range for ice production.
How to check:
Place an appliance thermometer in your freezer away from the ice maker. Wait 4-8 hours for an accurate reading.
The ideal temperature is 0-5°F. Temperatures above 10°F are too warm for proper ice production.
Temperatures below -10°F can freeze water lines.
Check your freezer temperature setting on the control panel.
Kenmore 795 models typically use a digital display or dial. The freezer should be set to 0°F or the manufacturer’s recommended setting.
The fix:
Adjust the temperature to the recommended setting (usually 0°F) and wait 24 hours. Monitor with a thermometer to verify the adjustment works.
If the freezer won’t reach proper temperature, check the condenser coils (see maintenance section). If coils are clean and temperature still won’t stabilize, you may have a sealed system problem requiring professional repair ($300-600).
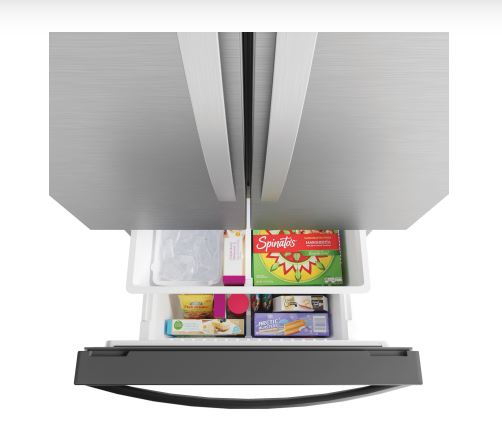
Step 5: Replace the Water Filter
Clogged water filters reduce water pressure and flow, causing small cubes, slow production, or complete failure. Kenmore recommends replacement every 6 months, but hard water areas need more frequent changes.
How to check:
Locate your water filter. In 795 models, it’s usually in the upper right interior corner or the bottom grille.
Note when you last replaced it—if it’s been over 6 months, replacement is due. Remove the filter and look at the color.
Dark brown or gray filters are heavily clogged. Check the O-ring seal for cracks or damage.
The fix:
Purchase a replacement filter for your Kenmore 795 model number. Genuine Kenmore filters cost $30-50, aftermarket versions (View on Amazon) run $15-30.
Remove the old filter by twisting counterclockwise (some models have a push-button release). Insert the new filter and twist clockwise until it locks.
Run 2-3 gallons of water through the dispenser to flush the new filter and purge air. Wait 24 hours for ice production to resume normally.
Step 6: Inspect and Test the Ice Maker Assembly
If water supply, temperature, and filters are all correct but you still have no ice, the ice maker assembly itself has likely failed. The 795 series uses modular assemblies that aren’t easily repairable.
How to check:
Open your freezer and remove the ice bin. Look at the ice maker assembly mounted to the freezer wall.
Check for visible damage, cracks in the ice mold, or stuck mechanisms. Press the test button (usually red or white, located on the ice maker body or inside the control module).
You should hear the motor cycle and see the ejector blades rotate. If nothing happens or you hear humming without movement, the motor has failed.
Check for ice buildup inside the ice mold that’s preventing ejection. A solid block of ice means the ejector isn’t cycling properly.
The fix:
If the ice maker assembly is faulty, replacement is usually more economical than repair. Kenmore 795 ice maker assemblies cost $80-150.
Order the correct part using your full model number (usually on a label inside the fridge). Unplug the refrigerator, remove the ice bin, and unscrew the old assembly (typically 2-3 screws).
Disconnect the wire harness and water line (have a towel ready for drips). Install the new assembly, reconnect everything, and wait 24 hours for first ice production.
Kenmore Elite 795 Ice Maker Leaking: Diagnosis and Repair
Ice maker leaks are among the most frustrating Kenmore 795 problems. They create ice buildup in your freezer, water damage, and potential mold issues.
Identifying the Source of Leaks
Kenmore Elite 795 ice maker leaks typically come from four locations. Understanding where your leak originates determines the fix needed.
Fill tube cracks: The plastic fill tube that delivers water to the ice mold can crack from repeated freeze-thaw cycles. Look for water dripping from the tube onto the ice maker or freezer floor.
Loose water line connections: The connection between the water supply and the ice maker can loosen over time from vibration. Check where the water line connects to the back of the ice maker assembly.
Cracked ice mold: The ice mold itself can develop hairline cracks that leak water during the fill cycle. This shows as water pooling under the ice maker.
Defective water inlet valve: A stuck-open valve continuously supplies water, causing overflow. This appears as excessive ice production, overflow, and water accumulation.
Fixing Common Leak Points
Most Kenmore Elite 795 ice maker leaks can be repaired without replacing the entire assembly. However, some require full replacement for proper resolution.
For fill tube leaks: The fill tube costs $15-25 to replace. Unplug the fridge, remove the ice maker assembly, and locate the fill tube connection.
Disconnect the old tube, install the new one with proper sealing, and reassemble. This repair takes 30-45 minutes.
For connection leaks: Tighten all compression fittings where water lines connect. Use two wrenches—one to hold the fitting, one to tighten the nut.
Don’t overtighten, which can crack plastic fittings. If tightening doesn’t stop the leak, replace the compression ferrule ($5-10).
For ice mold cracks: Unfortunately, cracked ice molds require complete ice maker replacement. Individual molds aren’t sold separately for 795 models.
Expect to spend $80-150 for a new ice maker assembly.
For inlet valve leaks: Replace the water inlet valve as described in the troubleshooting section above ($40-60).
Kenmore Elite 795 Ice Maker Replacement: Complete Installation Guide
When troubleshooting reveals that your ice maker assembly needs replacement, the process is straightforward enough for confident DIYers. Professional installation costs $150-250 in labor, which you can save by doing it yourself.
Selecting the Right Replacement Ice Maker
Kenmore 795 model numbers vary, and using the wrong ice maker assembly causes compatibility problems. Locate your exact model number on the label inside your refrigerator door or on the side wall.
Model numbers look like “795.7205” or “795.7130” followed by additional digits. Use this complete number when ordering parts.
OEM (original equipment manufacturer) ice makers cost $80-150 and guarantee compatibility. Aftermarket options (View on Amazon) run $60-100 but may have quality variations.
Popular reliable brands include ERP, Podoy, and Supco. Amazon, RepairClinic, and PartSelect stock Kenmore 795 ice makers with detailed compatibility information.
Ice Maker Replacement Process
The complete replacement takes 30-60 minutes for most DIYers with basic tools. You’ll need a Phillips screwdriver, flat-head screwdriver, towel, and possibly needle-nose pliers.
Step 1: Unplug the refrigerator or turn off the circuit breaker. This is critical for electrical safety.
Step 2: Remove the ice bin and set it aside. Locate the mounting screws holding the ice maker to the freezer wall (usually 2-3 screws).
Step 3: Remove the screws and carefully pull the ice maker forward. Don’t force it—the water line and wire harness are still connected.
Step 4: Find the wire harness connector at the back of the ice maker. Press the release tab and disconnect it.
Step 5: Find where the water supply line connects to the ice maker. This may be a quick-connect fitting or a threaded connection.
Disconnect carefully and have a towel ready for residual water.
Step 6: Remove the old ice maker completely.
Step 7: Position the new ice maker against the freezer wall, connecting the water line first, then the wire harness. Make sure connections are secure.
Step 8: Mount the new ice maker with the provided screws. Don’t overtighten—this can crack the mounting brackets.
Step 9: Replace the ice bin, plug in the refrigerator, and turn it on.
Step 10: Wait 24 hours for the first ice production cycle.
The ice maker must reach proper temperature and complete its initialization sequence.
Post-Installation Testing
After 24 hours, check for proper operation. The ice maker should produce 8-10 cubes per cycle (approximately every 90-120 minutes).
Monitor for leaks around the water connection point for the first few days. Check that ice cubes are full-sized and properly formed.
If problems persist after replacement, verify water pressure is adequate (20-40 PSI) and the freezer maintains 0-5°F. These environmental factors affect even new ice makers.
Preventive Maintenance for Kenmore 795 Ice Makers
Regular maintenance prevents most ice maker problems and extends the life of your appliance significantly. These simple tasks take minimal time but provide maximum benefit.
Replace water filters every 6 months. Mark your calendar when you install a new filter. Hard water areas need replacement every 3-4 months.
Clogged filters are the leading cause of preventable ice maker failures.
Clean condenser coils twice yearly. Pull the refrigerator out and vacuum the coils thoroughly.
Dirty coils force the compressor to work harder, raising freezer temperatures and slowing ice production. This 10-minute task prevents expensive repairs.
Inspect water lines annually. Check for cracks, wear, and proper connections. Replace aging water supply lines before they fail and cause water damage.
Level your refrigerator properly. Use a level to verify your fridge is stable and slightly tilted back (1/4 inch). Improper leveling affects water flow to the ice maker.
Maintain proper freezer temperature. Keep a thermometer in your freezer and verify it stays at 0-5°F. Adjust settings seasonally if needed.
Use the ice maker regularly. Ice makers that sit unused for extended periods (2+ weeks) can develop problems. If you’re away, turn the ice maker off or empty the bin weekly.
Check door seals monthly. Weak door gaskets let warm air in, raising freezer temperature and reducing ice production. Test by closing the door on a dollar bill—you should feel resistance when pulling it out.
When to Call a Professional vs. DIY Repair
Some Kenmore 795 ice maker problems are perfect for DIY repair, while others require professional expertise. Understanding the difference saves money and prevents making problems worse.
DIY-friendly repairs include:
- Replacing water filters
- Adjusting temperature settings
- Replacing the ice maker assembly
- Changing the water inlet valve
- Cleaning condenser coils
These require basic tools and straightforward procedures with minimal risk.
Professional repairs needed for:
- Refrigerant leaks (requires EPA certification)
- Compressor failures
- Control board replacements on models with complex electronics
- Water line repairs inside walls
- Situations where you’re uncomfortable with the repair
If your diagnostic efforts reveal problems beyond your skill level, calling a technician prevents expensive mistakes.
Professional service calls typically cost $100-150 for diagnosis, plus parts and labor. Get quotes from multiple technicians and verify they’re experienced with Kenmore/LG refrigerators.
Also Read:
Frequently Asked Questions
What causes Kenmore refrigerator model 795 ice maker problems?
Common causes include frozen water lines, defective water inlet valves, failed ice maker modules, and clogged water filters. Temperature settings above 10°F or below -10°F also cause problems, as does water pressure outside the 20-40 PSI range.
The 795 series is particularly sensitive to water quality issues, so if you have hard water, you’ll likely experience more frequent problems without proper filtration and maintenance.
How do I fix a Kenmore Elite 795 ice maker that’s leaking?
Identify the leak source first—check the fill tube for cracks, tighten water line connections, and inspect the inlet valve. Replace cracked fill tubes ($15-25), tighten loose fittings, or replace the inlet valve ($40-60) as needed.
If you see water pooling under the ice maker itself, the ice mold may be cracked, which requires replacing the entire ice maker assembly ($80-150).
How much does Kenmore Elite 795 ice maker replacement cost?
OEM ice maker assemblies cost $80-150 for parts, with professional installation adding $150-250. DIY installation requires only basic tools and takes 30-60 minutes, saving significant labor costs.
Aftermarket ice makers run $60-100 but may have quality variations, so weigh the cost savings against potential reliability issues.
Why is my Kenmore 795 ice maker not making ice but water works?
This shows the water supply is functional but the ice maker module has failed. Test the ice maker by pressing the test button—if nothing happens, replace the assembly for $80-150.
Sometimes the issue is just a frozen fill tube rather than a failed module, so check for ice buildup around the water inlet area before ordering parts.
How long does a Kenmore 795 ice maker last?
Properly maintained Kenmore 795 ice makers typically last 7-12 years. Lifespan depends on usage frequency, water quality, and maintenance—regular filter changes and proper temperature settings extend life significantly.
If you have hard water and don’t change filters regularly, expect the lower end of that range. With excellent water quality and consistent maintenance, some units last 15+ years.
Can I replace a Kenmore 795 ice maker myself?
Yes, ice maker replacement is straightforward DIY work requiring only basic tools and 30-60 minutes. Unplug the fridge, disconnect the old unit, and install the new assembly following the manufacturer’s instructions.
The key is ordering the correct replacement part for your specific model number. As long as you’re comfortable with basic appliance work, this is well within most homeowners’ capabilities.
What temperature should my Kenmore 795 freezer be for ice making?
The freezer should maintain 0-5°F for optimal ice production. Temperatures above 10°F slow production significantly, while temperatures below -10°F can freeze water supply lines solid.
Use an appliance thermometer rather than relying on the built-in display, as control panels can be inaccurate. Place the thermometer away from the ice maker for the most accurate reading.
Conclusion
A Kenmore Refrigerator 795 Ice Maker problem can be frustrating, but usually fixable with systematic troubleshooting. Most issues trace to water supply problems, temperature settings, or failed components that cost under $150 to replace, making DIY repair cost-effective compared to service calls or new refrigerators.
Start with the simplest checks (power, water supply, temperature) before moving to component testing and replacement. The modular design of 795 ice makers means you can swap out the entire assembly in under an hour with basic tools.
Regular maintenance—especially filter changes and coil cleaning—prevents most problems before they start. When you do need repairs, the parts are readily available and reasonably priced.
With the troubleshooting steps in this guide, you can diagnose and fix the vast majority of Kenmore 795 ice maker issues without professional help. Save the service call fees for the rare situations that truly require specialized equipment or expertise.

Hi, I’m Barlgan! I created Repair Me Yourself to empower homeowners to tackle appliance repairs with confidence. From decoding error codes to fixing cooling issues, I break down complex repairs into simple, actionable steps that save you time and money.