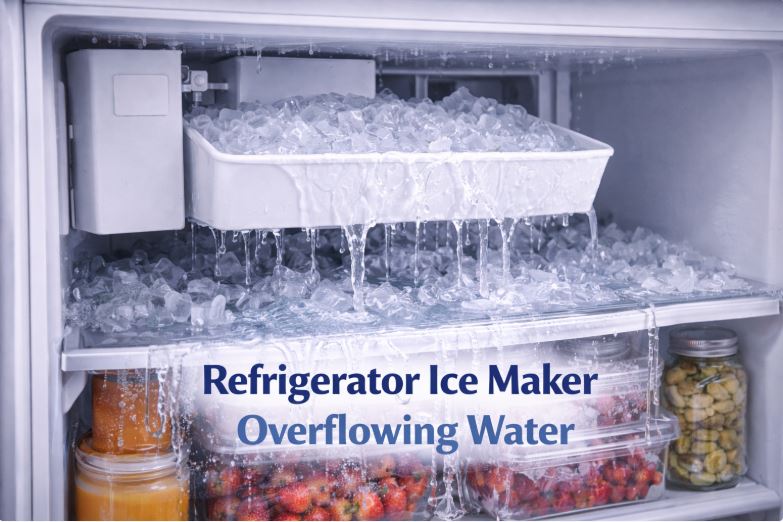
You open your freezer to find water pooling around your ice maker and ice cubes frozen together in clumps. An overflowing ice maker creates a mess and can damage your freezer if left unchecked.
An ice maker overflowing water typically results from a defective water inlet valve, incorrect water pressure, a malfunctioning fill cup or tube, a broken ice maker assembly, or faulty water level sensors. Too much water enters the ice maker during each fill cycle, creating oversized ice cubes that freeze together and cause spillage.
This troubleshooting guide will help you identify why your ice maker overflows and provide practical solutions to fix the problem permanently.
Quick Reference for An Ice Maker Overflowing Water
| Cause | Symptoms | Difficulty Level | Estimated Fix Time |
|---|---|---|---|
| Defective Water Inlet Valve | Continuous water flow, doesn’t shut off | Moderate | 45-90 minutes |
| High Water Pressure | Oversized ice cubes, water spillage | Easy | 10-30 minutes |
| Damaged Fill Cup/Tube | Water misses the mold, spills outside | Easy to Moderate | 20-60 minutes |
| Faulty Ice Maker Assembly | Overfilling, timing issues | Moderate | 30-75 minutes |
| Broken Water Level Sensor | Inconsistent ice sizes, random overflow | Moderate | 1-2 hours |
Why Is My Ice Maker Overflowing Water?
An ice maker overflow happens when more water enters the mold than it can hold. This excess water spills over the edges, freezes on contact with the cold freezer surfaces, and creates the frozen mess you’re dealing with.
Understanding the fill process helps you troubleshoot effectively. During each cycle, the ice maker signals the water inlet valve to open for a precise duration. Water flows through the fill tube into the mold, then the valve closes. If any component in this process malfunctions, overflow occurs.
Always turn off your ice maker immediately if you notice overflow. This prevents further water damage while you diagnose and fix the problem.
1. Defective Water Inlet Valve
The water inlet valve controls when water flows into your ice maker. Located at the back of your refrigerator where the water line connects, this valve opens electronically when the ice maker requests water.
A functioning valve opens for exactly the right duration, then closes completely. A defective valve either stays open too long or fails to close fully, allowing excess water to flow into the ice maker.
Signs of Valve Failure
- Your ice maker consistently produces oversized ice cubes that freeze together. Water pools around the ice maker even when it’s not actively filling.
- You might hear water continuously trickling even after the fill cycle should have completed. Sometimes the overflow happens intermittently rather than with every cycle.
- Ice cubes appear normal occasionally but then suddenly overflow without warning. This indicates a valve that’s failing gradually rather than completely broken.
How to Diagnose the Problem
Listen carefully during an ice maker fill cycle. The water should flow for approximately 7 to 10 seconds, then stop completely.
If water continues beyond this timeframe or you hear dripping after the fill cycle, suspect the valve. Turn off the ice maker and observe whether water continues to drip into the mold.
Access the valve by pulling your refrigerator away from the wall. Check for visible mineral deposits or corrosion around the valve body and connections.
How to Fix It
Shut off the water supply to your refrigerator. The shutoff valve is typically located on the wall behind or beneath the refrigerator.
Unplug your refrigerator for safety. Disconnect the water line from the inlet valve using an adjustable wrench. Keep a towel handy to catch water spillage.
Remove the electrical connector from the valve. Unscrew the mounting bracket holding the valve to the refrigerator frame.
Install the new water inlet valve (View on Amazon) by reversing these steps. Ensure all connections are tight and properly seated.
Turn the water supply back on slowly while checking for leaks. Plug in your refrigerator and monitor the next few ice maker cycles to confirm proper water fill.
Prevention Tips
Replace your refrigerator’s water filter every six months. Mineral buildup and sediment from old filters can damage the inlet valve over time.
If you have hard water, consider installing a water softener. Mineral deposits accelerate valve wear and malfunction.
2. Excessive Water Pressure
Your home’s water pressure directly affects how much water enters the ice maker during each fill cycle. The ice maker valve opens for a set time, and higher pressure means more water flows during that period.
Manufacturers design ice makers for water pressure between 40 and 120 PSI. Pressure above this range causes overfilling even when all components function correctly.
Signs of High Water Pressure
- Your ice maker produces consistently oversized ice cubes. The cubes freeze together into large clumps that are difficult to separate.
- Overflow happens with every ice maker cycle rather than intermittently. Other water-using appliances in your home may show signs of high pressure, such as loud pipe banging or fixtures that leak.
- Your water dispenser shoots water forcefully when you press it. Normal water pressure produces a steady, controlled flow.
How to Test Water Pressure
Purchase a water pressure gauge (View on Amazon) from any hardware store for $10 to $25. These gauges screw onto outdoor hose connections or washing machine valves.
Attach the gauge and turn on the water fully. Read the pressure on the dial. Ideal pressure for refrigerator ice makers is 40 to 60 PSI.
Pressure above 80 PSI significantly increases overflow risk. Pressure above 120 PSI will definitely cause problems and may damage other appliances and fixtures.
How to Fix It
For moderately high pressure (60 to 80 PSI), install an inline water pressure regulator specifically for your refrigerator. These attach between your shutoff valve and the refrigerator water line.
Inline regulators cost $15 to $35 and are easy to install. They reduce pressure to safe levels without affecting your home’s overall water system.
For high pressure throughout your home (above 80 PSI), install a whole-house pressure reducing valve at your main water line. This protects all appliances and fixtures, not just your refrigerator.
Whole-house pressure regulators (View on Amazon) require professional installation and cost $200 to $500 including labor. However, they prevent damage to all water-using appliances and extend their lifespan significantly.
Temporary Solution
While waiting for a permanent fix, slightly close your refrigerator’s water shutoff valve. This reduces flow without completely stopping water supply.
Turn the valve clockwise about one-quarter turn. Test the ice maker through a few cycles to see if overflow stops. Adjust as needed until you achieve proper fill levels.
3. Damaged or Misaligned Fill Cup and Tube
Water flows from the inlet valve through a fill tube into a small fill cup positioned above your ice maker mold. The fill cup directs water precisely into the mold cavities.
When the fill cup cracks, shifts out of position, or the fill tube becomes damaged, water misses the mold entirely or flows unevenly. This creates overflow even when the correct amount of water enters the system.
Signs of Fill Cup Issues
- Water appears outside the ice maker mold, pooling around the ice maker assembly. Ice cubes form unevenly, with some cavities overfull and others barely filled.
- You notice water frozen on the walls of your freezer near the ice maker. The ice maker produces small amounts of ice despite water clearly flowing during fill cycles.
- Visual inspection reveals the fill cup has shifted, cracked, or broken off its mounting position.
How to Inspect the Components
Turn off your ice maker and remove the ice bin. Look for the fill cup, which is typically a small white or clear plastic funnel positioned above the ice mold.
Check if the cup sits directly over the mold cavities. It should be centered and secure, not tilted or loose.
Trace the fill tube from the back of the freezer to the fill cup. Look for cracks, holes, or disconnections along its length.
How to Fix It
For a misaligned fill cup, carefully reposition it to center over the ice mold. Most fill cups snap into place or attach with small clips.
Ensure the fill tube connects securely to the fill cup. If the connection is loose, water sprays in the wrong direction during filling.
For cracked or damaged fill cups, order a replacement part using your refrigerator’s model number. Replacement fill cups cost $8 to $25 and typically snap into place without tools.
If the fill tube has cracks or holes, replace it with refrigerator-grade tubing available at appliance parts stores. Cut the tubing to the correct length and secure both ends properly.
Testing After Repair
Run a manual test cycle on your ice maker after repositioning or replacing components. Watch the fill process carefully to confirm water flows directly into the mold without spillage.
Adjust the fill cup position if needed until water distribution is even across all mold cavities.
4. Faulty Ice Maker Assembly Timer
The ice maker assembly includes a timer mechanism that controls how long the water inlet valve stays open. This timer is calibrated at the factory to allow exactly the right amount of water for proper ice cube formation.
When the timer malfunctions, it may signal the valve to stay open too long. Alternatively, mechanical components within the ice maker can fail, causing timing issues that result in overfilling.
Signs of Timer Problems
- Overflow happens inconsistently. Some cycles produce perfect ice, while others overflow dramatically.
- The ice maker seems to take longer than normal to complete cycles. You might hear the motor running longer than the typical 15 to 30 seconds.
- Ice cubes vary significantly in size from batch to batch. This indicates inconsistent water fill timing rather than a constant overflow.
How to Diagnose Timer Issues
Observe multiple ice maker cycles to identify patterns. If overflow happens randomly rather than every time, internal timing components are likely failing.
Use the manual test cycle feature if your ice maker has one. A properly functioning timer should produce consistent results with each test cycle.
Listen for unusual sounds from the ice maker motor. Grinding, clicking, or prolonged running noises suggest mechanical failure within the assembly.
How to Fix It
Unfortunately, you cannot repair internal timer mechanisms separately. The entire ice maker assembly requires replacement.
Turn off water and power to your refrigerator. Remove the ice bin to access the ice maker mounting screws.
Disconnect the wire harness connecting the ice maker to the refrigerator. Some models use a simple plug, while others have individual wire terminals.
Unscrew the mounting screws and remove the old ice maker. Install the new ice maker assembly (View on Amazon) by reversing these steps..
When to Replace vs Repair
If your ice maker is more than 5 years old and showing multiple problems, replacement is more cost-effective than attempting repairs. Modern ice makers are designed as complete units rather than serviceable assemblies.
5. Malfunctioning Water Level Sensor
Some newer ice makers use electronic sensors to detect water level in the mold. These sensors tell the inlet valve when to stop filling based on actual water level rather than timed filling.
When sensors malfunction, they fail to detect proper water levels. The valve continues filling beyond the correct amount, causing overflow.
Signs of Sensor Failure
- Your ice maker has electronic controls rather than mechanical timers. Sensor-based ice makers are typically found in refrigerators manufactured after 2010.
- Overflow occurs randomly and unpredictably. Some cycles produce normal ice while others overflow significantly.
- The ice maker produces error codes or warning lights on your refrigerator’s display panel. Check your user manual for specific error code meanings.
How to Identify Sensor-Based Systems
Consult your refrigerator’s user manual to determine if your ice maker uses water level sensors. These systems are often marketed as “precision fill” or “adaptive fill” technology.
Look for optical sensors or probe-style sensors within the ice maker mold. These appear as small electronic components rather than purely mechanical parts.
How to Fix It
Clean the sensor area thoroughly. Mineral deposits, ice crystals, or debris can interfere with sensor operation. Use a soft cloth dampened with white vinegar to remove mineral buildup.
If cleaning doesn’t resolve the problem, the sensor has likely failed electronically. These sensors cannot be replaced separately from the ice maker assembly.
Reset your ice maker using the reset button or power cycling procedure specific to your model. Sometimes sensor errors are temporary and reset resolves the issue.
For persistent sensor failures, replace the entire ice maker assembly. Follow the same procedure outlined in the timer malfunction section above.
Preventive Maintenance
If you have hard water, consider installing an inline water filter specifically designed to remove minerals. This prevents sensor contamination and extends ice maker life.
Clean your ice maker thoroughly every six months. Remove the ice bin, wipe down all surfaces, and clean the mold area with a mild cleaning solution.
Also Read: Why Your Fridge Leaks Water From Bottom (Quick Fix)
Frequently Asked Questions
Can an overflowing ice maker damage my freezer?
Yes, absolutely. Excess water freezes on freezer surfaces, creating thick ice buildup that restricts airflow and reduces cooling efficiency.
Water can damage electronic components if it reaches wiring or control boards. This leads to expensive repairs beyond just the ice maker itself.
Frozen water expands, potentially cracking plastic components or damaging the freezer liner. Address overflow immediately to prevent escalating damage.
Why does my ice maker overflow only sometimes?
Intermittent overflow typically indicates a component that’s failing gradually rather than completely broken. A water inlet valve may stick open occasionally but function normally most of the time.
Temperature fluctuations can affect how components operate. Warmer freezer temperatures may cause inconsistent ice formation that appears as overflow.
Water pressure variations in your home throughout the day can also cause intermittent overflow. Pressure typically peaks during morning and evening hours when household water usage is highest.
How much water should enter the ice maker during each cycle?
Most residential ice makers use approximately 4 to 6 ounces of water per cycle. This creates standard-sized ice cubes that fit properly in the mold.
The exact amount varies by ice maker model and cube size settings. Larger cube settings use more water per cycle.
If you notice significantly more water than this, or if water overflows the mold edges, you have a problem requiring attention.
Should I turn off my ice maker while troubleshooting?
Yes, always turn off your ice maker immediately when you notice overflow. Continued operation makes the problem worse and increases damage risk.
Most ice makers have a power switch on the unit itself, typically a wire arm you lift or a toggle switch. Turn it off until you’ve identified and fixed the cause.
If your ice maker lacks an obvious power switch, turn off the water supply to your refrigerator as a temporary measure. This stops overflow while allowing normal refrigerator operation.
Can I adjust my ice maker to use less water?
Some ice makers have adjustable water level screws or electronic settings that control fill duration. Check your user manual for model-specific adjustment instructions.
However, reducing water flow as a permanent solution isn’t recommended. Ice makers are calibrated for specific water amounts to produce properly formed ice cubes.
Instead, address the underlying cause of overflow. Proper repairs ensure your ice maker functions as designed without makeshift adjustments that compromise ice quality.
Stop Ice Maker From Overflowing Water for Good
You now understand the five main causes of ice maker overflow and how to fix each one. Most issues involve water control components that you can replace or adjust yourself.
Start troubleshooting by checking your home’s water pressure. This is the easiest test and often reveals the problem immediately. High pressure is surprisingly common and affects ice maker operation significantly.
Next, inspect the fill cup and tube for damage or misalignment. These visible components are easy to check and repair without specialized tools.
If these quick checks don’t identify the problem, test the water inlet valve. A valve that won’t close properly is the most common cause of consistent overflow.
For intermittent overflow issues, consider the ice maker assembly timer or water level sensors. These internal components require complete ice maker replacement when they fail.
Turn off your ice maker immediately when overflow occurs. This prevents additional water damage while you diagnose and repair the problem. Empty any standing water from your freezer and dry all surfaces thoroughly.
Regular maintenance prevents many overflow issues. Replace your refrigerator water filter every six months. Clean the ice maker assembly quarterly. Monitor your home’s water pressure annually.
When you’ve tried these troubleshooting steps without success, contact a qualified appliance repair technician. Some issues, particularly with sealed refrigeration systems or complex electronic controls, require professional diagnosis and repair.
Address ice maker overflow promptly to protect your freezer and ensure reliable ice production for years to come.

Hi, I’m Barlgan! I created Repair Me Yourself to empower homeowners to tackle appliance repairs with confidence. From decoding error codes to fixing cooling issues, I break down complex repairs into simple, actionable steps that save you time and money.