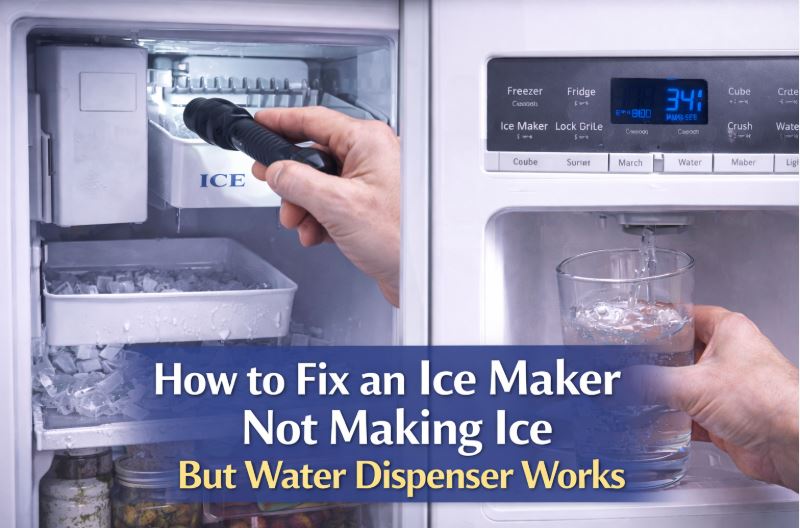
Your refrigerator’s water dispenser works perfectly, but the ice maker refuses to produce ice. This frustrating situation is more common than you think and usually points to specific, fixable problems.
An ice maker not making ice while the water dispenser works typically indicates a frozen water line to the ice maker, a faulty ice maker assembly, incorrect freezer temperature, a defective water inlet valve, or control arm issues. Since water reaches your dispenser but not the ice maker, the problem lies specifically in the ice-making system rather than the main water supply.
This simple troubleshooting guide will walk you through each potential cause and show you how to diagnose and fix the problem step by step.
Quick Reference for an Ice Maker Not Making Ice But Water Works
| Cause | Symptoms | Difficulty Level | Estimated Fix Time |
|---|---|---|---|
| Frozen Fill Tube/Water Line | No ice production, dispenser works | Easy to Moderate | 2-4 hours |
| Faulty Ice Maker Assembly | Motor runs but no ice, or no activity | Moderate | 30-60 minutes |
| Incorrect Freezer Temperature | Slow or incomplete ice formation | Easy | 5-15 minutes |
| Defective Water Inlet Valve | Low water flow to ice maker only | Moderate | 45-90 minutes |
| Control Arm/Sensor Issues | Ice maker stops even when bin is empty | Easy | 10-20 minutes |
Why Is My Ice Maker Not Making Ice But Water Works?
When your water dispenser works but your ice maker doesn’t, you’ve narrowed down the problem significantly. The main water supply to your refrigerator is functioning properly.
Instead, the issue lies somewhere between where the water line splits to serve both systems and the ice maker itself. This usually involves the ice maker’s dedicated water line, temperature issues, or the ice maker assembly.
Let’s systematically troubleshoot each possibility. Always unplug your refrigerator before working on internal components.
1. Frozen Fill Tube or Water Line to Ice Maker
Your refrigerator has separate water pathways. One leads to the door dispenser, and another feeds the ice maker through a fill tube inside the freezer.
The fill tube is a small hose that delivers water directly into the ice maker mold. Because this tube runs through the freezer compartment, it’s vulnerable to freezing, especially if your freezer is too cold or air circulation is poor.
Signs of a Frozen Fill Tube
- Your water dispenser works normally, dispensing water at regular pressure and temperature. Meanwhile, your ice maker produces no ice at all or makes significantly less than usual.
- You might hear the ice maker cycle attempting to operate, but no water enters the mold. Sometimes you’ll see a small ice formation or frost buildup near the fill tube opening at the back of the freezer.
How to Locate the Fill Tube
Open your freezer and look for the ice maker assembly. The fill tube typically enters from the back wall of the freezer, near the ice maker.
It’s usually a white or clear plastic tube about the diameter of a pencil. You may need to remove the ice bin to see it clearly.
How to Fix It
First, confirm the tube is frozen by gently feeling it. A frozen tube will be hard and cold to the touch. Never force or bend a frozen tube, as it can crack.
To thaw the fill tube, unplug your refrigerator and leave the freezer door open for several hours. This allows the ice to melt naturally. You can speed up the process by placing towels soaked in warm water near the tube.
Alternatively, use a hairdryer on the lowest heat setting. Hold it at least six inches from the tube and move it constantly. Never use high heat or concentrate on one spot for too long.
Once thawed, pour a small amount of warm water into the fill tube opening. If it flows freely, the blockage is cleared.
Preventing Future Freezing
Check your freezer temperature. The ideal setting is 0°F. Temperatures below this increase the risk of fill tube freezing.
Ensure proper air circulation in your freezer. Don’t pack items tightly against the back wall where the fill tube is located. Consider adding insulation wrap specifically designed for ice maker fill tubes, available at appliance parts stores for $5 to $15.
2. Faulty Ice Maker Assembly
The ice maker assembly is the complete unit that freezes water into ice cubes and ejects them into the bin. This assembly includes a motor, mold, heater, and various sensors.
When the assembly malfunctions, individual components fail even though water supply is available. The motor might run without ejecting ice, or the entire unit might remain inactive despite having water and power.
Signs of Assembly Failure
- Your ice maker shows no activity whatsoever. No cycling sounds, no water filling, and no ice production. Alternatively, you hear the motor running or attempting to cycle, but no ice forms or ejects.
- Ice cubes may form but never release from the mold. Sometimes partial ice formation occurs, with misshapen or incomplete cubes that don’t eject properly.
How to Test the Ice Maker
Most ice makers have a test button or cycle switch. Consult your user manual to locate it. This button is typically small and may be hidden behind the ice maker unit.
Press and hold the test button for about three seconds. A functioning ice maker should begin a harvest cycle. You’ll hear the motor run and, if water can reach it, water should fill the mold.
If nothing happens when you activate the test cycle, the assembly likely has failed internally. If the motor runs but nothing else occurs, specific components within the assembly need replacement.
How to Fix It
Testing individual components like the motor, heater, and thermostat requires a multimeter (View on Amazon) and electrical knowledge. For most homeowners, replacing the entire ice maker assembly is more practical.
Turn off power and water to your refrigerator. Remove the ice bin and locate the mounting screws holding the ice maker in place. Typically you’ll find two to four screws.
Disconnect the wire harness connecting the ice maker to the refrigerator. Some models use a plug connector, while others have individual wire connections.
Install the new ice maker assembly by reconnecting the wiring and securing it with mounting screws. Replacement ice maker assemblies (View on Amazon) cost $90 to $150 depending on your refrigerator brand and model.
Turn the water and power back on. Allow 24 hours for the first batch of ice to form. This gives the freezer time to reach proper temperature and the ice maker to complete initial cycles.
3. Incorrect Freezer Temperature Settings
Ice makers require a consistent freezer temperature at or below 10°F to function properly. The optimal temperature for ice production is 0°F.
When your freezer runs too warm, water may fill the ice maker mold but never freeze completely. Alternatively, ice forms too slowly, creating production delays that seem like failure.
Signs of Temperature Problems
- Your ice maker produces ice very slowly or makes soft, slushy ice instead of solid cubes. Sometimes it produces small amounts of ice that seem to melt partially before collection.
- Other frozen foods in your freezer may seem softer than usual. You might notice frost or ice crystals forming on food packaging, indicating temperature fluctuations.
How to Check Temperature
Don’t rely solely on the temperature display on your refrigerator. These can be inaccurate. Place an appliance thermometer in your freezer, away from the walls and door.
Wait 24 hours, then check the reading. The freezer temperature should read between 0°F and 5°F. Anything above 10°F will significantly impact ice production.
Check multiple locations in the freezer. Temperature can vary between the top, middle, and bottom sections.
How to Fix It
Adjust your freezer temperature setting to a colder position. Most refrigerators use a numbered dial (where higher numbers mean colder) or a digital control.
Wait 24 hours after adjustment before checking the temperature again. Make small adjustments rather than dramatic changes.
If the temperature remains too warm despite adjusting settings, check for these common issues. Ensure door seals close properly by performing the dollar bill test. Clean the condenser coils at the back or bottom of your refrigerator, as dirty coils reduce cooling efficiency.
Verify nothing blocks the air vents inside the freezer. Proper air circulation is essential for maintaining consistent temperatures.
When Temperature Won’t Stabilize
If your freezer can’t maintain proper temperature, you may have a failing compressor, low refrigerant, or defrost system problems. These issues require professional diagnosis and repair.
4. Defective Water Inlet Valve
The water inlet valve controls water flow from your home’s supply to your refrigerator. While this valve serves both the dispenser and ice maker, it has separate solenoids for each function.
A solenoid is an electromagnetic coil that opens and closes the valve. When the ice maker solenoid fails, water reaches your dispenser but not your ice maker, creating the exact symptoms you’re experiencing.
Signs of Inlet Valve Problems
- Water dispenses normally from your door, with good pressure and flow. However, your ice maker receives little to no water during fill cycles.
- You might hear a faint buzzing or humming from behind the refrigerator when the ice maker attempts to fill. This indicates the ice maker is calling for water, but the valve isn’t opening properly.
- Some ice production may occur, but very slowly. Ice cubes might be smaller than normal due to insufficient water fill.
How to Diagnose Valve Issues
Listen carefully when the ice maker should be filling. You’ll typically hear this happen shortly after a harvest cycle when ice ejects from the mold.
If you hear the ice maker motor but no water sounds follow, the valve may not be opening. Access the valve by pulling your refrigerator away from the wall. It’s located where the water line enters the refrigerator, typically at the bottom rear.
Inspect the valve for any visible damage, corrosion, or mineral buildup. Check both inlet and outlet connections for leaks or loose fittings.
Testing the Valve
Testing requires a multimeter (View on Amazon) to check the solenoid coil resistance. The ice maker solenoid should read between 200 and 500 ohms.
If the reading is significantly outside this range or shows no continuity, the valve needs replacement. You can also test by manually bypassing the valve momentarily, but this requires electrical knowledge and caution.
How to Fix It
Replacing a water inlet valve involves shutting off the water supply to your refrigerator. Unplug the appliance for safety.
Disconnect the water line from the inlet side of the valve. Place a towel underneath to catch any water spillage. Disconnect the water lines on the outlet side that lead to the dispenser and ice maker.
Remove the electrical connector from the valve. Unscrew the mounting bracket holding the valve in place.
Install the new valve by reversing these steps. Ensure all connections are tight and properly seated. Replacement water inlet valves (View on Amazon) cost $25 to $80 depending on your refrigerator model.
Turn the water supply back on slowly and check for leaks. Plug in your refrigerator and allow 24 hours for ice production to resume.
5. Control Arm or Sensor Malfunction
Ice makers use either a mechanical control arm or an optical sensor to detect when the ice bin is full. This safety feature prevents overfilling and ice maker damage.
The control arm is a wire or plastic arm that sits above the ice bin. When ice reaches a certain level, it pushes the arm up, signaling the ice maker to stop. An optical sensor uses an infrared beam to detect ice presence.
When these components malfunction, they send false signals. Your ice maker thinks the bin is full even when it’s completely empty.
Signs of Control Problems
- Your ice bin is empty or nearly empty, yet the ice maker won’t produce more ice. The ice maker shows no activity despite having water, power, and proper temperature.
- You’ve verified all other systems work properly. The control arm might be stuck in the raised position, or the optical sensor might be blocked or dirty.
How to Diagnose the Issue
For mechanical control arms, inspect the arm position. It should rest naturally in the down position when the bin is empty.
Try gently lowering the arm if it’s stuck in the up position. If the ice maker immediately begins a cycle, the arm was the problem. The arm should move freely without resistance.
For optical sensors, look for the small lens opening on the ice maker unit. Clean it gently with a soft, damp cloth. Dust, ice crystals, or residue can block the sensor beam.
How to Fix It
If the mechanical arm is bent or damaged, you can often replace just the arm component. These cost $10 to $25 and simply snap or screw into place.
Some ice makers allow you to bypass the control arm temporarily by flipping it to the up position and back down, which can reset the mechanism. However, a persistently faulty arm needs replacement.
For optical sensor issues, cleaning often resolves the problem immediately. If cleaning doesn’t help, the sensor may have failed internally. Unfortunately, optical sensors typically can’t be replaced separately and require replacing the entire ice maker assembly.
Check for any obstructions in the ice bin itself. Sometimes ice bridges form, creating a false full signal. Break up any clumped or bridged ice.
Prevention Tips
Don’t overfill the ice bin beyond its maximum fill line. Excess ice can damage the control arm or confuse the sensor. Regularly clean the ice bin and wipe down the ice maker area to prevent frost and debris buildup that affects sensor operation.
Frequently Asked Questions
How long does it take for an ice maker to start producing ice?
After installation or any repair, allow 24 hours for ice production to begin. The freezer needs time to reach proper temperature, and the ice maker typically completes one or two empty cycles before filling with water.
Once operational, most ice makers produce a batch of ice every 90 minutes to 3 hours. Production rate depends on freezer temperature, water pressure, and ambient room temperature.
A typical ice maker produces 3 to 7 pounds of ice per day. If yours produces less, troubleshoot using the methods in this guide.
Can I still use my refrigerator if the ice maker doesn’t work?
Absolutely. Your refrigerator will function normally for food storage and water dispensing even with a non-functioning ice maker.
If you’re not planning to repair the ice maker immediately, turn it off using the power switch usually located on the unit itself. This prevents the ice maker from cycling unnecessarily and potentially causing issues.
You can also purchase ice from stores until you’re ready to address the problem. Many people disconnect or turn off ice makers permanently and rely on ice trays or purchased ice.
Why does my ice maker work intermittently?
Intermittent operation usually indicates a borderline issue that affects the ice maker under certain conditions. Common causes include a freezer temperature that fluctuates around the minimum threshold for ice production.
A partially clogged fill tube can allow some water through during certain temperature conditions but freeze solid at other times. Water pressure fluctuations in your home can also cause intermittent ice production if pressure drops below the minimum required.
Additionally, a failing water inlet valve may work sometimes but fail at other times as internal components degrade. Track when the ice maker works versus when it doesn’t. Patterns can help identify the root cause.
How do I reset my ice maker?
Most ice makers reset using one of these methods. Look for a reset button on the ice maker unit, typically a small button that may be recessed. Press and hold for 3 to 10 seconds.
Alternatively, locate the power switch on the ice maker. Turn it off, wait 30 seconds, then turn it back on. Some models require you to remove the ice bin to access the power switch.
For ice makers without obvious controls, unplug your entire refrigerator for 5 minutes, then plug it back in. This forces a complete system reset.
After resetting, allow up to 24 hours for normal operation to resume. The first cycle or two may not produce ice as the system stabilizes.
What water pressure is needed for an ice maker?
Ice makers require a minimum water pressure of 20 PSI (pounds per square inch) to function properly. Most work best with 40 to 120 PSI.
Low water pressure causes slow ice production, small ice cubes, or no ice at all even when other components work correctly. Test your home’s water pressure using a pressure gauge available at hardware stores for $10 to $20.
Attach the gauge to an outdoor spigot or washing machine connection. Turn on the water and read the pressure. If pressure is below 20 PSI, contact a plumber to address your home’s water system.
If pressure is adequate elsewhere but seems low at the refrigerator, check for kinked water lines, a partially closed shutoff valve, or a clogged water filter in your refrigerator.
Get Your Ice Maker Working Again Today
You now have a complete understanding of why your ice maker isn’t producing ice even though your water dispenser works fine. Most causes involve the ice maker’s dedicated water path, temperature issues, or the ice maker assembly itself.
Start your troubleshooting by checking the easiest possibilities first. Verify your freezer temperature is at or below 10°F. Inspect the control arm to ensure it’s not stuck in the off position.
Next, test your ice maker using the manual cycle button if available. This helps determine if the assembly itself functions or has failed completely.
If these quick checks don’t reveal the problem, move on to examining the fill tube for freezing. This is the most common cause of the specific symptom you’re experiencing. Remember to thaw it gently and adjust freezer temperature to prevent recurrence.
For persistent issues after you’ve tried these solutions, consider replacing the ice maker assembly or water inlet valve. Both are moderate DIY projects that can save you significant money compared to service calls.
Maintain your ice maker by cleaning it quarterly, checking temperature settings seasonally, and replacing your refrigerator’s water filter according to the manufacturer’s schedule. Regular maintenance prevents most ice maker problems before they start.
When troubleshooting doesn’t resolve the issue, or if you’re uncomfortable working with water lines and electrical components, contact a qualified appliance repair technician for professional diagnosis and repair.

Hi, I’m Barlgan! I created Repair Me Yourself to empower homeowners to tackle appliance repairs with confidence. From decoding error codes to fixing cooling issues, I break down complex repairs into simple, actionable steps that save you time and money.