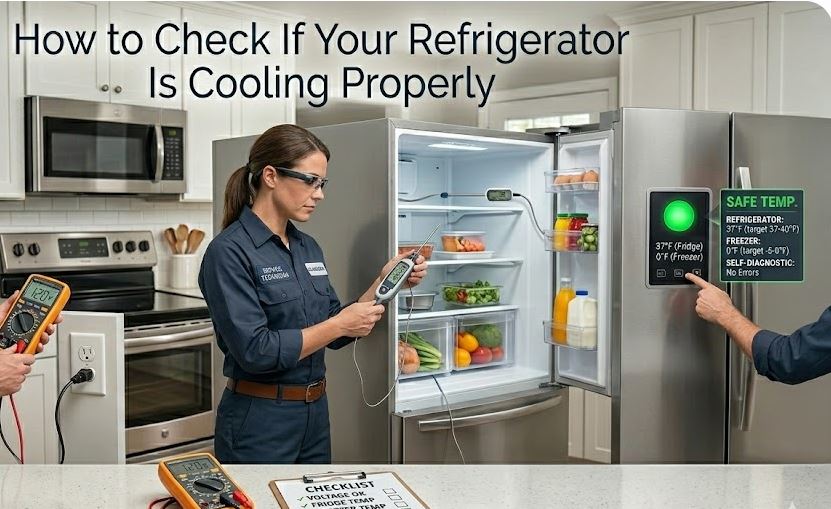
Your fridge feels less cold than it should. The milk is going off a day early. Ice cream comes out soft. The built-in temperature display reads 37°F but something doesn’t feel right — and you’re not sure whether to trust the display or your instincts.
The built-in thermometer in most refrigerators measures air temperature at a single fixed sensor location, typically near the top of the compartment. This reading can look correct while the bottom shelf stays warm, while a failing door gasket lets cold air escape overnight, or while dirty condenser coils force the compressor to run harder and longer just to maintain a mediocre temperature. A fridge can pass its own self-assessment and still be failing at the job it’s meant to do.
This guide covers three tools that give you an objective picture of how well your refrigerator is actually cooling: a probe thermometer for measuring real temperature at multiple locations inside both compartments, an infrared thermometer for identifying cold air leakage and thermal performance issues at the surface level, and a multimeter for testing the electrical components that control cooling when the physical and thermal checks suggest something is failing internally.
3 Tools to Check if Your Refrigerator is Cooling Properly
| Tool | Role in Diagnosis | Approx. Price | Where to Buy |
|---|---|---|---|
| ThermoPro TP19H Digital Instant Read Thermometer | Measure actual temperature at multiple locations inside fridge and freezer | ~$15–$20 | Amazon |
| Etekcity Lasergrip 1080 Infrared Thermometer | Detect door gasket cold air leaks, check condenser coil heat, check evaporator vent output | ~$16–$22 | Amazon |
| KAIWEETS HT118A Digital Multimeter | Test door gasket seal, thermostat, evaporator fan motor, start relay | ~$30–$42 | Amazon |
What a Refrigerator “Cooling Properly” Actually Means
Before testing anything, it helps to establish the target. The FDA and most appliance manufacturers agree on the following safe operating ranges: the fresh food compartment should maintain 35–38°F (2–3°C) and the freezer should hold 0°F (-18°C) or below. Any reading consistently above 40°F in the fridge compartment represents a food safety risk — the temperature range at which bacterial growth accelerates most rapidly is 40–140°F, and a fridge running at 42–45°F can move perishables toward spoilage in half the expected time.
The built-in temperature display, if present, should not be taken as a reliable absolute reading. It measures at one location and is calibrated at the factory, but the sensor can drift, the display can lag, and the reading won’t reflect temperature variation across different zones of the compartment. An independent probe measurement is the only way to know what temperature your food is actually experiencing.
| Location | Target Temperature | Food Safety Action Point |
|---|---|---|
| Fresh food compartment (middle shelf) | 35–38°F | Above 40°F — investigate immediately |
| Fresh food compartment (bottom shelf) | 35–40°F | Above 40°F — food safety risk |
| Door shelves (fresh food) | 38–42°F | Normal to be slightly warmer |
| Freezer | 0°F or below | Above 8°F — soft ice cream, ice crystals forming |
| Freezer (back wall) | -5°F to 0°F | Above 5°F — defrost system issue suspected |
Step 1 — Measure Actual Temperature With a Probe Thermometer
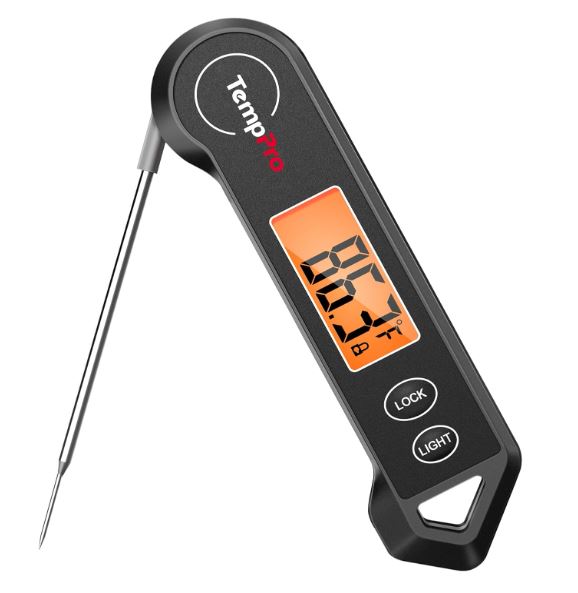
The ThermoPro TP19H Digital Instant Read Thermometer (View on Amazon) is the right tool for this first and most important check. It reads from -58°F to 572°F with ±0.9°F accuracy from 14–212°F — well within the temperature range of both fridge and freezer compartments.
Response time is 3–4 seconds, the 4.3″ food-grade stainless steel probe reaches the center of shelves and drawers, IP65 waterproofing makes cleanup straightforward, the display auto-rotates 180°, and a motion-sensing wake/sleep function means the battery (one AAA, rated to 3,000 hours) is conserved when it’s not in use.
The calibration function lets you zero the probe against an ice water reference if accuracy ever drifts after extended use. At $15–$20 with a 3-year warranty, it represents the most cost-effective objective temperature measurement available.
Taking Accurate Readings
The technique matters for fridge temperature testing. Air temperature in the compartment changes every time the door is opened, and readings taken immediately after opening won’t reflect steady-state operating temperature. For the most accurate assessment, leave the fridge undisturbed for at least two hours before testing. Place the TP19H probe tip at each measurement location, wait 30–60 seconds for the reading to stabilize, then lock the reading using the hold function and record it before moving to the next position.
Measure at minimum five locations: the middle of the top shelf, the middle of the bottom shelf, inside a crisper drawer, on the door shelf at mid-height, and at the freezer center. If any location reads more than 3–4°F warmer than another at the same level, airflow circulation is being blocked — either by overloading, or by ice buildup on the evaporator blocking the air vents.
The door shelf readings being warmer than the interior shelves is expected and normal — door shelves are the warmest zone of every refrigerator because they’re closest to the ambient air seal. Do not store meat, dairy, or anything requiring consistent cold temperatures on door shelves.
What the Readings Tell You
A fridge measuring 35–38°F across all interior positions with a freezer at 0°F or below is cooling correctly. If the interior reads 40–44°F, the fridge is marginal — food safety is at risk and the underlying cause needs investigation. Readings above 44°F indicate a significant cooling problem.
If the fridge reads above 40°F but the freezer is at or near 0°F, the problem is usually evaporator fan airflow between compartments, a failed damper, or ice buildup blocking the air transfer path — not the compressor or sealed refrigerant system. If both compartments are warm simultaneously, the compressor, start relay, condenser coil cleanliness, or sealed system refrigerant level may be the underlying cause.
Step 2 — Identify Where Cold Air Is Escaping
The fridge can be set correctly and have a working compressor yet still run warm — because cold air is leaking out through a failing door gasket faster than the compressor can replace it. This is one of the most common causes of gradual temperature rise in refrigerators over 5–7 years old and one of the easiest to diagnose and fix. Gasket replacements for most refrigerator models cost $20–$60 in parts.
The Etekcity Lasergrip 1080 Infrared Thermometer (View on Amazon) makes gasket leak diagnosis fast and systematic. Reading surface temperatures from -58°F to 1130°F with a 12:1 distance-to-spot ratio, adjustable emissivity, and backlit LCD, it turns a traditionally difficult-to-locate leak into an obvious thermal anomaly in under two minutes.
Gasket Cold Air Leak Scan
With the fridge running normally at operating temperature and undisturbed for at least one hour, point the Lasergrip at the door gasket from a distance of 6–8 inches, tracing slowly around the full perimeter of both the fridge and freezer doors. You’re looking for cold spots — locations where the gasket surface temperature drops significantly below the surrounding door frame temperature.
The ambient door frame typically reads near room temperature (68–72°F). A healthy, well-sealing gasket shows consistent temperatures along its entire perimeter. A failing gasket section — cracked, deformed, torn, or pulled away from the door liner — allows cold air to bleed through, creating a cold surface reading at the point of leakage. A leak registering 10°F or more below surrounding areas is significant and the gasket needs inspection and likely replacement.
You can confirm a gasket leak with the paper test: close the door on a sheet of paper at the suspected leak point. If the paper pulls out with no resistance, the gasket is not sealing properly at that location.
Condenser Coil Heat Check
Point the Lasergrip at the condenser coils — located at the back of the unit on older models or behind the bottom grille on most modern refrigerators. These coils should feel warm to moderately hot during compressor operation, as they’re releasing the heat extracted from the interior. An excessively hot reading (surface temperatures above 130–140°F) combined with the compressor running nearly continuously suggests the coils are coated with dust and lint, forcing the compressor to work harder to dissipate heat. Clean condenser coils restore efficiency, reduce compressor workload, and often directly improve interior temperature by 2–4°F.
Evaporator Vent Output Check
Open the fridge and locate the back panel air vents — the slots or grilles through which cold air circulates from the evaporator into the fresh food compartment. Point the Lasergrip at these vents while the fan is running. Cold air output should measure significantly below compartment temperature — typically 20–28°F at the vent face on a properly working unit. A vent reading at or near compartment temperature means the evaporator fan isn’t circulating cold air — either the fan motor has failed, or ice has built up on the evaporator coils and blocked the airflow path.
Step 3 — Test the Electrical Components
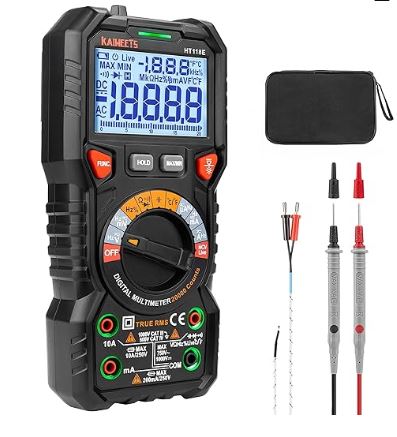
When probe thermometer readings confirm the fridge is too warm and the IR thermometer scan doesn’t identify a gasket leak or condenser issue as the primary cause, the fault is in an electrical component of the cooling circuit. The KAIWEETS HT118A Digital Multimeter (View on Amazon) handles every electrical test in this process. Auto-ranging TRMS 6000-count measurement, NCV detection, LED port indicators, CAT III 1000V / CAT IV 600V safety rating, and 36-month warranty. Unplug the fridge before accessing any internal components.
Test 1 — Door Gasket Continuity (Electrical Sealing Method)
Beyond the visual and paper test, the gasket can be tested for electrical continuity on refrigerators where the door switch and gasket form part of a sealed circuit. On most modern refrigerators, pressing the door switch manually while observing the interior light gives a quick functional test — the light should go out immediately and return instantly when released, confirming the switch is responding correctly. A slow response or no response indicates a door switch problem that may cause the evaporator fan to run while the door is open, warming the interior.
Test 2 — Evaporator Fan Motor
The evaporator fan circulates cold air from the freezer evaporator coils throughout both compartments. A failed evaporator fan is one of the most common causes of a fridge that’s warm while the freezer is still cold — because the cold air that’s being generated at the evaporator never makes it into the fresh food section. The fan is located behind the rear panel inside the freezer compartment.
Access the evaporator fan by removing the freezer’s rear panel (usually a few screws). Disconnect the motor wiring harness. Set the HT118A to resistance mode. Test the motor windings across the terminals. A working evaporator fan motor reads approximately 200–400 Ω. An OL reading indicates an open winding and the motor must be replaced. Also spin the fan blade by hand — it should rotate freely without resistance or grinding.
Test 3 — Start Relay
The start relay assists the compressor in starting each cooling cycle. A failed start relay prevents the compressor from starting, meaning the sealed system is intact but no cooling is being performed. The fridge runs silently with no compressor hum, and both compartments warm up gradually.
Locate the start relay by pulling the fridge away from the wall and finding the compressor at the bottom rear. The relay is a small plug-in component on the side of the compressor. Unplug it and shake it — a functional relay is silent; a failed relay rattles from its broken internal pellet. Test with the HT118A continuity function across the relay terminals to confirm. Replacement start relays cost $10–$25 and take minutes to install.
Test 4 — Temperature Thermostat or Thermistor
On older refrigerators with a mechanical dial thermostat, test by placing the sensing bulb in ice water and checking for continuity across the thermostat terminals with the HT118A — a working thermostat closes the circuit (shows continuity) in cold conditions.
On modern refrigerators with electronic thermistors, the thermistor is a small sensor typically located inside the fresh food compartment on the back wall or ceiling. Test resistance at room temperature — most refrigerator thermistors read approximately 5,000–15,000 Ω at room temperature (consult the model’s tech sheet for the exact specification). A reading of OL or significantly outside the specified range indicates the thermistor has failed and is sending incorrect temperature data to the control board.
Refrigerator Cooling Check Summary
| Check | Tool | What You’re Looking For |
|---|---|---|
| Fridge compartment temperature | ThermoPro TP19H | 35–38°F across all interior positions |
| Freezer temperature | ThermoPro TP19H | 0°F or below |
| Temperature variation across zones | ThermoPro TP19H | Less than 3–4°F difference at same shelf level |
| Door gasket leaks | Etekcity Lasergrip 1080 | Consistent gasket perimeter temps; no cold spots |
| Condenser coil heat | Etekcity Lasergrip 1080 | Warm but not excessively hot; no dust buildup |
| Evaporator vent output | Etekcity Lasergrip 1080 | Significantly below compartment temperature |
| Evaporator fan motor | KAIWEETS HT118A | 200–400 Ω; free blade spin |
| Start relay | KAIWEETS HT118A | Silent shake test; continuity confirmed |
| Thermostat / thermistor | KAIWEETS HT118A | Continuity in cold (mechanical); correct Ω (electronic) |
Frequently Asked Questions
How often should I check my refrigerator’s actual temperature?
A spot check with the probe thermometer every 2–3 months is adequate for a well-functioning unit. If you notice food spoiling faster than expected, condensation on the exterior, the compressor running unusually often, or any change in how cold the interior feels, check immediately. After any extended power outage lasting more than four hours, verify temperature has returned to target before consuming perishables.
My fridge reads the right temperature but ice cream goes soft. What’s wrong?
Soft ice cream is one of the most reliable early indicators that the freezer is running above 0°F — even if the display reads -2°F. The built-in sensor may not be positioned where temperature is highest, and any reading above 8–10°F softens ice cream noticeably. Measure with the ThermoPro TP19H at the center of the freezer and compare to the display. If the TP19H reads warmer than the display by more than 3–4°F, the display sensor is reading a cold spot rather than the average compartment temperature.
The fridge is cold but one section is much warmer than the rest. What causes that?
Uneven temperature distribution within a refrigerator is almost always caused by one of three things: blocked air vents (something physically blocking the cold air supply vents, usually at the back of the compartment), overloading that prevents air from circulating between items, or ice buildup on the evaporator coils that restricts airflow from the freezer into the fridge. The TP19H temperature map across positions identifies which zones are affected; if the problem is evaporator ice buildup, the Etekcity IR thermometer will show reduced or room-temperature output at the back vents.
The fridge temperature fluctuates a lot during the day. Is that normal?
Some refrigerator temperature fluctuation is normal — the compressor cycles on and off, so temperatures rise slightly when the compressor is off and drop when it cycles on. A normal fluctuation range is approximately 2–4°F over a cycle. Fluctuations of 8–10°F or more indicate the compressor is cycling too infrequently (thermostat or thermistor fault), the door is being opened very frequently, or the door gasket is allowing warm air infiltration during off cycles.
My condenser coils are dirty. Will cleaning them fix the temperature problem?
Often yes — dirty condenser coils are one of the most common and most overlooked causes of gradual refrigerator temperature rise. When the coils are coated with dust and pet hair, the compressor has to run longer and hotter to dissipate the same amount of heat, and the interior temperature creeps upward as a result. Learn how to clean refrigerator coils using this guide.
At what point should I replace the fridge rather than repair it?
The industry rule of thumb is the 50% rule: if the repair cost exceeds 50% of the replacement value of an equivalent unit, replacement is typically the better investment. For most refrigerators, this means that a failing compressor (the most expensive repair, typically $400–$800 in parts and labor) on a refrigerator unit more than 8–10 years old warrants replacement consideration. All the faults covered in this guide — gasket replacement, start relay, evaporator fan motor, thermostat — cost well under $100 in parts and are worth repairing even on older units. The probe thermometer, IR thermometer, and multimeter together tell you which category the fault falls into before you commit to anything.
Conclusion on How to Check if Your Refrigerator is Cooling Properly
A refrigerator that seems to be running is not the same as one that’s actually cooling properly. The ThermoPro TP19H gives you the objective temperature data your fridge’s built-in display can’t — precise readings at every zone, in both compartments, accurate to ±0.9°F. The Etekcity Lasergrip 1080 catches the gasket leaks, dirty condenser coils, and evaporator airflow problems that cause slow temperature drift without obvious symptoms. The KAIWEETS HT118A confirms or eliminates the electrical components — evaporator fan, start relay, thermostat — that control the entire cooling cycle.
Most refrigerator cooling problems have a root cause that’s identifiable in under 30 minutes with these three tools, and fixable with a replacement part that costs less than $50. The tools themselves cost less than a single service call and remain useful for every other appliance in the house.

Hi, I’m Barlgan! I created Repair Me Yourself to empower homeowners to tackle appliance repairs with confidence. From decoding error codes to fixing cooling issues, I break down complex repairs into simple, actionable steps that save you time and money.