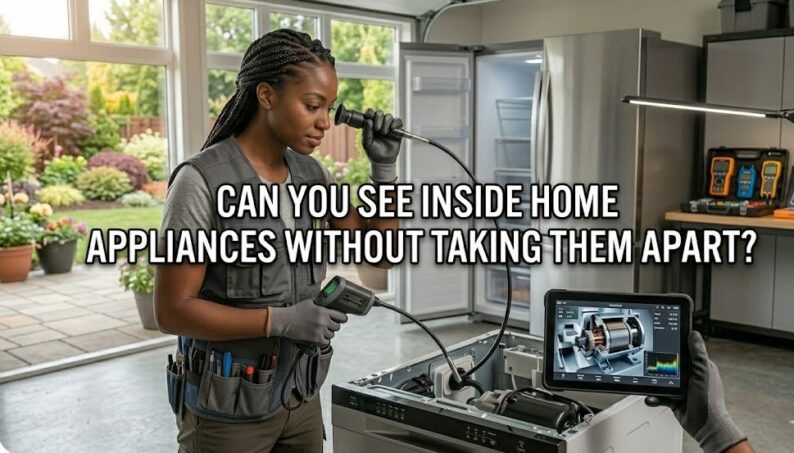
Most appliance repairs start with a symptom and end with a guess. Something rattles inside the washing machine. The fridge develops an intermittent drip. The dryer takes three cycles to dry what used to take one. The dishwasher leaves grit on glasses it used to clean perfectly. You know something is wrong. You just can’t see what it is.
The traditional response is to start disassembling. Remove the back panel. Unscrew the drum housing. Pull out the pump assembly. An hour later, you’ve taken apart half an appliance looking for something that might have taken thirty seconds to spot if you’d had the right tool at the start.
The good news is that a growing set of affordable tools — designed originally for industrial inspection, medical imaging, and professional trade work — have come down in price to the point where they belong in a home repair toolkit. These tools let you see inside appliances without opening them, without moving them, and in many cases without even switching them off. They don’t replace every diagnostic step, but they fundamentally change the first step — turning blind investigation into informed observation.
This guide covers every practical method for seeing inside home appliances without disassembly, what each method reveals, which tools do it best, and how to combine them into a systematic visual inspection workflow.
Quick Reference: Methods for Seeing Inside Home Appliances Without Disassembly
| Method | Tool Required | What It Reveals | Contact Required | Best Appliances |
|---|---|---|---|---|
| Flexible inspection camera | Endoscope / borescope | Physical faults, blockages, debris | Minimal — probe only | All appliances |
| Infrared thermal imaging | Thermal camera or IR thermometer | Heat distribution, insulation faults | None | All appliances |
| Acoustic listening | Stethoscope or contact microphone | Bearing wear, pump faults, airflow | Contact with casing | Washers, dryers, fridges |
| Magnetic field detection | EMF meter or compass | Motor and winding faults | None | Motor-driven appliances |
| Borescope with articulation | Articulating endoscope | Angled views around internal corners | Minimal — probe only | Fridges, ovens, washers |
| Wireless temperature sensor | Bluetooth / WiFi probe | Internal temperature over time | Probe placed inside once | Fridges, ovens |
| Drain camera inspection | Slim waterproof endoscope | Drain blockages, hose condition | Probe in drain only | Washers, dishwashers |
| Vibration analysis | Smartphone vibration app | Imbalance, bearing faults | Phone against casing | Washers, dryers |
Why Seeing Before Disassembling Changes Everything
There’s a principle in diagnostic work that experienced technicians apply consistently and beginners skip almost universally: gather information before taking action. In appliance repair, taking action means disassembly. And disassembly before adequate information gathering is the single most common source of wasted time, broken clips, stripped screws, and unnecessary part replacements.
The problem with disassembly-first diagnosis isn’t just efficiency — it’s that the act of disassembly can mask or destroy the evidence of the original fault. A component that’s loose in its housing rattles clearly when the appliance runs.
Once you’ve opened the machine and touched the component, it may reseat itself temporarily, the noise disappears, you reassemble, and the fault returns two weeks later. A blockage in a drain hose that’s clearly visible through the hose wall from the inside is easy to diagnose with a camera. Pull the hose off to inspect it physically and you may dislodge the blockage, clear the symptom without identifying its source, and miss the underlying cause entirely.
Seeing inside the appliance before touching anything inside it preserves the fault in its natural state — which makes the diagnosis more accurate and the repair more targeted. The tools in this guide are essentially diagnostic cameras of different types, each optimized for a different kind of seeing: visual, thermal, acoustic, and vibrational.
Method 1: Flexible Inspection Cameras (Endoscopes and Borescopes)
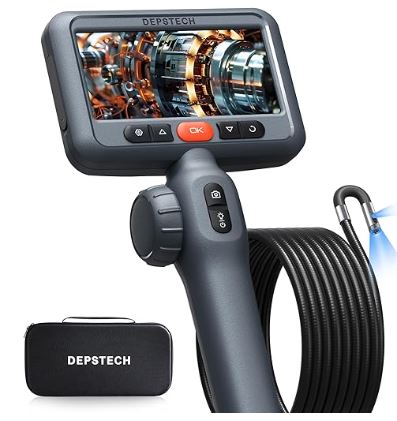
A flexible inspection camera (endoscope or borescope) is a thin cable equipped with a camera and LEDs that transmits live video to a screen. It allows you to navigate cavities and bends that would otherwise require total disassembly to see.
For home appliance repair, it is the most effective tool for real-time diagnosis of blockages, damaged components, or foreign objects.
Key Inspection Points by Appliance
| Appliance | Primary Access Point | Common Issues Identified |
| Washing Machine | Door seal gap (rear of gasket) | Trapped coins, keys, or small garments between the drum and tub. |
| Drain filter port | Debris at the impeller causing pump failure. | |
| Refrigerator | Freezer drain channel | Ice blockages or debris causing water to pool on shelves. |
| Dishwasher | Spray arm mounting hole | Grease buildup or food debris in the sump area. |
| Dryer | Lint trap slot | Hidden lint accumulation in the deep duct path (fire hazard). |
How to Navigate Effectively
- Washing Machines: Use a 5.5mm to 8mm camera to navigate the seal gap without damaging the rubber.
- Dishwashers: Many sump areas are visible through the spray arm ports without removing any panels.
- Dryers: A camera reveals lint buildup that is invisible from both the trap opening and the exterior vent.
Recommended Equipment & Specs
For appliance work, we recommend the DEPSTECH 10Ft Articulating Endoscope or the Teslong Two-Way Articulating Boroscope (View on Amazon). When shopping for a camera, prioritize these specifications:
- Diameter: 5.5mm to 8.5mm (for tight gaps).
- Durability: IP67 waterproofing for wet environments.
- Cable Type: Semi-rigid construction to help navigate around bends.
- Lighting: Adjustable LED brightness (crucial to prevent glare in close-range metal cavities).
Method 2: Infrared Thermal Imaging
Thermal imaging is a game-changer because it allows you to see invisible patterns of energy. While a borescope shows you physical objects, a thermal camera shows you how heat is moving—or escaping.
How It Works
A thermal camera detects infrared radiation and converts it into a color map.
- Warm Colors (Red/Yellow): Indicate heat.
- Cool Colors (Blue/Purple): Indicate cold or heat loss.
- Gradients: Reveal the flow of energy, pinpointing faults with high precision.
Top 3 Diagnostic Applications
| Application | What the Camera Reveals | Why It Matters |
| Gasket Integrity | Warm “intrusions” or patches along door seals. | Pinpoints exactly where room-air is leaking into a fridge. |
| Electrical Health | Unusual “hot spots” on control boards or wiring. | Predicts failure by identifying resistance before a part dies. |
| Insulation Gaps | Thermal anomalies on the exterior panels. | Detects degraded insulation without opening the appliance. |
Key Diagnostic Advantages
- Speed: Scan an entire refrigerator door perimeter in under 20 seconds.
- Non-Invasive: Identify wiring faults through vent openings or small panel gaps without disassembly.
- Predictive: Find loose connections or terminal blocks that are running hotter than their surroundings before they cause a fire or total failure.
Buying Guide: Specs That Matter
For appliance repair, high resolution is less important than thermal sensitivity (the ability to see small temperature differences).
- Target Sensitivity: Look for cameras rated below 100mK.
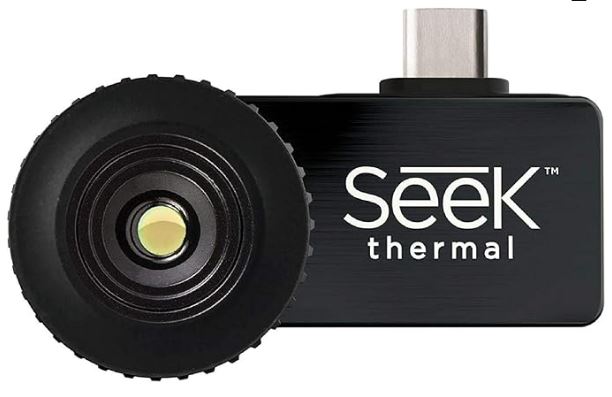
- Recommended Models: FLIR ONE Pro Thermal Camera (View on Amazon): High sensitivity; attaches directly to your smartphone.
- Seek Thermal Compact Camera (View on Amazon): A durable, lower-price alternative with great portability.
Method 3: Acoustic Listening
Acoustic listening is the art of “hearing” mechanical health. Because sound travels differently through solid materials than through the air, you can use specialized tools to listen to internal components without ever turning a screw.
By isolating internal vibrations, you can distinguish between normal operation and the early stages of mechanical failure.
Common Acoustic Signatures
- Worn Bearings: A rhythmic grinding or rumbling that intensifies as speed increases.
- Blocked Impellers: A distinctive “cavitation” sound (hollow popping or splashing).
- Airflow Restrictions: A high-pitched “whistling” or labored air-movement sound compared to the low hum of an open duct.
Top Diagnostic Applications
| Component | Sound Signature | Diagnostic Goal |
| Washer Drum Bearing | Rhythmic grinding/rumbling. | Localize the sound to the rear panel to confirm bearing failure. |
| Fridge Compressor | High-pitched whine or labored buzzing. | Distinguish between normal operation and internal wear/refrigerant issues. |
| Drain Pump | Erratic rattling or splashing. | Identify foreign objects or air bubbles (cavitation) in the impeller. |
The Toolset: Low-Tech vs. High-Tech
1. The Acoustic Stethoscope
- How it works: A medical or automotive stethoscope uses a metal probe to act as a conduit, filtering out ambient room noise and amplifying internal vibrations.
- The Benefit: Fast, zero-setup diagnosis. By moving the probe across the appliance casing, you can pinpoint exactly where the sound is loudest.
2. Digital Frequency Analysis
- How it works: A contact microphone is connected to a smartphone app (like Spectroid).
- The Benefit: It converts sound into a visual spectrogram.
- Visualizing Faults: Instead of relying on your ears, you can see specific frequency spikes that represent motor imbalance or bearing wear as a digital waveform.
Quick Recommendation
For under $30, the combination of a contact mic and a frequency analyzer app provides professional-grade diagnostic data that takes the guesswork out of “strange noises.”
Method 4: Vibration Analysis
Vibration analysis allows you to diagnose internal mechanical health by measuring the “pulse” of an appliance. By using your smartphone’s built-in sensors, you can turn invisible shakes into actionable data.
Every rotating part—from a drum to a fan blade—has a unique vibration signature. When a component fails or becomes imbalanced, that signature changes in a predictable way.
The Mechanics of Vibration
- Healthy Components: Produce low-amplitude, consistent vibrations.
- Imbalance: Causes high-amplitude spikes at the specific frequency of rotation (e.g., a heavy load in a washer).
- Mechanical Wear: Creates “noise” at higher frequencies, often related to bearing roller paths or cracked blades.
Diagnostic Applications
| Fault Type | Vibration Pattern | Typical Culprit |
| Imbalance | Strong, rhythmic spikes at low frequencies. | Tangled clothing or a loose washer drum. |
| Bearing Failure | “Fuzzy” or high-frequency vibrations. | Failing motor or drum bearings. |
| Component Damage | Irregular, sharp shocks or inconsistent readings. | A cracked dryer fan blade or missing pump vane. |
The Smartphone Technique
You don’t need industrial sensors; your phone’s accelerometer is sensitive enough for most home diagnostics.
- Preparation: Open a vibration app (e.g., Vibration Meter for Android or VibraTek for iOS).
- Placement: Place the phone flat against the top, back, and side panels while the appliance is running (e.g., during a spin cycle).
- Localization: Note which panel produces the highest amplitude (magnitude of shake). The fault is usually closest to the surface with the strongest readings.
- Analysis: Compare the vibration frequency to the rotation speed of the component to confirm the source.
Recommended Setup
Key Advantage: It allows you to “see” a failing part before it physically breaks or causes secondary damage to the appliance frame.
Apps: Vibration Meter (Android) or VibraTek (iOS).
Use Case: Best for Washing Machines and Dryers due to their large rotating masses.
Method 5: Wireless Temperature Monitoring
Wireless temperature sensors transform a single “snapshot” of temperature into a continuous time-series story. By monitoring internal conditions without opening the door, you can spot trends that indicate slow-acting failures or environmental sensitivities.
A wireless sensor (Bluetooth or WiFi) allows you to log temperature data over 24–48 hours. This reveals how an appliance behaves during different cycles, such as defrosting or high-use periods.
Why Continuous Data Beats a Single Reading
- Door Integrity: Opening a fridge door to check the temp immediately changes the data. Wireless sensors keep the environment sealed.
- Cycle Tracking: You can see exactly when a defrost cycle starts and how long it takes for the appliance to recover.
- Environmental Impact: See if the appliance fails only when your kitchen gets hot in the afternoon.
Diagnostic Scenarios
| Observed Pattern | What the Data Means | Potential Fault |
| Daily 2-hour “Warm Drift” | Defrost cycle is running too long. | Defrost timer or thermostat issue. |
| Gradual Multi-Day Warming | Compressor is running but losing ground. | Refrigerant leak or failing compressor. |
| Spikes During Room Heat | Cooling is marginal/inadequate. | Dirty condenser coils or airflow blockage. |
Recommended Equipment
1. SensorPush HT.w Temperature Sensor (View on Amazon)
- Best for: Precision and deep data.
- Storage: Logs 20 days of readings at one-minute intervals.
- The Benefit: The app turns raw data into a readable graph, making it easy to spot exactly when a “warm spike” occurred.

2. Govee H5179 WiFi Temperature Sensor (View on Amazon)
- Best for: Real-time remote monitoring.
- The Benefit: Provides a budget-friendly way to get alerts on your phone if the temperature exceeds a specific limit.
Pro Tip: Interpret the Graph
When reviewing your data, don’t just look for the current temperature. Look at the slope of the lines. A steep recovery line after a defrost cycle indicates a healthy cooling system, while a shallow, slow recovery line indicates a system that is struggling.
Method 6: Light-Based Visual Inspection
This method relies on high-intensity light to peer through the existing gaps, vents, and seams that are built into every appliance.
Strategic Access Points
Most appliances offer “windows” into their internal workings if you know where to point your light:
| Appliance | Inspection Point | What to Look For |
| Refrigerator | Kick plate gap & rear panel | Dust-clogged condenser coils or leaking drain pans. |
| Dryer | Drum interior & door seal | Cracked drum paddles or objects trapped in the rear seal. |
| Washing Machine | Door glass & gasket | Objects wedged in the tub or mold buildup in the folds. |
| Oven | Broiler drawer & glass | Element warping, debris, or damaged door hinges. |
The “Systematic Sweep” Technique
To ensure you don’t miss a subtle clue, follow this unhurried workflow:
- 360-Degree Perimeter: Move around the front, sides, back, top, and bottom.
- Light Positioning: Direct your light at an angle (oblique lighting) to make shadows pop—this helps reveal cracks or small foreign objects.
- The “Gap Check”: Peer through ventilation louvers and panel seams; many mechanical failures leave visual “breadcrumbs” (like shavings or fluid) near these openings.
The Pro-Tip: Go Hands-Free
While a handheld flashlight works, a high-lumen headlamp is the superior choice for appliance work.
- Follows Your Sight: The light beam automatically aligns with your eyes as you peer into tight crevices.
- Dual Hand Use: Frees up both hands to pull back gaskets, tilt the appliance, or move obstructing furniture.
- Constant Focus: Keeps the internal component illuminated while you adjust your viewing angle.
By starting with this zero-cost method, you often find that the “invisible” problem was actually in plain sight.
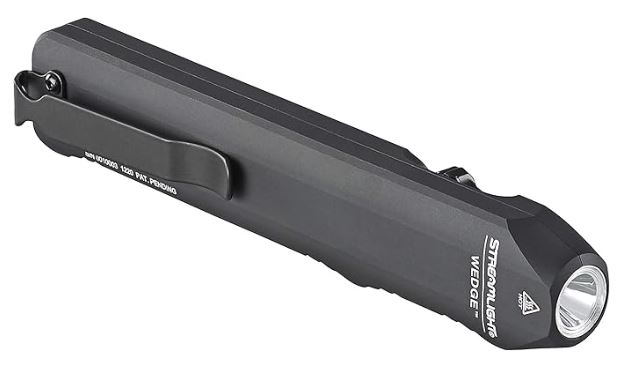
Recommended: Black Diamond Storm 500-R Rechargeable Headlamp | Streamlight 88810 Wedge 1,000 Lumen Max (View on Amazon)
Combining Methods: A Practical Non-Invasive Inspection Workflow
The real power of these methods comes from using them in sequence — each one narrowing down the location and nature of the fault before the next one confirms it. Here’s a practical workflow that applies to most appliance investigation scenarios.
| Step | Method | Tool | What You Learn |
|---|---|---|---|
| 1 | Visual inspection through gaps | Headlamp / flashlight | Obvious physical faults, debris, damage |
| 2 | Acoustic listening | Mechanical stethoscope | Bearing, pump, airflow condition |
| 3 | Vibration analysis | Smartphone + app | Imbalance, rotation faults, fault location |
| 4 | Thermal imaging | FLIR ONE or IR thermometer | Heat distribution, hot spots, gasket faults |
| 5 | Flexible camera inspection | Endoscope | Specific physical faults at identified location |
| 6 | Wireless temperature monitoring | WiFi or Bluetooth sensor | Time-based temperature patterns |
Working through steps 1 to 4 takes roughly 15 to 20 minutes and narrows most appliance faults to a specific area and likely cause. Step 5 — the endoscope inspection — then targets that specific area rather than exploring blindly. Step 6 runs in parallel over 24–48 hours for temperature-dependent faults.
This sequence inverts the traditional disassembly-first approach and replaces it with information-first diagnosis. By the time you reach for a screwdriver, you know what you’re looking for, where it is, and what you expect to find — which makes every subsequent step faster, more accurate, and less likely to create new problems.
Frequently Asked Questions
Can I really diagnose most appliance problems without taking anything apart?
For a significant proportion of common faults — foreign objects causing noise, blockages causing drainage problems, gasket failures causing temperature issues, bearing wear causing vibration — yes. Non-invasive inspection tools can identify the fault clearly enough to confirm both the diagnosis and the required repair before any disassembly begins. Some faults do require physical access to confirm or repair, but non-invasive inspection almost always reduces the scope and duration of that disassembly.
What is the single most useful tool for seeing inside appliances?
For direct visual inspection, a flexible inspection camera with a 5.5mm to 8.5mm diameter and IP67 waterproofing covers the widest range of appliance access points. For thermal fault detection, the FLIR ONE Pro provides capabilities that no other consumer tool approaches. But for most home repair scenarios, the inspection camera delivers more immediately actionable information — it shows you what’s physically present, which is often exactly what you need to know.
Do I need a thermal camera or will an infrared thermometer do the same job?
They measure the same physical property — infrared radiation — but a thermal camera creates a full image showing the spatial distribution of temperature across a surface, while an infrared thermometer gives you a single-point reading. For gasket inspection, component hot spot detection, and insulation fault finding, a thermal camera provides far more diagnostic information because the pattern of temperature distribution is what reveals the fault. An infrared thermometer is useful for confirming specific temperature values at known locations but can’t reveal the spatial patterns that thermal imaging makes visible.
Is acoustic listening a reliable diagnostic method or just guessing?
When applied systematically and interpreted carefully, acoustic listening through a mechanical stethoscope is a genuinely reliable diagnostic method — it’s been used by engineers and technicians for over a century. The key is using a proper contact stethoscope rather than listening freehand, moving the probe systematically between defined points on the appliance casing, and learning the specific sound signatures of common faults rather than interpreting sounds subjectively. Combined with vibration analysis data from a smartphone, acoustic findings become significantly more reliable.
How do I access the inside of a washing machine without removing panels?
The two main non-invasive access points on front-loading washing machines are the door seal gap at the rear of the gasket — which allows a slim endoscope probe to access the space between drum and outer tub — and the drain filter port at the front bottom, which provides access to the pump and lower sump area. Top-loading machines offer access through the drum opening itself. Neither requires panel removal and both give useful inspection access to the most fault-prone areas of the machine.
Can vibration analysis from a smartphone actually diagnose appliance faults?
Smartphone accelerometers are sensitive enough to detect the vibration signatures of common appliance faults — bearing wear, drum imbalance, fan blade damage — when the phone is placed in contact with the appliance casing during operation. The analysis requires a vibration measurement app and some familiarity with what the frequency data means. It’s more useful as a fault-localization tool — identifying which surface and therefore which component area generates the highest anomalous vibration — than as a definitive diagnosis tool. Combined with other methods, it provides meaningful directional information.
What appliance faults genuinely require disassembly to diagnose?
Internal wiring faults between components, control board failures that require visual inspection of solder joints and capacitors, motor winding failures that require probe access to motor terminals, and refrigerant leaks that require pressure testing all require at least partial disassembly to diagnose definitively. Non-invasive methods narrow the investigation to these components — so that when you do disassemble, you’re targeting exactly the right area rather than exploring blindly.
Conclusion on ‘How to See Inside Home Appliances Without Taking Them Apart’
The tools and methods in this guide represent a genuine shift in how appliance diagnosis can be approached — from disassembly-first guesswork to observation-first precision. They don’t eliminate every disassembly task, but they transform it from an exploratory act into a targeted one. You open the appliance knowing what you’re looking for, where it is, and what you expect to find.
The entry point is lower than most people expect. A flexible inspection camera and a mechanical stethoscope together cost under $60 and cover the majority of non-invasive inspection needs for all common home appliances. Add a thermal camera attachment for your phone if electrical component health and gasket inspection are priorities. Add a wireless temperature sensor for continuous refrigerator monitoring.
Build the capability in layers, starting with visual inspection and working outward to thermal, acoustic, and vibrational methods as your diagnostic needs grow. Each layer adds a different dimension of sight — and with enough dimensions, most appliance faults become visible long before a single screw is turned.
Browse appliance inspection tools on Amazon and start seeing what’s happening inside your appliances.

Hi, I’m Barlgan! I created Repair Me Yourself to empower homeowners to tackle appliance repairs with confidence. From decoding error codes to fixing cooling issues, I break down complex repairs into simple, actionable steps that save you time and money.