The ice maker churns out perfect cubes every few hours. Your freezer maintains ideal temperature, and everything seems fine—until you press the water dispenser lever and nothing happens.
Not a drip. Not a trickle. Just silence and an empty glass.
This specific problem baffles many GE refrigerator owners because the logic doesn’t add up. Both refrigerator systems share the same water line, right? So how can the ice maker work flawlessly while the water dispenser acts like it’s disconnected?
When your GE refrigerator water dispenser stops working but the ice maker functions normally, the problem typically lies in the dispenser switch, actuator assembly, control board, or dispenser-specific water line components rather than the main water supply. Since both systems branch from the same source, a working ice maker confirms adequate water pressure and supply. The failure point exists in components exclusive to the dispenser path—the dispenser valve, tubing from the reservoir to the door, door switch mechanisms, or electronic controls governing dispenser operation.
This guide takes a different approach than typical appliance troubleshooting. Instead of starting with “check if it’s plugged in,” we’ll leverage what’s already working (your ice maker) to narrow down exactly where the problem exists.
You’ll discover diagnostic tricks specific to GE models, including the French door series that’s notorious for dispenser issues. We’ll explore fixes you won’t find in the manual, explain why this particular problem happens so frequently, and show you how to repair it without replacing half your refrigerator.
Understanding Why GE Refrigerator Ice Maker Works But Water Dispenser Doesn’t
Here’s the counterintuitive truth about your GE refrigerator: the ice maker and water dispenser aren’t as connected as they seem. Yes, they share the same incoming water line from your home’s plumbing, but that’s where the similarity ends.
Think of your water supply as a main highway that splits into two separate exit ramps. One ramp leads to the ice maker in your freezer—a relatively simple path with few components.
Water flows through the inlet valve directly to the ice maker assembly. The other ramp leads to the water dispenser—a much more complex route involving the dispenser valve, internal reservoir tank, multiple feet of tubing through the door hinge, and several electronic components.
The critical insight: your working ice maker proves the main highway is open for business. Water pressure is adequate. The inlet valve functions.
The filter isn’t completely blocked. You’ve just eliminated 60% of typical water delivery problems with this single observation.
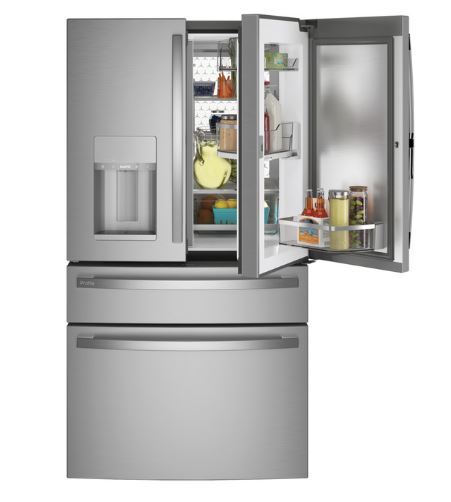
GE refrigerators manufactured from 2015 onward use increasingly sophisticated dispenser systems. The French door models especially incorporate multiple safety switches, electronic control boards, and even capacitive touch controls on newer units.
Each added component creates another potential failure point. Meanwhile, the ice maker remains refreshingly simple—a mechanical system that’s changed little in decades.
GE Refrigerator Water Dispenser Not Working But Ice Maker Is – The Fixes
Below are the applicable fixes when your GE refrigerator water dispenser stops working but the ice maker works just fine:
Fix #1: Checking The Frozen Reservoir Tank (Most Common Cause)
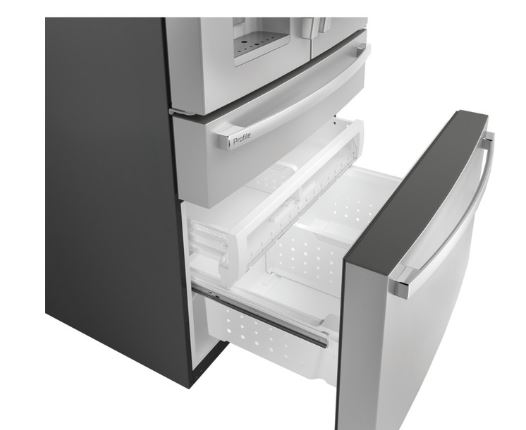
GE French door refrigerators have a persistent design issue involving the water reservoir tank. This small plastic tank sits in the fresh food compartment’s back wall and holds about 20 ounces of water.
When this tank freezes, water can’t reach the dispenser—but the ice maker continues working because it draws water before the reservoir.
The problem intensifies during winter or when the refrigerator runs cold.
The symptoms: Water dispenser delivers nothing or only a weak trickle. Ice maker produces perfect cubes. You might notice frost buildup on the back interior wall.
The permanent fix: Adjust your refrigerator temperature up by 1-2 degrees (to 38-39°F instead of 36-37°F). This slight increase won’t affect food safety but prevents reservoir freezing.
For immediate relief, use a hair dryer on LOW heat against the back wall where the reservoir sits (never use high heat on plastic). Ten minutes of gentle warming typically thaws the tank completely.
Some technicians recommend insulating the reservoir area with foam insulation tape available at hardware stores. This DIY modification prevents refreezing without affecting refrigerator performance.
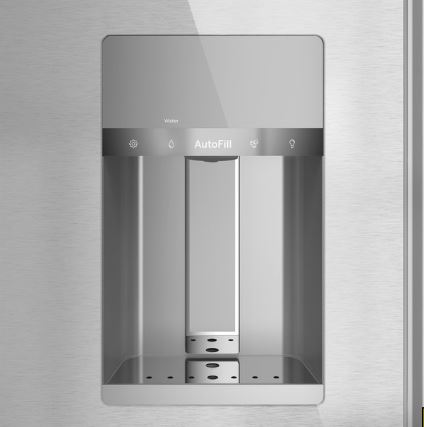
Fix #2: Dispenser Actuator Lever Replacement
The actuator is the plastic arm inside your dispenser area that you push with your glass. Over years of use, this component wears down, cracks, or breaks entirely.
When it fails, pressing it doesn’t activate the internal switch that signals the control board to open the water valve.
You’ll physically feel the difference—a broken actuator has excessive play, feels loose, or doesn’t spring back when released.
Diagnosis: Remove the dispenser cover (usually held by clips or screws hidden behind the drip tray). Inspect the actuator arm for cracks, especially where it connects to the switch mechanism.
Try pressing the switch directly with your finger—if water flows, the actuator is the problem.
The repair: GE actuator assemblies cost $25-45 depending on your model. Order using your model number (found inside the fresh food section on the left or right wall).
Installation takes 15 minutes with a screwdriver. Remove the old actuator by releasing the tabs, snap the new one into place, and reassemble the cover.
Pro tip: When you have the cover off, clean the entire dispenser area thoroughly. Years of calcium deposits and gunk buildup can prevent proper actuator movement even when the part itself is fine.
Fix #3: Dispenser Control Board Reset and Replacement
GE refrigerators with electronic touch controls occasionally experience software glitches or component failures on the dispenser control board. This board is separate from the main refrigerator control board in many models.
The reset procedure: Unplug your refrigerator for 5 full minutes (not 30 seconds—needs a complete power cycle). This clears the control board’s memory and resets all functions.
Plug back in and test. About 20% of dispenser failures resolve with this simple reset.
Testing the board: Access your refrigerator’s diagnostic mode by pressing specific button combinations (varies by model—common sequence is holding “Lock” and “Refrigerator Temperature” buttons for 3 seconds). Error codes will display.
Codes related to dispenser function indicate board issues. If the reset didn’t work and you have error codes, the board likely needs replacement.
Board replacement: Dispenser control boards cost $80-200 depending on your GE model series. The board is usually behind the control panel on the refrigerator door.
Remove the panel carefully (it’s held by clips that break easily), disconnect the wire harnesses, swap the board, and reassemble. Take photos before disconnecting anything—wire placement matters.
Fix #4: Door Switch Circuit Diagnosis
GE refrigerators include safety switches in the door assembly that prevent the dispenser from operating when the door is open. These switches fail frequently—especially on heavily-used refrigerators—creating a situation where the refrigerator thinks the door is always open.
Result: disabled water dispenser regardless of what you do.
Finding the switch: The door switch is typically located in the top right or left section of the refrigerator compartment frame (not on the door itself). It’s a small button that the door presses when closed.
Testing procedure: With the refrigerator running and door closed, manually press the switch with your finger. If the dispenser light turns off when you press it, the switch works.
If pressing it changes nothing, it has failed. You can also test continuity with a multimeter—the switch should show continuity when pressed, none when released.
The bypass test: Disconnect the switch’s wire connector and bridge the wires with a small piece of wire or paperclip (this tricks the system into thinking the door is closed). Try the dispenser.
If water flows, replace the switch ($15-35). If nothing changes, the problem lies elsewhere.
Fix #5: Dispenser Valve Coil Replacement
The dispenser valve is different from the main water inlet valve. It’s a secondary valve that controls water flow specifically to the dispenser.
When this valve fails, the ice maker continues working because it uses the primary inlet valve.
The dispenser valve is located inside the refrigerator compartment, usually behind the back wall or in the upper section.
Symptoms of valve failure: No water flow even when the valve receives power (you hear clicking but no water). Sometimes the valve sticks partially open, causing constant dripping from the dispenser.
Testing the valve: Use a multimeter (View on Amazon) to test the valve’s solenoid coil. You should read 200-500 ohms of resistance.
Infinite resistance (open coil) or near-zero resistance (shorted coil) means replacement is needed. Also manually check if the valve opens when powered—you can carefully apply 120V directly to the terminals for a split-second test (extreme caution required).
Replacement process: The valve costs $40-70 for GE models. Shut off the water supply, disconnect water lines (keep towels handy), remove electrical connections, unbolt the old valve, and install the new one.
The trickiest part is accessing the valve—some GE models require removing the entire back panel inside the refrigerator compartment, which involves temporarily removing shelves and drawers.
Fix #6: Purge Air From the Water Line System
Even though your ice maker works, air can become trapped in the dispenser-specific water lines. This happens after filter changes, water supply interruptions, or when the refrigerator has been unplugged for extended periods.
Air pockets prevent water from reaching the dispenser while not affecting the ice maker’s water supply (different line routing).
This is the easiest problem to fix but commonly overlooked.
The purging process: Press and hold the water dispenser lever for 2 full minutes. You’ll likely hear hissing and sputtering as air purges.
Initially, nothing may dispense—keep holding. After 30-60 seconds, water should start flowing sporadically, then steadily.
Dispense 2-3 gallons total to ensure complete purging.
For stubborn air locks, try this advanced technique: dispense water for 30 seconds, wait 2 minutes, then dispense again for 30 seconds.
Repeat this cycle 5-6 times. The wait periods allow the system to refill and build pressure, pushing trapped air out more effectively.
Some GE models have a purge function in the service menu. Access it through the diagnostic mode and run the automatic purge sequence.
Fix #7: Replace the Dispenser Water Tubing
The thin plastic tubing that carries water from the refrigerator compartment through the door hinge to the dispenser can crack, kink, or collapse. These tubes are subject to constant flexing every time you open and close the door—thousands of cycles per year.
Eventually, they fail. Because the ice maker doesn’t use this tubing path, it remains unaffected.
Inspection method: Open the refrigerator door fully. Look at the bottom hinge area where tubing runs from the cabinet into the door.
You’ll see thin plastic tubes (usually 1/4″ diameter). Gently manipulate them while checking for cracks, kinks, or collapsed sections.
Also check inside the door itself—some GE models have access panels that reveal the internal tubing path. Look for pinch points where tubing might be compressed.
Replacement approach: This repair ranges from simple to complex depending on your model. Tubing kits cost $20-40.
For bottom-hinge tube replacement, you’ll need to remove the bottom door hinge cover and disconnect the old tubing. Thread new tubing through the same path, being extremely careful not to kink it during installation.
The connections typically use push-fit fittings—push the tube in firmly until it seats completely.
For tubes damaged inside the door itself, you may need to remove the door from the refrigerator and disassemble the inner door panel.
This is advanced repair territory—consider professional help if you’re not comfortable with door disassembly.
Fix #8: Control Board Signal Path Repair
Less common but increasingly seen in GE Profile and Cafe series models: the control board receives the dispenser signal but fails to send power to the dispenser valve. This happens when specific circuits or relays on the board fail while the rest of the board functions normally.
Your ice maker works, lights work, temperature control works—everything except dispenser activation.
This is a partial board failure, and unfortunately, it requires board replacement.
There’s no component-level repair for modern refrigerator control boards due to their integrated circuits and surface-mount components.
Verification: Using a multimeter, test for voltage at the dispenser valve connections while someone presses the dispenser lever. You should read 120V AC when the lever is pressed.
If there’s no voltage, but the control board powers on and functions otherwise, the signal path has failed.
The solution: Main control board replacement for GE refrigerators costs $200-400 depending on your model. This is the most expensive repair on this list, but it’s also the least common cause.
Replace the control board only after eliminating all other possibilities. Consider the refrigerator’s age—if it’s over 10 years old and needs a $300 control board, repair might not be economical compared to replacement.
Fix #9: Water Filter Housing and Bypass Issues
While a completely clogged filter would affect both ice and water, a partially failing filter or filter housing can specifically impact the dispenser while leaving the ice maker functional. This happens because of the way water flow diverts after the filter.
The filter housing problem: Some GE refrigerators have a design where the dispenser draws filtered water while the ice maker can draw pre-filter water (to prevent slow ice production). When the filter housing cracks or the filter’s internal bypass valve fails, dispenser water flow stops.
Testing approach: Remove your water filter completely and install the filter bypass cap (came with your refrigerator—a small plastic plug that seals the filter housing). Try the dispenser.
If water flows without the filter, you’ve found the issue. The problem is either a severely clogged filter (replace every 6 months) or a cracked filter housing (needs replacement).
Housing replacement: Filter housings cost $30-60 for GE models. They’re usually simple snap-in components, but some models require removing interior panels for access.
Always use genuine GE filters or certified equivalents (View on Amazon). Note that cheap aftermarket filters sometimes don’t seal properly, creating the exact symptoms you’re experiencing.
Preventing Future Dispenser Problems in GE Refrigerators
Once you’ve fixed your dispenser, these practices keep it working reliably for years. GE refrigerators need specific maintenance that differs from other brands.
Temperature management is critical. GE French door models should run at 37-38°F in the refrigerator section, never below 36°F. Lower temperatures cause reservoir freezing and create the single most common dispenser failure.
Use the dispenser daily. Stagnant water in the lines and reservoir encourages bacterial growth and mineral deposits. Even if you don’t need water, dispense 4-6 ounces daily to keep the system flowing.
Replace filters on schedule. Every 6 months or 300 gallons, whichever comes first. Set phone reminders—don’t rely on memory.
Clogged filters create back-pressure that damages dispenser valves over time.
Check water pressure annually. Your home’s water pressure should be 20-120 PSI (optimal is 40-60 PSI).
Too much pressure damages valves and seals. Too little causes weak flow and air lock problems.
Install a pressure gauge (View on Amazon) on an outdoor spigot and test.
Clean the dispenser area quarterly. Calcium deposits and mineral buildup accumulate where you can’t see them—inside the dispenser housing and on valve seats.
Remove covers and clean thoroughly with white vinegar solution every 3 months.
What This Problem Reveals About Your GE Refrigerator
The “ice works but water doesn’t” problem actually provides valuable diagnostic information about your refrigerator’s overall health and remaining lifespan. Pay attention to these indicators.
If your GE is 3-5 years old and experiencing this issue, it’s likely a simple component failure (switch, actuator, frozen reservoir). These are normal wear items—fix and move on.
If your GE is 8-12 years old, consider this a warning sign. Dispenser problems at this age often precede compressor issues, sealed system leaks, or control board failures.
Budget for potential replacement (View on Amazon) within 2-3 years.
If you’re repeatedly having this problem (fixed it twice already), you have a systemic issue—usually temperature control problems or voltage fluctuations affecting electronic components.
Address the underlying cause rather than continuing to replace the same parts.
The complexity of your repair matters.
Simple fixes like frozen reservoirs or dirty filters cost under $50. Complex repairs requiring control boards or extensive disassembly push $300-500 when professionally done.
Compare this to a new mid-range refrigerator ($1,200-2,000). The decision point: repair if it’s under 7 years old or costs less than 30% of replacement value.
Also Read:
- Are GE refrigerators Good? (Expert Explanation)
- Why Your GE refrigerator is Making a Loud Humming Noise & Its Fix
Frequently Asked Questions
Why does my GE ice maker work but water dispenser doesn’t?
The ice maker and water dispenser use different water delivery paths after the main inlet valve. A working ice maker confirms adequate water supply, showing the problem lies in dispenser-specific components like the dispenser valve, frozen reservoir tank, or dispenser control mechanisms.
The most common culprit is a frozen water reservoir in the refrigerator compartment, which only affects the dispenser path while leaving ice maker operation completely normal.
How do I reset my GE refrigerator water dispenser?
Unplug the refrigerator for 5 full minutes to completely reset all control boards. Plug back in and test—this resolves about 20% of dispenser issues caused by software glitches or temporary electronic failures.
For models with touch controls, you can also try entering the diagnostic mode and running a system reset from there, though the full power cycle is more thorough.
What causes a GE refrigerator water dispenser to freeze?
Refrigerator temperature set below 36°F causes the internal water reservoir tank to freeze. This happens most frequently in French door models during winter months or when cooling systems run aggressively due to ambient temperature or door seal issues.
The fix is simple: increase your refrigerator temperature to 37-38°F, which prevents freezing without affecting food safety.
How much does it cost to fix a GE refrigerator water dispenser?
Simple fixes like actuators or switches cost $25-60 in parts. Dispenser valves run $40-70. Control boards are $80-400 depending on the model.
Professional repair with diagnosis costs $150-350 total for most dispenser problems. The frozen reservoir issue costs nothing to fix—just adjust your temperature setting.
Can I use my GE refrigerator if the water dispenser doesn’t work?
Yes, a non-functioning water dispenser doesn’t affect refrigeration, ice making, or food safety. You simply won’t have access to chilled water from the door—use the ice maker or store water pitchers inside as alternatives.
Many people run their refrigerators for years without fixing minor dispenser issues with no negative consequences.
Where is the water dispenser valve on a GE refrigerator?
The dispenser valve location varies by model but is typically inside the fresh food compartment behind the back wall panel or in the upper left section. It’s separate from the main water inlet valve at the back of the refrigerator.
You’ll need to remove interior shelving and the back panel to access it on most models.
How long do GE refrigerator water dispensers last?
With proper maintenance, GE water dispensers last 8-15 years. Factors affecting lifespan include usage frequency, water quality (mineral content), temperature settings, and whether filters are replaced on schedule.
French door models tend to have more dispenser issues than side-by-side or top-freezer models due to their more complex water routing.
Conclusion
A GE refrigerator with a working ice maker but failed water dispenser signals a specific subset of problems—none involving your main water supply. The working ice maker is your diagnostic advantage, immediately eliminating half the typical troubleshooting steps and pointing directly to dispenser-exclusive components, control circuits, or the notorious frozen reservoir issue affecting French door models.
Start with the simplest fixes first: check for a frozen reservoir by adjusting temperature settings, purge air from the lines, and verify your water filter isn’t clogged. These three solutions resolve about 70% of cases and cost little to nothing.
If those don’t work, move systematically through the component tests: actuator, door switch, dispenser valve, and control boards. Each has specific symptoms that help narrow down the exact failure point.
Remember that prevention beats repair. Maintain proper refrigerator temperature (37-38°F), replace filters every 6 months, and use your dispenser regularly to keep water flowing through the system. These simple habits prevent most dispenser failures before they start.
When repair costs approach $300-400, especially on refrigerators over 8 years old, seriously consider replacement. A dispenser failure this expensive often signals other components nearing the end of their service life.

Hi, I’m Barlgan! I created Repair Me Yourself to empower homeowners to tackle appliance repairs with confidence. From decoding error codes to fixing cooling issues, I break down complex repairs into simple, actionable steps that save you time and money.