Your Frigidaire window AC just quit working. Maybe it won’t turn on at all. Maybe the display is dark. Or perhaps it’s running but not cooling your room.
Frigidaire makes reliable window units, but like any appliance, they develop problems. Most issues follow predictable patterns once you know what to look for. I’ve diagnosed thousands of AC failures across models from the budget FFRA0511U1 to the smart-enabled FHWW084WD1.
Frigidaire window air conditioner problems typically stem from power supply issues, thermostat malfunctions, dirty filters, or component failures in the compressor, control board, or temperature sensors. Most problems can be resolved through systematic troubleshooting without professional service.
Quick Frigidaire Window Air Conditioner Troubleshooting Chart
Start here to identify your specific Frigidaire air conditioner problem and jump to the right solution.
| Symptom | Most Common Cause | Quick Check | Section to Read |
|---|---|---|---|
| Unit completely dead | Power supply or tripped breaker | Test outlet, check breaker | Power Issues |
| Runs but doesn’t cool | Dirty filter or low refrigerant | Check filter, feel coils | Cooling Problems |
| Control panel unresponsive | Control board glitch | Power cycle unit | Control Panel Section |
| Compressor won’t start | Capacitor failure or overload | Listen for clicking | Compressor Troubleshooting |
| Reset button keeps tripping | Electrical short or overload | Check amp draw | Reset Button Issues |
| Fan works, compressor doesn’t | Failed start relay | Test with multimeter | Compressor Section |
Understanding Your Frigidaire Window Air Conditioner System
Frigidaire window air conditioners operate through four main components working together. The compressor pressurizes refrigerant to enable heat transfer. The condenser and evaporator coils handle actual cooling. The control board manages everything electronically.
Each component depends on the others functioning correctly. When one part fails, symptoms can mislead you into diagnosing the wrong problem.
Power flows from your wall outlet through the control board, which regulates voltage to different components. The compressor draws the most power, often 7-12 amps depending on BTU rating.
Frigidaire uses proprietary control boards across their lineup. This means replacement parts must match your specific model number exactly. Generic boards don’t work with Frigidaire’s programming.
Frigidaire Window Air Conditioner Won’t Turn On
A completely unresponsive unit is actually easier to diagnose than intermittent problems. Power issues have clear culprits. Follow these steps to identify why your Frigidaire air conditioner won’t power up.
1. Verify Power Supply and Outlet Function
Before assuming your AC is broken, confirm it’s receiving electricity. This sounds obvious, but incomplete power causes 30% of “won’t turn on” calls.
Plug a lamp or phone charger into the same outlet. If nothing works, the outlet itself is dead. Check your circuit breaker panel for a tripped breaker.
Frigidaire window ACs require dedicated 15-20 amp circuits for larger models. Sharing circuits with other appliances causes voltage drops that prevent startup.
Use a multimeter (View on Amazon) to test outlet voltage. You should read 110-120 volts AC. Readings below 105 volts indicate wiring problems that prevent proper operation.
2. Inspect the Power Cord Thoroughly
Power cords fail more often than you’d expect, especially on units moved between seasonal storage. Look for any visible damage, kinks, or exposed wiring.
Check where the cord enters the unit casing. This connection point experiences stress from vibration and weight. Internal wire breaks occur here while the exterior looks fine.
Test continuity with a multimeter if you have one. Disconnect the cord and check resistance from plug to internal connection. Infinite resistance means a break somewhere.
Replacement cords cost $20-40 and take 15 minutes to swap. Match the amperage rating to your original cord, typically 13-15 amps for most window units.
3. Check Internal Fuses and Breakers
Many Frigidaire models include internal fuses protecting the control board. These blow during power surges but aren’t easily visible without opening the unit.
Unplug the AC and remove the front panel and outer casing. Look for a small glass or ceramic fuse near where the power cord connects to the control board.
Test the fuse with a multimeter set to continuity mode. A good fuse shows near-zero resistance. Replace blown fuses with identical amp and voltage ratings.
Some newer Frigidaire models use resettable thermal breakers instead of fuses. These small buttons pop out when tripped. Press them back in to reset.
4. Examine the Control Board for Damage
With the casing open, inspect the control board carefully. Look for burnt components, bulging capacitors, or discoloration indicating heat damage.
Smell for burnt electronics. A distinct electrical burning odor means components have fried. This typically requires full control board replacement.
Check for loose wire connections at the control board. Vibration shakes connectors loose over time. Press each connector firmly into its socket.
Look for corrosion on circuit board traces or connector pins. Green or white crusty buildup blocks electrical flow. Clean gently with electronics contact cleaner.
5. Test the Display and Indicator Lights
Sometimes the unit is actually on but the display is dead, creating the illusion of complete failure. Listen carefully for any sounds when you plug it in.
A faint humming means the transformer is energized even if nothing shows on the display. This narrows the problem to the display panel or its connections.
Check if remote control operation works when the panel doesn’t. Many Frigidaire models respond to remotes even with dead displays. This confirms the control board functions.
If only the display died, replacement panels cost $40-80. The main unit still works fine, and you can often control it via remote while waiting for parts.
Frigidaire Window Air Conditioner Control Panel Not Working
Control panel failures frustrate owners because the AC seems fine otherwise. These digital interfaces fail in specific ways that can be diagnosed and fixed systematically. Here’s how to go about it:
1. Diagnose Button Response Issues
Test each button systematically. Press each one firmly and hold for 2 seconds. Some buttons require long presses to activate.
If some buttons work while others don’t, the button membrane has partially failed. These flexible circuit boards degrade from repeated use and moisture exposure.
Buttons that produce sounds but no action indicate the control board receives signals but can’t execute commands. This points to control board logic failure.
Completely unresponsive buttons with no beeps or sounds mean the button membrane itself has died. The control board never receives input signals.
2. Address Window Unit Control Panel Problems
Window unit control panels face harsher conditions than portable units. Condensation drips onto them, and temperature swings stress electronics.
Remove the front grille and look for water damage around the control panel area. Even dried water leaves mineral deposits that conduct electricity incorrectly.
Clean the area behind the control panel with isopropyl alcohol on a cotton swab. This removes conductive residue without damaging electronics.
Check the ribbon cable connecting the control panel to the main control board. These flat cables work loose from vibration. Unplug and reseat it firmly.
If cleaning and reconnecting don’t help, the control panel assembly needs replacement. Order parts using your complete model number from the rating plate.
3. Resolve Display Issues Separately
Displays fail independently from buttons. You might have working buttons with a dark screen, or a lit screen with dead buttons.
LED displays fail when individual LED segments burn out. You’ll see partial numbers or letters. These displays require full replacement.
LCD displays fade when the backlight fails. You can sometimes see faint numbers in bright light. Backlight replacement is difficult, so replace the whole panel instead.
Flickering displays usually indicate loose connections rather than display failure. Reseat all connections before ordering replacement parts.
4. Factory Reset for Control Panel Recovery
Many control panel issues resolve with a proper factory reset. This clears corrupted settings and restarts the control logic.
Unplug the unit completely. Press and hold the power button while plugging it back in. Hold for 20 seconds.
The display should flash all segments or cycle through patterns. This indicates successful reset completion.
Release the button and wait 60 seconds before attempting any operation. The control board reinitializes all default parameters during this time.
Frigidaire Air Conditioner Heater Troubleshooting
Frigidaire’s heat-capable models add complexity with additional heating elements and safety switches. Heat mode failures have unique causes that require different diagnostic approaches.
Understand Heat Mode Operation
Heat pumps reverse refrigerant flow to extract heat from outside air. This only works above 40°F outside. Colder temperatures prevent effective heating.
Electric resistance heaters supplement or replace heat pump operation. These draw significant power, often 12-15 amps total.
Heat mode requires all cooling components plus additional heating elements. More parts mean more potential failure points.
Diagnose No Heat Output
If the unit runs but produces no heat, first verify you’ve selected heat mode correctly. Check that temperature setting exceeds room temperature by at least 3 degrees.
Feel the air coming from the unit. Slightly warm air means heating elements work partially. Room-temperature air means complete heating failure.
Listen for relay clicks when switching to heat mode. These sounds indicate the control board attempts to engage heating elements.
If you hear clicks but get no heat, the heating element itself has failed. These resistive coils burn out over time from thermal stress.
Check Heat Mode Safety Switches
Frigidaire includes thermal cutoffs preventing overheating fires. These safety switches interrupt power when temperatures exceed safe limits.
These switches reset automatically when cooling down, but repeated tripping indicates airflow problems. Clean filters and coils thoroughly.
Blocked vents or closed registers cause air temperature to rise excessively. Ensure nothing obstructs airflow in heat mode.
Test the high-limit switch with a multimeter. Access it near the heating element. It should show continuity when cool and open when hot.
Resolve Reversing Valve Problems
Heat pump models use reversing valves switching refrigerant flow direction. These valves fail in either cooling or heating position.
A stuck valve causes the unit to cool when you select heat, or vice versa. The valve itself makes a distinct whooshing sound when operating correctly.
Valve replacement requires recovering refrigerant professionally. This isn’t a DIY repair unless you’re EPA certified for refrigerant handling.
If valve failure is suspected, convert to cooling-only use by disconnecting the valve solenoid. The unit works fine as an AC, losing only heating capability.

Frigidaire Window Air Conditioner Compressor Not Turning On
The compressor is your AC’s heart. When it doesn’t run, cooling stops completely. These failures follow predictable patterns that can help you diagnose the issue. Here’s how to go about it:
1. Identify Compressor Failure Symptoms
A working compressor makes a steady humming sound and vibrates slightly. Feel the compressor body. It should be warm during operation.
Complete silence when the unit should cool means the compressor isn’t starting. Often you’ll hear clicking as the start relay attempts engagement.
The fan running with no compressor activity is the classic symptom. The control board activates the fan but the compressor never starts.
Check if the compressor is hot to touch even when off. Overheated compressors trigger thermal overload protection, preventing restart until cool.
2. Test the Start Relay and Capacitor
Start relays provide the initial power surge needed to overcome compressor inertia. These small components fail frequently.
Locate the start relay. It’s a small box attached to the compressor with two or three wires. Remove it and shake gently. Rattling means internal contacts broke loose.
Test relay continuity between terminals. Good relays show continuity in one direction. Failed relays show either constant continuity or none at all.
Capacitors store electrical charge helping the compressor start and run efficiently. They fail gradually, causing hard starting before complete failure.
3. Address Compressor Overload Protection
Thermal overload protectors shut down compressors automatically when they overheat. This prevents motor burnout but causes cooling interruption.
These protectors reset automatically after cooling down, usually 30-60 minutes. If your compressor runs briefly then stops repeatedly, overload protection is activating.
Overheating causes include low refrigerant, dirty condenser coils, or failing compressor bearings. Address root causes, not just symptoms.
Check amp draw with a clamp meter. Compressors drawing significantly over rated amperage indicate internal mechanical problems requiring replacement.
4. Determine When Compressor Replacement Is Needed
Compressors last 10-15 years typically, but failure can occur sooner with poor maintenance or manufacturing defects.
Loud screeching or grinding sounds mean internal bearing failure. This metal-on-metal contact destroys the compressor quickly. Replacement is the only option.
Compressor replacement costs $250-400 in parts plus labor. For window units over 8 years old, replacement often costs more than a new unit (View on Amazon).
Consider refrigerant type when deciding on replacement. Older R-22 units should be replaced with modern R-410A units due to refrigerant availability and cost.
Comprehensive Cooling Performance Problems
Sometimes Frigidaire units run perfectly but don’t cool adequately. These problems require different troubleshooting approaches focused on airflow and heat exchange efficiency.
Diagnose Insufficient Cooling Output
First, verify realistic expectations. Window ACs cool specific square footage based on BTU rating. Oversized rooms never reach desired temperatures.
Measure temperature differential between intake and output air. Properly functioning ACs produce 15-20°F difference. Less than 10°F indicates problems.
Check if the unit cycles on and off normally. Short cycling (running less than 10 minutes per cycle) prevents adequate cooling.
Verify outdoor temperature isn’t exceeding your unit’s design limits. Most window ACs struggle above 100°F ambient temperature.
Clean or Replace Air Filters
Dirty filters cause 50% of insufficient cooling complaints. Restricted airflow prevents heat exchange no matter how well other components work.
Remove filters and hold them to light. If you can’t see through them clearly, they need cleaning or replacement.
Washable filters should be cleaned monthly during peak usage. Rinse with warm water until water runs clear. Dry completely before reinstalling.
Disposable filters need replacement when discolored or matted. Keep spare filters on hand for immediate replacement during cooling season.
Clean Evaporator and Condenser Coils
Dirty coils reduce heat transfer efficiency dramatically. External condenser coils accumulate outdoor debris, while internal evaporator coils collect indoor dust.
Access condenser coils by removing the outer casing. Brush away loose debris, then spray with coil cleaner from appliance stores.
Evaporator coils require more care. They’re delicate and coated with condensation. Use gentle coil cleaner and soft brush. Rinse with spray bottle. Get this AC cleaning kit from Amazon, which features a coil cleaner, odor-elimination tab, and adjustable sprayer.
Severely dirty coils may need professional cleaning with specialized equipment. Years of buildup becomes cemented on and resists DIY cleaning.
Check Refrigerant Levels
Low refrigerant prevents proper cooling but isn’t DIY-serviceable without EPA certification. Signs include frozen evaporator coils and weak cooling.
Feel the larger refrigerant line running between indoor and outdoor sections. It should feel cold and possibly sweat during operation.
Ice buildup anywhere on the unit indicates refrigerant problems. Either too much or too little refrigerant causes freezing.
Refrigerant doesn’t deplete through normal use. If levels are low, leaks exist somewhere in the system. Simple recharging without leak repair wastes money.

Frigidaire Window Air Conditioner Reset Procedures
Proper reset procedures fix many electronic glitches and restore normal operation. Different reset types address different problems, so knowing which to use saves time.
Standard Power Cycle Reset
The basic reset solves temporary control board glitches. Unplug the unit completely from the wall outlet.
Wait a full 5 minutes. This time allows all capacitors to discharge fully and the control board memory to clear completely.
Plug back in and immediately test basic functions. Don’t adjust settings yet. Just verify the display lights up and buttons respond.
If problems persist after power cycling, more intensive reset procedures are necessary.
Control Board Hard Reset
Some issues require resetting the control board directly using its reset button. This goes deeper than simply unplugging the unit.
Remove the front panel to access the control board. Look for a small button labeled “Reset” or “SW1” near the microprocessor.
Press this button once with a paperclip tip. The display should briefly show all segments, confirming successful reset.
This reset clears error logs and calibration data, restoring absolute factory defaults. You’ll need to reprogram all settings afterward.
Filter Timer Reset
Many Frigidaire models include filter change reminders that light up after programmed hours. This isn’t a malfunction but confuses many owners.
Locate the Filter or Reset button on the control panel. It might share a button with another function.
Press and hold for 3-5 seconds until the indicator light turns off. This resets the hour counter to zero.
This maintenance reminder doesn’t affect operation but the persistent light makes users think something is wrong. Reset it after cleaning filters.
Temperature Calibration Reset
If your Frigidaire air conditioner displays incorrect room temperature, calibration might be off. This doesn’t prevent cooling but causes inefficient cycling.
Enter calibration mode by pressing temperature Up and Down buttons simultaneously for 5 seconds. Not all models support this feature.
Adjust displayed temperature to match a reliable thermometer placed near the intake vent. Changes typically occur in 1°F increments.
Save calibration by pressing the Mode button or waiting 10 seconds for automatic save. Test that displayed temperature now matches reality.
Frigidaire Air Conditioner Reset Button Keeps Tripping
Repeatedly tripping reset buttons indicate serious underlying problems. These require immediate attention to prevent damage or fire hazards. Here’s how to diagnose and fix the issue.
Understand Reset Button Types
Modern Frigidaire units include several types of reset mechanisms protecting different components. The main power reset protects against electrical overload.
GFCI-type resets protect against ground faults. That’s electrical current escaping to ground through unintended paths. These trip at 4-6 milliamps of leakage.
Thermal resets protect motors and compressors from overheating damage. They’re temperature-activated, not current-activated like other resets.
Identifying which type keeps tripping narrows down possible causes significantly. Check your manual for reset button locations and types.
Diagnose Electrical Overload Causes
Overload resets trip when amp draw exceeds safe limits. This happens from several causes, all requiring correction.
Measure operating current with a clamp ammeter. Compare to the rating plate specifications. Draws exceeding 110% of rated amps indicate problems.
Low voltage from weak outlets forces components to draw more current achieving the same work. Test outlet voltage under load conditions.
Failing motors draw excessive current as bearings wear or windings short. Listen for unusual sounds accompanying reset tripping.
Shared circuits with other appliances cause cumulative overload. Move the AC to a dedicated circuit rated for its full amp draw.
Address Ground Fault Issues
GFCI-style resets tripping immediately upon plugging in indicate ground faults. Current leaks to ground through damaged insulation or water intrusion.
Disconnect all wire harnesses from the control board. Plug in the unit. If the reset doesn’t trip, reconnect harnesses one at a time to isolate the fault.
Water damage creates ground paths through normally insulated components. Thoroughly dry all electrical components and check for corrosion.
Pinched wires where the casing closes create insulation damage. Inspect wire routing carefully, especially around sharp metal edges.
If tripping persists with everything disconnected, the power cord or control board itself has ground faults. Test each component individually for leakage.
Resolve Thermal Overload Tripping
Compressor thermal overloads trip when motor temperature exceeds safe limits. This protection prevents motor burnout but indicates problems.
Clean condenser coils thoroughly. Dirty coils cause excessive operating temperatures throughout the system, not just the coils themselves.
Verify adequate clearance around the outdoor portion. Blocked airflow raises condenser temperature and forces the compressor to work harder.
Check refrigerant charge. Both overcharging and undercharging cause compressors to overheat. Refrigerant service requires professional attention.
Failing compressor bearings generate excessive heat from friction. These compressors draw high current and run hot even when lightly loaded.
Temporary vs. Permanent Solutions
If reset button tripping started suddenly, temporary causes like dirty filters or blocked vents might be responsible. Clean everything thoroughly.
Intermittent tripping occurring randomly suggests connections working loose from vibration. Open the unit and reseat all wire harnesses.
Consistent tripping from the moment of installation indicates incorrect installation, wrong circuit type, or incompatible outlet wiring.
Never bypass or disable reset buttons. These safety devices prevent fires and electrocution. Fix root causes instead of defeating protection.

Seasonal Maintenance
Most Frigidaire troubleshooting situations arise from deferred maintenance. Preventive care dramatically reduces failure rates and extends your unit’s lifespan.
Monthly Maintenance Tasks
Check and clean air filters every month during active use. Set phone reminders. It’s easy to forget when the AC runs reliably.
Inspect the drain system. Window ACs condense significant water that must drain outside properly. Blocked drains cause water damage.
Wipe down the control panel with a dry cloth. Dust mixed with humidity conducts electricity incorrectly, causing button response issues.
Check outdoor clearance. Plants grow quickly in summer and can block condenser airflow within weeks. Maintain 12 inches of clearance minimum.
Seasonal Deep Cleaning
Before each cooling season, perform thorough cleaning. Remove the unit from the window if possible for complete access.
Disassemble the outer casing and clean all coils with proper coil cleaner. Rinse thoroughly and let dry completely before reassembly.
Vacuum the fan blades and motor housing. Accumulated dust on fan blades causes imbalance vibration that damages bearings.
Inspect all electrical connections. Tighten any loose terminals and clean any corrosion with electrical contact cleaner.
Off-Season Storage Best Practices
Proper storage prevents off-season damage. Remove the unit from the window entirely if your climate allows.
Store indoors in a dry location with the unit upright. Never lay window ACs on their sides. This allows oil to leak from the compressor.
Cover the unit completely with a breathable cover. Plastic encourages condensation. Use cloth or paper-based covers instead.
Store the remote control separately with batteries removed. Battery leakage ruins control electronics during long storage periods.
Frigidaire Window Air Conditioner Noise Troubleshooting
Different sounds indicate specific problems. Learning to identify noises speeds diagnosis dramatically and prevents unnecessary repairs.
| Sound | Likely Cause | Urgency | Solution |
|---|---|---|---|
| Clicking repeatedly | Failed start relay | Medium | Replace relay |
| Loud squealing | Belt or bearing failure | High | Stop use, inspect motor |
| Rattling/shaking | Loose panel or fan blade | Low | Tighten all fasteners |
| Hissing continuously | Refrigerant leak | High | Professional service |
| Gurgling periodically | Normal refrigerant flow | None | No action needed |
| Grinding metal sound | Bearing failure | High | Replace motor or compressor |
| Buzzing from compressor | Failing start capacitor | Medium | Replace capacitor |
Advanced Diagnostic Testing
Some problems require measurements beyond visual inspection. Basic tools enable precise diagnosis and prevent guesswork that wastes time and money.
Voltage Testing Throughout System
Test voltage at multiple points to identify where power loss occurs. Start at the wall outlet with nothing plugged in.
Measure again with the AC running under full load. Voltage drops exceeding 5 volts indicate outlet or wiring problems.
Check voltage at the control board input. This should match outlet voltage within 1-2 volts, accounting for cord resistance.
Measure voltage at major component connections while operating. Compressor should receive full voltage when running. Low voltage means control board problems.
Current Draw Analysis
Clamp ammeters measure current without breaking circuit connections. They’re essential for diagnosing electrical problems accurately.
Measure total current draw at the plug during different operating modes. Compare to rating plate specifications.
Fan-only mode should draw 1-3 amps. Cooling mode draws 7-12 amps depending on size. Significant deviations indicate component problems.
Individual component current can be measured if accessible. This isolates which component draws excessively when total current is high.
Component Resistance Testing
Resistance measurements identify failed electrical components. Always disconnect power before measuring resistance.
Test compressor winding resistance between all terminal combinations. Readings should be relatively equal. Infinite resistance means open windings.
Check motor windings similarly. Fan motors typically show 10-50 ohms resistance. Zero or infinite readings mean failed motors.
Temperature sensors should show resistance changing smoothly with temperature. Erratic readings or no change indicates sensor failure.
Model-Specific Frigidaire Quirks
Different Frigidaire model lines have unique characteristics worth knowing when troubleshooting. Understanding these differences prevents frustration and saves time.
FFRA Series (Budget Line)
These simpler models use mechanical controls on older versions and basic digital controls on newer ones. They’re inherently more reliable with fewer electronic failure points.
FFRA models lack sophisticated diagnostics. Troubleshooting relies on systematic component testing rather than error codes.
Parts availability is excellent for FFRA models since they share components across multiple years and similar capacities.
FFRE Series (Mid-Range)
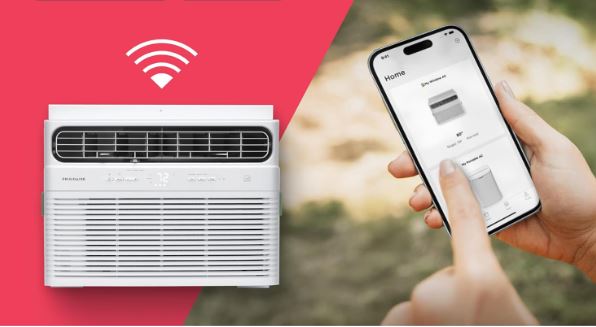
FFRE models introduced Wi-Fi connectivity and app control in 2022 versions. This adds wireless module failures to the troubleshooting mix.
These models display error codes helping diagnosis. E1 means temperature sensor failure, E2 indicates humidity sensor issues, E4 shows evaporator temperature sensor problems.
Remote control operation helps bypass failed control panels. If the unit responds to the remote, the main control board functions properly.
FHWW Series (Smart/Premium)
Premium models include heat pump operation, making troubleshooting more complex with additional components.
Voice control through Alexa or Google means network connectivity issues can masquerade as AC problems. Verify internet connection before deep troubleshooting.
These models include self-diagnostic modes accessed through button combinations. Check your manual for entering diagnostic mode.
Frequently Asked Questions
Why won’t my Frigidaire window AC turn on after winter storage?
Storage in cold environments thickens compressor oil, preventing immediate startup. Let the unit sit at room temperature for 24 hours before plugging in. This allows the oil to thin and flow properly back to the compressor sump. Internal moisture condensation during storage can also corrode electrical connections.
Before first use, inspect and clean all visible connections with electrical contact cleaner. Pay special attention to control board terminals where corrosion commonly develops. If the unit still won’t start after warming and cleaning, check for blown internal fuses or tripped thermal protectors that may have activated during storage.
Can I fix a Frigidaire AC that trips breakers immediately?
Immediate breaker tripping indicates a short circuit or ground fault somewhere in the unit. Start by disconnecting all internal wire harnesses from the control board. Plug the unit in again. If the breaker doesn’t trip with everything disconnected, reconnect one harness at a time to identify which component causes the fault.
Common culprits include the compressor, fan motor, or water-damaged control boards. Check for pinched wires where the casing halves meet, as this creates insulation damage leading to shorts. If tripping continues with all harnesses disconnected, the problem lies in the power cord or control board itself. Both components can be tested individually and replaced if faulty.
How do I know if my Frigidaire compressor is dead?
A dead compressor shows specific symptoms you can test. First, disconnect power and test for electrical continuity at the three compressor terminals. Use a multimeter set to resistance mode. All three terminal combinations should show some resistance, typically 2-10 ohms depending on compressor size. Infinite resistance on any combination means open windings requiring compressor replacement.
Also check for short circuits between each terminal and the compressor body (ground). Any continuity to ground indicates failed insulation and means the compressor must be replaced. Listen for sounds when power is applied. Completely silent compressors with proper voltage are mechanically seized. Humming without starting indicates failed start components (relay or capacitor) rather than compressor death.
What does it mean when my Frigidaire AC freezes up?
Ice formation on evaporator coils or refrigerant lines indicates restricted airflow or incorrect refrigerant charge. Start with the simplest fix: clean or replace the air filter. Dirty filters are the number one cause of freeze-ups. If the filter is clean, inspect the evaporator coils for dust buildup and clean them thoroughly with coil cleaner.
Check that nothing blocks the air intake or output vents. If freezing continues after addressing airflow, refrigerant levels are likely incorrect. Low refrigerant causes the evaporator to get too cold, freezing condensation instantly. High refrigerant causes different problems, but can also create ice. Both situations require professional service to locate any leaks, evacuate the system, and recharge with the correct amount of refrigerant.
Should I repair or replace my 10-year-old Frigidaire window AC?
Consider several factors when deciding. First, calculate repair costs versus 60% of replacement cost. For repairs exceeding $180-200 on units over 8 years old, replacement usually makes better financial sense. Modern window ACs offer 30-40% better energy efficiency than 10-year-old models, saving $50-100 annually on electricity bills. A new 8,000 BTU Energy Star unit costs $250-350, while major repairs (compressor, control board) on old units run $200-300 including parts and labor.
Also consider refrigerant type. If your old unit uses R-22 (Freon), replacement is better since R-22 is being phased out and costs $50-100 per pound. Newer R-410A units use cheaper, more available refrigerant. Finally, evaluate how many years you’ll keep using a window AC in that location. If it’s temporary (1-2 years), repair might work. For long-term use, replacement pays off.
Your Path to Frigidaire Window Air Conditioner Recovery
Most Frigidaire window air conditioner problems resolve with methodical troubleshooting. Start with simple checks before assuming major component failure.
Power problems account for half of all “broken” air conditioners. Verify electrical supply thoroughly before ordering parts or calling for service.
Keep your model number handy throughout troubleshooting. Frigidaire uses model-specific components that aren’t interchangeable between product lines.
Document everything you test and find. Take photos of wire connections before disconnecting anything. These notes prove invaluable when calling for professional help if DIY repairs don’t succeed.
Your Frigidaire will cool again. Just follow the diagnostic path matching your specific symptoms.

Hi, I’m Barlgan! I created Repair Me Yourself to empower homeowners to tackle appliance repairs with confidence. From decoding error codes to fixing cooling issues, I break down complex repairs into simple, actionable steps that save you time and money.