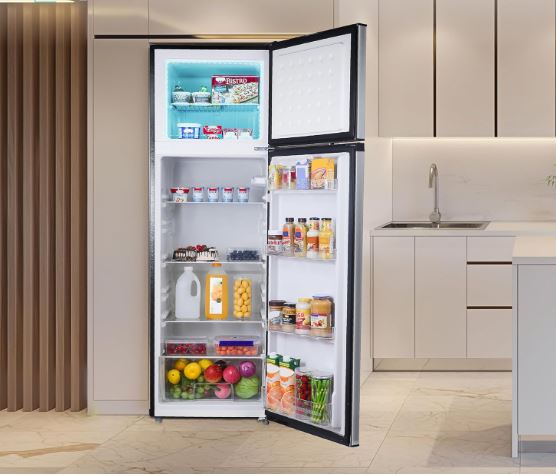
There’s nothing more frustrating than hearing your refrigerator run nonstop while discovering your milk is warm and your produce is wilting. This problem demands immediate attention because food safety is at stake, and every hour of delay increases the risk of spoilage and waste.
A refrigerator that runs constantly without maintaining proper temperature indicates the cooling system is attempting to work but can’t overcome an underlying problem. The most common causes include dirty condenser coils, failed door seals, low refrigerant levels, frosted evaporator coils, blocked air vents, faulty thermostats, or failing compressors.
These issues range from simple 15-minute DIY fixes to major repairs requiring professional service. The key is systematic troubleshooting, starting with the easiest and most common solutions before progressing to complex ones. You need to address this within 24-48 hours to prevent complete food loss.
This troubleshooting guide walks you through each potential cause and its specific solution, helping you identify and fix the problem efficiently.
Understanding Normal Refrigerator Operation
Before you diagnose why your fridge runs constantly but stays warm, you need to understand how it should work when functioning properly. This baseline knowledge helps you recognize abnormal behavior.
A properly functioning refrigerator operates on cycles rather than continuously. The compressor typically runs 30-40% of the time, cycling on for several minutes when temperature rises. Once it achieves the desired temperature, the compressor shuts off.
The thermostat monitors internal temperature and signals the compressor when cooling is needed. You should hear the compressor run for 4-8 minutes, achieve temperature, then remain off for 10-20 minutes before the next cycle begins. Your refrigerator should maintain 37°F in the fresh food section and 0°F in the freezer.
When we say a fridge “runs constantly,” we mean 80-100% run time without normal off periods. This differs from working harder during hot weather or after you restock groceries. Constant running combined with temperatures above 40°F signals a definite problem requiring immediate investigation.
Initial Diagnostic Steps
Before you start taking things apart or calling for repairs, run through these quick preliminary checks. These simple observations take just minutes but often reveal important clues about what’s wrong.
- Use an appliance thermometer (View on Amazon) to check actual internal temperature rather than relying on how food feels. Place it in the center of the middle shelf and wait 20 minutes for an accurate reading. This confirms whether you truly have a cooling problem or just a perception issue.
- Listen carefully to distinguish between the compressor actually running versus just fan noise. The compressor produces a low humming sound and creates vibration you can feel when you touch the back or sides. Fans create a whooshing sound without the same vibration.
- Check whether the problem affects both compartments or just one. A cold freezer with a warm fresh food section points to different causes than both compartments being warm. Document your starting temperature so you can track whether your fixes are working.
- Note any recent changes like doors left open accidentally, large quantities of warm food added, or recent power outages. These events can cause temporary issues that resolve on their own. Confirm your power supply is stable and you don’t have a partially tripped breaker causing reduced function.
- Remember the food safety timeline: perishables held above 40°F for more than 2 hours enter the danger zone for bacterial growth.
Quick Troubleshooting Guide for a Fridge That Runs Constantly But Not Cold
Use this table to quickly identify your most likely cause based on the symptoms you’re experiencing:
| Symptom | Most Likely Cause | Difficulty | Time to Fix |
|---|---|---|---|
| Exterior very hot, gradual problem | Dirty condenser coils | Easy | 20-30 min |
| Cold air escaping around door edges | Failed door seals | Moderate | 30-60 min |
| Freezer cold, fridge warm | Blocked air vents | Easy | 15-30 min |
| Heavy frost buildup in freezer | Frosted evaporator coils | Moderate | 8-24 hours |
| Hissing sound, oily residue | Refrigerant leak | Professional | 1-3 hours |
| Extremely hot compressor | Failed compressor | Professional | 2-4 hours |
| No response to temperature adjustment | Faulty thermostat | Moderate-Difficult | 30-90 min |
Common Causes When Your Fridge Runs Constantly But Not Cold
Below are the most likely reasons why your refrigerator runs constantly but the food stays warm. You’ll also discover how to identify the issue and fix it.
Cause 1: Dirty Condenser Coils Preventing Heat Release
This is the most common culprit when a fridge runs constantly but doesn’t cool properly, and fortunately it’s also the easiest to fix. Let’s look at why this happens and how to resolve it.
Why dirty coils make your fridge run constantly:
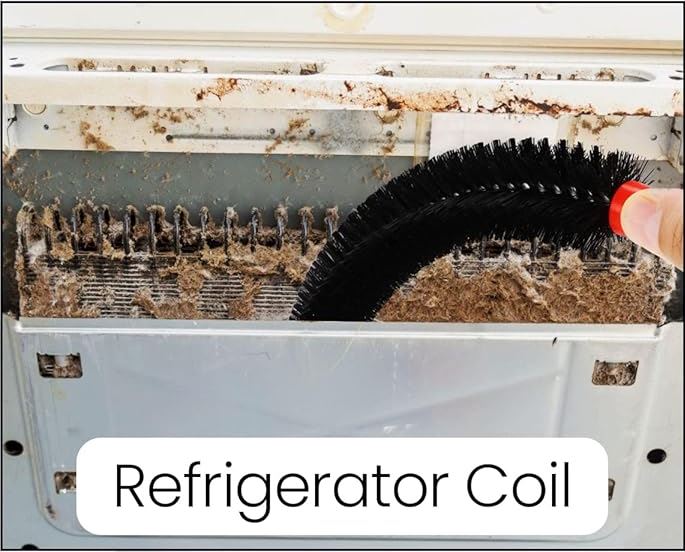
Condenser coils dissipate heat that your refrigerator extracts from inside. These coils sit on the back or bottom of your unit. When dust, pet hair, and debris accumulate on the coils, they act as insulation and trap heat instead of releasing it to the surrounding air.
The compressor must run continuously trying to cool the refrigerator, but without efficient heat dissipation, it can’t maintain proper temperature. Studies show dirty coils reduce efficiency by 25-35%. Your refrigerator essentially tries to cool with a blanket wrapped around its radiator.
Signs that point to dirty coils:
- The exterior back or bottom of your refrigerator feels excessively hot when you touch it.
- If you can see the coils, visible dust accumulation covers them.
- The problem developed gradually over weeks or months rather than suddenly overnight.
- You haven’t cleaned the coils in over six months, or possibly never since you owned the refrigerator.
- Pet owners typically see this problem more frequently due to hair accumulation.
- Homes in dusty environments or near unpaved roads also experience faster buildup.
How to Clean Your Refrigerator’s Condenser Coils
This fix takes 20-30 minutes and requires minimal tools that most homeowners already have. Follow these steps to clean condenser coils.
Gather your supplies:
You need a vacuum cleaner with a hose attachment, a refrigerator coil brush (View on Amazon) and a flashlight. Refrigerator coil brushes cost around $10-15 at hardware stores and feature long, narrow bristles designed specifically to fit between coil rows.
Unplug the refrigerator completely:
Pull the power cord from the wall outlet before you begin. Never skip this critical safety step. If the plug sits behind cabinetry and you can’t reach it, turn off the circuit breaker supplying power to your kitchen instead.
Locate your condenser coils:
Check either the back panel of your refrigerator or behind the bottom front grille. Older models typically have back-mounted coils you can see easily. Newer models hide coils underneath with access from the front.
Remove loose debris first:
Use your vacuum hose to remove surface dust and debris from the coils. Work systematically from top to bottom. Avoid pressing hard against the coils, which could bend the delicate fins.
Brush away compacted buildup:
Insert your coil brush between the coil rows and use gentle up-and-down motions. The brush dislodges compacted dust that vacuuming alone can’t remove. Work section by section across the entire coil surface.
Vacuum again:
Capture all the debris you loosened by brushing. Pay particular attention to the floor area beneath the coils where dust falls during cleaning. Make sure you remove all loose material so it won’t get sucked back into the coil area.
Restore power and monitor:
Plug your refrigerator back in or restore power at the breaker. Check the temperature after 4-6 hours to see if you notice improvement. The system needs time to cool down after you restore power.
If dirty coils caused your problem, you should see the compressor start cycling normally within this timeframe as the system cools more efficiently.
Cause 2: Failed Door Seals Allowing Warm Air In
Door gaskets create the airtight seal essential for maintaining cold temperatures inside your refrigerator. When these seals fail, your fridge runs constantly fighting a losing battle against warm air infiltration.
Why bad seals make your fridge work overtime:
Damaged, cracked, or worn door seals allow constant warm air infiltration into your refrigerator. Even small gaps dramatically impact efficiency because your refrigerator essentially tries to cool your entire kitchen. The compressor runs nonstop attempting to combat continuous cold air loss that it can never win against.
Door seals typically last 5-7 years before they degrade enough to cause problems. The constant opening and closing, exposure to temperature changes, and simple aging all break down the rubber material over time.
How to identify failing door seals:
Visual inspection often reveals cracks, tears, or permanently deformed areas in the rubber gasket. Look closely at the corners and high-wear areas where problems typically start first.
Perform the dollar bill test: close the door on a dollar bill, then try to pull it out. If it slides out easily without resistance, the seal has failed. You should feel significant resistance when pulling the bill from a properly sealed door.
You might feel cold air escaping from door edges when you run your hand along the perimeter with the door closed. Notice condensation or frost forming around the door perimeter, which indicates air leakage. The door lacks the normal magnetic “grab” when you close it, swinging shut without that satisfying seal.
How to Fix or Replace Your Refrigerator Door Seals
You can try temporary fixes first to see if they resolve the issue, then move to permanent replacement if needed. Start with the quickest solutions.
Try cleaning first:
Remove the gasket from its channel if possible and clean it thoroughly with warm soapy water. Debris, food particles, and grime often prevent proper sealing. Dry the gasket completely before reinstalling it.
Apply a thin layer of petroleum jelly to compressed areas that look flattened. This helps them seal better temporarily by making the rubber more pliable. Check if the gasket simply needs to be pushed back into its retaining channel properly rather than replaced.
Replace the gasket permanently:
Order a replacement gasket (View on Amazon) specific to your refrigerator’s make and model number. You’ll find the model number on a sticker inside the refrigerator, usually on the side wall or door frame.
Wait for the new gasket to arrive, then let it sit at room temperature for a few hours before installation. This makes the rubber more flexible and easier to work with. Remove the old gasket by pulling it from its retaining channel or unscrewing it, depending on your model design.
Install the new gasket by pressing it firmly into the channel all the way around the door perimeter. Start at the top and work your way around to ensure even installation. If your model uses screws, tighten them evenly without over-tightening, which can deform the gasket.
Verify proper sealing with the dollar bill test at multiple points around the door. The seal should grip the bill firmly at every location you test.
Temperature should improve immediately after you install a proper seal, with normal compressor cycling returning within a few hours as the refrigerator reaches and maintains its set temperature.
Cause 3: Blocked Vents Stopping Cold Air Flow
Your refrigerator generates cold air in the freezer, then circulates it to the fresh food section through vents and ducts. When these pathways get blocked, cold air can’t reach where it needs to go.
Why blocked vents cause cooling problems:
When vents become blocked by food items, ice buildup, or simple overpacking, cold air can’t circulate properly through your refrigerator. The system produces cold air just fine, but that air gets trapped in the freezer instead of flowing throughout both compartments.
The result is often a cold freezer around 0°F but a warm fresh food section. Items pushed against the back wall also block airflow, preventing proper temperature distribution. Your compressor runs constantly because the thermostat senses the warm temperature in the fresh food section and keeps calling for more cooling.
Signs pointing to blocked vents:
- Your freezer maintains proper temperature while the fresh food section stays warm. This specific symptom strongly suggests airflow problems rather than system failure.
- You can see food items blocking vent openings, which typically sit at the top of the fresh food compartment or along the back wall.
- Ice or frost buildup appears around interior vents, physically blocking the openings.
- You recently overstocked the refrigerator for holidays or after a major grocery trip, cramming items into every available space.
How to Clear Vents and Restore Air Circulation
This is one of the easiest problems to fix because it requires no tools or replacement parts. You simply need to reorganize your refrigerator contents properly.
Remove blocking items immediately:
Pull out any items blocking vent openings. These vents usually appear as slotted openings at the top rear of the fresh food section. You need complete clearance around these openings for air to flow freely.
Check both the fresh food section and freezer for items pushed too close to vents. Ensure at least 1-2 inches of clearance from the back wall throughout both compartments. This space allows air to circulate behind items instead of getting trapped.
Address overpacking issues:
If you’ve stuffed your refrigerator completely full, remove items to reduce content to approximately 75% full. This capacity provides optimal efficiency by maintaining thermal mass while allowing air circulation.
Remove any ice buildup blocking vents using a plastic scraper. Never use metal tools or sharp objects that could damage components. Alternatively, let ice melt naturally by turning off the refrigerator temporarily if the buildup is severe.
Reorganize using airflow principles:
Maintain clear airflow pathways throughout your refrigerator. Don’t overload individual shelves because air must circulate between items, not just around the perimeter. Avoid storing tall items that block upper vents where cold air enters the fresh food section.
Never cover shelves with aluminum foil or solid liners. Some people do this thinking it helps with cleanliness, but it blocks air from circulating through the shelf slots. Use shelf liners (View on Amazon) specifically designed with ventilation holes if you want something to catch spills.
Store items with space between them rather than pushing everything together tightly. Think of it like arranging furniture in a room where you need walking space, not cramming everything against walls.
Temperature should improve within 2-4 hours as cold air circulates properly again throughout both compartments.
Cause 4: Frosted Evaporator Coils Blocking Heat Absorption
Evaporator coils sit inside your freezer walls and absorb heat to create cold air. When they frost over heavily, they can’t perform this essential function properly.
Why frost buildup causes constant running:
Your refrigerator’s automatic defrost system normally prevents frost accumulation by running heating cycles every 8-12 hours. When a defrost system component fails—the timer, heater element, or thermostat—frost builds up on evaporator coils over days or weeks.
This frost layer insulates the coils and prevents them from absorbing heat effectively. The compressor runs constantly trying to produce cooling, but it can’t work properly through the frost barrier. Both compartments warm up despite the nonstop operation.
Identifying frost buildup problems:
- Heavy frost or ice buildup appears inside freezer walls or on food packages. The buildup might be visible or hidden behind interior panels depending on your refrigerator design.
- Both compartments are warming despite constant compressor operation. You notice frost visible behind interior panels if you remove them to look. The evaporator fan in the freezer sounds labored or has stopped completely because it froze in place.
- You hear the fan struggling to turn or a scraping sound as ice-covered blades try to spin. The defrost drain at the bottom of the freezer appears frozen or blocked with ice.
How to Defrost and Address Evaporator Coil Problems
Manual defrosting resolves the immediate problem, but you need to determine whether the automatic defrost system needs repair. Here’s the complete process.
Prepare for manual defrost:
Remove all food from both compartments and store it in coolers with ice. You need access to the entire interior and the process takes many hours. Transfer your most perishable items first, then work through everything systematically.
Place towels on the floor beneath and inside the refrigerator to catch melting water. You’ll be surprised how much water accumulates from severe frost buildup. Have extra towels ready to replace saturated ones.

Execute the defrost:
Unplug the refrigerator and leave all doors open wide. Position fans to circulate room-temperature air into the compartments, which speeds the process slightly.
Wait 12-24 hours for complete defrosting. Never use heat guns, hair dryers, or sharp objects to speed the process. These methods can damage components, puncture refrigerant lines, or create electrical hazards with water present.
Check progress periodically by looking for remaining ice. The process is complete when you can’t see or feel any ice anywhere in either compartment. Water will continue dripping for a while even after visible ice is gone.
Clean and restart:
Once completely defrosted, clean and dry the interior thoroughly with towels. Wipe down all surfaces to remove water that could refreeze when you restore power.
Plug the refrigerator back in and close the doors. Monitor temperature over the next 24 hours as the system cools down. Set your thermometer to check that temperatures reach and maintain 37°F in the fridge and 0°F in the freezer.
Watch for recurring problems:
If your refrigerator was caused by defrost system failure, it will work properly for a few days or weeks before frost rebuilds. The temporary fix works until automatic defrost should kick in but doesn’t.
If the problem recurs, you need professional replacement of defrost system components. The three possible failures are the defrost timer that controls when cycles run, the defrost heater that melts accumulated frost, or the defrost thermostat that monitors coil temperature during the cycle.
Cause 5: Low Refrigerant Stopping the Cooling Cycle
Refrigerant is the chemical substance that absorbs heat from inside your refrigerator and releases it outside. Without adequate refrigerant, cooling becomes impossible no matter how hard the compressor works.
Why refrigerant loss prevents cooling:
Low refrigerant means insufficient cooling capacity regardless of how hard or long the compressor runs. The compressor circulates refrigerant through the sealed system, but if there’s not enough refrigerant, the system can’t absorb and move enough heat.
Refrigerant operates in a completely sealed system and doesn’t “run out” through normal operation like gasoline in a car. If levels drop, a leak exists somewhere in the system. This problem appears more commonly in older refrigerators where seals and connections have degraded over years of thermal cycling.
Signs pointing to refrigerant issues:
- You’ve tried all previous fixes with no improvement in cooling performance.
- You hear a slight hissing sound near coils or the compressor area, which indicates escaping refrigerant.
- Oily spots or residue appear on the floor beneath the refrigerator. Refrigerant leaks often bring compressor oil with them, creating these telltale marks.
- The compressor feels extremely hot when you touch it, far hotter than normal operation would cause.
- Both compartments gradually warm despite constant operation.
- Frost forms on only a portion of the evaporator coils rather than evenly across them, indicating uneven cooling from insufficient refrigerant flow.
Professional Refrigerant Service Requirements
You cannot fix refrigerant issues yourself. This work requires professional service for legal, safety, and practical reasons.
Why professionals must handle this:
Refrigerant handling requires EPA certification by federal law. You cannot legally purchase, handle, or dispose of refrigerant without proper licensing. Specialized equipment is needed to evacuate systems, detect leaks, and recharge with precise amounts.
Refrigerants operate under high pressure in sealed systems. Improper handling creates safety hazards including frostbite from rapid expansion, inhalation risks, and environmental damage. The work requires training and equipment that homeowners don’t possess.
What the technician will do:
A qualified technician locates the leak using electronic detectors or UV dye systems. They identify exactly where refrigerant escapes before performing any repairs.
They repair or replace the leaking component depending on its location and accessibility. Common leak points include connection fittings, coil joints, and the sealed compressor housing itself.
The technician evacuates any remaining refrigerant from the system properly. They vacuum the entire system to remove moisture and air that entered through the leak. Moisture in refrigeration systems causes ice blockages and corrodes components.
Finally, they recharge the system with the proper refrigerant type and exact amount specified by the manufacturer. Too little or too much refrigerant both cause performance problems. The system must contain precisely the right amount.
Consider replacement for older units:
If your refrigerator exceeds 10 years old and needs refrigerant service, replacement often makes more financial sense than major repair with no warranty coverage. New refrigerators (View on Amazon) offer dramatically better energy efficiency, modern features, and manufacturer warranties.
Cause 6: Failed Compressor Unable to Pump Refrigerant
The compressor is your refrigeration system’s heart, pumping refrigerant throughout the sealed system. When it fails, cooling becomes impossible even though you hear it running.
Why compressor failure prevents cooling despite operation:
A failed compressor motor may spin without actually compressing refrigerant effectively. Internal valves can fail, allowing refrigerant to bypass rather than circulate properly through the system.
The mechanical pumping action that compresses refrigerant might fail while the motor still runs. You hear humming and feel vibration, but the compressor doesn’t produce adequate pressure to circulate refrigerant. Compressors typically last 10-15 years before mechanical components wear out.
Identifying compressor failure:
The compressor runs extremely hot, too hot to touch for more than a few seconds. Normal operation produces warmth, but a failing compressor overheats dramatically.
You hear clicking sounds as the compressor attempts to start but fails repeatedly. The start relay tries to engage the motor multiple times per minute without successful startup. There’s constant humming or buzzing but no actual cooling occurs in either compartment.
You’ve systematically eliminated all other potential causes. Your refrigerator exceeds 10 years old, which puts it in the typical failure age range. The compressor vibrates excessively compared to normal operation, which you can feel by touching the cabinet sides.
Professional Diagnosis and Replacement Considerations
Compressor failure requires professional diagnosis and creates a critical decision point about repair versus replacement. Here’s what you need to know.
Professional diagnosis confirms failure:
A technician tests compressor operation using specialized equipment. They check electrical amp draw to verify the motor works properly and pulls the expected current.
They verify refrigerant pressures in the system using gauge sets. A failed compressor shows abnormal pressure readings that confirm mechanical failure rather than other issues. The diagnosis process eliminates other sealed system problems before recommending expensive compressor replacement.
The repair or replace decision:
For refrigerators over 10 years old, replacement usually makes more financial sense than compressor repair. New refrigerators (View on Amazon) use 30-50% less electricity than models from 2010 or earlier, providing immediate operational savings.
Modern refrigerators include manufacturer warranties, typically 1-5 years on parts and labor. Compressor repairs carry limited warranty coverage from the service company alone. New refrigerators offer improved features, better temperature control, and enhanced reliability.
Consider the 50% rule when making this decision: if repair exceeds 50% of replacement cost, replace instead. A comparable new refrigerator provides better long-term value than an expensive repair on an aging appliance.
Cause 7: Faulty Thermostat Sending Wrong Signals
The thermostat monitors your refrigerator’s internal temperature and signals the compressor when to run. When it fails, the compressor receives incorrect signals that cause constant operation without achieving proper cooling.
Why thermostat failure causes constant running:
A failed thermostat may incorrectly signal the compressor to run continuously regardless of actual temperature inside. The sensor component that reads temperature stops working accurately.
Digital control boards can develop electronic faults that prevent proper cycling. Circuit board components fail over time, especially after power surges or electrical storms. The compressor receives constant “run” signals even when temperature should trigger a shutdown.
Mechanical thermostats can stick in the “cooling” position. The physical mechanism that switches based on temperature expansion fails to move properly. Either type of failure results in nonstop operation without adequate cooling response.
Identifying thermostat problems:
- The compressor never cycles off even when temperatures should trigger a shutdown.
- You measure actual temperature with a separate thermometer and find it differs significantly from what the temperature display shows.
- Adjusting temperature settings up or down produces no change in operation whatsoever.
- The compressor keeps running at exactly the same rate regardless of your adjustments.
- You experienced a recent power surge or electrical storm before problems started.
- The digital display shows error codes or behaves erratically. Some models display diagnostic information when control boards detect problems.
- The display might be blank, flickering, or showing incorrect information.
Thermostat and Control Board Replacement
You can replace thermostats yourself if you’re comfortable with basic electrical work, or hire a professional for complex digital systems. Here’s the process either way.
Test before replacing:
You can temporarily bypass the thermostat to confirm it’s the problem. Consult your model’s service manual for the specific bypass procedure, which varies by design.
If the compressor cycles properly without the thermostat in the circuit, you’ve confirmed thermostat failure. This test prevents replacing a good thermostat when another problem exists. Professional technicians perform this test as part of diagnosis.
DIY replacement process:
Order the correct thermostat for your specific refrigerator make and model. Match the model number exactly because thermostats aren’t interchangeable between different models even from the same manufacturer.
Unplug the refrigerator completely before you begin work. Never work on electrical components with power connected. Remove the control panel to access the thermostat, following your model’s specific disassembly procedure.
Take a photo of wire connections before you disconnect anything. This reference photo helps you reconnect wires correctly to the new thermostat. Disconnect the wire harness from the old thermostat carefully without pulling on wires themselves.
Remove the old thermostat from its mounting bracket or clips. Install the new thermostat in the same position and orientation. Connect the wire harness to the new thermostat, matching wire colors and positions to your reference photo.
Reassemble the control panel and restore power. Test operation by adjusting temperature settings and verifying the compressor responds appropriately. Listen for proper cycling over the next few hours.
When to use professional service:
Digital control boards prove more complex than mechanical thermostats. Models with sealed control assemblies require specialized tools to open. If you feel uncomfortable working with electrical connections, professionals handle the work safely.
If the thermostat was faulty, proper cycling should resume immediately after you install the replacement.
Also Read: Troubleshoot a Fridge’s Intermittent Buzzzing Noise Problem (Repair Guide!)
Deciding Between Fridge Repair and Replacement
When your fridge runs constantly but won’t cool, you eventually face the repair or replace decision. Several factors help you determine which choice makes better financial sense.
Repair makes sense in these situations:
- Your refrigerator is less than 7 years old and otherwise functions perfectly.
- The required fix is relatively simple like coils, seals, or a thermostat. You own a high-quality brand with a strong reliability record.
- The repair represents good value compared to replacement.
- You’ve maintained the appliance well and expect many more years of service after the repair.
Replacement makes better sense when:
- Your refrigerator exceeds 10 years old regardless of the needed repair.
- Multiple issues occur simultaneously rather than one isolated problem.
- You’ve already made previous repairs and problems keep appearing.
- Major components like the compressor or sealed system need replacement.
- Energy efficiency improvements would provide substantial operational savings.
- The repair approaches or exceeds half the cost of a comparable new model.
Example calculation: Consider a 12-year-old refrigerator that needs major repair. A new Energy Star model (View on Amazon) costs less than twice the repair amount and saves significant electricity annually. The efficiency savings alone justify replacement within a few years, plus you gain warranty coverage and reliability.
Protecting Your Food While Troubleshooting
While you diagnose and fix your refrigerator, you need to protect your food from spoilage. These strategies minimize losses during the repair process.
Minimize temperature loss:
Keep doors closed as much as possible during diagnosis. An unopened refrigerator stays cold for approximately 4 hours. A full freezer maintains safe temperature for 48 hours if you don’t open it.
Every time you open doors, warm air enters and cold air escapes. Plan what you need before opening, then retrieve everything in one trip. Avoid repeatedly opening doors to check whether temperature has improved.
Transfer perishables temporarily:
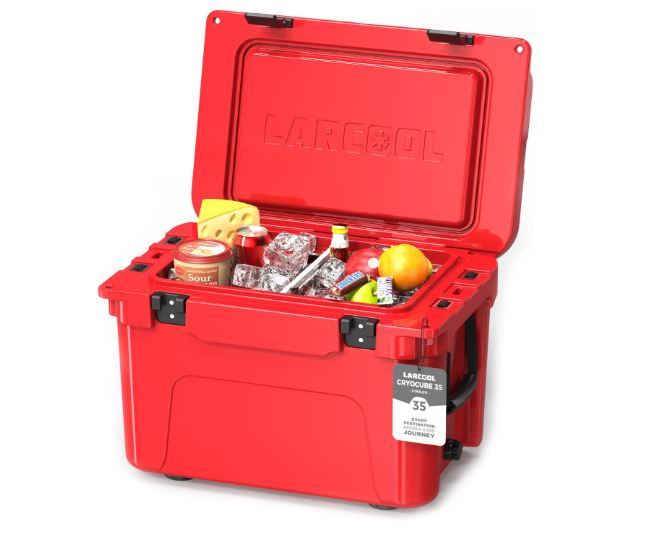
Use coolers (View on Amazon) with ice for your most perishable items like dairy, meat, and prepared foods. These items pose the greatest safety risk and spoil fastest. Prioritize them for cooler storage while you work on repairs.
Fill coolers completely because full coolers maintain temperature better than partially filled ones. Use frozen water bottles or ice packs along with ice cubes. Keep coolers in the coolest part of your home, away from direct sunlight and heat sources.
Follow food safety guidelines:
Discard any perishables held above 40°F for more than 2 hours according to USDA guidelines. This time limit isn’t negotiable because bacteria multiply rapidly at unsafe temperatures.
When you doubt whether something is safe, throw it out. Food poisoning creates far greater problems than the cost of replaced groceries.
Hard cheeses, butter, and most condiments tolerate brief temperature fluctuations better than other items. Fruits and vegetables generally survive better than dairy or meat. Document significant losses for potential insurance claims if the problem results in major spoilage.
Also Read: How Long is Cake Good for in the Fridge? (Answered)
Take Action Now to Save Your Food and Fridge
Generally, if your fridge runs constantly but not cold enough, you’ve to take action. Start your troubleshooting immediately with the simplest, most common fixes. Clean those condenser coils first, check door seals thoroughly, and clear any blocked vents.
If simple fixes don’t resolve the issue within 24 hours, progress to more complex diagnosis. Look at the defrost system, consider refrigerant levels, or evaluate compressor function. Don’t hesitate to call professionals for refrigerant work or compressor issues because these repairs require specialized tools and certification.
For refrigerators over 10 years old facing expensive repairs, seriously consider replacement instead. Modern refrigerators (View on Amazon) offer dramatically better energy efficiency, reliability, and features that justify the investment over repairing an aging appliance.
Most importantly, act quickly. Every hour of delay increases food spoilage risk and potential appliance damage. Your systematic troubleshooting starting today can save hundreds in food loss and potentially thousands in unnecessary appliance replacement.

Hi, I’m Barlgan! I created Repair Me Yourself to empower homeowners to tackle appliance repairs with confidence. From decoding error codes to fixing cooling issues, I break down complex repairs into simple, actionable steps that save you time and money.