Opening your dishwasher to find cloudy glasses and greasy plates is beyond frustrating. You’ve used a full cycle, hot water, and a fresh detergent tab, yet your dishes are still dirty. So what went wrong?
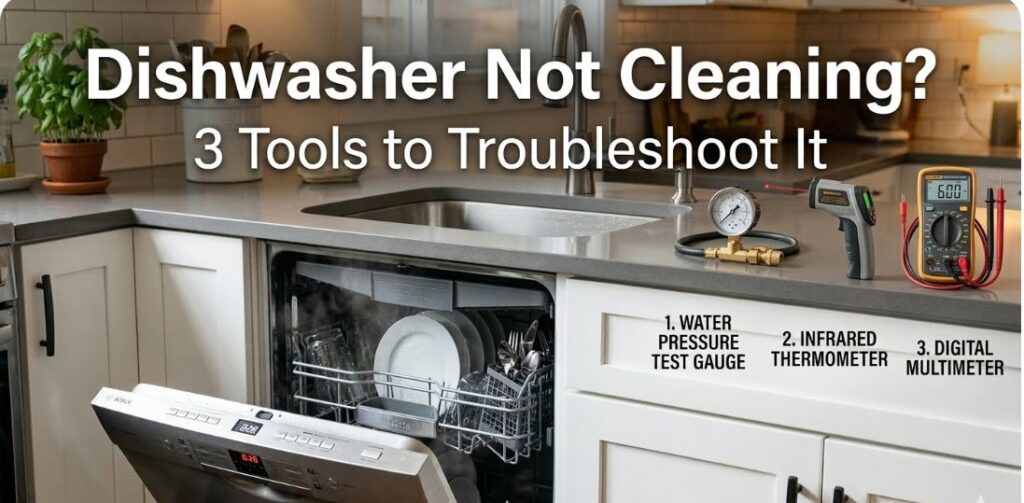
When a dishwasher is not cleaning properly, the issue is almost always tied to one of three root causes. Either the water isn’t hot enough to activate the detergent, the spray pressure is too low to dislodge food, or a specific part like the inlet valve or heating element has failed.
The good news is that dishwasher troubleshooting is straightforward once you know what to look for. Each failure leaves a specific pattern of evidence that you can confirm with a simple test. This guide walks you through a professional diagnostic sequence to identify physical obstructions and test electrical components.
Quick-Reference Summary Table
| Tool | Role in Diagnosis | Approx. Price | Where to Buy |
|---|---|---|---|
| MEASUREMAN 2-1/2″ Water Pressure Test Gauge | Confirm water supply pressure meets the 20 PSI minimum requirement | $10–$15 | Amazon |
| Etekcity Lasergrip 1080 Infrared Thermometer | Verify incoming water temperature and heating element zone heat | $16–$22 | Amazon |
| KAIWEETS Digital Multimeter | Test water inlet valve, heating element, detergent dispenser, wash motor | $30–$42 | Amazon |
Why Dishwashers Stop Cleaning: The Diagnostic Framework
Understanding how a dishwasher actually cleans makes the fault-finding process logical rather than speculative. Every wash cycle depends on four things working together: enough water entering the tub (inlet valve), enough pressure to drive the spray arms effectively (circulation pump), hot enough water to dissolve detergent and emulsify grease (heating element), and detergent releasing at the right moment in the cycle (dispenser door mechanism).
When any one of these fails — or when the filter and spray arm jets are clogged and restrict the entire flow path — the cleaning result degrades in a predictable way.
| Symptom | Most Likely Cause |
|---|---|
| Everything comes out dirty — top and bottom racks | Low water pressure, clogged filter, or failing wash pump |
| Top rack dirtier than bottom | Upper spray arm clogged or water delivery tube blocked |
| Bottom rack dirtier than top | Lower spray arm clogged, filter blocked, or low water level |
| Cloudy film on everything | Hard water mineral deposits, water temperature too low, bad rinse aid |
| Food residue despite water reaching dishes | Water not hot enough to activate detergent |
| Detergent tab still intact after cycle | Dispenser door mechanism failed, water too cool to dissolve pod |
| Greasy film on dishes | Water temperature too low (below 120°F) |
| Dishes dirty only on one side | Spray arm rotation blocked by overloaded rack |
The first two diagnostic checks — pressure and temperature — can be done without opening any panels. Only if those pass does the diagnosis move to electrical component testing.
Step 1 — Check and Clear Physical Obstructions First
Before using any instruments, spend five minutes on the physical checks that account for a significant portion of dishwasher cleaning failures and cost nothing to fix.
Filter Cleaning
The dishwasher filter sits at the bottom of the tub beneath the lower rack and lower spray arm. On most modern machines (post-2010), it’s a removable cylinder with a fine mesh screen that traps food particles and prevents them from recirculating onto clean dishes. When it’s clogged — from grease accumulation, mineral deposits, or simply months of use — dirty water gets pumped back over the dishes during the rinse cycle.
Remove the lower rack. Locate the filter assembly — typically a twist-lock cylinder. Unscrew and lift it out. Rinse under hot running water and scrub the mesh with a soft brush or old toothbrush. If grease is significant, soak in warm soapy water for 10–15 minutes before scrubbing. Reinstall securely. Manufacturers recommend monthly cleaning; in practice, every 4–6 weeks is adequate for normal household use.
Spray Arm Inspection and Clearing
The spray arms distribute water throughout the wash cycle via small jets (holes) drilled into the arm body. These jets are typically 1–2mm in diameter and clog readily with food particles, mineral scale from hard water, and grease accumulation. When jets are blocked, water pressure from the working jets increases but coverage across the tub decreases — dishes in zones served by blocked jets stay dirty.
Remove both the lower and upper spray arms (they typically unscrew counterclockwise or unclip). Hold each arm up to a light source and look through each jet hole. Partially or fully blocked holes are easy to spot. Clear each blocked jet with a toothpick, thin wire, or straightened paper clip. Flush the arms under running water, shaking to dislodge debris. Spin the arms freely by hand before reinstalling to confirm the bearing ring isn’t damaged.
If the upper rack is consistently dirtier than the lower, also check the water delivery tube at the back of the tub that feeds the upper spray arm. This tube connects via a docking port when the upper rack is slid fully in — if the connection is misaligned or the port is blocked, the upper arm receives little to no water.
Step 2 — Verify Water Supply Pressure
The dishwasher requires a minimum of 20 PSI and typically performs best between 40–80 PSI. Below 20 PSI, the fill cycle is too slow, the circulation pump can’t build adequate spray pressure, and the entire cleaning cycle is compromised. Above 120 PSI, the inlet valve and hose connections are under stress and can fail prematurely.
Many homeowners experiencing dishwasher cleaning problems have already cleaned the filter and spray arms, tried different detergent, and still get poor results — because the root cause is insufficient water pressure at the supply line, not a blocked component. The pressure test takes two minutes and definitively rules this in or out.
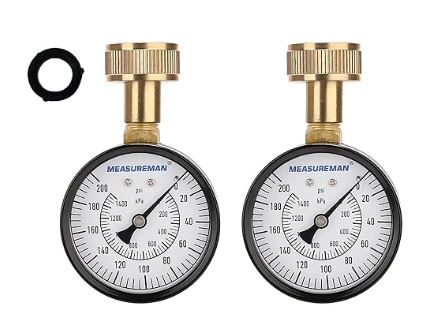
The MEASUREMAN 2-1/2″ Water Pressure Test Gauge (View on Amazon) is the standard homeowner water pressure test instrument. It has a 2.5-inch dial with 0–200 PSI / kPa dual scale, a red maximum pressure memory pointer that holds the highest reading during the test, and a 3/4″ female hose thread that attaches directly to any standard outdoor hose bib or the laundry tap. No tools are required for connection. At $10–$15, it’s one of the most inexpensive diagnostic tools available and has uses across irrigation, water heater diagnosis, appliance servicing, and plumbing leak detection.
How to Test Dishwasher Supply Pressure
Turn off the dishwasher and shut off the water supply valve under the sink (or behind the lower access panel). Disconnect the dishwasher supply hose from the shutoff valve. Attach the Measureman gauge directly to the shutoff valve outlet — it threads on by hand to the 3/4″ fitting. Slowly reopen the supply valve. The gauge needle rises to the line pressure immediately. The red memory pointer holds the peak reading.
A reading between 40–80 PSI is ideal for dishwasher operation. A reading of 20–40 PSI is borderline — cleaning performance will be reduced, especially in longer hose runs. And a reading below 20 PSI means the dishwasher cannot fill or circulate water properly and the cleaning problem is primarily a supply pressure issue. Check whether the supply valve was partially closed, whether there is a pressure-reducing valve on the main supply line that can be adjusted, or whether house-wide pressure is below normal (which affects all appliances).
If pressure is normal at the supply valve but the dishwasher still fills slowly or has weak spray, the inlet valve screen may be partially clogged — move to Step 4 for electrical testing of the inlet valve and physical inspection of its inlet screen.
Step 3 — Verify Water Temperature
Water temperature is the most commonly overlooked variable in dishwasher cleaning performance. Dishwashers are designed to operate with incoming water at a minimum of 120°F (49°C). Below this temperature, enzyme-based detergents don’t activate fully, grease doesn’t emulsify, and food residue doesn’t rinse away cleanly — even if water pressure is adequate and spray arms are clear.
Most households set their hot water heater at 120°F, but the actual temperature at the dishwasher inlet depends on how long the hot water line to the dishwasher is and whether hot water was recently used elsewhere in the house. In many kitchens, if you haven’t run the hot water tap recently, the dishwasher starts its cycle on cool or lukewarm water sitting in the line.
The Etekcity Lasergrip 1080 Infrared Thermometer (View on Amazon) reads surface temperatures from -58°F to 1130°F with a 12:1 distance-to-spot ratio. At $16–$22, it makes both supply temperature checks and heating element diagnosis fast and non-contact.
Check 1 — Incoming Hot Water Temperature
Before starting the dishwasher, run the kitchen hot water tap for 30–60 seconds until the water is fully hot. Then point the Lasergrip at the dishwasher door or the bottom of the tub area immediately after the first fill cycle completes (open briefly and take a reading at the water surface). A properly heated fill should read 120°F or above. Consistently reading below 110°F means either the hot water heater needs adjustment, or the dishwasher’s internal heating element is not supplementing the water temperature as it should.
Check 2 — Heating Element Zone Temperature
The heating element sits at the bottom of the dishwasher tub as a circular or U-shaped coil. It serves two functions: heating the water during the wash cycle (on models that supplement incoming temperature) and heating the interior during the drying cycle. If the element is failing, water stays at below-optimal temperature throughout the cycle.
With the dishwasher running in the main wash phase, open the door briefly and point the Lasergrip toward the element at the base of the tub. A working element that’s actively heating will show a surface temperature significantly above the ambient water temperature — typically 140–160°F on the element body itself. An element at or near water temperature during the heated wash phase is likely failing. Confirm with a multimeter continuity test in Step 4.
A simple pre-run habit eliminates the supply temperature variable entirely: run the kitchen hot water tap until steam appears before starting the dishwasher. This purges the cold water sitting in the supply line and ensures the machine starts its fill cycle with water already at target temperature.
Step 4 — Test the Electrical Components
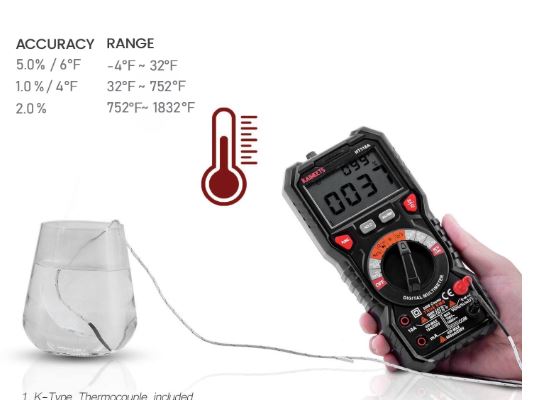
If pressure is confirmed adequate and temperature checks suggest the heating element or inlet valve may be failing, the KAIWEETS Digital Multimeter (View on Amazon) handles every electrical test a dishwasher cleaning diagnosis requires. TRMS 6000-count auto-ranging, NCV detection, LED port indicators, CAT III 1000V / CAT IV 600V safety rating, and 36-month warranty cover every test in this section.
Always unplug the dishwasher or turn off the circuit breaker before accessing any internal components.
Test 1 — Water Inlet Valve Solenoid
The water inlet valve controls water entry into the dishwasher tub. It has one or two solenoid coils that energize to open the valve during the fill phase. When a solenoid fails or when the valve’s inlet screen becomes clogged with sediment (common in areas with hard water or older supply lines), the tub fills too slowly or doesn’t reach the correct water level — resulting in poor wash pressure and inadequate detergent activation.
Access the valve at the bottom front of the dishwasher behind the lower kick panel, where the supply hose connects. Disconnect the solenoid wiring harness. Set the HT118A to resistance (Ω). Test across the solenoid coil terminals. A working inlet valve solenoid typically reads 200–500 Ω depending on the model. An OL reading indicates an open coil and the valve needs replacement (~$20–$50). Also visually inspect the small mesh screen inside the valve inlet port — sediment accumulation here is one of the most common causes of restricted fill and can be cleaned without replacing the valve.
Test 2 — Heating Element
The heating element is accessible from inside the dishwasher tub — locate the visible coil at the bottom. To test it, disconnect the wiring leads from the element terminals (accessible from below after removing the kick panel). Set the HT118A to resistance mode. Touch the probes to the element terminals. A working heating element reads approximately 15–40 Ω. An OL reading indicates a broken element that must be replaced. Elements typically cost $20–$60 depending on the model and are straightforward to replace in most dishwasher designs.
Test 3 — Detergent Dispenser Door Mechanism
The detergent dispenser releases the detergent pod or powder at a specific point in the wash cycle — typically 15–20 minutes in, when water has already been heated. If the dispenser door doesn’t open, detergent never reaches the dishes. If it opens too early (mechanically failing spring), the detergent is washed away before the heated main wash phase. Either way, the result is dishes that go through a full cycle with inadequate detergent exposure.
The dispenser door is spring-loaded and triggered by a wax motor or solenoid depending on the dishwasher model. If a detergent tab is consistently surviving the wash cycle intact, the dispenser mechanism has failed. On solenoid-triggered designs, test the solenoid with the HT118A continuity function — a working solenoid completes the circuit when probed. On models with a wax motor, the failure is typically mechanical and visible on inspection.
Also check that tall items in the lower rack aren’t physically blocking the dispenser door from opening — a common loading error that mimics a component failure.
Test 4 — Door Latch Switch
Most dishwashers won’t heat the water or run the full cycle if the door latch switch doesn’t register as properly latched. A failing door latch switch can allow the machine to appear to run normally — filling and draining — while preventing the control board from activating the heating element or completing other heated phases. The result is a cycle that runs but uses cold water, producing poor cleaning results.
Test the door latch switch with the HT118A continuity function. With the latch pressed in (simulating a closed door), the switch should show continuity. Releasing the latch should break the circuit. A switch that fails to change state requires replacement ($10–$25 depending on the model).
What Each Tool Diagnoses at a Glance
| Component or Variable | Water Pressure Gauge | Etekcity IR Thermometer | KAIWEETS Multimeter |
|---|---|---|---|
| Supply water pressure | ✓ Direct reading at valve | — | — |
| Incoming water temperature | — | ✓ Surface temp at tub fill | — |
| Heating element function | — | ✓ Surface temp during cycle | ✓ Resistance test |
| Water inlet valve solenoid | — | — | ✓ Resistance test |
| Inlet valve screen blockage | ✓ Low pressure suggests restriction | — | — |
| Detergent dispenser solenoid | — | — | ✓ Continuity test |
| Door latch switch | — | — | ✓ Continuity test |
| Wash pump motor | — | — | ✓ Resistance test |
When to Call a Technician
The tools above cover every dishwasher cleaning fault a homeowner can safely diagnose and repair. Two situations call for professional involvement.
Wash Pump Motor Failure
If pressure, temperature, filter, spray arms, inlet valve, and heating element all test correctly but wash pressure is still inadequate, the circulation pump’s wash impeller may have failed. The pump is accessible but its replacement involves draining the sump, removing the lower assembly, and working with pump motor wiring. On older or mid-range dishwashers, the repair cost relative to appliance value often makes this a technician decision — they can confirm the fault and advise on whether repair or replacement makes more financial sense.
Control Board Issues
If multiple components test electrically sound but the dishwasher still doesn’t complete a full heated cycle correctly, the control board may not be properly sequencing the wash cycle phases. Control board diagnosis requires probing test points under live conditions and cross-referencing against service documentation — this is professional territory. The component tests you’ve already done eliminate all cheaper likely faults first.
Frequently Asked Questions
How do I know if my dishwasher’s water pressure problem is the house supply or just the dishwasher?
Attach the Measureman pressure gauge to an outdoor hose bib or the laundry tap and compare the reading to what you measured at the dishwasher supply valve. If house pressure is normal (40–80 PSI) but the dishwasher supply shows lower pressure, the issue is local to the dishwasher — check the supply valve (is it fully open?), the supply hose (any kinks?), and the inlet valve screen. If house pressure is below 40 PSI across all taps, the problem is whole-house supply pressure — contact your water utility or a plumber.
My dishwasher runs but the detergent pod is always intact at the end. What’s wrong?
This is almost always a detergent dispenser door failure — the spring latch or solenoid mechanism isn’t releasing the door at the correct point in the cycle. First confirm the dispenser door isn’t physically blocked by a tall item in the lower rack. If loading isn’t the issue, test the dispenser solenoid (where present) with the KAIWEETS multimeter or inspect the door latch spring for wear or damage. Dispenser replacements typically cost $15–$40 in parts.
What temperature should my dishwasher water actually reach?
The wash cycle water should reach at least 120°F for standard cleaning and 140–150°F for sanitize cycles (where applicable). Incoming cold water that hasn’t been pre-heated in the line can drop the initial fill temperature significantly, which is why running the hot tap before starting the machine makes a measurable difference in cleaning performance. If your machine has an internal heating element, it should supplement the fill temperature — use the Etekcity IR thermometer to confirm it’s generating heat during the heated wash phase.
How often should the filter be cleaned?
Manufacturers typically recommend monthly, but this depends heavily on how the dishwasher is used. Heavy use with food-laden dishes, hard water, or high-fat cooking residue warrants cleaning every 2–3 weeks. Light use or pre-rinsed loads can stretch to every 6–8 weeks. A blocked filter is the single easiest fix for poor cleaning performance — it takes three minutes, requires no tools, and costs nothing.
The top rack always comes out dirtier than the bottom. Is that a spray arm problem?
It almost always is — either the upper spray arm jets are clogged (clean them following the process above), or the water delivery tube that feeds the upper arm isn’t connecting properly when the upper rack is slid in. Pull the upper rack out fully, slide it back in firmly, and confirm the docking port at the rear of the rack connects with the water supply tube. If the problem persists after cleaning the upper arm jets, test the inlet valve — inadequate water pressure affects the upper arm before the lower, since it’s fed second in the water circuit.
Conclusion
A dishwasher that isn’t cleaning properly almost always has a fixable, diagnosable cause that doesn’t require a service call. The Measureman pressure gauge rules out the supply pressure issue that undermines cleaning performance even when every component is working correctly. The Etekcity Lasergrip 1080 confirms whether the water is actually reaching the temperature needed to activate detergent and cut grease. The KAIWEETS HT118A tests every electrical component in the cleaning circuit — inlet valve, heating element, detergent dispenser, door latch — with definitive pass/fail results.
Total investment in all three tools is under $70. A service call to diagnose the same faults typically starts at $100 before any repair is carried out. More importantly, the physical checks — filter cleaning and spray arm clearing — are free, take under 10 minutes combined, and resolve a significant share of all dishwasher cleaning complaints on their own.

Hi, I’m Barlgan! I created Repair Me Yourself to empower homeowners to tackle appliance repairs with confidence. From decoding error codes to fixing cooling issues, I break down complex repairs into simple, actionable steps that save you time and money.