Your Bryant air conditioner stopped working when you need it most. Maybe it won’t turn on at all. Perhaps it’s running but your home stays uncomfortably warm. Or the thermostat screen just went blank without warning.
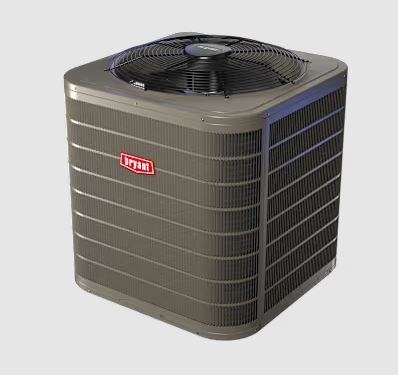
Bryant manufactures reliable HVAC systems backed by Carrier Corporation’s engineering. I’ve diagnosed hundreds of Bryant units from entry-level Legacy series to premium Evolution systems with smart controls. Most problems follow predictable patterns once you understand Bryant’s design philosophy.
Bryant air conditioner troubleshooting involves systematic diagnosis of power supply, thermostat communication, airflow restrictions, refrigerant levels, and component failures. Most issues are resolvable through methodical testing without professional service. Success requires understanding symptom patterns, following diagnostic sequences, and knowing when problems exceed DIY capabilities.
Quick Bryant Air Conditioner Troubleshooting Guide
Use this reference to immediately identify your issue and navigate to detailed troubleshooting for that specific problem.
| Primary Symptom | Associated Sounds | Thermostat Behavior | Most Likely Cause | Urgency |
|---|---|---|---|---|
| Complete silence, no power | Nothing | Blank screen | Power supply failure | Critical |
| Indoor fan runs, no cooling | Fan noise only | Normal display | Outdoor unit or compressor problem | High |
| Outdoor unit silent | Indoor fan only | Normal display | Thermostat wiring or outdoor power | High |
| Short cycling (on/off rapidly) | Frequent clicking | Normal display | Dirty filter or pressure switch | Medium |
| Runs continuously | Continuous operation | Normal display | Thermostat or low refrigerant | Medium |
| No air movement | Complete silence | Normal display | Blower motor or control board | High |
| Weak airflow | Quiet fan sound | Normal display | Dirty filter or duct problems | Low |
| Error code displayed | Varies | Shows error | Specific component failure | Varies |
Understanding Bryant Air Conditioner Systems
Bryant systems share engineering with Carrier units but have model-specific characteristics worth understanding for effective troubleshooting.
Bryant residential systems range from single-stage Legacy models to variable-speed Evolution systems with Infinity controls. Each tier uses different control strategies.
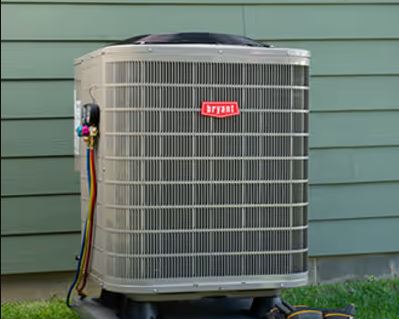
All Bryant ACs separate into indoor air handler and outdoor condensing units. Communication between units happens through low-voltage thermostat wiring.
Control boards in Bryant systems are sophisticated. They manage staging, protection circuits, diagnostics, and communication with thermostats.
Bryant’s diagnostic LED systems provide troubleshooting information through blink patterns on control boards. These codes dramatically speed diagnosis.
Understanding your specific model’s features helps troubleshooting. Variable-speed systems behave differently than single-stage units during normal operation.
Troubleshooting Bryant Air Conditioner Problems: Systematic Approach
Effective troubleshooting follows logical sequences eliminating possibilities methodically. Random part replacement wastes time and money. Here’s how to diagnose problems correctly.
Start With Visual Inspection
Before testing anything, observe your system completely. Visual clues often reveal problems immediately.
Check the thermostat display. Note any error messages, blank screens, or unusual indicators.
Inspect the outdoor unit for obvious damage. Look for bent fins, debris accumulation, or disconnected wiring.
Examine the indoor unit or air handler. Check for water leaks, ice formation, or unusual sounds.
Look at circuit breakers in your electrical panel. Tripped breakers are obvious but often overlooked.
Check air vents throughout your home. Blocked registers prevent proper airflow affecting performance.
Note any recent changes or events. Power outages, storms, or maintenance work often correlate with failures.
Establish What Actually Works
Determining which components function narrows down possibilities before detailed testing begins.
Test if the thermostat responds to inputs. Change settings and observe if anything happens.
Listen for indoor blower activation. This motor runs for both heating and cooling in most systems.
Check outdoor unit operation. The condenser fan should spin when cooling is called for.
Feel air temperature from vents. Note whether it’s cool, warm, or just room temperature.
Verify power to both units. Indoor and outdoor units have separate power supplies to check.
Test different modes if applicable. Some problems affect only cooling or heating, not both.
Follow Power From Source to Component
Electrical problems cause most Bryant AC failures. Trace power systematically from breaker to component.
Start at the main electrical panel. Verify both breakers (indoor and outdoor) are fully ON.
Test voltage at the outdoor disconnect. This safety switch near the condenser sometimes gets turned off.
Check voltage at the air handler. The indoor unit needs power independent of the outdoor unit.
Measure transformer output. The 24V transformer powers thermostats and control circuits.
Verify voltage reaches the control board. Dead control boards prevent system operation despite proper supply.
Test component power. Measure voltage at motors and compressor when they should be running.
Bryant Air Conditioner Not Turning On: Power System Diagnosis
Complete power failure requires methodical electrical investigation. These problems have clear diagnostic paths when approached systematically. Here’s what to do when your Bryant air conditioner won’t turn on:
Check Primary Power Sources
Power supply problems account for 40% of “won’t turn on” service calls. Start with the most basic verifications.
Inspect both circuit breakers at your electrical panel. Bryant systems typically use two separate 240V breakers.
Breakers don’t always look tripped. They may sit in a middle position between ON and OFF. Flip fully OFF then back ON.
Check the outdoor disconnect switch near the condenser. This safety switch includes fuses in many installations.
Remove the disconnect and inspect fuses if present. Blown fuses prevent all outdoor unit operation.
Test for proper voltage at both indoor and outdoor units. Use a multimeter (View on Amazon) measuring 230-240V AC.
Verify GFCI outlets haven’t tripped if your installation uses them. Some configurations include ground fault protection.
Look for emergency shutoff switches. These red switches near the air handler sometimes get turned off accidentally.
Bryant Thermostat Blank Screen: Diagnosis and Fixes
A blank thermostat screen indicates power problems but doesn’t necessarily mean thermostat failure.
First verify thermostat type. Battery-powered thermostats go blank with dead batteries. Hardwired models need 24V power.
For battery thermostats, replace batteries with fresh alkaline cells. Use quality brands. Cheap batteries cause intermittent issues.
For hardwired thermostats, test voltage at R and C terminals. You should measure 24V AC between these wires.
No voltage at thermostat means transformer failure or broken wiring. Trace back to the air handler’s transformer.
Check the transformer at the air handler. Measure primary voltage (120V or 240V) and secondary voltage (24V).
Zero secondary voltage with proper primary voltage confirms transformer failure. Replace with matching voltage and VA rating.
Inspect thermostat wiring for damage. Look for cuts, staples through wires, or rodent damage.
Test the thermostat with proper voltage present. If 24V exists at terminals but screen stays blank, the thermostat itself failed.
Test Control Board Power and Function
Control boards manage all system functions. Power problems or board failures prevent operation entirely.
Locate the control board in the air handler or furnace. Remove the service panel accessing the board.
Look for LED indicators on the board. Most Bryant boards include status LEDs showing power and diagnostic codes.
Check for blown fuses on the control board. Small 3-5 amp fuses protect control circuits from shorts.
Measure voltage at the board’s power input terminals. Compare to specifications in your system documentation.
Inspect for obvious damage. Burnt components, bulging capacitors, or cracked traces indicate board failure.
Smell for electrical burning. Burnt electronics produce distinctive odors confirming component damage.
Test the control board’s relay outputs. Boards receive power but fail to switch relays preventing component operation.
Bryant Air Conditioner Not Cooling: Temperature Problem Solutions
Cooling failures frustrate most because the system runs but doesn’t deliver comfort. Multiple factors affect cooling performance, and proper diagnosis requires understanding the difference between various cooling problems.
Distinguish No Cooling From Insufficient Cooling
These different conditions require different troubleshooting approaches. Proper diagnosis starts with accurate classification.
Measure temperature difference across the air handler. Proper systems show 15-20°F between return and supply air.
Temperature drops under 10°F indicate refrigerant or airflow problems. Zero difference means complete cooling failure.
Check if the outdoor unit operates when cooling is called for. The compressor and condenser fan must run.
Feel both refrigerant lines at the outdoor unit. Large line should feel cold. Small line should feel warm.
Both lines at the same temperature indicate refrigerant circulation problems. This suggests compressor or refrigerant issues.
Note how long the system runs. Continuous operation suggests inadequate capacity or refrigerant loss.
Bryant Air Conditioner Running But Not Cooling: Specific Diagnosis
This symptom means major components operate but cooling output is absent or inadequate.
Verify the system is definitely in cooling mode. Check thermostat settings confirming cool mode selection.
Set temperature 5°F below room temperature. Small differentials might not trigger active cooling in some systems.
Check air filter condition immediately. Dirty filters cause 60% of “runs but doesn’t cool” complaints.
Inspect evaporator coils for dirt buildup. Dirty indoor coils prevent heat transfer despite adequate airflow.
Look for ice formation on indoor coils or refrigerant lines. Ice indicates low refrigerant or severe airflow restriction.
Test static pressure across the filter. High pressure drop confirms restriction even when filters look okay.
Verify proper refrigerant charge. Low refrigerant is the most common cause after filter problems.
Address Airflow Problems Affecting Cooling
Restricted airflow mimics refrigerant problems but costs nothing to fix. Always eliminate airflow issues first.
Replace or clean air filters immediately. Never run systems with severely clogged filters even temporarily.
Check all registers and dampers throughout your home. Closed vents reduce airflow dramatically affecting performance.
Inspect ductwork for disconnections or damage. Separated ducts dump conditioned air into unconditioned spaces.
Look for crushed or kinked flex duct. Improper installation creates restrictions preventing adequate airflow.
Verify return air paths aren’t blocked. Furniture against returns or closed doors prevents proper circulation.
Clean evaporator coils using appropriate coil cleaner (View on Amazon). Follow product directions carefully avoiding coil damage.
Check blower wheel for dust accumulation. Heavy buildup reduces airflow significantly despite motor operation.
Diagnose Refrigerant and Compressor Issues
If airflow checks out but cooling still fails, refrigerant system problems likely exist.
Listen for outdoor unit operation. Both compressor and condenser fan should run when cooling.
Feel compressor temperature. It should be warm to hot during operation. Cool compressors aren’t running.
Look for oil residue around fittings and service ports. Refrigerant leaks leave oily marks.
Check for hissing sounds near refrigerant connections. Active leaks produce audible noise.
Observe frost patterns on refrigerant lines. Abnormal frost indicates refrigerant problems.
Test refrigerant pressures if you have gauges. Low pressures confirm refrigerant loss. High pressures suggest airflow or overcharge issues.
Note that refrigerant work requires EPA certification. DIY refrigerant service is illegal without proper licensing.

Bryant AC Fan Not Working: Blower and Condenser Fan Diagnosis
Fan failures prevent air circulation eliminating cooling even if refrigeration works perfectly. Different fans require different diagnosis approaches.
Indoor Blower Motor Troubleshooting
The indoor blower circulates air through your ductwork. This motor is essential for both heating and cooling.
Test if the blower runs at all. Set thermostat to fan-only mode forcing blower operation.
Listen for motor sounds. Humming without airflow suggests mechanical binding or failed start components.
Check blower speeds. Some problems affect only certain speeds leaving others functional.
Verify the blower wheel spins freely with power off. Binding indicates bearing failure or debris obstruction.
Test motor capacitor with a capacitance meter. Failed capacitors prevent starting or cause weak operation.
Measure voltage at motor terminals when it should be running. No voltage means control board problems.
Check motor windings with a multimeter. Measure resistance between terminals. Infinite or zero resistance indicates failure.
Inspect the blower wheel for damage or debris. Imbalanced wheels cause vibration and reduce airflow.
Bryant Air Conditioner Blower Not Working: Specific Fixes
Complete blower failure requires targeted diagnosis isolating the exact failed component.
First verify power reaches the blower motor. Measure voltage at motor connections when thermostat calls for fan.
No voltage at motor with fan called for means control board output failure. Test board relay operation.
Voltage present but no motor operation indicates motor failure. Test motor independently of control board.
Check the blower relay on the control board. Stuck or burned relays prevent blower activation.
Test door safety switches on the air handler. Open doors trigger switches preventing operation.
Inspect motor mounting and bearing condition. Seized bearings prevent rotation despite electrical function.
Verify proper wiring connections. Loose wires or corroded terminals interrupt power to motors.
Replace failed motors with exact speed and voltage matches. Bryant uses specific motor configurations.
Outdoor Condenser Fan Diagnosis
The outdoor fan rejects heat from the refrigeration system. Fan failure prevents cooling completely.
Check if the condenser fan spins when cooling is called for. This fan should run whenever the compressor operates.
Listen for outdoor unit sounds. Compressor humming without fan indicates specific fan problems.
Manually spin the fan blade with power off. Free rotation suggests electrical problems. Binding means mechanical failure.
Inspect fan blades for damage. Bent or cracked blades cause imbalance preventing proper operation.
Test the fan motor capacitor. These fail frequently requiring routine replacement.
Measure voltage at the fan motor terminals. Proper voltage without operation confirms motor failure.
Check the fan relay on the control board. Failed relays prevent fan operation despite good motors.
Verify nothing obstructs fan rotation. Debris or bent shrouds sometimes prevent blade movement.
Bryant Air Conditioner Compressor Not Working: Detailed Analysis
Compressor failures are serious issues. These expensive components justify thorough diagnosis before replacement decisions.
Verify Compressor Receives Power
Compressors need proper voltage to operate. Verify electrical supply before assuming mechanical failure.
Measure voltage at compressor terminals with cooling called for. Should read 230-240V across terminals.
Check the compressor contactor. This large relay supplies power when energized by the control board.
Inspect contactor points for pitting or burning. Damaged contacts prevent proper power delivery to compressor.
Test for proper contactor coil voltage. Control board should send 24V energizing the contactor.
Measure amp draw at the compressor. Zero amps confirms no operation. Excessive amps indicate mechanical problems.
Check capacitors, both run and start if equipped. Failed capacitors prevent starting despite adequate voltage.
Verify overload protector status. These safety devices interrupt power when compressors overheat.
Test Compressor Start Components
Compressors rely on several components for reliable starting. These accessories fail more frequently than compressors themselves.
Measure run capacitor capacitance with a meter. Compare to rating on the capacitor body. Values outside ±10% indicate failure.
Test start capacitor on systems equipped with them. These provide extra starting torque for larger compressors.
Check the potential relay on systems using start capacitors. Failed relays prevent proper start capacitor operation.
Inspect hard start kits if installed. These aftermarket additions help marginal compressors start but fail occasionally.
Test thermal overload protection. These reset automatically after cooling but indicate overheating problems.
Verify proper control board outputs. Boards must energize contactors when cooling is demanded.
Check high and low pressure switches. Safety switches prevent operation under conditions damaging compressors.
Diagnose Mechanical Compressor Failure
Internal mechanical problems produce specific symptoms distinguishing them from electrical issues.
Listen for unusual compressor sounds. Grinding, squealing, or rattling indicates internal mechanical damage.
Check for excessive compressor vibration. Abnormal vibration suggests internal component failure.
Feel compressor temperature. Overheating beyond normal warmth indicates inefficient operation from internal problems.
Look for acid in the refrigerant system if accessible. Burnt compressors produce acid contaminating refrigerant.
Test compressor winding resistance. Measure between all terminal combinations. Unbalanced readings indicate winding problems.
Check for shorted windings to ground. Measure resistance from terminals to compressor body. Should be infinite.
Monitor amp draw over time. Current gradually increasing above ratings indicates developing mechanical failures.
Compressor replacement requires professional service. Refrigerant handling and brazing exceed DIY capabilities.

How to Fix Bryant Air Conditioner: Common Repair Procedures
Many Bryant problems are DIY-fixable with basic tools and proper procedures. These repairs save significant service call costs and can be completed in under an hour.
Filter Replacement and Cleaning
The simplest and most important maintenance task. Proper filters prevent most common problems.
Locate filter access, usually at air handler or return grilles. Mark filter orientation before removal.
Check filter condition monthly during heavy use seasons. Replace or clean when discolored or restricted.
Use filters matching your system specifications. MERV ratings between 8-11 work well for most systems.
Never run systems without filters installed. Unfiltered air damages coils and fills ductwork with debris.
Washable filters need complete drying before reinstallation. Damp filters promote mold growth.
Consider upgrading to higher-quality media filters. Better filtration improves air quality and system protection.
Thermostat Replacement Procedure
Failed thermostats are common and relatively easy to replace. Match features to your system requirements.
Turn off power at the breaker before starting. Working on live thermostat wiring risks control board damage.
Remove old thermostat from wall mounting plate. Photograph wiring before disconnecting anything.
Label each wire with its terminal designation. Use masking tape writing clear terminal letters.
Install new mounting plate level on the wall. Proper leveling ensures accurate mercury switch operation if applicable.
Connect wires to matching terminals on new thermostat. R, C, Y, G, W are standard designations.
Verify compatibility with your Bryant system. Variable-speed systems need compatible communicating thermostats.
Restore power and configure thermostat settings. Program schedules and temperature differentials.
Capacitor Replacement
Capacitors fail regularly requiring routine replacement. This simple repair restores operation quickly.
Turn off all power to the unit. Capacitors store dangerous voltage even when power is off.
Discharge the capacitor before touching terminals. Use an insulated screwdriver shorting across terminals briefly.
Photograph capacitor wire connections. Capacitors have multiple terminals and proper connection is critical.
Remove the old capacitor from its mounting bracket. Note the capacitance (μF) and voltage ratings.
Install new capacitor matching exact specifications. Voltage must match or exceed original. Capacitance should match exactly.
Connect wires to proper terminals. Terminals are marked C (common), HERM (compressor), and FAN.
Secure capacitor in mounting bracket. Ensure it’s firmly held preventing vibration damage.
Restore power and test system operation. Motor starting should be crisp and immediate.
Contactor Replacement
Worn contactors prevent proper compressor or fan operation. Replacement is straightforward but requires care.
Turn off power to the outdoor unit completely. Verify voltage absence before proceeding.
Photograph existing contactor wiring. Note which wires connect to which terminals.
Disconnect all wires from the old contactor. Pull straight off terminals avoiding wire damage.
Remove mounting screws holding the contactor to its bracket.
Install new contactor matching voltage and amperage ratings. Under-rated contactors fail quickly.
Reconnect all wires to proper terminals. Load wires connect to line side. Control wires to coil terminals.
Ensure tight connections. Loose wires cause arcing and premature contactor failure.
Test operation after power restoration. Contactor should pull in cleanly when cooling is called for.
Bryant Air Conditioner Error Codes: Complete Reference
Bryant systems display error codes through LED blink patterns on control boards or error numbers on thermostats. Understanding these codes speeds diagnosis significantly.
How to Read Control Board LED Codes
Control board LEDs communicate diagnostic information through timed blink patterns.
Access the control board by removing the air handler service panel. LEDs are visible on the board.
Count blinks carefully over multiple cycles. Patterns repeat after brief pauses.
Some boards use multiple LEDs in combination. Note which LEDs blink and their sequence.
Record the pattern with your smartphone camera. Video allows accurate review and counting.
Consult your system’s service manual for code interpretation. Codes vary between model generations.
Common Bryant Error Code Meanings
These standard codes appear across most Bryant residential systems with slight variations.
Code 13 (1 blink + pause + 3 blinks) – Limit switch open. Blower operation issue or restricted airflow.
Cause: Dirty filter, blocked coils, or failed blower motor preventing proper airflow triggering safety.
Fix: Clean or replace filter. Verify blower operates correctly. Check for duct restrictions.
Code 14 – Ignition lockout (heating systems). Multiple failed ignition attempts triggered safety shutdown.
Fix: For heating problems, verify gas supply and igniter operation. Not applicable to cooling-only issues.
Code 21 – Blower motor off too long. Motor didn’t start when commanded by control board.
Cause: Failed blower motor, bad capacitor, or control board output failure.
Fix: Test motor directly. Replace capacitor. Verify control board relay operation.
Code 23 – Stuck button on thermostat or control. A button is registering as continuously pressed.
Cause: Damaged thermostat, moisture in controls, or failed control board input.
Fix: Disconnect thermostat. If error clears, replace thermostat. If error persists, replace control board.
Code 31 – Pressure switch error. Airflow-proving pressure switch not responding correctly.
Cause: Dirty filter, blocked vent, or failed pressure switch preventing proper airflow detection.
Fix: Clean filter and verify proper airflow. Test pressure switch operation. Replace if failed.
Code 33 – Limit switch open (cooling). High limit safety tripped due to temperature exceeded safe levels.
Cause: Refrigerant overcharge, dirty coils, or airflow restriction causing excessive temperatures.
Fix: Clean coils thoroughly. Verify proper airflow. Check refrigerant charge professionally.
Code 41 – High pressure switch trip. Refrigerant pressure exceeded safe limits.
Cause: Dirty condenser coils, blocked outdoor airflow, overcharged refrigerant, or non-condensable gases.
Fix: Clean outdoor coils. Verify unobstructed airflow. Professional refrigerant service may be needed.
Code 42 – Low pressure switch trip. Refrigerant pressure dropped below minimum safe level.
Cause: Refrigerant leak, restriction in refrigerant circuit, or severely dirty evaporator coils.
Fix: Locate and repair leak professionally. Verify proper airflow. Refrigerant service required.
Code 51 – Gas valve error (heating). Control board detected problem with gas valve operation.
Fix: Not applicable to cooling-only problems. Indicates heating system issues.
Code 62 – Communication error with thermostat. Control board can’t communicate with connected thermostat.
Cause: Loose wiring, incompatible thermostat, or control board failure.
Fix: Check all thermostat wire connections. Verify thermostat compatibility. Replace board if wiring tests good.

Clear Error Codes After Repairs
Error codes persist even after fixing problems. Proper clearing confirms repairs succeeded.
Turn off power to the entire system for 5 minutes. Both indoor and outdoor units must be de-energized.
Restore power and immediately test operation. Monitor for 20 minutes confirming errors don’t return.
Some codes require manual reset through thermostat menus. Navigate to installer settings for reset options.
If codes return immediately, the underlying problem wasn’t resolved. Additional diagnosis is necessary.
Document all codes that appeared and repairs performed. This record helps if professional service becomes necessary.
How Do I Reset My Bryant Air Conditioner: Complete Reset Procedures
Proper resets clear temporary glitches and restore normal operation. Different reset types address different issues, so choosing the right method matters.
Basic Power Cycle Reset
The simplest reset clears temporary control glitches. Try this first before complex procedures.
Turn off the thermostat setting it to OFF position. Wait 30 seconds.
Turn off both circuit breakers powering your Bryant system. Indoor and outdoor units typically have separate breakers.
Wait exactly 5 minutes by setting a timer. This duration ensures complete capacitor discharge.
Restore both breakers to ON position. Wait 30 seconds before attempting to start the system.
Turn on the thermostat and set to cooling mode. Set temperature 5°F below room temperature.
Monitor system startup listening for normal operation sounds. Both indoor blower and outdoor unit should start.
This reset resolves about 60% of temporary operational issues without further intervention.
Control Board Factory Reset
Deeper resets restore factory settings erasing custom configurations and error logs.
Access the control board by removing the air handler service panel. Locate the reset button on the board.
Press and release the reset button once with a paperclip. Don’t hold it. Brief press triggers reset.
LEDs should flash or cycle confirming reset completion. Some boards beep audibly.
Wait 60 seconds for complete reinitialization. Control boards reload default parameters during this time.
Reconfigure any custom settings after reset. All programming returns to factory defaults.
Test all system functions confirming normal operation. Verify cooling, heating, and fan modes all work.
Thermostat Reset Procedure
Thermostat resets address control communication problems and corrupted programming.
Remove thermostat batteries if battery-powered. Wait 60 seconds before reinstalling.
For hardwired thermostats, turn off breaker power for 5 minutes. This fully resets thermostat memory.
Access thermostat setup menus. Navigate to factory reset or default settings option.
Confirm reset when prompted. Thermostat will restart showing default display.
Reprogram all custom settings including schedules and temperature preferences.
Verify thermostat communicates properly with the system. Test all modes and fan settings.
Also Read:
Preventing Future Bryant Air Conditioner Problems
Consistent maintenance prevents most Bryant AC problems before they occur. Following these schedules maximizes reliability and extends equipment life.
Monthly Maintenance Tasks
Quick monthly attention catches developing problems when fixes are simple and inexpensive.
Check and clean or replace air filters. Set phone reminders ensuring consistent attention.
Inspect condensate drain lines. Pour a cup of water verifying free drainage without backup.
Check thermostat operation. Test all modes confirming proper system response.
Listen for unusual sounds. New noises indicate developing mechanical problems.
Verify airflow from all vents. Weakening flow indicates filter or duct problems.
Inspect outdoor unit for debris. Clear leaves, grass clippings, and paper.
Quarterly Deep Maintenance
Every three months, perform thorough maintenance beyond basic filter changes.
Clean indoor evaporator coils using coil cleaner spray. Follow product directions carefully.
Clean outdoor condenser coils similarly. These accumulate more dirt requiring frequent attention.
Inspect and tighten electrical connections. Thermal cycling loosens terminals over time.
Test capacitors with a meter if possible. Capacitance degradation causes starting problems.
Check refrigerant line insulation. Replace damaged insulation preventing energy loss.
Verify proper thermostat calibration. Compare thermostat reading to accurate thermometer.
Annual Professional Service
Professional maintenance catches problems beyond typical homeowner capabilities.
Technicians measure refrigerant pressures and temperatures verifying correct charge.
Comprehensive electrical testing identifies failing components before complete failure.
Amp draw measurements reveal motors developing problems before breakdown.
Airflow testing ensures proper CFM delivery meeting system design specifications.
Control system diagnostics verify proper operation of all safety and control circuits.
Professional cleaning reaches inaccessible areas using specialized equipment.

Frequently Asked Questions
Why won’t my Bryant AC turn on after a power outage?
Power outages trigger protective time delays preventing immediate restart and protecting the compressor from rapid cycling damage. After power restoration, wait a full 3-5 minutes before attempting to start your system. During outages, breakers often trip from the power surge when electricity returns.
Check your electrical panel and verify both circuit breakers (one for indoor unit, one for outdoor unit) are fully reset to the ON position. Sometimes breakers appear to be on but are actually in a partially tripped middle position. Flip each breaker fully OFF, then back to ON to ensure complete reset.
If the unit still doesn’t start after waiting and resetting breakers, perform a complete power cycle reset. Turn both breakers OFF and leave them off for exactly 5 minutes by setting a timer. This extended time allows all capacitors to fully discharge and the control board’s memory to clear completely.
After 5 minutes, restore both breakers, wait 30 seconds, then set your thermostat to cooling mode with temperature 5°F below room temperature. The system should start within 2-3 minutes. If problems persist, check for blown fuses in the outdoor disconnect box and verify the transformer hasn’t failed during the outage surge. Power surges during outages sometimes damage transformers, control boards, or capacitors requiring replacement.
How do I know if my Bryant AC needs refrigerant?
Several clear symptoms indicate low refrigerant levels requiring professional attention. Poor cooling performance despite clean filters and proper airflow is the primary indicator. The system runs continuously trying to reach the set temperature but never succeeds or takes many hours longer than normal. Ice or frost formation on indoor evaporator coils or refrigerant lines signals refrigerant problems.
Low refrigerant causes excessive temperature drops across the coil, instantly freezing condensation that forms there. Check both refrigerant lines at the outdoor unit where they connect. The larger suction line should feel very cold to the touch and may even sweat or frost slightly in humid conditions. The smaller liquid line should feel warm from compressed refrigerant returning to the outdoor unit. If both lines are at similar temperatures or the suction line is only slightly cool rather than very cold, refrigerant levels are probably low.
Listen for hissing or bubbling sounds near refrigerant connections at both indoor and outdoor units. Significant leaks produce audible noise at the leak point. Look for oily residue around fittings, joints, and service ports. Refrigerant and compressor oil mix in the system, so leaks leave telltale dark oily marks showing where refrigerant escaped.
Understand that refrigerant doesn’t naturally deplete through normal operation. The system is completely sealed. Low refrigerant levels always indicate leaks somewhere requiring repair. Simply adding refrigerant without finding and fixing leaks wastes money as the system will leak out again within weeks or months. Professional HVAC service with EPA Section 608 certification is legally required for all refrigerant work including diagnosis, leak detection, recovery, repair, and recharging.
Can I replace a Bryant control board myself?
Yes, you can replace a Bryant control board yourself if you’re comfortable with electronics and follow proper procedures meticulously. However, several important considerations apply. First, control boards are expensive components, typically costing $150-300 depending on your model, with premium Evolution system boards reaching $400-500.
Get professional confirmation that the control board is actually faulty before purchasing a replacement. Many symptoms blamed on control boards actually stem from failed sensors ($15-35), bad capacitors ($20-40), or wiring problems (free to fix). Incorrect diagnosis leads to expensive parts purchases that don’t solve your problem.
Once you’ve confirmed board failure, order the exact OEM replacement using your complete model number from the equipment rating plate. Generic or “compatible” boards often don’t work properly with Bryant’s proprietary systems and communication protocols. Before removing anything, photograph all wire connections from multiple angles showing every detail clearly. Label each wire with masking tape marked with its terminal position.
Mount the new board in exactly the same orientation and location as the old one. Reconnect wires one at a time, double-checking each connection against your photos before proceeding to the next wire. After installation, power up gradually. Restore breakers and immediately monitor for proper startup. Test all functions through multiple modes verifying normal operation.
What causes Bryant AC systems to short cycle?
Short cycling, where the system starts and stops every 2-5 minutes without completing normal 10-20 minute run cycles, has several common causes progressing from simple to complex. Dirty air filters are by far the most frequent culprit, causing airflow restriction that triggers multiple safety switches and sensors. The system overheats or pressures build abnormally, triggering automatic shutdown.
Within minutes conditions normalize and the system restarts, only to repeat the cycle. Clean or replace filters first before investigating other causes. Failed run capacitors are the second most common cause. Weak capacitors prevent motors from starting properly. The compressor attempts to start, draws excessive current, trips overload protection, then resets and tries again minutes later creating rapid cycling.
Test capacitance with a meter comparing readings to the capacitor’s marked rating. Values more than 10% out of specification indicate failure. Refrigerant problems, both overcharge and undercharge, cause abnormal pressures triggering safety switches. Low refrigerant causes the evaporator to freeze, blocking airflow and triggering high-pressure shutdowns when ice melts.
Overcharge causes excessive head pressures doing the same. Thermostat problems including incorrect placement, failed temperature sensors, or improper differential settings cause systems to satisfy temperature quickly and shut down, then restart moments later.
Oversized equipment installed in spaces too small for their capacity is a design problem not a failure. These systems reach temperature very quickly and cycle excessively. Finally, failed pressure switches can create false short cycling by incorrectly detecting problems that don’t exist, triggering unnecessary shutdowns.
How often should I change Bryant AC filters?
Filter change frequency depends on several factors including filter type, home conditions, and usage patterns. Change standard disposable 1-inch fiberglass filters monthly during peak cooling season (May through September in most climates). These inexpensive filters lose effectiveness quickly as they trap particles. Washable permanent filters need monthly cleaning during active use. Remove them, rinse thoroughly with a garden hose until water runs clear, allow them to dry completely (24 hours minimum), then reinstall.
Never reinstall damp filters as moisture promotes mold and mildew growth. High-efficiency pleated filters with MERV ratings of 8-13 typically last 2-3 months depending on conditions. Check them monthly and replace when visibly dirty regardless of time elapsed. Media filters in 4-5 inch housings last 6-12 months but require checking every 2 months.
Certain conditions require more frequent changes regardless of filter type. Homes with pets need filter changes twice as often due to hair and dander. Remodeling or construction creates excessive dust requiring weekly filter checks. High pollen seasons in spring increase particle load dramatically. Wildfires or poor outdoor air quality necessitates more frequent replacement.
The definitive test is visual inspection. Remove the filter and hold it up to a bright light. If you cannot easily see light through the filter media, replace it immediately regardless of how long it’s been installed. Heavily clogged filters dramatically reduce airflow causing the system to work harder, use more electricity, provide less cooling, freeze up, and potentially trigger safety shutdowns.
Restoring Your Bryant AC to Perfect Operation
Most Bryant air conditioner problems resolve through systematic troubleshooting following diagnostic protocols outlined here. Start with simple checks before assuming complex failures.
Power and airflow issues cause the majority of service calls. Verify these basic systems thoroughly before moving to component-level diagnosis.
Document everything you observe and test. Take photos, write down measurements, note unusual sounds or smells. Comprehensive notes help professional technicians diagnose efficiently if DIY efforts don’t fully succeed.
Know when to stop and call professionals. Refrigerant work requires EPA certification and specialized equipment. Electrical repairs beyond basic fixes need licensed electricians. Complex diagnostics often require expertise and tools beyond typical homeowner capabilities.
Your Bryant system will return to reliable cooling performance. Just follow the appropriate diagnostic path for your specific symptoms.