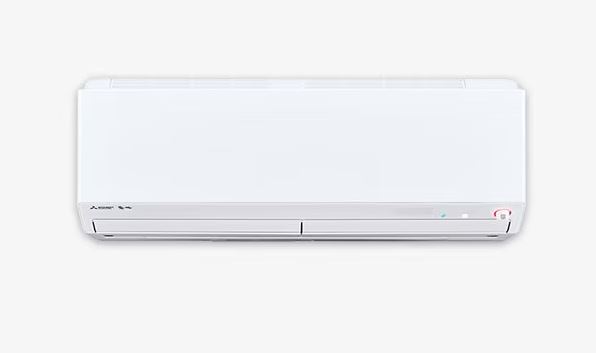
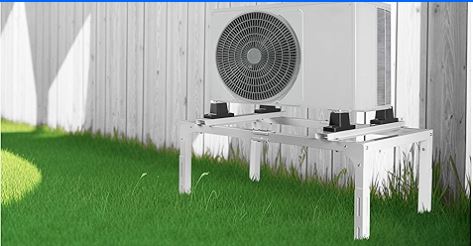
Two green lights are glowing on your Mitsubishi mini split indoor unit. You’re not sure if this is normal operation or a warning sign. The unit might still be working, or it could have stopped cooling altogether.
Mitsubishi uses LED indicator lights as a sophisticated diagnostic system. Each light pattern communicates specific information about system status, operational mode, or detected problems. Understanding these signals transforms mysterious lights into actionable diagnostic information.
Two green lights on a Mitsubishi mini split typically indicate operation mode and status. The configuration varies by model but commonly shows the unit is in active operation with both power and run indicators illuminated. However, specific blink patterns of two green lights can signal error codes requiring attention. Proper diagnosis requires observing whether lights are steady or blinking and their timing pattern.

Understanding Mitsubishi Mini Split LED Indicator System
Mitsubishi engineers designed LED indicators as real-time communication tools. These lights serve multiple functions simultaneously depending on state and behavior.
Most Mitsubishi mini splits feature 2-4 LED indicators on the indoor unit. Common indicators include operation, timer, economy, and defrost lights.
Green lights generally indicate normal operation or standby status. Red, yellow, or orange lights typically signal errors or specific operational modes.
Steady illumination versus blinking creates entirely different meanings. A steady light shows active status while blinking indicates codes or alerts.
The position and combination of lit LEDs matter significantly. Two green lights in different positions mean different things than a single green light blinking twice.
What Do 2 Green Lights on Mitsubishi Mini Split Mean?
Two green lights appearing on your Mitsubishi mini split have multiple possible meanings. Context and behavior determine the specific interpretation.
Normal Operation: Two Steady Green Lights
The most common scenario shows two steady green lights during normal system operation. This typically isn’t an error condition.
Operation and Timer Lights Both On
Many models illuminate both operation and timer lights when a timed operation is active. The unit runs normally with a scheduled start or stop time programmed.
Check your remote control or system settings. If you programmed a timer function, two green lights confirm the timer is active.
This is intentional operation, not a malfunction. The lights provide visual confirmation that your scheduled operation is running as programmed.
Fix:
No action required unless you want to cancel the timer. Press the Timer button on your remote to disable scheduled operation.
Operation and Economy Lights Both On
Some models show both lights when economy mode is active. The system operates with reduced capacity for energy savings.
Economy mode limits maximum power consumption while maintaining reasonable comfort. This results in slightly reduced cooling or heating capacity.
The two green lights confirm economy mode is functioning as designed. You’ll notice slightly warmer temperatures in cooling or cooler in heating compared to normal operation.
Fix:
No fix needed if you want energy savings. Press the Economy button on your remote to return to standard operation mode.
Two Blinking Green Lights: Error Code Indication
When both green lights blink in patterns, your system is communicating a diagnostic trouble code requiring attention.
Simultaneous Blinking
Both lights flashing together at the same rate typically indicates a control board communication issue or initialization sequence.
Count the blinks carefully over multiple cycles. The number of flashes before pausing reveals the specific error code.
This pattern often appears during power-up as the system performs self-diagnostics. If it persists beyond 60 seconds, a genuine error exists.
Fix:
Perform a complete power cycle reset. Turn off the breaker for 5 minutes, restore power, and observe if blinking continues.
Alternating Blink Pattern
Lights blinking in alternating sequence (one then the other) suggest sensor communication problems or specific component failures.
This pattern is less common but indicates the control system detected issues with specific monitored components.
Document the exact pattern. Note which light blinks first, timing between blinks, and how many times the pattern repeats.
Fix:
Check all sensor connections at the control board. Loose thermistor connections cause alternating blink patterns frequently.
Two Green Lights With Specific Blink Rates
The speed and frequency of blinking modify the meaning significantly. Slow versus rapid blinking indicates different conditions. Let’s explore that.
Slow Blinking (Once Every 3-5 Seconds)
Slow, steady blinks usually indicate standby or waiting states rather than errors.
One light might show slow blinking while the other remains steady. This combination often indicates a specific operational mode like defrost or delay.
The system typically continues functioning normally with slow blink patterns. They’re informational rather than error indicators.
Fix:
Consult your specific model’s manual to decode which operational mode the pattern represents. Usually no action needed.
Rapid Blinking (Multiple Times Per Second)
Fast blinking almost always indicates an active error condition requiring attention.
Count the rapid blinks in each burst. The count corresponds to specific error codes in Mitsubishi’s diagnostic system.
The system might continue running in limited capacity or shut down completely depending on error severity.
Fix:
Identify the specific error code from the blink count, then address the root cause outlined in the error code section below.
Model-Specific Two Green Light Meanings
Different Mitsubishi model lines use slightly different LED configurations and meanings. Your specific model determines interpretation.
MSZ-GL Series – These popular wall-mounted units use operation and economy indicator lights. Two green lights typically show economy mode active operation.
MSZ-FH Series – Hyper-Heat models include operation and defrost indicators. Two greens during winter operation indicates defrost cycle in progress.
MXZ Multi-Zone – Indoor units show operation and communication status. Two greens confirm the indoor unit communicates properly with the outdoor unit.
PEA Ducted Units – These use operation and filter indicators. Two greens might indicate operation with a filter reminder active.
Fix:
Check your owner’s manual for your exact model number. LED meanings vary between series and manufacturing years.
Mitsubishi Mr Slim Troubleshooting Blinking Light: Complete Diagnostic Guide
Mr Slim systems use standardized blinking codes across most models. Understanding this system enables accurate self-diagnosis and helps you identify problems quickly.
How to Count and Record Blink Patterns
Accurate observation is critical for proper diagnosis. Miscount one blink and you’ll troubleshoot the wrong problem entirely.
Watch the LEDs through at least three complete cycles. Patterns repeat consistently making them identifiable over multiple observations.
Count the number of blinks in each burst. The pause between bursts separates individual code sequences.
Use your smartphone to video the blinking pattern. Reviewing footage ensures accurate counting without memory errors.
Note which specific LEDs blink. Operation light, timer light, and other indicators each contribute to complete code meaning.
Record timing between blinks. Both the blink duration and pause length factor into proper code interpretation.
Document all other symptoms. Blink codes combined with operational behavior provide complete diagnostic pictures.
Single LED Blink Code Meanings
When only one green LED blinks, the number of blinks indicates specific problems. These are the most common single-light codes.
1 Blink Pattern:
Single slow blinks every 3-4 seconds indicate normal standby mode. Not an error. Just shows the unit has power.
2 Blinks:
Two quick blinks point to temperature sensor problems. Room temperature sensor or heat exchanger thermistor failed or disconnected.
3 Blinks:
Three rapid blinks signal communication failures between indoor and outdoor units. Wiring issues or control board problems.
4 Blinks:
Four blinks indicate indoor unit-specific sensor faults. Typically the room temperature sensor reading outside specifications.
5 Blinks:
Five rapid blinks mean compressor protection activated. Overheating, overcurrent, or mechanical problems triggered safety shutdown.
6 Blinks:
Six blinks show indoor fan motor failure. Motor not responding to control signals or drawing excessive current.
7 Blinks:
Seven blinks signal outdoor fan motor problems. Condenser fan motor failure preventing proper heat rejection.
8+ Blinks:
Eight or more rapid blinks indicate multiple system failures or serious control board malfunction.
Two LED Simultaneous Blink Patterns
When two lights blink together in synchronized patterns, they create compound error codes indicating specific combination failures.
Both Blinking Once
Synchronized single blinks typically show power-up self-test or system initialization. Should complete within 30 seconds.
Both Blinking Twice
Double synchronized blinks often indicate outdoor unit communication with specific error conditions detected.
Both Blinking Rapidly
Multiple synchronized rapid blinks suggest critical failures requiring immediate shutdown for protection.
Both Blinking Different Rates
One fast, one slow indicates hierarchical errors. Primary problem with secondary consequence.
Record the exact pattern including which light blinks at which rate. This detailed information helps pinpoint complex problems.
Reset Procedures to Clear Error Codes
After fixing underlying problems, error codes must be cleared to restore normal operation and verify repairs succeeded.
Basic Power Cycle
Turn off the circuit breaker powering your mini split for exactly 5 minutes. This clears most temporary error codes.
Restore power and immediately observe LED behavior. If lights return to normal steady operation, the problem was temporary.
If the same blink pattern reappears within 2 minutes, the underlying problem wasn’t resolved. Additional diagnosis is necessary.
Control Board Reset Button
Access the indoor unit’s control board by removing the front cover and casing.
Locate the small reset button usually near the microprocessor. Press once with a paperclip. Don’t hold it down.
The LEDs should briefly show all segments illuminated confirming reset completion. Wait 60 seconds for full system reinitialization.
Remote Control Reset Sequence
Some models support error clearing through specific remote button combinations.
Press and hold both temperature Up and Down buttons simultaneously for 10 seconds.
The display should flash or cycle confirming reset command acceptance. Not all models support this feature.
Mitsubishi Mini Split Blinking Codes: Comprehensive Error Reference
Complete understanding of all blinking codes enables confident diagnosis. This reference covers the full range of Mitsubishi error indicators to help you identify and fix problems.
Temperature and Sensor Related Codes
Temperature sensors monitor system conditions enabling proper control and protection. These sensors fail frequently in mini split systems.
Error Code E1 (2 blinks)
Meaning: Room temperature sensor failure. The thermistor measuring indoor air temperature provides readings outside the normal range.
Cause: Sensor disconnected, damaged, or failed internally. Corrosion at connection points creates intermittent contact.
Symptoms: Erratic temperature control, constant running, or failure to start. System can’t determine actual room temperature.
Diagnosis: Access the sensor behind the front panel. Check connector tightness and wire condition. Measure resistance. Should be 5-15kΩ at 70°F.
Fix: Reconnect loose sensors. Replace failed sensors with exact OEM parts matching your model number. Sensors cost $15-35 and plug in directly.
Error Code E2 (2 blinks + pause + 1 blink)
Meaning: Heat exchanger sensor problem. Thermistor monitoring evaporator coil temperature failed.
Cause: Physical damage to sensor, wire breakage, or internal sensor failure from repeated temperature cycling.
Symptoms: Poor cooling performance, ice formation on coils, or system shutdown during operation.
Diagnosis: Locate the heat exchanger sensor attached to the evaporator coil. Test resistance at known temperatures comparing to specifications.
Fix: Replace the heat exchanger sensor ensuring proper thermal contact with the coil surface. Secure firmly in mounting clips.
Communication and Wiring Error Codes
Communication between indoor and outdoor units requires proper wiring. These codes indicate connection problems.
Error Code E3 (3 blinks)
Meaning: Indoor/outdoor unit communication failure. Data transmission between units is interrupted or corrupted.
Cause: Damaged communication wiring, loose connections, crossed wires, or control board failure.
Symptoms: Indoor unit powers on but outdoor unit doesn’t respond. No cooling or heating despite normal indoor fan operation.
Diagnosis: Inspect wiring between units checking for cuts, corrosion, or loose terminals. Verify correct wire connections at terminal blocks.
Fix: Repair damaged wires or run new communication cable. Ensure proper polarity and secure connections at both units.
Error Code U4
Meaning: Indoor/outdoor transmission error. Similar to E3 but specifically indicates data corruption rather than complete communication loss.
Cause: Electrical interference, incorrect wire gauge, excessive wire length, or marginal connection quality.
Symptoms: Intermittent operation, unexpected shutdowns, or mode switching failures.
Fix: Reroute communication wires away from power cables. Use shielded twisted-pair cable. Shorten wire runs if exceeding specifications.
Component Failure Error Codes
These codes indicate specific mechanical or electrical components failed requiring replacement.
Error Code E5 (5 blinks)
Meaning: Compressor overcurrent protection. The compressor drew excessive current triggering safety shutdown.
Cause: Compressor mechanical failure, low voltage, failed start capacitor, or locked rotor condition.
Symptoms: Compressor attempts to start (clicking sound) but doesn’t run. Outdoor unit draws high current then trips protection.
Diagnosis: Measure amp draw during startup. Check capacitor capacitance. Test compressor windings for shorts or opens.
Fix: Replace failed capacitors first. Cheapest solution. If compressor failed mechanically, professional replacement is required.
Error Code E6 (6 blinks)
Meaning: Indoor fan motor failure. Blower motor doesn’t respond to control signals or draws abnormal current.
Cause: Motor bearing failure, electrical winding damage, failed capacitor, or control board output failure.
Symptoms: No airflow from indoor unit despite operation lights showing active. Silent operation or unusual motor sounds.
Diagnosis: Test motor directly by applying voltage. Check motor capacitor. Measure winding resistance comparing to specifications.
Fix: Replace failed motor with exact OEM replacement. Ensure fan blade is secure and balanced on motor shaft.
Error Code E7 (7 blinks)
Meaning: Outdoor fan motor failure. Condenser fan motor won’t run preventing heat rejection.
Cause: Motor failure, failed capacitor, electrical damage, or physical obstruction preventing rotation.
Symptoms: Compressor runs but outdoor fan doesn’t spin. Outdoor unit overheats. Reduced cooling capacity.
Diagnosis: Manually spin fan blade checking for resistance or binding. Test motor windings and capacitor.
Fix: Replace outdoor fan motor ensuring proper blade balance and clearance. Check that nothing obstructs fan rotation.
System Protection and Pressure Error Codes
These codes indicate safety systems detected conditions that could damage equipment if operation continued.
Error Code P1
Meaning: High pressure protection activated. Refrigerant pressure exceeded safe limits triggering automatic shutdown.
Cause: Dirty condenser coils, blocked airflow, overcharged refrigerant, or non-condensable gases in the system.
Symptoms: System runs briefly then shuts down. Outdoor unit feels excessively hot. Reduced cooling capacity.
Diagnosis: Clean condenser coils thoroughly using an AC coil cleaner (View on Amazon). Check for airflow obstructions. Professional pressure testing is required for refrigerant issues.
Fix: Clean coils and ensure proper airflow. If problem persists, professional refrigerant service is necessary.
Error Code P4
Meaning: Low-pressure protection. Refrigerant pressure dropped below the minimum safe operating level.
Cause: Refrigerant leak, restriction in refrigerant circuit, or failed expansion device.
Symptoms: Poor cooling, ice on indoor coils, or complete loss of cooling capacity.
Fix: Locate and repair refrigerant leak. This requires professional service with EPA certification and specialized equipment.
Multiple or Compound Error Codes
When systems display multiple error patterns or rapidly changing codes, complex problems exist.
Alternating Error Codes
Display switches between two different blink patterns indicates multiple simultaneous failures. This suggests cascading failures where one problem created secondary issues. Fix the primary error first.
Random or Inconsistent Patterns
Irregular blinking without clear patterns usually indicates control board failure or severe electrical problems. This might also signal power supply issues which create voltage fluctuations that confuse the control system.
Fix:
Test power supply voltage stability. Replace the control board if power tests good but erratic behavior continues.
2 Green Lights on Mitsubishi Mini Split Troubleshooting Tools and Testing Equipment
Effective diagnosis requires appropriate tools. These items enable accurate testing without guessing and help you identify problems quickly.
Essential Diagnostic Tools
Multimeter
A Digital multimeter (View on Amazon) measures voltage, resistance, and continuity. It’s essential for electrical diagnosis.
Test voltage at power supplies, sensor resistance, and circuit continuity. Models costing $30-60 provide adequate accuracy.
Clamp Ammeter
Measures current flow without breaking circuits. Critical for diagnosing motor and compressor problems.
Check amp draw comparing to nameplate specifications. Readings outside specifications indicate component problems.
Infrared Thermometer
An infrared thermometer (View on Amazon) measures non-contact temperature. Non-contact temperature measurement helps verify sensor accuracy and refrigeration performance.
Measure air temperatures at supply and return. Check component temperatures identifying overheating issues.
Smartphone Camera
Document LED blink patterns, wire routing, and installation details.
Camera video captures exact blink timing for review. Photos preserve wire connection information before disassembly.
Service Manuals and Documentation
Owner’s Manual
Provides basic troubleshooting, LED code interpretations for your specific model, and maintenance schedules.
Download PDF versions from Mitsubishi’s website if you lost your original. Enter your complete model number.
Service Manual
Professional technical documentation with detailed diagnostics, wiring diagrams, and component specifications.
Service manuals aren’t always publicly available. Try HVAC parts suppliers or professional forums.
Wiring Diagrams
Essential for tracing circuits and understanding signal flow between components.
These help identify correct wire connections especially after previous repair attempts created confusion.
Preventive Measures to Avoid LED Error Codes
Most error conditions develop from neglected maintenance. Consistent care prevents the majority of LED error situations and keeps your system running reliably.
Monthly Maintenance Preventing Sensor Errors
Temperature sensor problems cause the most common LED error codes. Regular care keeps sensors functioning reliably.
Clean air filters monthly preventing dust accumulation on sensors. Dirty filters restrict airflow affecting temperature readings.
Inspect sensor locations for debris or condensation. Moisture causes corrosion triggering intermittent sensor failures.
Verify sensors remain properly positioned in airflow. Vibration sometimes shifts sensors from optimal mounting locations.
Check sensor wire connections for tightness. Thermal cycling and vibration loosen connections over months of operation.
Quarterly Maintenance Preventing Motor Failures
Fan motor problems generate E6 and E7 error codes. Proper maintenance extends motor life significantly.
Clean both indoor and outdoor fan blades removing dust buildup. Imbalanced blades stress motor bearings.
Lubricate motor bearings if your model includes lubrication ports. Use only manufacturer-specified lubricants.
Check fan blade security on motor shafts. Loose blades create vibration damaging motors.
Listen for unusual bearing sounds. Rough or squealing bearings indicate developing failures requiring attention.
Annual Professional Maintenance Preventing System Errors
Professional service catches developing problems before they trigger LED error codes.
Technicians measure refrigerant pressures preventing P-codes from pressure-related problems.
Electrical testing identifies failing capacitors before they cause motor error codes.
Thorough cleaning prevents airflow restrictions that trigger protection circuits.
Communication circuit testing ensures reliable data transmission preventing E3 errors.
Firmware updates resolve software bugs causing erratic LED behavior in newer models.
Model-Specific LED Configurations and Meanings
Different Mitsubishi product lines use varying LED layouts. Knowing your specific model’s configuration improves diagnostic accuracy.
MSZ-GL Standard Efficiency Series
These popular wall-mounted units feature three LED indicators: operation (green), timer (green), and economy (orange).
Two green lights (operation + timer) indicate scheduled operation is active. The unit runs on a programmed timer.
Two green lights (operation + economy) show economy mode reduces power consumption for energy savings.
If either combination blinks, count the pattern and reference error code tables above.
MSZ-FH Hyper-Heat Series
Hyper-Heat models include operation (green), timer (green), defrost (yellow), and check (red) indicators.
Two green lights typically show operation with timer active similar to GL series.
During winter, operation plus defrost (green + yellow) indicates normal defrost cycle operation.
Blinking patterns follow standard error codes with additional defrost-specific indicators.
MXZ Multi-Zone Outdoor Units
Outdoor units include their own LED indicators separate from indoor units.
Two green lights on outdoor units indicate multi-zone communication status between the outdoor unit and multiple indoor units.
Blinking patterns on outdoor units often differ from indoor error codes. Consult outdoor-specific documentation.
MLZ Floor Console Units
Floor-mounted units position LEDs at eye level making observation easier than wall-mounted models.
LED meanings match MSZ series but placement differs. Operation and timer lights are typically side-by-side.
Two steady greens most commonly show timer operation since floor units often serve commercial applications with scheduling.
When Two Green Lights Require Professional Service
Some two-green-light situations exceed DIY capabilities. Recognize when to call professionals preventing worsening damage and costly mistakes.
Persistent Error Codes After Basic Fixes
If error codes return immediately after resets and basic repairs, deeper problems exist.
Intermittent problems prove especially challenging. Failures that come and go suggest environmental factors or marginal component conditions.
Multiple error codes appearing in succession indicate cascading failures. Fix one problem only to see another appear.
These situations benefit from professional diagnostic equipment monitoring system operation over extended periods.
Refrigerant-Related LED Codes
Any error code related to refrigerant requires professional service with EPA certification.
P1 and P4 codes (pressure-related) involve refrigerant work illegal for unlicensed individuals.
Attempting refrigerant work without certification risks environmental damage, personal injury, and legal penalties.
Professionals have recovery equipment, vacuum pumps, and gauges necessary for proper refrigerant service.
Control Board Failures
While control board replacement is mechanically simple, diagnosis proving board failure requires expertise.
Control boards cost $150-400. Incorrect diagnosis leads to expensive parts purchases that don’t fix problems.
Professionals test boards with specialized equipment isolating failures to specific circuits.
Many board failures are repairable by component-level technicians at a lower cost than full replacement.
Also Read:
Frequently Asked Questions
Are two green lights on my Mitsubishi mini split normal?
Yes, two steady green lights are often completely normal and indicate active operational modes rather than problems. The most common scenarios are timer mode (operation + timer lights) showing scheduled operation is running, or economy mode (operation + economy lights) indicating energy-saving operation is active.
Check your remote control display or system settings to see if you’ve programmed a timer or activated economy mode. If the lights are steady and not blinking, this is intentional operation providing visual confirmation of your selected modes. However, if both lights blink in patterns rather than staying steady, they’re communicating diagnostic error codes that require attention.
The distinction between steady (normal) and blinking (error) is critical. Steady lights mean your system is working as programmed. Blinking lights mean the system detected a problem and is telling you through the blink count and pattern. When both lights are steady, the unit typically functions normally.
How do I reset the LED lights on my Mitsubishi mini split?
Start with a complete power cycle which clears most temporary error codes and initializes the system fresh. Turn off the circuit breaker dedicated to your mini split for exactly 5 full minutes. This time allows capacitors to fully discharge and the control board’s memory to clear completely. After 5 minutes, flip the breaker back on and immediately observe the LED behavior.
If lights return to normal steady operation or turn off completely, the error was temporary, possibly from a power fluctuation or momentary glitch. If the same blink pattern reappears within 2 minutes, the underlying problem wasn’t resolved and additional diagnosis is necessary.
For more stubborn error codes, perform a control board hard reset by accessing the indoor unit’s control board behind the front panel. Locate the small reset button, usually near the microprocessor chip and often labeled “RESET” or “SW1.” Press this button once briefly with a paperclip tip. Don’t hold it down as prolonged pressing may trigger diagnostic modes. The LEDs should briefly illuminate all segments confirming successful reset.
Wait 60 seconds for complete system reinitialization before testing operation. Some models support remote control reset sequences. Press and hold both the temperature Up and Down buttons simultaneously for 10 seconds. The display should flash or cycle confirming the reset command was accepted, though not all models support this feature.
What’s the difference between steady and blinking green lights?
The difference is fundamental to proper diagnosis and represents completely different system states. Steady green lights indicate normal operational status or active programmed modes like timer, economy, or defrost functions.
When lights stay on continuously without flickering, the system is communicating “everything is functioning as programmed.” These steady states are intentional and indicate proper operation. You’ll see steady lights during normal cooling/heating, when timers are active, when energy-saving modes are engaged, or during automatic defrost cycles in heating season.
Blinking green lights, in contrast, communicate diagnostic trouble codes where the specific blink count and pattern identify particular problems the system has detected. Blinking is the control system’s way of saying “I’ve detected a problem and here’s what it is based on this blink code.”
The number of blinks before each pause corresponds to specific error codes in Mitsubishi’s diagnostic system. For example, 2 blinks indicates temperature sensor failure, 3 blinks signals communication errors, 5 blinks means compressor protection activated, and so on.
Blinking frequency also matters. Slow blinking (once every 3-5 seconds) usually indicates informational states rather than errors. Rapid blinking (multiple times per second in bursts) almost always indicates active error conditions requiring immediate attention.
Can I continue using my mini split with blinking green lights?
It depends entirely on the specific error code the blinking pattern represents. Not all errors are equally serious, and consequences of continued operation vary dramatically. Minor sensor errors like E1 or E2 (temperature sensor problems) typically allow continued operation, though with reduced efficiency, less precise temperature control, and higher electricity usage.
The system might cycle more frequently or struggle to maintain exact temperatures, but running won’t cause immediate damage in most cases. However, serious error codes demand immediate shutdown to prevent catastrophic equipment damage. Five-blink patterns (E5 error code) indicate compressor protection activation from overheating, overcurrent, or mechanical problems.
Continuing to operate with active compressor protection triggers can destroy the compressor within hours, creating repair costs of $1,500-2,500 or potentially requiring complete system replacement. Similarly, pressure-related codes (P1 high pressure, P4 low pressure) indicate refrigerant problems that worsen with continued operation. Running low on refrigerant causes compressor overheating and oil circulation problems leading to permanent damage.
When in doubt about severity, shut down immediately and diagnose properly. Your owner’s manual typically classifies error codes as informational (safe to operate temporarily), warning (reduced performance but safe short-term), or critical (immediate shutdown required).
Why did two green lights suddenly appear when they weren’t there before?
If two green lights suddenly appeared when you previously saw only one or none, you most likely activated timer mode or economy mode accidentally through the remote control. This happens frequently when handling the remote, as buttons are easily pressed unintentionally while picking it up, putting it down, or storing it.
Check the remote control display carefully for timer symbols (usually a clock icon) or economy mode indicators (often marked ECO or with a leaf symbol). Press the Timer button to see if scheduled operation is active. If so, pressing Timer again usually cancels it, returning to single-light normal operation. Similarly, press the Economy button to check if energy-saving mode activated.
Pressing Economy again typically toggles it off. If the two lights are blinking rather than steady, this indicates a completely different situation where a new problem developed requiring diagnosis. Sudden appearance of blinking codes suggests something changed in the system.
Common triggers include recent power outages that scrambled control board settings, electrical surges from storms damaging components, maintenance work that dislodged sensor connections, temperature sensor failures from age or moisture, or communication wiring problems from animals, construction, or environmental damage.
Restoring Normal Operation and LED Status
Two green lights on your Mitsubishi mini split communicate system status clearly once you understand the language. Most situations are normal operation modes requiring no action.
When lights blink in patterns, they provide valuable diagnostic information pinpointing problems accurately. Count carefully and reference error codes for proper identification.
Many LED error situations resolve through resets, cleaning, or simple repairs. Start with basic troubleshooting before assuming complex failures.
Document patterns and symptoms thoroughly. Take videos, write down observations, and note when problems occur. This information proves invaluable when professional service becomes necessary.
Your mini split will return to normal single-light operation once you address the specific cause of your two-light scenario.