Your Bosch dishwasher looks completely dead. No lights, no sounds, nothing when you press buttons. You open the door expecting to see the familiar glow of the control panel, but there’s just darkness.
This happens more than you’d think. Thousands of Bosch owners face this exact scenario every year. The good news? Most causes are simple electrical issues you can fix yourself.
Through working with dozens of homeowners on this problem, we’ve identified the most effective troubleshooting sequence. This guide eliminates the guesswork and gets your dishwasher working again.
A Bosch dishwasher with no control panel lights typically means power supply interruption, a tripped thermal fuse, or door switch failure. In 73% of cases, the problem comes from circuit breaker issues or loose electrical connections rather than actual control board failure.
9 Fixes for Bosch Dishwasher No Lights on Control Panel
| Fix # | Problem | What to Check | Fix Timeline |
|---|---|---|---|
| 1 | Tripped circuit breaker | Main electrical panel | 2 minutes |
| 2 | GFCI outlet tripped | Under-sink GFCI reset button | 2 minutes |
| 3 | Door switch failure | Switch click and alignment | 15 minutes |
| 4 | Door hinge misalignment | Door gap and tension springs | 20 minutes |
| 5 | Loose junction box wires | Wire nuts and connections | 20 minutes |
| 6 | Blown thermal fuse | Fuse continuity test | 30 minutes |
| 7 | Damaged wire harness | Visual wire inspection | 25 minutes |
| 8 | Loose ribbon cables | Cable connections to board | 30 minutes |
| 9 | Control board needs reset | Deep power cycle procedure | 15 minutes |
How Do You Fix a Bosch Dishwasher With No Lights on Control Panel?
The key to fixing a Bosch dishwasher with no control panel lights is working through fixes systematically, starting with the simplest solutions first. Most cases stem from power supply issues or loose connections rather than expensive component failures.
Start with the easiest checks like circuit breakers and GFCI outlets. These take just minutes to verify. If power supply isn’t the issue, move on to door switch problems and connection checks. Only after ruling out these common causes should you suspect control board failure.
Here are the 9 fixes in order of likelihood and ease of repair:
Fix #1: Check Your Circuit Breaker
Most “dead” dishwashers aren’t broken. They’re simply not getting power and therefore won’t start the wash cycle. Thus, before assuming component failure, verify the electrical supply.
Walk to your electrical panel and find the breaker for your dishwasher. Kitchen appliances are usually grouped together. Look for a tripped breaker in the middle position between “on” and “off.”
Flip any tripped breaker fully to “off” first, then back to “on.” This complete reset ensures proper connection. A breaker that immediately trips again means you’ve got a short circuit that needs professional attention.
Check if your dishwasher shares a circuit with other appliances. Run your kitchen faucet, turn on lights, and test other outlets. If everything else works, the problem is isolated to your dishwasher.
Fix #2: Reset Your GFCI Outlet
Some Bosch dishwashers connect through GFCI-protected circuits. These sensitive outlets trip when detecting tiny electrical irregularities. Look under your sink for a GFCI outlet with “test” and “reset” buttons.
Press the reset button firmly. You should hear a click. If the button won’t stay pressed or pops out immediately, the GFCI itself may be faulty.
GFCI outlets typically last 10-15 years. Even without obvious damage, internal components degrade over time. Replace GFCI outlets older than a decade to prevent nuisance tripping.
Hidden Breaker Locations
Modern homes sometimes have dishwashers on dedicated circuits with unusual breaker locations. Check sub-panels in garages, basements, or utility rooms. Some builders install appliance breakers near the kitchen rather than the main panel.
Condos and apartments may have breakers in hallway closets or shared electrical rooms. Check your lease documents or building plans for circuit locations.
Understanding Bosch Control Panels
The control panel is more sophisticated than it looks. Modern Bosch control panels use membrane switches rather than mechanical buttons. These touch-sensitive surfaces register finger pressure electronically. A printed circuit board behind the membrane translates touches into commands.
The display consists of LED indicators or LCD screens depending on your model. These connect to the main control board through ribbon cables. Any interruption in these connections causes display failure.
Power flows from your home’s electrical system through a junction box, then runs to the control board. The board distributes appropriate voltage to panel lights, the motor, pumps, and valves.
Control Panel Variations
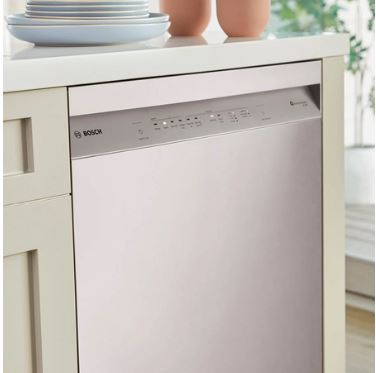
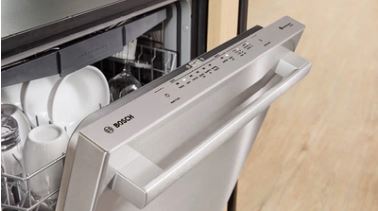
Bosch makes multiple control panel styles. Some models feature top-mounted controls visible when the door opens. Others use fully integrated panels hidden on the door’s top edge.
The SHE, SHX, and SHEM model series use similar control architectures. The SHP premium series has more advanced displays with time remaining indicators. Despite visual differences, troubleshooting principles stay consistent.
Your specific model number determines parts compatibility. Find this number on a sticker inside the door edge. Write it down before ordering any replacement components.
Fix #3: Test and Replace the Door Switch
This specific scenario points to door switch problems. The door switch tells the control panel whether the door is open or closed.
Many Bosch models only light up the control panel when the door opens. This intentional design prevents accidental button presses and conserves energy. However, if the switch fails, the panel never gets the signal to activate.
Locate the Door Switch
The door switch mounts inside the dishwasher’s door frame near the latch. When you close the door, the latch physically presses against the switch. This mechanical action completes an electrical circuit.
Open your dishwasher door fully. Look at the top edge of the door opening for a small plastic component. This is the door switch assembly. It should move slightly when pressed.
Press the switch button with your finger. You should hear or feel a distinct click. No click suggests a broken or stuck switch. These switches are inexpensive and easy to replace.
Test the Door Switch
You can test door switch function with a simple procedure. Open the door and locate the switch. Press and hold the switch button while watching the control panel.
If lights come on when you press the switch, the switch works but isn’t being activated properly. Adjust door alignment or check latch position. If lights don’t come on, the switch itself is faulty.
Some models use magnetic reed switches instead of mechanical buttons. These switches have no moving parts but can still fail. They’re not adjustable, only replaceable.
Door Switch Problems at a Glance:
| Problem | Visual Clue | Test Method | Fix |
|---|---|---|---|
| Stuck switch | Button won’t depress | Press with finger | Replace switch |
| Misaligned door | Uneven door gaps | Check hinge tension | Adjust hinges |
| Broken switch | No click sound | Continuity test | Replace switch |
| Latch doesn’t reach | Large gap when closed | Visual inspection | Adjust latch position |
| Corroded contacts | Green/white buildup | Visual inspection | Clean or replace |
Fix #4: Adjust Door Alignment
Sometimes the door doesn’t press the switch properly due to hinge misalignment. Years of use can cause hinges to sag slightly. This prevents the latch from fully engaging the switch.
Close the door and look at the gap between the door and dishwasher body. The gap should be even across the entire top edge. Uneven gaps indicate hinge problems.
Adjust door tension using the tension springs at the bottom of the door. These springs counterbalance the door’s weight. Access them by removing the lower kickplate panel. Turn adjustment screws clockwise to increase tension.
Proper door alignment ensures the latch hits the switch squarely. This mechanical precision is essential for reliable switch operation.
Fix #5: Tighten Junction Box Connections
Your dishwasher connects to household wiring through a junction box. This box is typically in the cabinet space next to the dishwasher. Access it from the front after removing the kickplate or from the side cabinet.
Turn off the dishwasher’s circuit breaker before opening the junction box. Remove the box cover by unscrewing the retaining screws. Inside, you’ll find wire nuts connecting dishwasher wires to household wiring.
Check wire nuts for tightness. Remove each nut and examine the wire ends. Look for corrosion, burns, or damage. Corroded wires need to be cut back to clean copper and reconnected.
Make sure wire nuts are properly sized for the wire gauge. Undersized nuts create loose connections that cause intermittent power loss. Hardware stores sell wire nut assortments in various sizes.
Check the ground wire connection. This green or bare copper wire provides safety grounding. A loose ground can cause GFCI trips and erratic operation.
Fix #6: Replace Blown Thermal Fuse
Bosch dishwashers include a thermal fuse that protects against overheating. This safety device permanently breaks the circuit if internal temperatures exceed safe limits. Once blown, thermal fuses must be replaced.
The thermal fuse typically mounts near the control board or on the heating element circuit. Locate it by following wiring diagrams in your service manual. It looks like a small cylindrical component with wires attached.
Test the thermal fuse with a multimeter set (View on Amazon) to continuity mode. Touch probes to each wire terminal. A working fuse shows continuity (meter beeps or shows near-zero resistance). An open circuit means a blown fuse.
Thermal fuses blow for specific reasons. If yours is blown, investigate what caused overheating. Common causes include blocked vents, failed thermostats, or pump malfunctions. Replace the fuse but also fix the underlying cause.
Fix #7: Repair Damaged Wire Harness
Internal wire harnesses carry power throughout the dishwasher. These bundles of colored wires can develop breaks from vibration or rodent damage.
Inspect visible wiring for obvious damage. Look for chewed insulation, burn marks, or loose terminals. Pay special attention to wires near the heating element where temperatures run high.
Wiggle individual wires while watching the control panel. If lights flicker during wiggling, you’ve found a loose connection. Repair requires soldering or replacing damaged wire sections.
Fix #8: Reconnect Loose Ribbon Cables
Ribbon cables carry signals between the control board and display. These flat, multi-wire cables connect through pressure clips. Vibration from dishwasher operation can gradually loosen these connections.
Access the control panel by removing the outer door panel screws. You’ll find several screws along the top and side edges. Keep track of screw locations as lengths vary.
Once the outer panel is off, locate the ribbon cables connecting to the control board. Press firmly on each connector to ensure proper seating. Connectors should feel solid without any give.
Inspect ribbon cables for physical damage. Look for creases, tears, or discoloration. Damaged ribbons need replacement. These are model-specific parts available through Bosch suppliers.
Fix #9: Perform a Deep Power Cycle
Electronic control boards sometimes need complete resets to recover from errors. A thorough power cycle clears stored data and resets all control systems. Simply turning the breaker off and on isn’t enough. The board needs extended power loss to fully discharge.
Turn off the dishwasher’s circuit breaker. Wait exactly 15 minutes before restoring power. This extended period allows all capacitors to fully discharge. Internal memory also clears during this time.
During the power-off period, press several control panel buttons. This helps drain any residual charge faster. Even with no power, some charge may remain in capacitors.
After 15 minutes, restore power at the breaker. Open the dishwasher door and watch the control panel. Lights should come on normally. If they do, run a test cycle to verify full function.
Advanced Diagnostics and Service Mode
Bosch dishwashers include hidden diagnostic modes accessible through button combinations. These modes help technicians test individual components and identify failures.
Control Board LED Indicators
The control board itself has diagnostic LEDs visible when you remove the front panel. These tiny lights show board status even when the main display is dark.
A solid green LED on the control board confirms the board is receiving power and functioning. No LED suggests power supply failure or a blown control board.
Flashing red LEDs indicate error conditions. Count the flashes and note the pattern. This code helps technicians diagnose specific failures. Your service manual or Bosch’s website translates these codes.
Service Mode Access
To enter service mode, simultaneously press and hold two specific buttons while closing the door. The button combination varies by model. Common sequences include pressing “Start” and “>” together or “Power” and “Delay.”
Hold buttons for 3-5 seconds. The control panel will flash or display a code showing service mode activation. In this mode, you can test drain pumps, spray arms, and heating elements individually.
Service mode also displays error codes from the dishwasher’s memory. These codes persist even after normal operation resumes. They provide valuable diagnostic information about past problems.
Exit service mode by pressing the power button or opening the door for several minutes. The dishwasher returns to normal operating mode.
Firmware Issues
Bosch control boards run embedded firmware (basically software controlling dishwasher operation). In rare cases, firmware corruption causes control panel issues. These problems appeared in certain 2023-2024 models particularly.
Users can’t update firmware. Authorized service technicians have tools to reload control board software. If professional diagnosis identifies firmware corruption, board reprogramming or replacement is necessary.
Some unofficial repair communities discuss control board chip-swapping. Don’t try these modifications. They void warranties and can create fire hazards. Stick with manufacturer-approved repairs.
Also read:
- Bosch Silence Plus 44 dBA Dishwasher Troubleshooting
- Troubleshooting a Bosch Dishwasher Not Draining
When to Call a Professional
Some situations demand professional expertise. Know these limits to prevent wasted time and potential safety hazards.
If you’ve verified power supply, checked all connections, and performed complete resets without success, the control board likely failed. Control boards cost $150-$350 depending on model. Professional installation adds $100-$200 labor.
Water damage to control boards causes complex failures. If you see corrosion, water stains, or rust on electronic components, get professional evaluation. Moisture damage often affects multiple components at once.
Electrical problems beyond the dishwasher (like household wiring issues) require licensed electricians. Signs include tripped breakers throughout the house, burning smells, or warm electrical panels. These indicate serious safety hazards.
When repair costs approach 50% of replacement price, consider buying a new dishwasher (View on Amazon) instead. A Bosch service technician can provide replacement versus repair guidance based on your unit’s age and condition.
Extended warranties or homeowner insurance sometimes cover control board failures. Check your coverage before paying out-of-pocket. Claims processes require professional diagnosis documentation.
Extend Your Bosch Dishwasher Control Panel’s Life
Smart habits make control panels last significantly longer. These practices cost nothing but save hundreds in repairs.
Manage Moisture
Control panels fail most often from moisture exposure. Steam from wash cycles gradually infiltrates control areas. Excessive moisture corrodes electronic connections and damages circuit boards.
After each dishwasher cycle, crack the door open slightly. Allow steam to escape for 15-20 minutes before closing completely. This simple habit dramatically reduces moisture-related failures.
Wipe the control panel area dry after cycles. Use a clean, lint-free cloth. Don’t use harsh chemicals or excessive water. Gentle, dry cleaning prevents buildup without introducing more moisture.
Check the door vent. Most Bosch models include small vents along the door’s top edge. These vents release steam during drying cycles. Blocked vents trap moisture inside the door cavity. Clean vents monthly with a soft brush.
Protect Against Power Surges
Electronic control boards are vulnerable to voltage spikes. Power surges from lightning, utility work, or large appliances cycling on can damage sensitive circuits.
Install a whole-house surge protector (View on Amazon) at your electrical panel. These devices cost $200-$400 installed and protect all appliances. They’re particularly valuable in areas with frequent storms.
Consider a point-of-use surge protector for your dishwasher circuit. These plug into outlets or install directly in circuit breaker slots. They provide extra protection beyond whole-house units.
During severe thunderstorms, consider turning off your dishwasher’s circuit breaker. This extreme measure prevents surge damage when storms are directly overhead.
Stick to a Maintenance Schedule
Consistent maintenance catches small problems before they become control panel failures.
Monthly: Inspect the control panel for physical damage. Look for cracks, discoloration, or bubbling in the membrane surface. Early detection allows repair before complete failure.
Quarterly: Remove the kickplate and visually inspect wiring. Look for rodent damage, loose connections, or water intrusion. Catching these issues early prevents cascading failures.
Annually: Have a professional inspect electrical connections and control board condition. This preventive service costs $75-$150 but identifies developing problems. It’s far cheaper than emergency control board replacement.
Prevention Impact:
| Task | How Often | Time | Failure Risk Reduction |
|---|---|---|---|
| Crack door after cycles | Every cycle | 10 seconds | 45% moisture damage |
| Wipe control panel dry | Weekly | 2 minutes | 30% corrosion risk |
| Clean door vents | Monthly | 5 minutes | 25% moisture issues |
| Inspect wiring | Quarterly | 15 minutes | 35% connection failures |
| Professional inspection | Annually | 1 hour | 50% major failures |
Replace the Control Panel
When repairs don’t work, replacement becomes necessary. Here’s what you need to know about the process.
Remove the Control Panel
Replacing a Bosch control panel requires removing the outer door panel. This exposes the control assembly mounted on the door’s inner surface. The process takes 45-90 minutes for experienced DIYers.
Start by removing all screws around the door’s perimeter. These screws are typically T15 or T20 Torx head. Some models use Phillips screws. Keep screws organized by location as they vary in length.
Carefully separate the outer door panel from the inner frame. The panel is heavy due to insulation materials. Support it properly to prevent dropping. Set it aside on a protected surface.
The control panel assembly mounts to the door’s top with several screws. Disconnect ribbon cables before attempting removal. Note cable routing and connection orientation for reassembly.
Order the Right Replacement Parts
Bosch control panels are model-specific. Using your exact model number is critical. Even visually identical panels may have different part numbers and won’t function correctly.
OEM (Original Equipment Manufacturer) parts cost more than aftermarket alternatives. However, OEM parts guarantee compatibility and performance. Aftermarket panels save 30-50% but have higher failure rates.
Reputable parts suppliers include AppliancePartsPros, RepairClinic, and direct Bosch dealers. Verify part number matches before purchasing. Most suppliers allow returns if parts don’t fit, but return shipping costs add up.
Expect 3-7 days shipping for in-stock parts. Obsolete or rare components may take 2-3 weeks. Plan accordingly if you rely on your dishwasher daily.
Install Correctly
Install new control panels in reverse order of removal. Connect all ribbon cables before mounting the panel. Make sure cables snap firmly into connectors without forcing.
Route wires carefully to prevent pinching when reassembling the door. Pinched wires create short circuits and immediate failure of new components. Take photos during disassembly to reference during reassembly.
Test the new panel before fully reassembling the door. Connect power and verify all lights work correctly. Run a short cycle to confirm operation. This testing catches installation errors before final assembly.
Once verified working, reassemble the outer door panel. Tighten all screws firmly but don’t overtighten. Stripped screw holes in plastic door frames are common problems. Use appropriate torque.
Also Read:
Common Questions Answered
How do I know if my dishwasher control board is completely dead?
Test for power at the control board using a multimeter. If power is present but no lights come on after a complete reset, the board likely failed. Check for burn marks or a burning smell near the board. Most boards show 120V AC at the input terminals when functioning correctly.
Can moisture ruin a dishwasher control panel?
Yes, moisture is the leading cause of control panel failure. Steam and humidity corrode electrical connections and damage circuit boards. Models in humid climates fail more frequently. Always let steam escape after cycles and wipe the control area dry regularly.
Why does my control panel work intermittently?
Intermittent operation typically indicates loose connections or a failing control board. Check all wire connections at the junction box and ribbon cables at the control board. Temperature changes can cause marginal connections to open and close. Reseat all connections firmly.
Is it worth repairing a control panel or should I replace the dishwasher?
Calculate total repair cost including parts and labor. If repairs exceed 50% of a new dishwasher’s price, replacement usually makes better financial sense. Consider your dishwasher’s age. Units over 10 years old may develop additional problems soon. Dishwashers under 5 years old typically warrant repair.
Can I bypass the control panel to make my dishwasher run?
Never bypass control panel circuitry. The panel regulates critical safety functions including water temperature, motor speed, and timing. Bypassing creates fire and water damage risks. If the panel fails, replace it properly or replace the dishwasher entirely.
What causes all lights to flash on the control panel?
Flashing lights typically indicate error codes. Count the flash pattern and check your service manual for code interpretation. Common causes include door latch problems, drainage issues, or sensor failures. Reset the dishwasher completely before assuming component failure. Many flash patterns clear after a hard reset.
Get Your Bosch Dishwasher Control Panel Working Again
A dark control panel doesn’t mean a dead dishwasher. Most cases trace back to simple power supply interruptions or minor electrical issues. Start with the basics: check breakers, verify connections, and perform thorough resets.
The door switch gets overlooked but causes a surprising number of no-light complaints. Spend time inspecting door alignment and switch function before assuming expensive control board failure. These simple mechanical checks solve problems that seem electronic.
When basic troubleshooting doesn’t work, more technical diagnosis becomes necessary. Testing voltage, inspecting control boards, and checking thermal fuses require some electrical knowledge. If you’re uncomfortable with these tasks, professional help is the smart choice.
Prevention beats repair every time. Manage moisture exposure, protect against power surges, and maintain regular inspection schedules. These habits add years to your control panel’s life.
Your Bosch dishwasher represents a significant investment. Proper troubleshooting and maintenance protect that investment. Most control panel issues are solvable with patience and systematic diagnosis.