Your Maytag Centennial dryer stopped mid-cycle, and now your wet laundry sits in a damp heap. You press the start button and nothing happens. Or maybe it runs for an hour but leaves clothes soaking wet. These frustrations are more common than you’d think, and most have straightforward fixes you can handle yourself.
The Maytag Centennial dryer’s most common issues stem from thermal fuse failures, clogged vents, broken drive belts, and faulty door switches. All of these are fixable with basic tools and 30-60 minutes of your time.
This guide walks through the most frequent Maytag Centennial dryer troubleshooting scenarios, from heating failures to drum issues, with tested solutions that actually work. We’ll cover thermal fuse replacements, reset procedures, and when it’s time to call a technician.
Quick Maytag Centennial Dryer Troubleshooting Reference
| Problem | Most Likely Cause | Quick Fix |
|---|---|---|
| Dryer won’t start | Door switch failure or thermal fuse | Check door latch, test thermal fuse continuity |
| No heat | Blown thermal fuse or heating element | Replace thermal fuse, clean lint buildup |
| Won’t spin | Broken drive belt or motor issue | Inspect belt tension, replace if worn |
| Not drying completely | Clogged vent or weak airflow | Clean exhaust vent, check outdoor flapper |
Understanding Common Maytag Centennial Dryer Problems
The Centennial line was designed for reliability, but certain components wear out predictably. Most failures trace back to four systems: the thermal safety circuit, the drive mechanism, the heating assembly, and the control board.
Unlike newer models with electronic diagnostics, the Centennial uses mechanical switches and thermal fuses that fail without warning. The good news is that these parts are inexpensive and accessible without dismantling the entire cabinet.
Thermal protection devices fail most often because lint accumulation causes overheating. When internal temperatures exceed safe limits, the thermal fuse blows permanently to prevent fires. This is intentional since the fuse sacrifices itself to protect your home, but it also means your dryer won’t work until you replace it.
Drive belts stretch and crack after years of use, and a broken belt stops the drum from rotating while the motor continues running. You’ll hear the motor humming but see no movement. Door switches malfunction from repeated use, preventing the start circuit from engaging even when the door closes properly.
Below are the commonest Maytag Centennial dryer problems and their troubleshooting tips:
Maytag Centennial Dryer Will Not Start
A completely unresponsive dryer points to power, door, or control issues. Here’s what to do when your Maytag Centennial dryer won’t start running:
1. Verify Power Supply
Confirm the outlet has power by plugging in another device or using a voltage tester. Check that the dryer cord is firmly seated in both the outlet and the terminal block inside the dryer since loose connections prevent starting even when power is present at the outlet.
Inspect the power cord for damage, especially near the plug and where it enters the dryer. Frayed insulation or exposed wires create intermittent connections.
2. Test the Door Switch
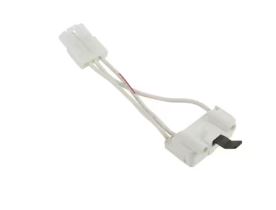
The door switch is a safety interlock that prevents operation when the door is open. This small switch mounts in the door frame and gets pressed by a strike plate on the door. Repeated door closures wear out the switch mechanism or break the plastic actuator.
Open the door and manually press the switch while listening. You should hear or feel a click, and you can test continuity across the switch terminals with the door closed. No continuity means the switch failed and needs replacement.
3. Inspect the Start Switch and Wiring
The start button itself can fail from accumulated dirt or mechanical wear. Remove the control panel (usually two screws along the top edge) and inspect the start switch for burned contacts or loose wire connections. Clean any corrosion with electrical contact cleaner.
Trace the wiring from the start switch to the main control board since damaged wires or loose connectors interrupt the start signal.
Maytag Centennial Dryer Not Heating
A dryer that tumbles without heat is one of the most reported problems. Your clothes stay damp after a full cycle, or they come out slightly warm but nowhere near dry. This points directly to the heating circuit, and the Maytag Centennial uses either electric heating elements or gas burners depending on your model.
Here’s what to do when your Maytag Centennial dryer won’t heat up:
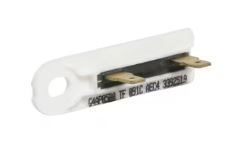
1. Check the Thermal Fuse First
The thermal fuse sits on the blower housing or heating element housing. It’s a small, rectangular component with two wire terminals, and this fuse has no reset button. Once blown, it requires replacement.
To test it, disconnect the power and use a multimeter (View on Amazon) set to continuity mode. Remove one wire from the fuse and touch the probes to each terminal. A working fuse shows continuity with near-zero resistance, while no continuity means it’s blown.
Thermal Fuse Testing Results:
- Continuity present (beep) – Fuse is functional, check other heating components
- No continuity (no beep) – Fuse is blown, replace fuse ($8-15) and clean vents
- Fuse looks burned/scorched – Severe overheating occurred, replace fuse AND investigate airflow blockage
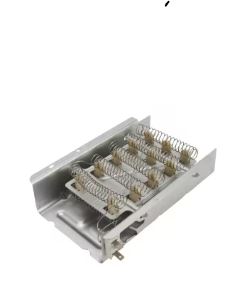
2. Inspect the Heating Element Assembly
If the thermal fuse tests good, examine the heating element itself. Electric dryers use a coiled wire element that can break or short circuit. Visual inspection helps since you can often spot obvious breaks in the coil.
Use your multimeter to test continuity across the element terminals. A functional element shows 10-50 ohms of resistance, while infinite resistance means the element is broken internally. Replace damaged elements with OEM Maytag parts for proper fit since aftermarket elements sometimes have different wattage ratings that affect drying performance.
3. Verify the High-Limit Thermostat
This cycling thermostat sits near the heating element and regulates maximum temperature. Unlike the thermal fuse, it resets automatically when it cools down. Test it the same way by checking for continuity at room temperature.
It should show continuity when cool and open (no continuity) when heated beyond its rated temperature. A stuck-open thermostat prevents heating even if all other components work perfectly.
Fixing Thermal Fuse Problems
Thermal fuse failures create multiple symptoms beyond just no heat. Your dryer might not start at all if the thermal fuse is in the main power circuit, since some Centennial models wire the fuse through the start circuit as an additional safety measure.
Why Thermal Fuses Blow Repeatedly
If you’ve replaced the thermal fuse once and it blows again within weeks, you have an underlying airflow problem. The fuse is doing its job by protecting against dangerously high temperatures. Restricted airflow causes the dryer to overheat, triggering the fuse repeatedly.
Check your exhaust vent thoroughly by pulling the dryer away from the wall and disconnecting the vent hose. Inspect both the hose and the wall duct for lint buildup since a completely blocked vent can blow a thermal fuse in a single load. Even partial restrictions cause gradual overheating over several cycles.
Clean your lint screen before every load, but also wash it monthly with hot soapy water. Fabric softener residue creates an invisible film that blocks airflow while looking perfectly clean.
Thermal Fuse Replacement Steps
- Unplug the dryer completely and shut off the gas supply if applicable
- Remove the top panel by releasing clips or removing screws (varies by exact model year)
- Locate the thermal fuse on the blower housing (usually white or silver, about one inch long)
- Take a photo of wire connections before removing anything
- Disconnect the wire terminals by pulling straight off
- Remove the mounting screw holding the fuse to the housing
- Install the new fuse in the exact same position and orientation
- Reconnect wires to the correct terminals
- Reassemble the panel and test with a small load
The entire process takes 15-30 minutes once you locate the fuse. Always replace the thermal fuse with the exact same temperature rating, which is usually 280°F or 290°F for Centennial models.
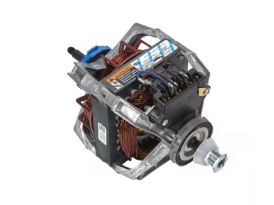
Maytag Centennial Dryer Won’t Spin
A non-spinning drum with motor noise indicates drive system problems.
Examine the Drive Belt
The drive belt wraps around the drum, under an idler pulley, and connects to the motor pulley. This long, thin belt stretches and cracks over time, making a broken belt the most common cause of no-spin problems.
Remove the front panel to access the drum and try rotating it by hand. If it spins too easily with no resistance, the belt is broken or off the pulleys. Replace the belt with an OEM part that matches your exact model number since belt dimensions vary, and the wrong size causes slippage or excess wear.
Check the Idler Pulley
The spring-loaded idler pulley maintains belt tension. A seized pulley prevents the belt from moving even if intact, so inspect the pulley for smooth rotation. It should spin freely without grinding or squeaking, and you should replace the pulley if it’s rough or frozen.
Also check the pulley’s mounting spring. A broken or stretched spring can’t maintain proper tension, causing belt slippage that mimics a worn belt.
Test the Drive Motor
If the belt is intact but the drum won’t spin, the motor may have failed. Listen carefully when you press start and see if you hear any humming or buzzing. A humming motor that doesn’t turn indicates a locked rotor or failed start capacitor (on some motor types), while no sound at all means the motor isn’t receiving power, pointing to wiring or control board issues.
Motors rarely fail suddenly unless they’ve been struggling with high resistance from drum or pulley problems.
Maytag Centennial Dryer Not Drying Effectively
Insufficient drying despite heat and tumbling indicates airflow problems or sensor issues. Your dryer completes the cycle, but clothes remain slightly damp or take two cycles to dry fully. This gradually worsening problem frustrates users because it’s harder to pinpoint than complete failures.
Here’s what to do when your Maytag Centennial dryer won’t dry clothes:
1. Measure Your Vent Run
Dryer vents should be as short and straight as possible. The Maytag Centennial works best with vent runs under 25 feet, and every 90-degree elbow reduces effective length by 5 feet. If your installation exceeds these limits, the dryer can’t push air efficiently through the system.
Rigid metal ducting outperforms flexible plastic or foil alternatives. Ridged interiors create turbulence that traps lint, while smooth metal ducts maintain better airflow and reduce fire risk.
2. Test the Blower Wheel
The blower wheel pulls air through the drum and pushes it out the vent. Remove the front panel to access it and spin the wheel by hand. It should rotate smoothly without wobbling or scraping.
Lint buildup on the wheel blades reduces efficiency dramatically. Clean any accumulated lint with a vacuum and soft brush since a cracked or damaged blower wheel creates weak airflow that can’t dry clothes properly.
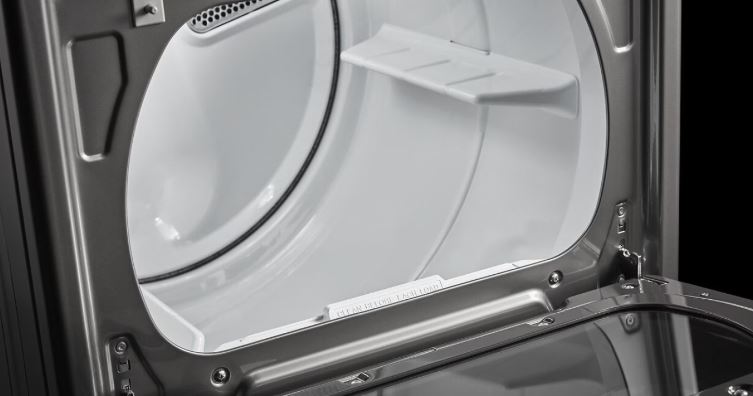
3. Check the Moisture Sensor Bars
Automatic dry cycles depend on moisture sensors inside the drum. These are two metal bars mounted on the back wall or inside the door opening, and fabric softener residue coats these sensors over time, preventing accurate moisture detection. The dryer thinks clothes are dry when they’re still damp, ending the cycle prematurely.
Clean sensor bars monthly with rubbing alcohol and a soft cloth. This simple maintenance step solves many “not drying” complaints instantly.
Troubleshooting No Heat Problems by a Maytag Centennial Dryer
No heat issues stem from electrical, gas, or control system failures.
For Electric Models
Check your home’s circuit breaker box first. Electric dryers use two breakers or a double-pole breaker, and if one breaker trips, the dryer runs and tumbles but doesn’t heat. Reset both breakers fully by turning them completely off, then back on. A partially tripped breaker looks normal but breaks the 240V circuit needed for heating.
Test the outlet voltage if breakers are fine. You need 240V across the two hot terminals, and lower voltage means a wiring problem between the panel and dryer outlet.
For Gas Models
Gas models need proper gas flow and functioning ignition systems. Listen for the gas valve clicking during the heat cycle. You should hear a distinctive click followed by the whoosh of igniting gas, and no click means the gas valve coils or flame sensor failed.
The flame sensor is a metal probe that extends into the burner assembly. It confirms flame presence before allowing continuous gas flow, and a dirty or corroded sensor shuts off gas flow for safety, preventing heating.
Gas Dryer Components:
| Component | Failure Symptom | Testing Method |
|---|---|---|
| Gas valve coils | No clicking sound, no ignition | Test coil resistance (should be 1000-1500 ohms) |
| Flame sensor | Gas ignites briefly then shuts off | Clean sensor rod, test continuity |
| Igniter | No glow, no ignition attempt | Check for visible glow when dryer starts |
How to Reset Your Maytag Centennial Dryer
The Centennial line doesn’t have a traditional electronic reset button like newer models.
Power Cycle Reset Procedure
Unplug the dryer from the wall outlet and wait a full 5 minutes. This allows capacitors to discharge and the control board to reset completely. For hardwired dryers, flip the circuit breaker off instead.
After 5 minutes, restore power and attempt to start a normal cycle. This reset clears error codes and restarts the control sequence, solving occasional glitches but not mechanical failures.
Thermal Cutoff Reset
Some Centennial models use a thermal cutoff switch that’s manually resettable, though this is less common than the disposable thermal fuse. This button-style switch mounts on the heating element housing, and you press the small red or black button firmly to reset it. You’ll feel it click when properly reset.
Only reset this switch after identifying and fixing what caused overheating. Repeated resets without addressing the root cause leads to component damage or fire risk.
Additional Maytag Centennial Dryer Troubleshooting Solutions
Drum Rollers and Glides
Worn drum support rollers create thumping noises and cause excessive friction that can overwork the motor. The Centennial uses 4 rollers (2 front, 2 rear) that support the drum. Check them for flat spots or rough surfaces, and replace all 4 rollers at once even if only one is damaged since they wear at similar rates.
Drum glides on the front bulkhead also wear down, creating a gap that lets the drum sag. Replace worn glides to restore proper drum position.
Control Board Diagnostics
The Centennial uses a relatively simple control board compared to modern dryers. Most failures show obvious symptoms: the panel goes completely dark, specific cycle selections don’t work, or the dryer runs but ignores timer settings.
Visual inspection helps, so remove the control panel cover and look for burned components, loose connectors, or corrosion. Control boards can sometimes be repaired by resoldering loose connections, but replacement is usually more reliable.
Belt Switch Issues
Some Centennial models include a belt switch that prevents operation if the belt breaks. This safety feature stops the motor when the drum doesn’t move. If the belt switch fails in the open position, the dryer won’t start even with an intact belt. Bypass the switch temporarily (jump the terminals) to test if it’s the issue.

When to Call a Professional
Certain repairs require specialized tools or expertise beyond typical DIY capability.
Gas Line Work – Any work involving gas connections, valve replacement, or leak testing needs a certified technician. Gas leaks create explosion and poisoning risks too severe for experimentation. Igniter and flame sensor replacements are safe DIY projects, but never disassemble the gas valve itself.
Control Board Replacement – While replacing a control board isn’t dangerous, getting the correct replacement part is tricky. The Centennial line spanned multiple years with subtle board variations, and an incorrect board may physically fit but lack specific features your model needs. Professional techs have access to parts databases that match boards to serial numbers.
Drum Removal and Bearing Work – Replacing drum bearings or the drum itself requires complete disassembly. You’ll remove the entire cabinet, disconnect multiple components, and need special tools for bearing removal. This 3-4 hour job is best left to experienced repair techs unless you’re mechanically inclined with a proper workspace.
Cost-Benefit Analysis – If your dryer is more than 10 years old and needs multiple expensive repairs (motor, control board, drum assembly), replacement often makes more financial sense. Modern dryers offer better efficiency and reliability, and a service tech can provide honest assessment of remaining lifespan to guide your decision.
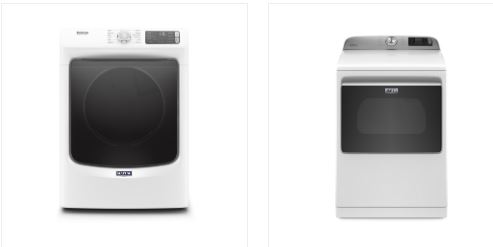
If you need a replacement dryer, check out decent selections from Amazon!
Maytag Centennial Dryer Prevention and Maintenance
Regular maintenance prevents most Maytag Centennial dryer troubleshooting issues before they develop.
Monthly Tasks
- Clean the lint screen before every load (takes 5 seconds and prevents overheating)
- Wash the screen with hot soapy water to remove fabric softener buildup, let dry completely
- Wipe down moisture sensor bars with rubbing alcohol to prevent false dry readings
Quarterly Tasks
- Disconnect the vent hose and clean both the hose and wall duct with a dryer vent brush
- Check the outdoor vent flapper to ensure it opens freely when the dryer runs
- Inspect the power cord and plug for damage, tighten loose connections at the terminal block
Annual Tasks
- Pull the dryer away from the wall for deeper inspection
- Vacuum lint from underneath and behind the unit
- Remove the lower front panel and clean lint from the blower housing and motor area
- Check exhaust vent routing for proper installation
- Replace flexible vent hoses with rigid metal ducting if possible
Usage Best Practices
Don’t overload the dryer since clothes need room to tumble for effective drying and to prevent motor strain. Clean out pockets before drying to prevent foreign objects from damaging the drum or clogging the blower. Use the moisture sensor (auto-dry) setting instead of timed dry to prevent over-drying that wastes energy and damages fabrics.
Frequently Asked Questions
Why does my Maytag Centennial dryer run but produce no heat?
The most common cause is a blown thermal fuse triggered by restricted airflow. Check and clean your exhaust vent system, then test the thermal fuse for continuity and replace it if blown. On electric models, also verify you have 240V at the outlet since one tripped breaker can make the dryer run without heat.
How long should a Maytag Centennial dryer last?
With proper maintenance, Centennial dryers typically last 10-15 years. The motor and drum assemblies are quite durable, while heating elements and thermal safety devices wear out first and need replacement every 3-7 years depending on usage. Regular vent cleaning extends lifespan significantly by reducing overheating stress.
Can I use a generic thermal fuse instead of OEM parts?
Always use thermal fuses with the exact temperature rating specified for your model (usually 280°F or 290°F). Generic fuses must meet these specifications exactly. Using a higher-rated fuse compromises safety since it won’t blow soon enough to prevent damage or fire, while lower ratings cause nuisance failures. Match the temperature and amperage rating precisely.
Why does my dryer stop mid-cycle and won’t restart?
This indicates the thermal cutoff switch or thermal fuse has triggered from overheating. Let the dryer cool for at least 30 minutes, then clean the lint screen and check vent airflow. If it restarts but stops again quickly, you have a serious airflow restriction that needs immediate attention to prevent damage.
What causes the squealing noise during operation?
Squealing typically comes from worn drum support rollers, a failing idler pulley, or a loose drive belt. These components wear with age and need replacement. Continuing to run the dryer with squealing noises will eventually damage the motor or other components, so address squealing noises promptly.
Is it normal for the dryer to feel hot on the outside?
The top and sides should feel warm but not burning hot. Excessive external heat indicates poor ventilation since heat is building up inside the cabinet instead of exhausting properly. Check your vent system immediately because continued operation with overheating can blow thermal fuses or damage the control board.
How do I know if the heating element is bad?
Use a multimeter to test for continuity across the element terminals with power disconnected. A good element shows 10-50 ohms resistance, while infinite resistance means it’s broken. Visually inspect for breaks in the coil, and also check that the element housing has no holes where the coil could touch metal and short out.
Can I replace the thermal fuse without removing the dryer drum?
Yes, on most Centennial models you can access the thermal fuse by removing just the top or front panel. The fuse typically mounts on the blower housing which is accessible without drum removal. Check your specific model’s service manual for exact panel removal steps, but drum removal is rarely necessary for thermal fuse replacement.
Keep Your Maytag Centennial Dryer Running Reliably
Most Maytag Centennial dryer troubleshooting problems come from predictable wear patterns you can prevent or fix yourself. Thermal fuses, drive belts, and lint buildup cause about 80% of failures, and all are manageable with basic tools and regular maintenance.
Stay ahead of problems by cleaning vents quarterly and testing thermal components annually. When your dryer acts up, start with the simplest explanations before assuming major component failure. That systematic approach will have your laundry routine back to normal in under an hour for most issues.