Winter arrived and your Mitsubishi mini split refuses to produce heat. The unit runs perfectly in cooling mode all summer, but now when you desperately need warmth, it either blows cold air, won’t switch to heat mode at all, or provides frustratingly weak heating that barely raises room temperature.
This problem is especially maddening because Mitsubishi mini splits are renowned for their heating capabilities—many models operate efficiently even in sub-zero temperatures. This comprehensive guide addresses every scenario where Mitsubishi mini splits fail to heat properly, from units that won’t engage heat mode to systems that struggle in extreme cold weather.
We’ll walk through professional diagnostic procedures, explain how heat pump technology works differently than traditional furnaces, and provide actionable solutions that restore your heating comfort without expensive service calls.
When a Mitsubishi mini split won’t heat, the problem typically involves incorrect mode selection, reversing valve failure preventing heat pump operation, outdoor temperature limitations exceeding the unit’s capacity, refrigerant leaks reducing heating efficiency, defrost cycle malfunctions, or sensor failures sending incorrect temperature data. Most heating failures resolve through proper mode selection verification, understanding outdoor temperature limitations, clearing blocked outdoor coils, resetting the system after error codes, or professional refrigerant system diagnosis for persistent issues.
Mitsubishi Mini Split Quick Heating Problem Diagnosis Chart
| Symptom | Unit Operation | Outdoor Temperature | Most Likely Cause | Immediate Check | Solution Difficulty |
| Blows cold air only | Runs normally | Any temperature | Wrong mode selected | Verify HEAT mode active | Easy – DIY |
| Weak heating | Runs constantly | Below 20°F | Operating at capacity limit | Check model specifications | May need auxiliary heat |
| No heat, runs normal cooling | Cools perfectly fine | Any temperature | Reversing valve stuck | Listen for valve click | Professional repair |
| Stops heating periodically | Cycles on and off | 20-40°F range | Normal defrost cycles | Observe outdoor unit ice | Normal operation |
| Won’t turn on heat mode | Powers on normally | Any temperature | Control board or remote issue | Test with reset | DIY to professional |
| Heat works then stops | Starts heating, quits | Below 0°F | Outdoor temp too extreme | Verify model’s temp rating | May need upgrade |
| Outdoor unit iced over | Indoor blows cool | Freezing temps | Defrost malfunction | Check outdoor coil | Professional service |
| Error code displayed | Shows error message | Any temperature | Specific component failure | Document error code | Varies by code |
Understanding How Mitsubishi Heat Pumps Work
Heat pump technology differs fundamentally from traditional furnaces. Understanding this distinction helps troubleshoot heating problems effectively.
Furnaces generate heat through combustion or electrical resistance. They create warmth regardless of outside temperature.
Heat pumps move existing heat rather than generating it. They extract heat from outdoor air and transfer it indoors.
This seems counterintuitive—how can cold air contain heat? Even at 0°F, air molecules contain thermal energy. Heat pumps concentrate this energy indoors.
Mitsubishi’s inverter-driven compressor technology optimizes this heat transfer. Variable speed operation maintains precise temperatures while maximizing efficiency.
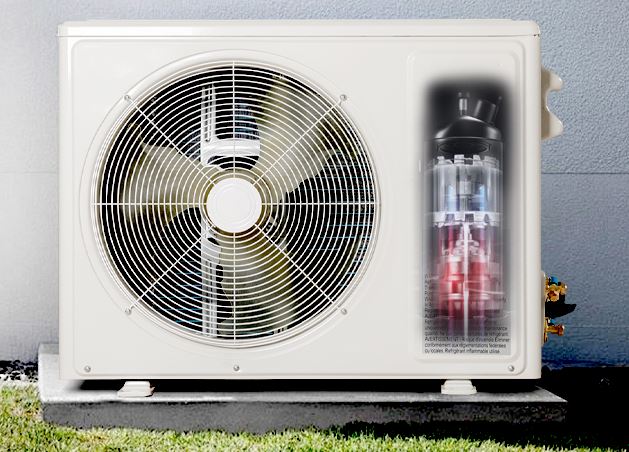
The refrigerant cycle reverses between heating and cooling modes. A reversing valve controls refrigerant flow direction. This single component determines whether the system cools or heats.
In heating mode, the outdoor coil becomes the evaporator (cold side). The indoor coil becomes the condenser (hot side). This is opposite of cooling mode operation.
Why Is My Mitsubishi Mini Split Not Heating? Common Causes & Fixes
Understanding specific failure modes helps identify solutions quickly. These causes account for 90% of heating complaints.
Incorrect Mode Selection
The most common “problem” isn’t actually malfunction—users simply haven’t selected heat mode properly.
Cause: The remote or control panel shows temperature settings but isn’t in HEAT mode. The unit might be in AUTO, FAN, or COOL mode.
Symptoms: Unit runs but provides no heating. Air feels neutral or slightly cool. No warm air output despite running continuously.
Fix: Press the “MODE” button on your remote repeatedly until “HEAT” displays clearly. Look for the sun icon or “HEAT” text on the LCD screen. Some remotes cycle through: AUTO → COOL → DRY → HEAT → FAN. Count cycles to ensure proper selection.
Set temperature at least 7-10 degrees above current room temperature to trigger heating operation. Small differentials (2-3 degrees) might not activate the compressor immediately.
Wait 3-5 minutes after mode selection. The reversing valve takes time to switch refrigerant flow. Initial air might feel cool as the system transitions.
Reversing Valve Failure
The reversing valve mechanically changes refrigerant flow direction. When it fails, the system operates only in one mode.
Cause: Electrical failure preventing valve actuation, mechanical sticking from contamination, or refrigerant pressure imbalance preventing valve movement.
Symptoms: Unit cools perfectly but won’t heat. You hear normal compressor operation but no heat output. No clicking sound when switching between modes.
Diagnosis: Listen carefully when switching from COOL to HEAT mode. A properly functioning valve produces an audible click or swoosh sound within 3-5 seconds.
Touch the refrigerant lines at the outdoor unit. In heating mode, the larger line (suction) should feel warm. If it feels cold, refrigerant isn’t reversing.
Fix: Reversing valve issues require professional service. Technicians test electrical signals to the valve and measure refrigerant pressures.
Valve replacement costs $300-$600 including labor. Some valves can be cleaned if contamination is the cause, reducing cost to $150-$300.
Low Refrigerant Charge
Refrigerant carries heat energy between indoor and outdoor units. Insufficient refrigerant drastically reduces heating capacity.
Cause: Refrigerant leaks at connections, damaged refrigerant lines, manufacturing defects, or improper installation charging.
Symptoms: Progressively declining heating over days or weeks. Unit runs constantly without reaching set temperature. Ice formation on outdoor unit even during heating mode. Hissing sounds near refrigerant connections.
Diagnosis: Check refrigerant lines for oily residue—refrigerant carries compressor oil that leaks with escaping gas. Look for frost or ice on refrigerant lines during heating operation (abnormal).
Measure temperature differential between supply and return air. Heating should produce 15-25°F temperature rise. Lower differentials suggest low refrigerant.
Fix: Refrigerant work requires EPA Section 608 certification. DIY refrigerant handling is federally illegal.
Professional diagnosis costs $100-$200. Leak detection, repair, and recharge costs $400-$1,200 depending on leak location.
Small capacity systems or units 10+ years old might not justify refrigerant repair costs economically.
Dirty or Blocked Air Filters
Restricted airflow prevents adequate heat transfer. The system produces heat but can’t distribute it effectively.
Cause: Months of dust accumulation, pet hair, debris, or simply forgetting routine filter maintenance.
Symptoms: Weak airflow from indoor unit. Heating output feels insufficient despite unit running. Frost forming on indoor coil. Unit shutting off on safety switches.
Diagnosis: Remove filter and hold up to light. If you can’t see through it clearly, it’s too dirty. Even partial restriction significantly reduces capacity.
Fix: Remove filter following manufacturer instructions. Usually involves opening the front panel and sliding filter out.
Wash reusable filters under running water. Use mild dish soap for heavy soil. Scrub gently—filters are delicate. Rinse thoroughly until water runs clear.
Dry completely before reinstalling—minimum 4 hours, preferably 24 hours. Never operate without filters.
Clean filters every 2 weeks during heating season. Monthly is absolute minimum. Set phone reminders for consistent maintenance.

Defrost Cycle Misunderstanding
During heating operation in cold weather, the outdoor coil accumulates frost. Defrost cycles are normal and necessary.
Cause: Not actually a problem—this is normal operation that users mistake for malfunction.
Symptoms: Heating stops every 30-90 minutes for 5-15 minutes. During these periods, the unit might blow cool air or just fan air. Outdoor unit develops visible frost between defrost cycles.
Understanding: When heating, the outdoor coil operates below freezing. Moisture from air freezes on the coil surface.
Excessive frost blocks airflow and reduces efficiency. Periodic defrost melts accumulated ice.
During defrost, the system temporarily reverses to cooling mode. This warms the outdoor coil and melts ice. The indoor unit typically stops heating during this cycle.
Normal vs. Abnormal: Defrost every 30-90 minutes lasting 5-15 minutes is normal in freezing weather. Defrost every 10 minutes or lasting 20+ minutes indicates problems.
Fix: If defrost cycles are normal (not excessive), no fix is needed. This is proper operation in cold weather.
Excessive frosting indicates problems: low refrigerant, defrost sensor failure, or control board issues. These require professional diagnosis.
Outdoor Temperature Below Operating Range
Heat pumps have physics-based limitations. Efficiency drops dramatically at extreme cold temperatures.
Cause: Outdoor temperature below the unit’s designed operating range. Standard mini splits work to +5°F. Hyper Heat models work to -13°F.
Symptoms: Adequate heating at moderate temperatures (40°F+) but insufficient heating as temperatures drop. Unit runs continuously but can’t maintain set temperature.
Identification: Check your model specifications. MSZ-FH, MSZ-FS, and similar models have “Hyper Heat” capability to -13°F. Standard models (MSZ-GE, MSZ-GL) typically work to +5°F.
Check current outdoor temperature. If it’s at or below your model’s rating, limited capacity is expected, not malfunction.
Fix: For temperatures within specifications: Ensure outdoor coil is clear of snow and ice. Clean coils improve efficiency at temperature extremes.
For temperatures below specifications: Install auxiliary electric heat strips (if compatible). Use portable heaters for supplemental warmth. Consider upgrading to Hyper Heat models if frequently facing extreme cold.
Lower temperature expectations. Heat pumps at extreme cold may only maintain 65-68°F instead of 72-75°F.
Dirty Outdoor Coil
The outdoor coil must exchange heat with outside air. Blockage prevents proper heat absorption.
Cause: Dirt, leaves, cottonwood seeds, grass clippings, or snow covering the outdoor unit. Neglected maintenance over multiple seasons.
Symptoms: Declining heating performance over weeks or months. Unit works harder and longer to produce same heat. Ice accumulation on outdoor coil even above freezing temperatures.
Diagnosis: Inspect outdoor unit visually. Look through the coil fins—you should see through to the other side. Blockage appears as packed debris.
Fix: Turn off power at the disconnect switch. Gently spray coils from inside outward using a garden hose at low pressure. High pressure bends delicate fins.
Use coil cleaner foam designed for outdoor coils. Spray on, wait 10-15 minutes, rinse thoroughly.
Remove debris around the unit. Clear 24 inches in all directions for proper airflow.
Straighten bent fins using a fin comb tool (available at HVAC supply stores). Bent fins significantly restrict airflow.
Clean outdoor coils annually at minimum. Twice yearly (spring and fall) is better in dusty or debris-heavy environments.
Thermistor and Sensor Failures
Temperature sensors control system operation. Failed sensors send incorrect data causing improper heating behavior.
Cause: Age-related failure, moisture infiltration, electrical surges, or physical damage from maintenance.
Symptoms: Erratic heating—too much heat, insufficient heat, or cycling inappropriately. Error codes related to temperature sensors. Unit claims room is at temperature when it’s clearly not.
Diagnosis: Error codes E1, E3, or similar sensor codes appear. Temperature readings on display don’t match actual room temperature by more than 3 degrees.
Sensor resistance testing requires multimeter and technical knowledge. Sensors should show specific resistance at specific temperatures.
Fix: Sensor replacement requires accessing internal components. Indoor sensors are typically behind the front panel. Outdoor sensors require removing service panels.
Sensors cost $20-$60. Installation requires electrical knowledge—connectors must be secure and polarity correct where applicable.
Professional replacement costs $150-$300 including diagnosis and labor. This is economical repair for most mini split systems.
Control Board Malfunctions
Control boards manage all system functions. Board failure prevents proper mode switching and operation.
Cause: Power surges, moisture infiltration, component age, or manufacturing defects.
Symptoms: Can’t switch to heat mode. Error codes appearing without corresponding problems. Multiple simultaneous strange behaviors. Display not responding correctly.
Diagnosis: Error codes indicating control board communication failures. Unit behavior doesn’t match commands from remote. Multiple error codes appearing randomly.
Fix: Control board diagnosis requires professional tools and knowledge. DIY troubleshooting is limited to verification that all connections are secure.
Board replacement costs $250-$600 depending on model and whether indoor, outdoor, or both boards failed.
For units under warranty, board replacement may be covered. Check warranty status before paying for replacement.
How Do You Turn On the Heat on a Mitsubishi Mini Split?
Proper heat mode activation seems straightforward but has specific steps ensuring successful operation.
Step-by-Step Heat Mode Activation
Step 1: Locate Your Remote Control
Ensure the remote has fresh batteries. Dead or weak batteries prevent proper signal transmission even if the display works.
Point the remote at the indoor unit from 10-15 feet away. Verify nothing blocks the infrared receiver on the unit.
Step 2: Power On the Unit
Press the “ON/OFF” or power button. The indoor unit should beep and display should illuminate.
Wait for initialization—usually 3-5 seconds. The unit performs self-checks before accepting commands.
Step 3: Select Heat Mode
Press the “MODE” button repeatedly. Each press cycles through operating modes.
Watch the display carefully. Mode indicators include: AUTO, COOL, DRY, HEAT, FAN. Continue pressing until “HEAT” displays.
Some remotes show icons instead of text. Look for a sun symbol indicating heat mode.
Step 4: Set Temperature
Press the “TEMP UP” or “+” button to increase temperature setting.
Set temperature at least 7-10 degrees above current room temperature. This ensures the system activates heating immediately.
The display shows target temperature, not current room temperature. This confuses many users.
Step 5: Select Fan Speed
Press “FAN” button to choose airflow speed: LOW, MEDIUM, HIGH, or AUTO.
AUTO fan speed automatically adjusts based on heating demand. This provides best efficiency.
LOW speed operates quietly but distributes heat more slowly. HIGH speed heats faster but produces more noise.
Step 6: Adjust Louver Direction
Press “VANE” or “SWING” button to control air direction.
For optimal heating, direct louvers downward. Warm air rises naturally—downward direction ensures floor-level heating.
Swing mode oscillates louvers continuously, distributing heat more evenly throughout the room.
Step 7: Wait for Heat
Allow 3-5 minutes before heat output begins. The reversing valve needs time to switch modes.
Initial air might feel cool or neutral. This is normal during transition period.
Full heating capacity develops within 5-10 minutes of activation.
Using the Indoor Unit Control Panel
If your remote is lost or broken, the indoor unit has backup controls.
Remove the front cover to access the control panel. Usually located on the right side of the unit.
Buttons include: POWER, MODE, TEMP UP/DOWN, and sometimes FAN. Button labels might be small or use icons.
Press MODE repeatedly until heat mode activates. LED indicators or small display confirm mode selection.
The control panel has limited functionality compared to remotes. Order replacement remotes ($40-$80) for full feature access.
Programming Heating Schedules
Most Mitsubishi remotes include timer and scheduling functions.
Press “TIMER” button to access scheduling. Set start times for automatic heating before you wake or arrive home.
Program different temperatures for different times. Lower temperatures when sleeping or away saves energy.
Weekly scheduling (available on advanced remotes) sets different schedules for weekdays versus weekends.
Scheduling maintains comfort while minimizing energy waste. Units only heat when needed.
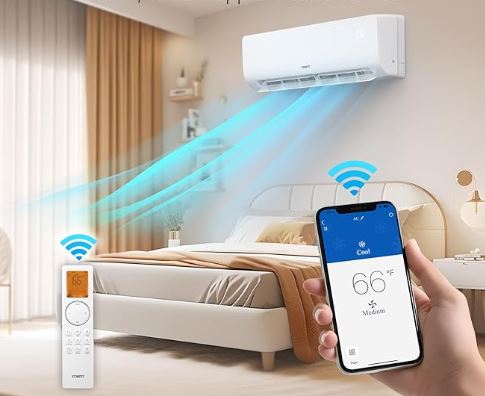
Using Smart Controls and WiFi
Mitsubishi’s kumo cloud system enables smartphone control of compatible units.
Download the kumo cloud app (iOS or Android). Create account and pair with your indoor unit.
Control heating remotely from anywhere. Start heating before arriving home to pre-warm spaces.
Monitor energy usage and receive maintenance reminders. Smart features optimize both comfort and efficiency.
Set geofencing rules. The system automatically adjusts when you leave or approach home.
Mitsubishi Mini Split Not Heating in Cold Weather
Cold weather performance distinguishes premium mini splits from budget models. Understanding limitations prevents frustration.
Understanding Cold Weather Performance Ratings
Mitsubishi publishes heating capacity at various outdoor temperatures. These specifications reveal true cold-weather capability.
Standard models maintain full capacity to approximately 40°F outdoor temperature. Capacity declines progressively below this point.
At 17°F outdoor temperature, standard models deliver approximately 75% of rated capacity. At 5°F, capacity drops to 50-60%.
Hyper Heat models (H2i technology) maintain over 80% capacity down to 5°F. They continue operating efficiently to -13°F.
Check your model designation. FH, FS, and FE series typically have Hyper Heat. GE, GL, and GS series are standard performance.
Why Heat Pumps Struggle in Extreme Cold
Physics limits heat pump performance at low temperatures.
Heat transfer efficiency depends on temperature differential. Larger differences between refrigerant and outdoor air reduce efficiency.
At very cold temperatures, less heat energy exists in outdoor air to extract. The unit must work harder to gather sufficient heat.
Defrost cycles become more frequent in cold weather. The outdoor coil frosts rapidly, requiring frequent melting.
Each defrost cycle interrupts heating for 5-15 minutes. Frequent defrost wastes energy and reduces net heating output.
Compressor oil thickens in extreme cold. This increases mechanical resistance and reduces compressor efficiency.
Optimizing Performance in Cold Weather
Specific strategies maximize heating output when temperatures drop.
Keep outdoor unit clear: Remove snow and ice immediately. Even partial blockage drastically reduces capacity.
Use a shelter or snow hood above the unit (maintaining required clearances). This prevents snow accumulation.
Maintain clean filters: Dirty filters reduce airflow when you need maximum heat transfer most. Clean weekly in extreme cold.
Lower temperature expectations: Accept 68°F instead of 73°F when outdoor temperatures fall below 15°F.
Minimize door openings: Each opening admits cold air requiring additional heating.
Use ceiling fans on reverse: Set fans to clockwise rotation at low speed. This gently pushes warm air downward.
Insulate refrigerant lines: Ensure refrigerant line insulation is intact. Exposed lines waste heat energy.
When to Use Auxiliary Heat
Auxiliary or emergency heat supplements heat pump capacity during extreme cold.
Electric resistance heat strips can be added to some Mitsubishi systems. These provide instant heat but consume significantly more electricity.
Activate auxiliary heat only when outdoor temperature falls below your heat pump’s effective range.
Portable electric heaters provide targeted supplemental heat. Use only in occupied rooms for efficiency.
Wood stoves or fireplaces supplement heat pump operation in extremely cold climates.
Calculate auxiliary heat costs. Electric resistance heat costs 3-4 times more per BTU than heat pump operation.
Geographic Considerations
Your location determines appropriate mini split selection.
Mild climates (rarely below 25°F): Standard models provide adequate heating. Hyper Heat is unnecessary expense.
Moderate climates (occasional 15°F nights): Standard models work most winters. Expect reduced capacity during cold snaps.
Cold climates (regular 5°F or below): Hyper Heat models are essential for reliable winter heating.
Extreme climates (below -10°F regularly): Even Hyper Heat models need supplemental heat. Consider dual-fuel systems combining heat pump with backup furnace.
Cold Weather Maintenance
Additional maintenance prevents cold weather failures.
Check refrigerant line insulation before winter. Repair any damaged sections.
Verify outdoor unit isn’t subject to ice dam damage from roof runoff. Redirect water flow away from unit.
Test defrost operation before extreme cold arrives. Ensure defrost sensors function properly.
Consider professional pre-winter inspection. Technicians identify potential problems before weather turns severe.
Keep emergency heating alternatives available. Portable heaters provide backup if the primary system fails during a cold snap.
Mitsubishi Mini Split Heat Pump Not Heating
When your heat pump specifically won’t heat despite the unit operating normally in other respects, specific components are suspect.
Heat Pump Versus Air Conditioner Distinction
Clarify whether you have a true heat pump or cooling-only air conditioner.
Heat pumps reverse operation for heating. Air conditioners only cool. This seems obvious but confusion exists.
Check model documentation. Model numbers typically indicate capability: “H” designation often indicates heat pump.
Look for HEAT mode on your remote. If the MODE button doesn’t cycle to HEAT, you might have cooling-only system.
Some units have electric heat strips but aren’t true heat pumps. These provide heat but don’t reverse refrigerant cycle.
Reversing Valve Specific Diagnosis
The reversing valve is the heat pump’s critical component.
Location: Reversing valve is located in the outdoor unit, usually near the compressor discharge.
Operation: When energized, the valve mechanically shifts refrigerant flow direction using internal slide mechanisms.
Electrical testing: Measure voltage at reversing valve solenoid. Should read 24V when heat mode selected. No voltage indicates control problem, not valve failure.
Sound verification: Working valves produce characteristic sounds when activating: click, thud, or swoosh. No sound suggests valve isn’t receiving signal or is mechanically stuck.
Temperature testing: Feel refrigerant lines at outdoor unit. In heat mode, the smaller line (liquid) should feel warm/hot. Large line (suction) should feel cool. If reversed, the valve isn’t operating.
Refrigerant Flow Issues
Proper refrigerant circulation is essential for heat pump operation.
Restriction symptoms: Unit runs but provides minimal heating. High amp draw on compressor. Unusual temperature patterns on refrigerant lines.
Restriction causes: Contamination in refrigerant lines, kinked lines from improper installation, moisture freezing at metering devices, filter-drier clogged.
Diagnosis: Requires pressure gauges. Abnormal pressure differentials indicate restrictions.
Resolution: Removing restrictions requires professional service. Technicians flush systems or replace restricted components.
Compressor Issues
Compressor problems prevent heat pump operation.
Weak compression: Compressor runs but doesn’t develop proper pressure. Heating capacity severely reduced.
Electrical failure: Compressor windings open or shorted. Compressor attempts to start but fails or runs poorly.
Mechanical seizure: Compressor locked up mechanically. Makes humming sound but doesn’t run.
Testing: Requires electrical testing of compressor terminals and pressure measurements during operation.
Replacement consideration: Compressor replacement costs $1,200-$2,500 installed. For many mini splits, this exceeds economic repair value.
Outdoor Fan Motor Problems
The outdoor fan moves air across the heat exchanger. Fan failure reduces heating capacity dramatically.
Symptoms: Compressor runs but outdoor fan doesn’t spin. Outdoor unit overheats. High-pressure errors occur.
Causes: Failed fan motor, bad capacitor, frozen bearings, or control board not sending fan signal.
Testing: Check voltage at fan motor. Should read 120V or 240V depending on motor type.
Try manually spinning fan blade (with power off). Should rotate freely. Grinding or seizing indicates bearing failure.
Repair: Fan motors cost $150-$350. Capacitors cost $20-$50. Replacement is straightforward for experienced technicians.
Metering Device Malfunction
Metering devices (expansion valves) control refrigerant flow rate. Malfunctions affect heating.
Types: Electronic expansion valves (EEV) or fixed orifice devices depending on model.
Symptoms: Intermittent heating, erratic capacity, or complete heating failure.
Diagnosis: Requires professional equipment. Subcooling and superheat measurements indicate metering problems.
Resolution: Electronic valves sometimes reset successfully. Failed valves need replacement ($200-$400 installed).
Mitsubishi Mini Split Cooling But Not Heating
Your system cools perfectly all summer but refuses to produce heat. This specific symptom pattern indicates particular components.
Reversing Valve as Primary Suspect
When cooling works but heating doesn’t, suspect the reversing valve first.
The valve controls refrigerant flow direction. Stuck valves lock the system in one mode.
Stuck in cooling mode: Valve doesn’t shift when heat mode selected. Unit continues cooling operation even when set to heat.
Partial movement: Valve moves partially but doesn’t complete shift. Results in no cooling or heating—just lukewarm air.
Electrical versus mechanical: Determine whether the valve receives electrical signal but doesn’t move (mechanical), or doesn’t receive signal (electrical).
Test electrical signal at valve solenoid. 24V should appear when heat mode selected. No voltage = electrical problem. Voltage present but no valve operation = mechanical problem.
Control Signal Issues
The indoor unit must send proper signals to activate heating mode.
Remote control problems: Remote sends heat command but indoor unit doesn’t respond. Replace batteries. Try hard reset of indoor unit.
Control board programming: Control board might have lost configuration. Factory reset sometimes restores function.
Mode lock: Some installations have service locks preventing heat mode. Check for configuration switches or jumper settings.
Wiring issues: Low-voltage control wiring between indoor and outdoor units carries mode signals. Broken or corroded connections prevent heat mode activation.
Defrost Control Problems
Faulty defrost controls can prevent heating while allowing cooling.
Defrost sensor failure: Failed sensors prevent defrost cycles. The outdoor coil ices over completely, blocking airflow.
Ice-blocked coil stops heating entirely. Cooling mode doesn’t defrost, so ice persists.
Defrost timer issues: Control board might not initiate defrost cycles. Ice accumulation progressively worsens.
Visual verification: If outdoor coil is encased in ice during attempted heating, defrost system has failed.
Refrigerant Charge Specific to Heating
Refrigerant charge affects heating differently than cooling.
Slightly low refrigerant might allow adequate cooling but prevents sufficient heating. Heating mode requires higher refrigerant pressures.
Testing: Requires pressure gauges and temperature measurements. Compare readings to manufacturer specifications for heating mode.
Seasonal variation: Charge that seems adequate in summer might prove insufficient in winter when ambient temperatures drop.
Outdoor Temperature Sensor
Some Mitsubishi models have safety lockouts based on outdoor temperature.
Failed outdoor sensors might report temperatures below the unit’s operating range even when conditions are suitable for heating.
Symptoms: Heat mode works at moderate temperatures but not at cold temperatures, yet outdoor temp is within specifications.
Testing: Compare sensor reading (if displayed) to actual outdoor temperature using accurate thermometer. Discrepancy indicates sensor failure.
Resolution: Sensor replacement costs $75-$200 including labor. This economical repair restores full heating function.
Indoor Coil Issues Specific to Heating
In heating mode, the indoor coil operates as condenser. Specific problems affect heating more than cooling.
Coil contamination: Dirt blocks heat transfer. The coil might be clean enough for cooling but too dirty for heating’s higher heat transfer requirements.
Coil leak: Small leaks might affect heating more than cooling due to pressure differences between modes.
Air distribution: Louvers not directing air across coil properly. Heating requires better airflow patterns than cooling.
Professional Diagnosis and Repair Considerations for a Non-Heating Mitsubishi Mini Split
Understanding when DIY ends and professional service begins saves time and money.
Heating-Specific Diagnostic Tools
Professional diagnosis requires specialized equipment.
Manifold gauges: Measure refrigerant pressures during heating operation. Readings differ from cooling mode—technicians need heating-specific specifications.
Thermometers: Multiple thermometers measure temperatures throughout the system. Superheat and subcooling calculations indicate system health.
Amp meters: Measure compressor and fan motor current draw. Compare to nameplate specifications.
Multi-meters: Test voltages, resistances, and continuity throughout electrical system.
Infrared thermometers: Non-contact temperature measurement identifies hot and cold spots indicating problems.
Cost Expectations for Heating Repairs
Budget appropriately for professional heating repairs.
| Repair Type | Parts Cost | Labor Cost | Total Range | Repair Value |
| Reversing valve replacement | $150-$300 | $200-$400 | $350-$700 | Usually worthwhile |
| Refrigerant leak repair + recharge | $100-$400 | $300-$600 | $400-$1,000 | Consider unit age |
| Control board replacement | $200-$500 | $150-$300 | $350-$800 | Economical for newer units |
| Defrost sensor replacement | $30-$80 | $100-$200 | $130-$280 | Usually good value |
| Compressor replacement | $800-$1,800 | $600-$1,200 | $1,400-$3,000 | Rarely economical |
| Outdoor fan motor | $150-$350 | $150-$300 | $300-$650 | Usually worthwhile |
| Complete diagnostic | N/A | $100-$250 | $100-$250 | Essential for informed decisions |
Get multiple quotes for repairs exceeding $500. Prices vary significantly by region and contractor.
Warranty Coverage Considerations
Check warranty status before paying for repairs.
Manufacturer warranty: Mitsubishi provides 5-7 year parts warranties on most components. Compressor warranties extend to 10-12 years.
Labor coverage: Standard warranties typically don’t cover labor. Extended warranties sometimes include labor.
Registration requirement: Many warranties require online registration within 90 days of installation. Unregistered units might have shorter warranty periods.
Proof of maintenance: Some warranty claims require maintenance records. Annual professional service documentation helps warranty claims.
Repair Versus Replacement Decisions
Economic analysis helps determine whether repair makes sense.
50% Rule: If repair costs exceed 50% of replacement value, replacement usually makes better sense.
Age factor: Units under 5 years old justify most repairs. Units 10+ years old rarely justify expensive repairs.
Efficiency gains: New 2026 Mitsubishi models are 20-30% more efficient than 10-year-old models. Energy savings offset replacement costs over time.
Heating capacity: If your current unit is undersized or inadequate for your heating needs, upgrade rather than repair.
Multiple problems: Units requiring multiple simultaneous repairs (compressor + control board + refrigerant) signal overall system decline.
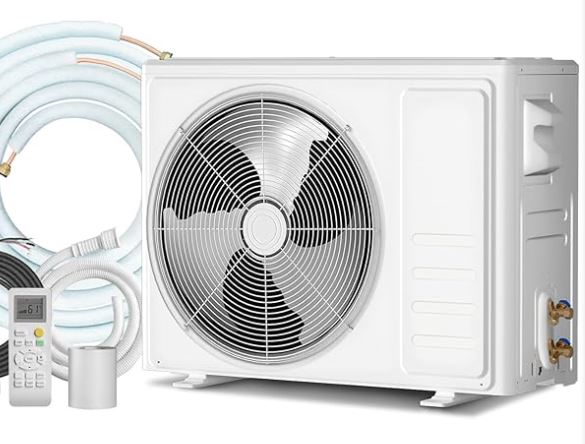
Looking to replace your Mitsubishi mini split? Find the best mini split air conditioner systems on Amazon!
Preventive Strategies for Reliable Heating by a Mitsubishi Mini Split
Proactive maintenance ensures your Mitsubishi mini split heats reliably throughout winter.
Pre-Winter Preparation Checklist
Prepare your system before heating season begins.
Filter cleaning: Start winter with completely clean filters. This single task prevents most heating problems.
Outdoor coil cleaning: Clear leaves, debris, and dirt from outdoor unit. Fall cleanup prevents winter blockage.
Refrigerant line inspection: Check insulation integrity. Repair damaged insulation before cold weather.
Drain system verification: Ensure condensate drains freely. Frozen drain lines cause winter shutdowns.
Test heating operation: Run heat mode for 30 minutes before you actually need it. Identify problems early when service is less expensive and urgent.
Battery replacement: Replace remote control batteries. Don’t wait for failure during the coldest day.
Monthly Winter Maintenance
Continue maintenance throughout heating season.
Filter inspection: Check filters bi-weekly. Clean when visibly dirty. Heating can actually dirty filters faster than cooling in some environments.
Outdoor unit monitoring: After snow or ice storms, clear outdoor unit immediately. Verify nothing blocks airflow.
Ice accumulation check: Light frost between defrost cycles is normal. Heavy ice buildup indicates problems.
Performance monitoring: Note heating times. If the unit takes progressively longer to heat, efficiency is declining.
Error code awareness: Any error codes appearing should be documented and addressed promptly.
Professional Winter Service
Annual professional maintenance catches problems before they cause failures.
Technicians perform tasks beyond homeowner capability:
Refrigerant pressure verification: Confirms proper charge for heating mode operation.
Electrical testing: Measures voltages and currents throughout the system identifying weak components.
Defrost system check: Verifies sensors, timers, and defrost cycle operation.
Reversing valve testing: Confirms valve operates properly in both directions.
Component wear assessment: Identifies capacitors, contactors, and motors approaching failure.
Schedule service in fall before heating season. Don’t wait until the system fails during extreme cold.
Frequently Asked Questions
Why does my Mitsubishi mini split work in summer but not in winter?
Heating mode uses different components and places different demands on the system than cooling. The reversing valve specifically enables heat mode—when it fails, cooling works but heating doesn’t. Low refrigerant affects heating more severely than cooling because heating requires higher refrigerant pressures. Outdoor coil blockage prevents heat absorption in heating mode while not affecting cooling’s heat rejection as severely. Have the reversing valve, refrigerant charge, and outdoor coil inspected to identify the specific cause.
What temperature is too cold for a Mitsubishi mini split to heat?
Standard Mitsubishi models operate effectively down to +5°F outdoor temperature. Below this, capacity declines rapidly. Hyper Heat models (H2i technology) with model designations like MSZ-FH, MSZ-FS, or MSZ-FE operate efficiently to -13°F. Even Hyper Heat models lose capacity below -20°F. Check your specific model specifications—the data plate on the outdoor unit lists minimum operating temperature. Attempting operation below rated temperature risks compressor damage and doesn’t provide adequate heating.
How long does it take for a Mitsubishi mini split to start heating?
After selecting heat mode, allow 3-5 minutes before expecting warm air. The reversing valve needs time to switch refrigerant flow direction mechanically. During this transition, air might feel neutral or slightly cool—this is normal. Full heating capacity develops within 5-10 minutes of activation. In extremely cold weather (below 20°F), initial warm-up might take 10-15 minutes as the system works harder to extract heat from cold air. If no heating occurs after 15 minutes, troubleshoot for actual problems.
Can I force my Mitsubishi mini split to heat when it won’t switch modes?
Don’t force operation if the system won’t switch to heat mode—underlying problems exist requiring diagnosis. Repeatedly attempting mode changes can damage the reversing valve. Instead, perform a complete system reset: turn off power at the breaker for 10 minutes, restore power, wait 3 minutes, then attempt heat mode selection. If this doesn’t work, the reversing valve, control board, or communication wiring has failed. Forcing operation risks component damage and potential refrigerant system problems requiring expensive repairs.
Why does my mini split blow cold air in heat mode?
Cold air during heating indicates: incorrect mode selection (verify HEAT displays), normal transition period (wait 5 minutes), defrost cycle operation (wait 15 minutes), reversing valve stuck in cooling position, or extremely cold outdoor temperatures exceeding capacity. Check the remote display confirms heat mode. Listen for reversing valve click when switching modes. If cold air persists beyond 15 minutes and outdoor temperature is within specifications, the reversing valve has likely failed and needs professional replacement.
How often should I clean my mini split filters in winter?
Clean filters every 2 weeks during active heating season—more frequently than cooling season in many cases. Heating pulls more dust through filters in some environments. Homes with pets, fireplaces, or poor insulation need weekly cleaning. Dirty filters reduce heating capacity by 30-50%, increase energy costs, and cause system shutdowns. Set recurring phone reminders for consistent maintenance. Cleaning takes 5 minutes and prevents service calls costing $150-$300. This single maintenance task prevents more heating problems than any other action.
Is it normal for my Mitsubishi mini split to ice up when heating?
Light frost on the outdoor unit is completely normal during heating in cold weather (below 40°F). The outdoor coil operates below freezing to extract heat. Periodic defrost cycles (every 30-90 minutes) melt accumulated frost. However, heavy ice coating the entire coil, ice persisting between defrost cycles, or ice on refrigerant lines indicates problems: low refrigerant, defrost sensor failure, or blocked airflow. Heavy icing requires professional diagnosis—continued operation with excessive ice damages the compressor.
Should I use auxiliary heat or just the mini split for heating?
Use the mini split as primary heat whenever outdoor temperature is within its operating range. Mitsubishi heat pumps are 300% more efficient than electric resistance heat—they move heat rather than generate it. Activate auxiliary electric heat only when outdoor temperature falls below your model’s effective range (typically below 5°F for standard models, -13°F for Hyper Heat). Monitor your electricity costs—auxiliary heat costs 3-4 times more per BTU. If frequently needing auxiliary heat, consider upgrading to Hyper Heat models for better cold-weather efficiency.
Can low refrigerant cause heating problems but not cooling problems?
Yes, heating is more sensitive to refrigerant charge than cooling. Slight refrigerant loss (10-15%) might allow adequate cooling but severely impacts heating capacity. Heating mode requires higher refrigerant pressures to transfer heat effectively. Low refrigerant prevents the system from developing necessary pressures. Symptoms include: adequate cooling all summer, insufficient heating in winter, outdoor unit icing during heating, progressively declining heating output. Refrigerant doesn’t deplete—only leaks cause low levels. Professional leak detection, repair, and recharge costs $400-$1,000.
Why does my mini split heating stop and start repeatedly?
Short cycling (frequent on-off) during heating indicates: extremely dirty filters restricting airflow, thermostat sensor location in direct heat flow, oversized system for the space, defrost cycles (normal if every 30-90 minutes), or low refrigerant causing pressure imbalances. Clean filters immediately. Verify thermostat isn’t in direct airflow path. If cycling continues every 5-10 minutes (not normal defrost pattern), professional diagnosis is needed. Short cycling wastes energy, increases wear, and eventually causes component failures. Address promptly before expensive damage occurs.
Conclusion: Restoring Your Mitsubishi Mini Split Heating
Mitsubishi mini split heating problems often seem mysterious but follow predictable patterns. Most issues trace to incorrect mode selection, dirty filters, outdoor coil blockage, or reversing valve failures. Understanding heat pump operation—how they extract heat from cold air rather than generating it—helps set realistic expectations for cold weather performance.
Start troubleshooting systematically: verify heat mode selection, clean filters, check outdoor coil condition, ensure outdoor temperature is within specifications, and perform system resets. These basic steps resolve 60-70% of heating complaints without professional intervention.
Recognize when professional service is necessary. Reversing valve problems, refrigerant leaks, defrost system failures, and compressor issues require specialized tools and EPA certification. Attempting these repairs yourself risks equipment damage, safety hazards, and voided warranties.
Preventive maintenance is your best defense. Monthly filter cleaning, annual professional service, and pre-winter preparation prevent most heating failures. A $200 annual tune-up prevents $1,000+ emergency repairs during the coldest weather.
When facing repair versus replacement decisions, consider the 50% rule: repairs exceeding half the replacement cost rarely make financial sense, especially for systems 10+ years old. Modern 2026 Mitsubishi models offer significant efficiency improvements offsetting replacement costs through energy savings.
Your Mitsubishi mini split is engineered for exceptional heating performance—even in challenging cold climates. With proper understanding, systematic troubleshooting, and regular maintenance, it delivers reliable, efficient warmth throughout the harshest winters. Invest in maintenance, address problems promptly, and enjoy the superior heating comfort Mitsubishi heat pump technology provides throughout 2026 and beyond.