There’s nothing more frustrating than pressing your thermostat on a sweltering day only to realize your AC unit won’t turn on. Whether your system is completely dead after a power outage, refuses to start after winter storage, or mysteriously stopped working after you flipped the breaker, you need answers fast.
This comprehensive troubleshooting guide addresses every scenario where air conditioning units fail to start—from central systems where the outside unit sits silent while the inside blower runs, to window units that show zero signs of life. We’ll walk through professional diagnostic steps that identify exactly why your AC won’t turn on and provide solutions that get you back to comfortable cooling without unnecessary service calls.
When your AC unit won’t turn on, the problem typically involves electrical issues like tripped breakers or blown fuses, thermostat failures, safety switch activation, or component damage from power surges. Start troubleshooting by verifying power supply at breakers and disconnect switches, checking thermostat settings and batteries, inspecting safety switches like float switches and drain pan sensors, then examining contactors, capacitors, and compressor condition. Most no-start situations resolve through systematic electrical diagnosis.
Quick Diagnostic Reference for an AC Unit Not Starting
| Symptom Pattern | Indoor Unit Status | Outdoor Unit Status | Most Likely Cause | First Check |
| Complete silence | Nothing happens | Nothing happens | Power supply failure | Circuit breakers at panel |
| Indoor fan runs | Blower operates normally | No sound, no operation | Outdoor disconnect or contactor | Disconnect switch near condenser |
| After power outage | May show lights | Won’t start | Safety lockout or surge damage | Reset breaker; wait 5 minutes |
| After winter storage | Responds to thermostat | Compressor won’t start | Seized compressor or bad capacitor | Listen for humming at outdoor unit |
| Breaker won’t stay on | Trips immediately | Never starts | Short circuit in wiring | Professional diagnosis needed |
| Thermostat shows cooling | Display works fine | Outdoor unit silent | Bad contactor or low voltage | Check voltage at thermostat |
| Window unit completely dead | No lights, no response | N/A (self-contained) | Plug/outlet or internal fuse | Test outlet; check LCDI plug |
| Clicking but no start | Relay sounds heard | Attempts but fails | Failed capacitor or compressor | Listen for clicking vs humming |
Understanding Why AC Units Fail to Start
Air conditioning systems are complex electrical and mechanical assemblies. Understanding the startup sequence helps identify failure points.
When you set your thermostat to cooling mode below current temperature, it sends a low-voltage signal (24V) to the control board. This board activates the indoor blower and signals the outdoor condensing unit.
The outdoor unit’s contactor receives the 24V signal and closes. This sends full voltage (240V typically) to both the compressor and condenser fan motor.
Capacitors provide the electrical boost needed to start these motors. Without proper capacitance, motors receive voltage but can’t overcome starting inertia.
Any interruption in this sequence—from thermostat to contactor to capacitor to motor—prevents startup. Identifying where the chain breaks determines the fix.
Modern systems include numerous safety switches. These deliberately prevent operation under conditions that could cause damage: frozen coils, full drain pans, disconnected ducts, or low refrigerant pressure.
How Do I Get My AC Unit to Turn On?
Walking through systematic troubleshooting from simplest to complex identifies the problem efficiently. Never skip basic checks—they solve 40% of no-start situations.
Step 1: Verify Thermostat Settings and Power
Confirm the thermostat is actually calling for cooling. User error causes surprising numbers of service calls.
Set the thermostat to “COOL” mode. Setting temperature alone doesn’t activate cooling—mode selection is essential.
Lower the temperature setting at least 5 degrees below current room temperature. Small differentials might not trigger operation.
Check thermostat display for error messages or blank screens. Blank displays indicate power issues.
Replace thermostat batteries even if the display works. Low batteries prevent sending signals to the AC system despite appearing functional.
Wait 3-5 minutes after making changes. Systems have built-in delay timers preventing immediate restarts after recent operation.
Step 2: Inspect All Circuit Breakers
Air conditioning systems typically use two breakers—one for indoor air handler and one for outdoor condensing unit.
Locate your main electrical panel. Find breakers labeled “AC,” “Air Conditioner,” “Condenser,” or “Air Handler.”
Look for breakers in the middle position (tripped) or feel for warmth. Tripped breakers aren’t always visually obvious.
Reset breakers properly: flip completely to “OFF” position first, then firmly to “ON.” Half-reset breakers don’t restore power.
AC systems draw high current—30 to 60 amps total. Breakers trip from overload, short circuits, or component failures.
If breakers trip immediately upon resetting, a serious electrical problem exists. Don’t repeatedly reset—call an electrician or HVAC technician.
Step 3: Check the Outdoor Disconnect Switch
The outdoor condensing unit has a dedicated disconnect switch mounted on or near the unit. This safety device allows power shutoff for maintenance.
Locate the disconnect box—typically a gray metal box on the wall within 10 feet of the outdoor unit.
Open the disconnect box. Inside is either a pullout fuse block or a simple switch.
Ensure the pullout is fully inserted or the switch is in the “ON” position. Partial insertion doesn’t complete circuits.
Inspect fuses if your disconnect uses them. Blown fuses show blackened windows or broken internal elements. Replace with exact amperage matches.
Someone may have turned off the disconnect for winter and forgotten. Seasonal shutdowns are common causes of “won’t start” calls.
Step 4: Verify the Safety Float Switch
Condensate overflow switches prevent water damage by shutting down AC systems when drain pans fill.
Locate your drain pan—usually under the indoor air handler in the attic, basement, or utility closet.
Check for standing water in the pan. Any water indicates drainage problems triggering the safety switch.
The float switch resembles a small plastic cube or cylinder mounted in the pan. When water lifts the float, it cuts power to the system.
Clear the condensate drain line. Use a wet-dry vacuum on the drain line terminus to remove clogs.
Once the pan empties, the float drops and power restores. The system should start normally if this was the only issue.
Step 5: Inspect Outdoor Unit Components
Walk outside to the condensing unit. Even if it’s not running, visual inspection reveals important clues.
Listen for any sounds when the thermostat calls for cooling. Clicking indicates the contactor engaging. Humming suggests power reaches the unit but motors won’t start.
Look for debris blocking the unit—leaves, grass clippings, or vegetation restricting airflow. Remove all obstructions.
Check for obvious damage—dented coils, disconnected wires, or animal damage. Rodents sometimes chew wiring causing open circuits.
Feel the outdoor disconnect switch. If it’s hot, electrical resistance or loose connections exist. This requires professional attention.
Step 6: Test the Contactor
The contactor is an electrical relay controlling power to the compressor and fan motor. Contactor failure is extremely common.
Remove the outdoor unit’s access panel. The contactor is usually visible—a black cube with wires attached.
Observe the contactor when thermostat calls for cooling. It should physically close with an audible click.
If the contactor doesn’t close despite thermostat calling for cooling, check for 24V at the contactor coil terminals with a multimeter.
No voltage at the coil means wiring issues or thermostat problems. Voltage present but contactor not closing means the contactor failed.
Contacts that appear burned, pitted, or welded require replacement. Contactors cost $20-$50 and are straightforward replacements for DIYers comfortable with electrical work.
Step 7: Evaluate Capacitors
Capacitors store electrical energy to start and run motors. Failed capacitors are the most common cause of compressor or fan motor failure to start.
Critical safety warning: Capacitors store dangerous voltage even when power is off. Discharge them using an insulated screwdriver across terminals before touching.
Visual inspection often reveals failed capacitors. They bulge at the top, leak oily fluid, or show burn marks.
Test capacitance with a multimeter having capacitance measuring capability. Readings should match rated microfarads (µF) within 10%.
Dual capacitors (one component serving both compressor and fan) are common. Either section failing prevents operation of that component.
Replacement capacitors cost $15-$60. Installation requires basic electrical knowledge. Always match voltage and capacitance ratings exactly.
Step 8: Listen for Compressor Sounds
The compressor makes distinctive sounds indicating its condition.
No sound at all: Power isn’t reaching the compressor, or it’s completely failed.
Clicking only: Contactor engaging but compressor not starting—likely capacitor failure.
Humming without starting: Compressor trying to start but can’t—capacitor failure or seized compressor.
Buzzing then stopping: Thermal overload protection triggering—compressor overheating or electrical issues.
Humming that stops after 3-5 seconds indicates the overload protector activated. This protects the compressor from damage but indicates underlying problems.
AC Unit Won’t Turn On After Flipping Breaker
You’ve flipped the breaker, but the AC still refuses to start. This specific scenario requires targeted troubleshooting.
Verify Breaker Actually Reset
Breakers don’t always reset properly on first attempt. Physical feedback isn’t always reliable.
Flip the breaker completely OFF first. Don’t just push it to ON from the middle position.
Then firmly flip to ON. You should feel positive engagement and hear a slight click.
Test outlet power at the indoor air handler or thermostat transformer. Use a multimeter or outlet tester.
Some breakers fail internally. They appear reset but don’t conduct electricity. This requires breaker replacement.
Check for Secondary Breakers
Many homes have sub-panels or secondary breaker boxes. The AC system might have breakers in multiple locations.
Garages, utility rooms, and outdoor locations sometimes house additional panels. Check all electrical panels in your home.
Some air handlers have their own built-in circuit breakers or fuses. Check inside the air handler cabinet.
Outdoor disconnect boxes contain fuses that function like breakers. These blow independently of main panel breakers.
Inspect for Tripped GFCI Outlets
Some AC installations use GFCI-protected circuits. GFCI outlets trip independently of breakers.
Look for GFCI outlets near the indoor and outdoor units. These have “TEST” and “RESET” buttons.
Press “RESET” firmly. A properly functioning GFCI clicks when resetting.
GFCI outlets in damp locations (basements, crawlspaces) trip frequently from moisture. This is normal protective operation.
If GFCI won’t reset or trips immediately, moisture or ground fault conditions exist. This requires professional diagnosis.
Address Surge Damage
Flipping breakers after power events doesn’t fix surge-damaged components. Lightning strikes and utility power surges destroy electronics instantly.
Control boards, thermostats, and contactors are vulnerable to surge damage. These components fail permanently from voltage spikes.
Surge damage often affects multiple components simultaneously. Simply restoring power doesn’t revive damaged electronics.
Look for visible damage—burned components, blackened circuit boards, or melted wiring. These indicate replacement needs.
Surge protectors for HVAC systems cost $150-$300 installed. They prevent most surge damage but don’t help after damage occurs.
Wait for Safety Timers
Modern AC systems have mandatory delay timers. These prevent immediate restart after power restoration.
Wait a full 5 minutes after resetting breakers before expecting operation. Impatience causes false “still broken” conclusions.
High-pressure switches need time to equalize. The compressor won’t start until refrigerant pressures balance.
Thermal overload protectors need cooling time. Overheated compressors won’t restart until internal temperatures drop.
Test System Components Individually
If basic breaker reset doesn’t work, test individual components for function.
Force the indoor blower on using thermostat fan setting. If the blower runs, indoor electrical works.
Check voltage at the outdoor unit’s disconnect. Should read 240V (or 208V on some systems). No voltage indicates wiring problems between panel and disconnect.
Measure voltage at the contactor output terminals. This confirms whether the contactor successfully passes power.
Testing requires a multimeter and electrical safety knowledge. If uncomfortable with electrical testing, call a professional.
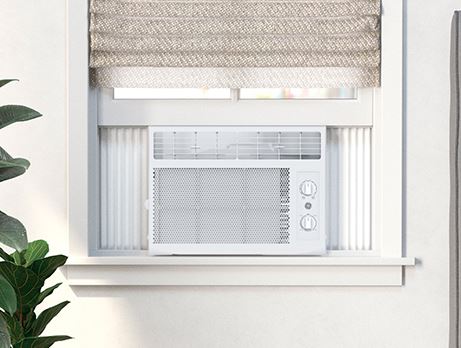
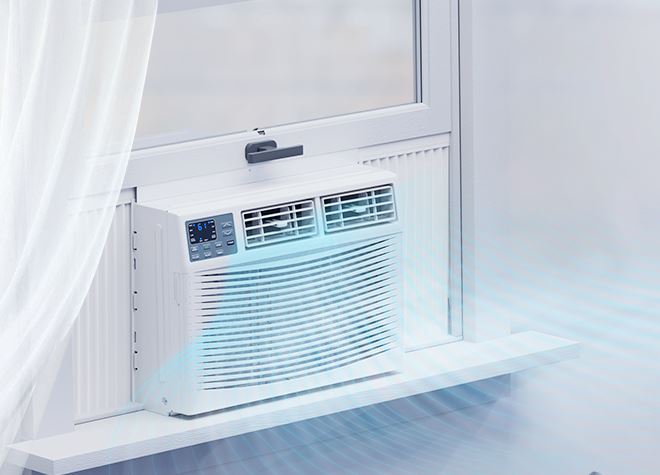
Window AC Unit Not Turning On
Window air conditioners are self-contained systems with different troubleshooting requirements than split systems.
Check the Power Plug and Outlet
Window AC units plug into standard outlets. Connection problems are surprisingly common.
Ensure the plug is fully inserted. Vibration from operation gradually loosens plugs over days or weeks.
Test the outlet with another device like a lamp. If nothing works, the outlet itself is dead.
Check the circuit breaker for that outlet. Window ACs draw 8-15 amps—enough to trip 15-amp circuits if shared with other devices.
Inspect plug prongs for damage, corrosion, or bending. Clean corroded prongs with fine sandpaper.
Some window units have LCDI (Leakage Current Detection and Interruption) plugs with “TEST” and “RESET” buttons. Press “RESET” if tripped.
Test the LCDI Plug Functionality
LCDI plugs are safety devices required on many portable and window AC units. They detect electrical faults and shut off power.
Press the “RESET” button firmly. You should hear a click. If it immediately pops back out, an electrical fault exists.
Test LCDI functionality by pressing “TEST”—the unit should shut off. If pressing TEST does nothing, the LCDI plug itself has failed.
Replace failed LCDI plugs ($30-$60) or use the unit without the LCDI feature by cutting off the plug and installing a standard plug (not recommended due to safety concerns).
LCDI plugs trip from moisture, damaged wiring, or ground faults. Repeated tripping indicates serious problems requiring professional diagnosis.
Inspect Internal Fuses
Window air conditioners contain internal fuses protecting against power surges.
Accessing fuses requires removing the outer cabinet. Always unplug before opening.
Fuses are located on the control board or near the power cord connection. They’re small glass tubes with metal end caps.
Blown fuses appear blackened or have broken wires visible inside the glass.
Replace with exact amperage matches. Common ratings are 3A, 5A, or 10A. Wrong amperage creates fire hazards.
If fuses blow repeatedly, an underlying short circuit exists. Find and fix the root cause.
Check the Control Board
Window unit control boards can fail completely, preventing any operation.
Look for signs of control board power—LED displays, indicator lights, or response to button presses.
Complete darkness despite good outlet power suggests control board failure or blown fuses.
Water damage is common in window units. Condensation or rain infiltration corrodes control boards.
Control board replacement costs $80-$200 depending on model. For budget window units under $250, replacement often makes more sense than repair.
Verify the Thermostat Function
Window unit thermostats can fail in the “off” position, preventing startup.
Set the thermostat to its coldest setting. Turn the dial or press buttons to maximum cold.
Listen for any response—clicking, fan starting, or compressor humming. Total silence suggests power or thermostat issues.
Mechanical dial thermostats wear out. The contacts inside fail to close even when set to coldest position.
Electronic thermostats fail differently. The temperature sensor might read incorrectly, preventing cooling calls.
Address Compressor Issues
Window unit compressors fail more frequently than split system compressors due to their portable nature and exposure to environmental stress.
Listen carefully when the unit should be running. Humming without starting indicates seized compressor or capacitor failure.
Clicking without humming suggests the overload protector is tripping immediately. This indicates electrical problems or mechanical seizure.
Complete silence despite proper power and thermostat setting means the compressor electrical connections failed.
Compressor replacement in window units rarely makes economic sense. Units are designed for replacement, not repair.
AC Unit Not Turning On But Blowing Air
The indoor unit runs and blows air through vents, but cooling never starts. The outdoor unit remains silent and inactive.
Understand the Split System Operation
Central air conditioning uses two units. The indoor air handler circulates air. The outdoor condenser removes heat.
Indoor blower operation without outdoor unit activation indicates a communication or power problem between the two components.
The thermostat controls both units. It sends signals to the air handler (to run the blower) and to the outdoor unit (to start cooling).
If only the blower responds, either the outdoor unit isn’t receiving signals, or it’s receiving signals but can’t respond.
Diagnose the Thermostat Wiring
Low-voltage wiring (24V) connects the thermostat to both indoor and outdoor units. Broken or disconnected wires prevent outdoor unit operation.
Remove the thermostat from its wall mount. Inspect wire connections at the terminals.
Key wires for cooling: R (power), C (common), G (fan), Y (cooling). The Y wire specifically signals the outdoor unit.
Check that the Y wire is securely connected at the thermostat. A loose Y wire prevents outdoor unit operation while the fan still works.
Trace Y wire to the air handler. Verify connection at the control board. Broken Y wires between thermostat and air handler are common.
Check the Outdoor Unit Power Supply
Just because the indoor unit works doesn’t mean the outdoor unit has power.
Verify the outdoor disconnect switch is in the ON position and fuses (if equipped) are intact.
Check the dedicated circuit breaker for the outdoor unit. It’s separate from the indoor unit breaker.
Test voltage at the outdoor unit’s disconnect box. Should read 240V (or 208V on some systems).
No voltage at the disconnect despite a good breaker indicates wiring problems between the electrical panel and the outdoor unit.
Inspect the Condensate Safety Switch
Safety switches prevent AC operation under abnormal conditions. These might allow fan operation while blocking cooling.
The most common is the condensate overflow switch. Check the indoor drain pan for standing water.
Secondary drain pan switches are often in attics. Look for water in ceiling pans under the air handler.
Other safety switches include: high-pressure switches (outdoor unit), low-pressure switches (refrigerant system), and duct disconnect switches.
Each safety switch type has different reset procedures. Some reset automatically when conditions normalize. Others require manual reset.
Test the Contactor at Outdoor Unit
Even if the outdoor unit has power, the contactor must close to start the compressor and fan.
With the thermostat calling for cooling, observe the contactor. It should close with a visible and audible click.
Use a multimeter to test for 24V at the contactor coil. No voltage means wiring problems. Voltage present without closing means contactor failure.
Manually push the contactor closed (with system power ON—be careful). If the outdoor unit starts, the contactor coil is bad but contacts are okay.
Replace contactors showing burned contacts, melted housing, or failure to close. They cost $20-$50.
Evaluate Control Board Issues
The indoor air handler control board orchestrates system operation. Board failure can prevent outdoor unit communication.
Check for error codes or blinking lights on the control board. These indicate diagnostic information.
Measure voltage at the board’s Y terminal (outdoor unit signal). Should read 24V when thermostat calls for cooling.
No voltage at Y terminal despite thermostat calling means the board isn’t sending the signal. This indicates board failure.
Control boards cost $150-$400. Replacement requires electrical knowledge. Many homeowners prefer professional installation.
AC Unit Not Turning On After Power Outage
Power outages create multiple scenarios causing AC systems to remain off even after electricity restores.
Wait for System Reset Timers
When power returns, don’t immediately expect cooling. Safety systems require time.
Wait at least 5 minutes after power restoration before troubleshooting. Built-in delays prevent rapid cycling.
High-pressure and low-pressure switches need time to equalize. The compressor physically cannot start until pressures balance.
Thermal overload protectors require cooling. If the compressor was hot when power cut, it needs 30+ minutes before restarting.
Patience prevents false diagnosis. What seems like failure might just be normal safety delays.
Reset Tripped Breakers and GFCI
Power surges accompanying outage restoration trip breakers even if the initial outage didn’t.
Check all AC-related breakers at the main panel. Reset any in the tripped position.
Inspect GFCI outlets and reset them. These trip more easily than standard breakers.
Some GFCI devices won’t reset immediately after power restoration. Wait 2-3 minutes then try resetting.
If breakers trip immediately upon resetting after an outage, surge damage to system components likely occurred.
Check for Surge Damage
Lightning strikes and grid switching during outages create voltage spikes. These destroy sensitive electronics instantly.
Look for visible damage on control boards—burned components, blackened areas, or melted plastic.
Thermostats might show blank displays or error messages after surge damage.
Contactors can weld closed or burn open from surges. Inspect for melted appearance or burning smell.
Capacitors sometimes burst from overvoltage. Bulging, leaking, or exploded capacitors are obvious casualties.
Surge damage typically requires component replacement. Simple resets don’t fix burned electronics.
Restore Correct Thermostat Settings
Power outages reset some thermostats to default settings. This might mean “OFF” mode.
Check that the thermostat is in “COOL” mode, not “OFF” or “HEAT.”
Verify temperature setpoint. Power restoration sometimes resets to default temperatures like 78°F.
Battery-powered thermostats might need battery replacement after outages. Weak batteries prevent proper operation even if the display works.
Smart thermostats might need WiFi reconnection after outages. Check that they’ve reconnected to your network.
Inspect the Condensate Drain System
Extended outages allow condensate pans to fill without evaporation. This triggers safety switches.
Check drain pans for standing water. Even an inch of water activates float switches.
Clear condensate drain clogs. Algae and debris grow during inactive periods, blocking drains.
Once water drains and the pan empties, the safety switch resets and the system should start.
Some systems require manual reset buttons on the safety switch itself. Look for small red buttons near the drain pan.
Consider Prolonged Outage Effects
Multi-day outages create unique problems beyond simple power restoration.
Refrigerant settling occurs during long downtimes. The first start after extended shutdown may fail as the system re-equilibrates.
Compressor oil migration happens when systems sit idle. Oil flows away from where it’s needed, causing hard starting.
Moisture infiltration in outdoor units during rain-accompanied outages can cause temporary electrical issues.
Give the system multiple start attempts over several hours. What doesn’t work immediately might function after the system settles.
If problems persist 24 hours after power restoration, actual damage occurred requiring professional diagnosis.
AC Unit Not Turning On After Winter
Seasonal startups commonly fail. Months of inactivity create multiple potential problems.
Remove Outdoor Unit Covers and Blocks
Winter protection often becomes springtime problems. Covers left in place prevent operation.
Remove any outdoor unit covers completely. Even partial coverage restricts airflow.
Check for debris accumulation—leaves, seed pods, or nesting materials built up over winter.
Inspect for ice accumulation if starting early in spring. Cold nights create ice that must melt before operation.
Vegetation grows rapidly in spring. Cut back bushes, weeds, and grass encroaching on the outdoor unit.
Restore Power at Disconnect and Breakers
Many homeowners shut off AC power for winter. This saves energy and protects equipment.
Turn ON the outdoor disconnect switch if it was turned off for winter.
Reset any breakers that were turned off seasonally. Both indoor and outdoor unit breakers need restoration.
Check that furnace-season thermostat settings didn’t disable cooling functions. Some thermostats lock out cooling below certain dates.
Wait 24 hours after restoring power before attempting operation. Compressor heaters need time to warm refrigerant oil.
Address Seized or Sticky Compressors
Compressors sitting idle for months can develop mechanical stickiness. Internal components slightly bind from lack of lubrication circulation.
When first starting after winter, listen carefully. Humming without starting might indicate temporary mechanical binding.
Hard start kits help stubborn compressors. These auxiliary capacitors provide extra starting boost.
Don’t attempt repeatedly if the compressor hums without starting. This overheats windings and causes permanent damage.
Sometimes the compressor needs multiple gentle start attempts. Try starting, wait 30 minutes, try again.
If the compressor won’t start after 3-4 attempts over several hours, professional diagnosis is necessary. The compressor might be permanently seized.
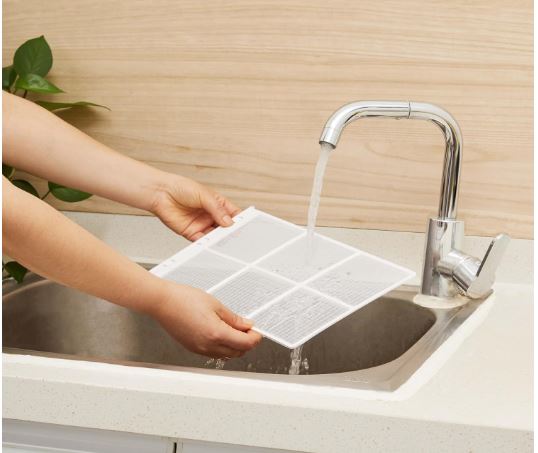
Clean or Replace Filters
Filters left in place over winter accumulate dust even without system operation. Air infiltration deposits dust regardless.
Remove and inspect all filters. Replace disposable types automatically—they’re cheap insurance.
Wash reusable filters thoroughly. Six months of dust accumulation requires extra cleaning effort.
Dirty filters at startup cause immediate problems. The system works harder, potentially triggering safety switches.
Starting the season with clean filters prevents unnecessary service calls and improves efficiency.
Inspect Electrical Connections
Thermal cycling over winter months loosens connections. Expansion and contraction from temperature changes affects all metal components.
Open the outdoor unit access panel. Inspect all wire connections for looseness.
Tighten terminal screws slightly. Don’t over-tighten—just snug them properly.
Look for corrosion on connections. Green or white crusty deposits indicate oxidation. Clean with contact cleaner spray.
Rodent damage is common over winter. Mice and rats chew wire insulation seeking nest materials. Look for damaged wiring.
Check Refrigerant System
Refrigerant leaks develop during the off-season. Vibration from wind, thermal stress, or simple aging causes leaks.
Look for oily residue near refrigerant connections. Refrigerant carries oil that escapes with leaking gas.
Listen for hissing sounds when the system tries to start. This indicates active refrigerant leaks.
Low refrigerant prevents compressor startup. Pressure switches detect low pressure and prevent operation to protect the compressor.
Refrigerant diagnosis and repair require professional service. This isn’t DIY-friendly work.
Perform Thermostat Battery Replacement
Many homeowners forget about thermostats during winter if only using heat. Batteries slowly drain regardless.
Replace thermostat batteries even if the display works. Weak batteries prevent sending proper signals.
Some thermostats display low-battery warnings only when first calling for cooling, not during heating season.
Battery-less thermostats (powered from HVAC system) can have communication issues after long periods. Reset them by removing from the wall mount for 30 seconds.
Outside AC Unit Not Turning On But Inside Is
The blower runs perfectly but the outdoor unit sits completely silent. This split-system failure pattern points to specific issues.
Verify Thermostat Is Actually Calling for Cooling
Sometimes the indoor fan runs but the thermostat isn’t actually calling for cooling.
Check that “COOL” mode is selected, not just “FAN.” Fan-only mode runs the blower without signaling the outdoor unit.
Ensure temperature is set below room temperature. The cooling demand must exist for the outdoor unit to activate.
Look for thermostat display indicators showing active cooling. Usually a “COOL ON” or snowflake icon appears.
Wait 3-5 minutes after making settings. The outdoor unit has delay timers that prevent immediate startup.
Test the Outdoor Unit Power Supply
The outdoor unit has separate power from the indoor unit. One can have power while the other doesn’t.
Check the dedicated outdoor unit breaker at the main electrical panel. Reset if tripped.
Verify the outdoor disconnect switch is ON. This dedicated shutoff is often turned off for winter.
Test voltage at the outdoor disconnect box using a multimeter. Should read 240V (or 208V).
No voltage despite good breakers indicates wiring problems between the panel and the disconnect box.
Inspect the Contactor Operation
The contactor is the most common failure point causing this exact symptom pattern.
Remove the outdoor unit’s service panel. Locate the contactor—a black or gray cube with wires attached.
Observe the contactor when the thermostat calls for cooling. It should visibly close with an audible click.
If nothing happens, check for 24V at the contactor coil terminals. No voltage indicates wiring or control problems.
Voltage present but no closing indicates contactor failure. Replace it ($20-$50).
Manually push the contactor closed (carefully—power is ON). If the unit starts, the contactor coil failed but contacts work.
Check Safety Switch Status
Numerous safety switches can prevent outdoor unit operation while allowing the blower to run.
Condensate overflow switches are most common. Check for water in drain pans under the indoor unit.
High-pressure switches on the outdoor unit prevent operation when refrigerant pressure is excessive. These require professional diagnosis.
Low-pressure switches prevent operation with insufficient refrigerant. Look for ice on refrigerant lines or oily residue indicating leaks.
Duct safety switches prevent operation with disconnected or blocked ductwork. Verify all duct connections are secure.
Each switch type has different locations and reset procedures. Consult your system’s documentation.
Evaluate Capacitor Condition
Failed capacitors prevent compressor or fan motor starting even with proper power delivery.
Locate the capacitor(s) inside the outdoor unit. Usually cylindrical components with wire connections.
Safety warning: Capacitors store dangerous voltage. Discharge with an insulated screwdriver before touching.
Visual inspection reveals many failures. Bulging tops, leaking fluid, or burn marks indicate bad capacitors.
Test with a multimeter having capacitance function. Readings should match rated microfarads (µF) within 10%.
Replace failed capacitors immediately. They cost $15-$60. Always match voltage and capacitance ratings exactly.
Trace the Control Wiring
Control wiring carries the 24V signal from indoor to outdoor unit. Broken wires prevent communication.
Locate the control wire bundle connecting indoor and outdoor units. Follow it carefully.
Common damage points: where wiring enters and exits units, transitions through walls, and outdoor exposure areas.
Look for rodent damage, landscape equipment cuts, or weather deterioration.
Test continuity of the Y wire (cooling signal) from thermostat to outdoor unit. Breaks anywhere prevent operation.
Repair damaged wiring or install new control wire. This is relatively inexpensive compared to component replacement.
AC Unit Advanced Diagnostic Techniques
When basic troubleshooting doesn’t identify the problem, advanced diagnostics become necessary.
Measure System Voltages
Voltage testing pinpoints electrical problems precisely. This requires a multimeter and electrical safety knowledge.
Thermostat power: Should read 24V between R and C terminals. Low voltage indicates transformer problems.
Outdoor unit supply: Should read 240V (or 208V) at disconnect box and contactor input.
Contactor output: Should read 240V at output terminals when contactor closes. This confirms contactor passes power.
Control voltage at outdoor unit: Should read 24V at contactor coil when thermostat calls for cooling.
Voltage present where expected but unit not starting indicates component failure, not electrical supply problems.
Interpret Error Codes and Diagnostic LEDs
Modern AC systems have built-in diagnostics. Learning to read them speeds diagnosis significantly.
Control boards inside air handlers flash LED patterns indicating problems. Common patterns:
- Steady light: Normal operation
- Slow flash: Waiting for cooling call
- Fast flash: Error condition detected
- Multiple flashes: Specific error codes (count flashes)
Consult your system’s technical documentation for error code interpretation. Each manufacturer uses different codes.
Some thermostats display error codes directly. Modern smart thermostats provide detailed diagnostic information.
Document error codes before calling service. This information significantly reduces diagnostic time and cost.
Test Capacitors Under Load
Capacitors that test fine with a multimeter sometimes fail under actual load conditions.
Install an inline ammeter to measure motor starting current. Compare to nameplate specifications.
High starting amperage despite good capacitor readings indicates the capacitor can’t deliver needed current under load.
This advanced testing requires HVAC-specific tools. Most homeowners should defer to professionals for load testing.
Evaluate Compressor Windings
Testing compressor electrical condition identifies whether replacement is necessary.
Measure resistance between compressor terminals: Common, Start, and Run. Specific readings vary by compressor type.
Infinite resistance (open circuit) indicates burned windings—compressor is permanently failed.
Zero resistance indicates shorted windings—also permanent failure.
Resistance to ground indicates insulation breakdown. This dangerous condition requires immediate replacement.
Compressor testing requires accessing terminals, which varies by unit design. Many require substantial disassembly.
When to Call a Professional
Some AC problems are beyond DIY capabilities. Knowing when to call professionals saves time and prevents damage.
Refrigerant Issues
Any problem involving refrigerant requires professional service. Federal law requires EPA Section 608 certification for refrigerant work.
Symptoms requiring professional service: ice on refrigerant lines, hissing sounds, oily residue on connections, progressively declining cooling.
Refrigerant doesn’t deplete—only leaks cause low levels. Leak detection and repair require specialized equipment.
Recharging refrigerant without fixing leaks is temporary and environmentally harmful. Proper service finds and repairs leaks first.
Electrical Problems Beyond Basic Troubleshooting
Complex electrical issues require professional diagnosis for safety and accuracy.
Call professionals for: repeatedly tripping breakers, burning smells, sparking, melted wiring, or voltage problems.
Electrical work on 240V systems is dangerous. Mistakes cause fires, equipment damage, or fatal electrocution.
Licensed electricians or HVAC technicians have proper tools, training, and insurance for electrical work.
Compressor Replacement Decisions
Compressor replacement is expensive—often $1,500-$3,000 including labor. This might exceed replacement value for older systems.
For systems under 5 years old with warranty coverage, compressor replacement makes sense.
For systems 10+ years old, replacement usually makes better financial sense. Additional failures are imminent in aging systems.
Consider efficiency improvements. New systems are 30-50% more efficient than 15-year-old models. Energy savings offset replacement costs over time.
Calculate total cost of ownership: repair cost plus expected remaining lifespan versus new system cost with 10-15 year lifespan.
Ductwork and Airflow Problems
Duct system issues require professional assessment. Leaking ducts waste 20-30% of conditioned air.
Signs of duct problems: uneven cooling, high energy bills, excessive dust, or whistling noises from vents.
Duct sealing and insulation improvements significantly impact system performance and efficiency.
Professional duct testing uses blower doors and pressure measurements. This accurately quantifies duct system condition.
System Sizing and Design Issues
Improperly sized systems never perform correctly regardless of repairs. Professional load calculations ensure proper sizing.
Oversized systems short-cycle, wasting energy and failing to dehumidify properly. Undersized systems run constantly without adequate cooling.
Manual J load calculations consider home size, insulation, window quality, orientation, and occupancy. This determines correct system capacity.
Installing the right-sized system costs the same as installing the wrong size. Getting it right from the start is crucial.
Get the right-size AC from Amazon!
Preventive Maintenance to Avoid Future AC Unit Failures
Consistent maintenance prevents most AC failures. Small time investments save major repair expenses.
Monthly Maintenance Tasks
Filter inspection and cleaning/replacement. This single task prevents 50% of all AC problems. Set recurring calendar reminders.
Thermostat battery check. Replace annually or whenever display dims. Don’t wait for complete failure.
Visual inspection of outdoor unit. Remove debris, check for vegetation growth, verify clear airflow space.
Drain pan monitoring. Check for standing water monthly. Clear drains before they overflow and trigger safety switches.
Listen for unusual sounds. Grinding, squealing, or rattling indicate developing problems. Address early before catastrophic failure.
Seasonal Maintenance
Spring startup: Clean or replace all filters. Inspect refrigerant lines for damage. Test all functions before you actually need cooling.
Mid-summer check: Verify continued efficient operation. Monitor energy bills for increases indicating declining efficiency.
Fall shutdown: Clean system completely before winter. Cover outdoor units if desired. Turn off power if winterizing.
Professional tune-ups cost $80-$150 annually. This service identifies and fixes small problems before they cause system failure.
Critical Component Care
Coil cleaning: Indoor evaporator and outdoor condenser coils need annual cleaning. Dirty coils reduce efficiency by 30-40%.
Electrical connection tightening: Thermal cycling loosens connections. Annual tightening prevents arcing and component damage.
Condensate drain clearing: Algae grows in drain lines. Annual flushing with bleach solution (1:10 ratio) prevents clogs.
Refrigerant pressure check: Annual verification ensures proper charge. Early leak detection prevents expensive compressor damage.
Smart Thermostat Benefits
Modern smart thermostats provide diagnostic alerts before failures occur. They monitor system performance continuously.
Alerts for: excessive runtime, failed startup attempts, temperature sensor problems, or communication failures.
Remote monitoring means you know about problems immediately, not when you arrive home to discomfort.
Energy usage tracking identifies efficiency decline indicating maintenance needs. Gradual increases signal developing problems.
Installation costs $150-$300 including professional setup. Benefits include energy savings, comfort improvement, and early problem detection.
Emergency Cooling Alternatives
While troubleshooting or awaiting repairs, maintain livable conditions with these strategies.
Immediate Cooling Solutions
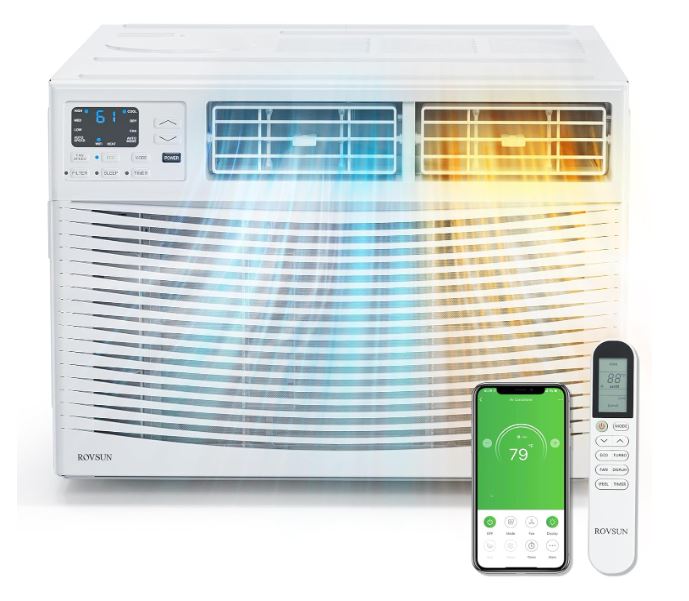
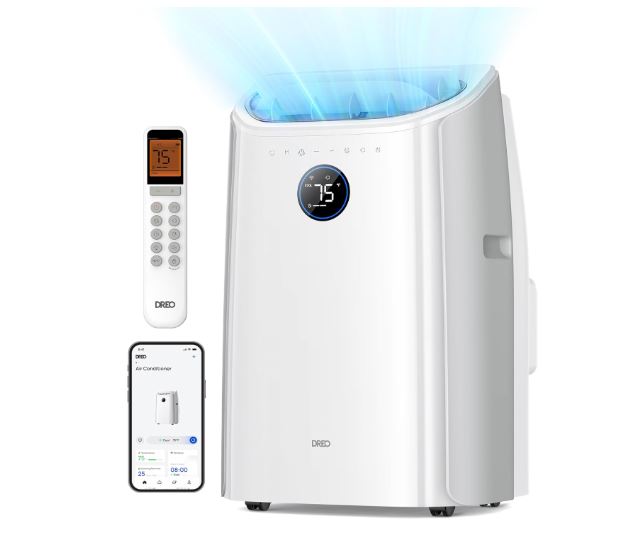
Portable air conditioners: Available at big-box stores for $300-$600. They provide temporary cooling for critical spaces.
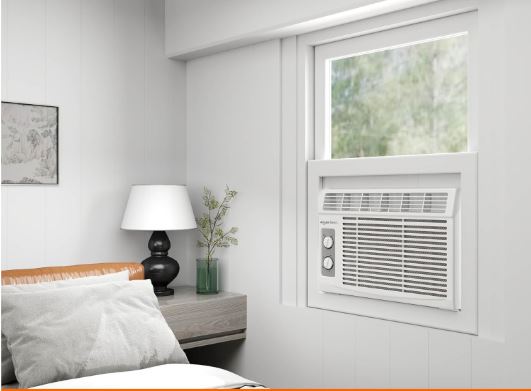
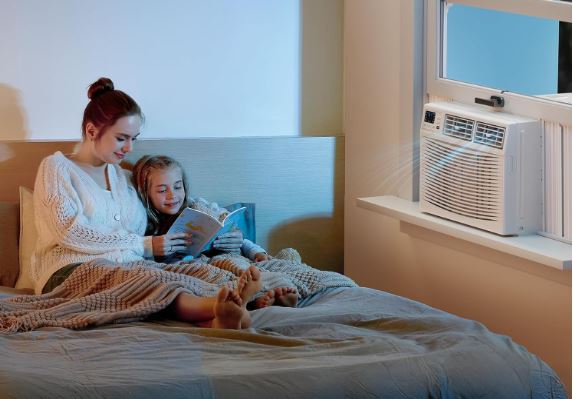
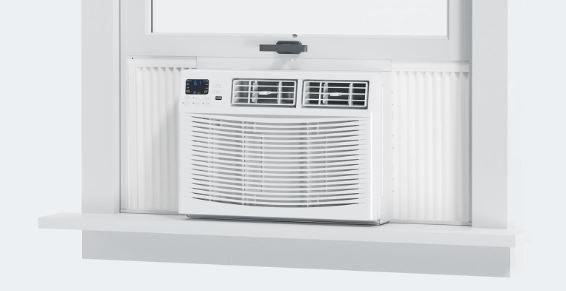
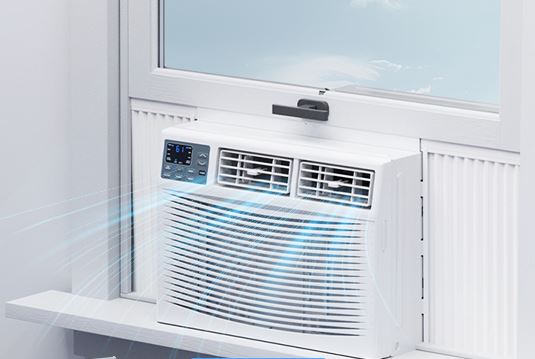
Window units: Less expensive ($150-$400) and highly effective for single rooms. Bedrooms should be priority.
Fans with ice: Position box fans behind bowls of ice. Evaporating ice cools the air blown by fans.
Cool showers and damp towels: Personal cooling methods reduce heat stress while mechanical systems are down.
Heat Management Strategies
Block sunlight: Close curtains and blinds, especially on south and west-facing windows. This reduces heat gain significantly.
Avoid heat-generating activities: Use outdoor grills instead of ovens. Delay laundry and dishwashing until cooler evening hours.
Create cross-ventilation: Open windows on opposite sides of the house during cooler hours. Create airflow paths.
Focus on critical spaces: Cool only bedrooms overnight. This requires less capacity than whole-house cooling.
Health Considerations
Monitor vulnerable individuals: Elderly, very young, and those with health conditions are heat-sensitive. Prioritize their cooling needs.
Stay hydrated: Increase water intake significantly. Dehydration compounds heat stress.
Recognize heat illness signs: Dizziness, confusion, rapid heartbeat, or cessation of sweating indicate dangerous heat exposure. Seek medical attention immediately.
Consider temporary relocation: For multi-day outages during extreme heat, stay with family, friends, or cooling centers.
Repair Timeline Management
Emergency service availability: True emergencies (health risks) justify premium emergency service rates. Most repairs can wait until normal business hours.
Part ordering delays: Uncommon components might require 2-5 day shipping. Plan accordingly.
Technician scheduling: Peak season (summer) means 1-3 day waits for service appointments. Call early morning for best availability.
DIY repair time: Ordering parts yourself and attempting repairs saves money but extends downtime. Weigh comfort versus cost.
AC Unit Cost Considerations and Repair Economics
Understanding repair costs helps make informed decisions about repair versus replacement.
Common Repair Costs (2026 Pricing)
| Repair Type | Parts Cost | Labor Cost | Total Range |
| Thermostat replacement | $80-$250 | $75-$150 | $155-$400 |
| Contactor replacement | $20-$50 | $100-$200 | $120-$250 |
| Capacitor replacement | $15-$60 | $80-$150 | $95-$210 |
| Control board replacement | $150-$400 | $100-$250 | $250-$650 |
| Compressor replacement | $800-$1,800 | $700-$1,200 | $1,500-$3,000 |
| Refrigerant leak repair | $200-$600 | $200-$500 | $400-$1,100 |
| Complete condenser unit | $1,500-$3,500 | $500-$1,200 | $2,000-$4,700 |
| Full system replacement | $3,000-$7,000 | $2,000-$4,000 | $5,000-$11,000 |
Prices vary significantly by region, system size, and contractor. Get multiple quotes for major repairs.
The 50% Rule for Repair Decisions
If repair costs exceed 50% of replacement value, replacement usually makes better financial sense.
Example: $2,000 repair on a system worth $6,000 when new (now 8 years old). Repair might make sense if the system has 5+ years of remaining life.
However, $2,000 repair on a 12-year-old system worth $5,000 when new doesn’t make sense. Additional failures are imminent.
Factor in efficiency improvements. New systems save 30-50% on energy costs compared to 15-year-old models.
Warranty Considerations
Systems under manufacturer warranty have covered parts. You pay only labor, dramatically reducing repair costs.
Labor warranties from installation contractors typically last 1-2 years. This covers installation-related issues.
Extended warranties purchased at installation time cover parts beyond manufacturer coverage. Evaluate cost versus expected repair savings.
Home warranty plans sometimes cover HVAC systems. Read terms carefully—many exclude pre-existing conditions or have high deductibles.
DIY Savings Versus Professional Service
DIY repairs save labor costs but require time, tools, and knowledge. Mistakes can make problems worse.
Simple tasks (filter changes, thermostat batteries, contactor replacement) are DIY-friendly. Save $80-$150 in service call fees.
Moderate tasks (capacitor replacement, control board replacement) require electrical knowledge. Errors risk equipment damage or personal injury.
Complex tasks (refrigerant work, compressor replacement, extensive electrical diagnosis) require professional service. DIY attempts often cost more in the long run.
Frequently Asked Questions
What should I check first when my AC unit won’t turn on?
Start with the thermostat—verify it’s set to COOL mode and temperature is 5+ degrees below room temperature. Replace batteries if applicable. Next, check all circuit breakers including both indoor and outdoor unit breakers. Reset any tripped breakers by flipping completely off then on. Verify the outdoor disconnect switch is on. Check for water in indoor drain pans—full pans trigger safety switches preventing operation. These five checks resolve 60% of no-start situations.
How long should I wait after a power outage before my AC unit will turn on?
Wait at least 5 minutes after power restoration before expecting AC operation. High and low pressure switches need time to equalize refrigerant pressures. If the compressor was hot when power failed, thermal overload protectors need 30+ minutes cooling time. Some systems won’t start for up to an hour after outages. Additionally, if the outdoor disconnect was off during the outage, wait 24 hours after turning it back on to allow crankcase heaters to warm the compressor oil.
Why does my circuit breaker keep tripping when I try to turn on my AC unit?
Breakers that trip immediately indicate electrical problems: short circuits in wiring, failed capacitors causing motor overload, seized compressor drawing excessive current, or ground faults from damaged insulation. Don’t repeatedly reset tripping breakers—this risks fire. One reset attempt is diagnostic. Immediate re-tripping requires professional diagnosis. Possible causes include damaged wiring from rodents, water infiltration causing shorts, or failed components from power surges. This situation requires electrician or HVAC technician evaluation.
Can I run my AC unit if the outdoor unit isn’t working but indoor fan works?
No, don’t run the system this way. The indoor blower circulates air without cooling when the outdoor unit isn’t working. This wastes energy and can damage components. If the outdoor unit doesn’t start within 5 minutes of thermostat calling for cooling, turn the system off. Running the blower continuously without cooling can freeze the evaporator coil from temperature imbalance. Address the outdoor unit problem before attempting operation again.
How much does it cost to fix an AC unit that won’t turn on?
Simple fixes cost $95-$250: thermostat batteries, reset breakers, basic contactor or capacitor replacement. Moderate repairs cost $250-$650: control board replacement, extensive wiring repair, or multiple component failures. Major repairs cost $1,500-$3,000: compressor replacement or condenser unit replacement. Diagnostic fees range $80-$150 and often apply toward repair costs. Get estimates before authorizing repairs. For systems 10+ years old with repair costs exceeding $1,500, replacement often makes better economic sense.
Will my AC unit turn on after sitting unused all winter?
Most systems start normally after winter if properly shut down. However, several issues commonly occur: outdoor disconnect switches left off, tripped breakers from winter power events, seized compressors from lack of lubrication, or rodent damage to wiring. Before first startup, remove outdoor covers, clear debris, verify power switches are on, replace filters, and restore power 24 hours before attempting operation. If the compressor hums without starting after winter storage, wait several hours and try again—temporary mechanical binding sometimes resolves.
Why is my thermostat on but AC unit not working?
Thermostats can display and appear functional while not actually communicating with the AC system. Check batteries even if the display works—weak batteries prevent signal transmission. Verify the thermostat is set to COOL mode, not just lowering temperature. Inspect wiring connections at the thermostat base—loose or corroded wires prevent communication. Test by setting temperature very low (60°F)—if nothing happens after 5 minutes, wiring or control board issues exist. Smart thermostats might be disconnected from WiFi but this doesn’t affect basic AC operation.
Is it normal for my AC unit not to turn on immediately after I adjust the thermostat?
Yes, built-in delay timers are normal. After shutting off, compressors won’t restart for 3-5 minutes. This delay protects the compressor from damage caused by starting under unequal pressure. If you just adjusted settings, wait a full 5 minutes before concluding the system isn’t working. Additionally, some thermostats have “temperature anticipation” features that delay operation to prevent short cycling. Continuous delay beyond 10 minutes indicates actual problems requiring investigation.
Also Read:
- Frigidaire Air Conditioner Not Working? (Troubleshooting Guide)
- GE Air Conditioner Acting Up? (Troubleshooting Guide)
- Mitsubishi Mini Split Troubleshooting Guide
Conclusion: Getting Your AC Running Again
AC units that won’t turn on create immediate discomfort and stress, but systematic troubleshooting identifies most problems quickly. Start with the basics—thermostat settings, circuit breakers, and disconnect switches—before assuming major component failure. These simple checks resolve more than half of all no-start situations.
Understanding your AC system’s operation helps you communicate effectively with technicians when professional service becomes necessary. Knowing whether your indoor blower runs, whether outdoor unit makes sounds, and when problems started significantly reduces diagnostic time and cost.
Prevention remains your best defense against AC failures. Monthly filter changes, seasonal professional maintenance, and prompt attention to unusual sounds or behaviors prevent most catastrophic failures. A $150 annual tune-up prevents $1,500+ emergency repairs during peak summer heat.
When facing repair versus replacement decisions, consider system age, repair costs, and efficiency improvements. The 50% rule provides good guidance—repairs exceeding half the replacement cost rarely make sense, especially for systems over 10 years old.
Your AC system is a significant investment in home comfort. Whether troubleshooting yourself or working with professionals, informed decision-making ensures you get maximum value from your cooling system throughout 2026 and beyond. Stay cool, stay comfortable, and address problems promptly before they escalate.