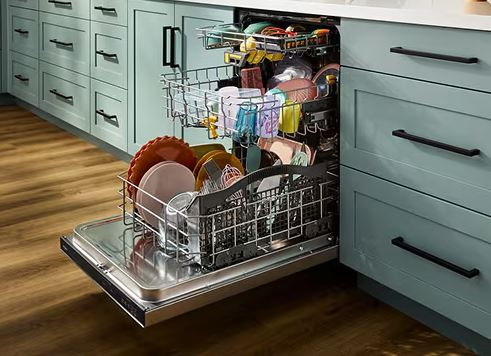
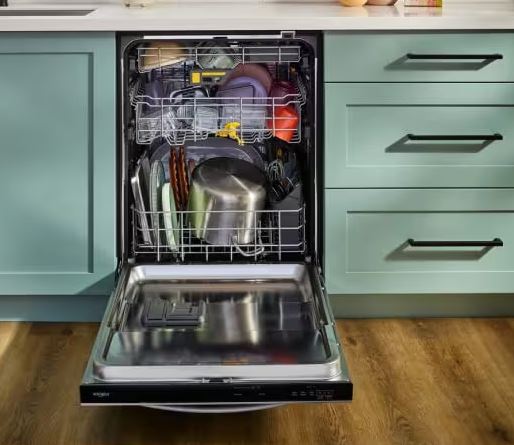
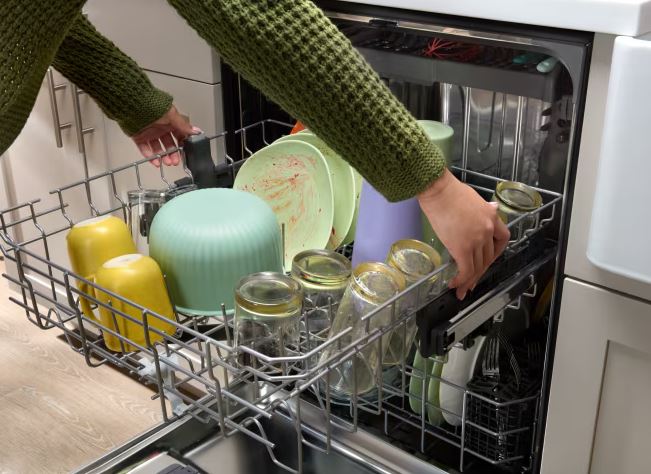
You press the button. Nothing happens. No lights, no sounds, no water filling. Your Whirlpool dishwasher is not turning on. It’s completely unresponsive.
This morning it worked fine. Now it’s acting like it’s not even plugged in. You’ve got dinner dishes stacking up and a machine that refuses to acknowledge your existence.
A Whirlpool dishwasher that won’t turn on typically suffers from electrical supply issues, tripped thermal fuses, failed control boards, or faulty door switches. The good news is that 80% of these cases resolve without replacing major components.
We’re diving deep into every possible cause behind a dead dishwasher. You’ll learn diagnostic techniques that professionals use, troubleshooting sequences that save time, and exactly when DIY stops and professional help begins.

Power Issue Quick Reference for a Whirlpool Dishwasher Not Turning On
| Symptom | Primary Cause | First Action |
| No lights, completely dead | Circuit breaker tripped | Check breaker panel |
| Lights work, won’t start | Door latch failure | Inspect door closure |
| Intermittent power | Loose wire connection | Check terminal box |
| Recent power surge | Blown thermal fuse | Test fuse continuity |
| Delayed response | Control lock activated | Disable control lock |
What Makes Whirlpool Dishwashers Stop Responding
Whirlpool dishwashers rely on multiple safety systems working together. When any component in this chain fails, the entire unit shuts down.
The power flows through a specific sequence. It travels from your home’s electrical panel through the circuit breaker. Then it moves through the dishwasher’s junction box to the control board. Along this path, safety devices monitor for dangerous conditions.
Thermal fuses protect against overheating. Door switches prevent operation when the door is open. The control board acts as the brain, coordinating all functions. When even one component in this chain fails, your dishwasher plays dead.
Understanding this sequence helps you troubleshoot systematically. You’ll start at the power source and work toward the control board. This eliminates causes one by one until you find the culprit.
What Do You Do When Your Whirlpool Dishwasher Won’t Turn On?
When dealing with a Whirlpool dishwasher not turning on, start with a methodical approach rather than random button pushing. This systematic process identifies problems faster than trial and error.
Initial Assessment Steps
Stand in front of your dishwasher and document what you observe. Does the control panel have any indicator lights? Do you hear any sounds when you press buttons? Does the panel feel warm or cool to touch?
Write down these observations. They provide clues about whether the problem is electrical or mechanical. A completely dark panel suggests power supply issues. A lit panel that won’t respond indicates control or latch problems.
Check the time of day and recent activities. Did storms pass through recently? Did someone run the garbage disposal? These environmental factors often correlate with sudden dishwasher failures.
The Five-Minute Power Test
This simple test eliminates 40% of no-power complaints without tools. Press the dishwasher door firmly closed. Hold it for three seconds. Open it completely and close it again.
Press the power button and hold for five seconds. Some Whirlpool models require long presses to power on after extended inactivity. Watch for any flicker of lights or sounds.
Try different cycle buttons while holding power. Sometimes specific button combinations trigger response when normal power buttons don’t. This indicates button membrane damage rather than complete power failure.
Checking the Control Lock Feature
Whirlpool dishwashers include control locks to prevent accidental operation. This feature is particularly common on models manufactured after 2022.
Look for a lock icon on the control panel. It might be lit or appear in the display. The control lock prevents all button responses except the unlock sequence. Your dishwasher has power but ignores your commands.
Locate the control lock button combination in your user manual. Common sequences include holding “Heated Dry” for three seconds or pressing “Air Dry” and “Normal” simultaneously. Try these combinations even if you don’t see a lock indicator.
The lock sometimes activates when someone leans against the control panel. Children love pressing dishwasher buttons. Either scenario can engage the lock without your knowledge.
Whirlpool Dishwasher No Power No Lights
Complete power loss with zero illumination indicates fundamental electrical problems. The dishwasher isn’t receiving electricity at all.
Circuit Breaker Investigation
Walk to your home’s electrical panel immediately. Locate the breaker labeled for the dishwasher or kitchen appliances. Breakers don’t always look tripped when they are.
Flip the dishwasher breaker completely off, then firmly back on. This full cycle resets internal breaker mechanisms. A breaker that trips repeatedly signals serious electrical problems requiring professional evaluation.
Check adjacent breakers in the panel. Sometimes the wrong breaker gets labeled during home construction. Try cycling breakers for the kitchen, garbage disposal, and outlets. One of these might actually control the dishwasher.
Test other kitchen appliances on the same circuit. If multiple devices stopped working, the problem exists in your home’s wiring rather than the dishwasher itself. According to Underwriters Laboratories safety standards, kitchen circuits should handle 15-20 amps safely.
Junction Box Connections
The junction box is where your home’s wiring connects to the dishwasher. This connection point hides behind the lower kickplate or under the unit.
Turn off the breaker before inspecting the junction box. Remove the kickplate by loosening the screws at the bottom corners. Shine a flashlight into the space beneath the dishwasher.
Look for a metal or plastic box with wire connections. Check if wires are securely fastened with wire nuts. Loose connections create intermittent power or complete failure. Gently tug each wire to verify solid connections.
Inspect for signs of overheating: melted insulation, burn marks, or discolored wires. These indicate serious electrical problems requiring immediate professional attention. Never attempt to rewire connections yourself unless you’re qualified.
GFCI Outlet Complications
Some installations use GFCI outlets for dishwasher power. These outlets trip easily and cut all power to the appliance.
Check all GFCI outlets in your kitchen. They have test and reset buttons in the center. Press the reset button firmly. You should hear a click. If the button doesn’t stay pressed, the GFCI is faulty.
GFCI outlets sometimes hide in unexpected locations. Check inside cabinets under the sink. Look in the garage near the kitchen wall. Previous owners occasionally installed them in strange spots.
A constantly tripping GFCI indicates ground fault issues in the dishwasher wiring. This safety feature prevents electrical shocks. Don’t bypass a tripping GFCI. The underlying problem needs professional diagnosis.
Testing the Power Cord
Built-in dishwashers typically use hardwired connections rather than pluggable cords. Portable models use standard three-prong plugs that can fail.
For portable units, unplug the cord completely. Inspect the plug prongs for burn marks, corrosion, or bent metal. These indicate poor connections that create resistance and heat. Replace damaged cords immediately.
Plug the cord into a different outlet that you’ve verified works. This eliminates the original outlet as a variable. If the dishwasher powers on elsewhere, the original outlet needs repair.
Test the outlet with a multimeter set to AC voltage. You should read 115-125 volts. Lower readings indicate wiring problems. No reading confirms the outlet is dead.
Read Also: Whirlpool Dishwasher Start Button Not Working? (DIY Fix)
Whirlpool Dishwasher Power Off Issues
Power-off scenarios differ from no-power situations. The dishwasher had power but shut down unexpectedly or won’t stay powered.
Mid-Cycle Shutdowns
Dishwashers that stop during cycles usually trigger thermal protection. The unit overheated and cut power automatically. This safety feature prevents fires and component damage.
Feel the control panel temperature after shutdown. Excessive heat indicates ventilation problems or failing components. Allow the unit to cool for 30 minutes before attempting restart.
Check the heating element resistance with a multimeter. Disconnect power first. Remove the lower panel and locate the heating element terminals. Measure resistance between terminals. Normal readings range from 15-30 ohms. Infinite resistance means the element is broken.
A shorted heating element draws excessive current and trips thermal protection. This creates the power-off-during-cycle symptom. The element needs replacement to restore normal operation.
Thermal Fuse Failures
The thermal fuse is your dishwasher’s last line of defense against fire. When temperatures exceed safe limits, this fuse blows permanently. Unlike breakers, thermal fuses don’t reset.
Access the thermal fuse by removing the outer door panel. It typically mounts near the control board or heating element. The component looks like a small cylinder with two wires.
Disconnect the wires and test continuity with a multimeter. A functioning fuse shows zero resistance. Blown fuses show infinite resistance. Replace blown thermal fuses with exact OEM replacements.
Thermal fuses blow for specific reasons. Find and fix the root cause before replacing the fuse. Common causes include failing heating elements, blocked ventilation, or control board malfunctions. Simply replacing the fuse without addressing the cause leads to repeated failures.
Power Supply Voltage Problems
Low voltage starves the dishwasher of necessary electricity. The control board can’t function properly without stable 120-volt power.
Voltage issues stem from utility problems, old home wiring, or too many appliances on one circuit. Test voltage at the junction box with the dishwasher disconnected. Readings below 115 volts indicate supply problems.
Contact your utility company if voltage measures low. They’ll test the supply to your home. Internal home wiring problems require an electrician’s attention. According to National Electrical Code standards, kitchen appliances need adequate amperage for safe operation.
Shared circuits cause voltage drops when multiple appliances run simultaneously. Dishwashers need dedicated circuits for reliable operation. If your dishwasher shares a circuit with the microwave or electric kettle, voltage drops during peak use.
Diagnostic Testing Procedures for a Whirlpool Dishwasher Not Turning On
Professional technicians follow specific diagnostic testing sequences. These methods quickly identify failed components.
Multimeter Testing Basics
A basic digital multimeter (View on Amazon) costs $10-40 and solves countless appliance problems. Learn three essential tests: voltage, continuity, and resistance.
Voltage testing confirms power presence and levels. Set the multimeter to AC voltage 200V range. Touch probes to hot and neutral wires. Readings should show 115-125 volts.
Continuity testing verifies complete electrical paths. Set the multimeter to continuity or ohms. Touch probes to component terminals. A beep or zero reading confirms continuity. Infinite readings indicate breaks in the circuit.
Resistance testing measures opposition to current flow. Some components should show specific resistance values. Heating elements, door switches, and thermal fuses all have characteristic resistance ranges.
Door Switch Testing
Door switches prevent operation when doors are open. Failed switches make dishwashers think doors are perpetually open.
Locate the door switch inside the door frame near the latch. It’s a small plunger-style button or magnetic sensor. Press the switch manually and listen for a click.
Test the switch with a multimeter set to continuity. Press the switch and measure across its terminals. Working switches show continuity when pressed, no continuity when released.
Replace door switches that don’t show proper continuity changes. These components cost $15-35 and install in minutes. Disconnect power before replacing any switches.
Control Board Visual Inspection
Control boards fail through power surges, moisture exposure, or component aging. Visual inspection reveals many board problems without electrical testing.
Remove the control panel cover carefully. Avoid touching circuit board components. Look for obvious damage: burn marks, swollen capacitors, or cracked solder joints.
Swollen capacitors appear as bulging cylindrical components. They should have flat tops. Bulged or leaking capacitors indicate board failure. Burn marks around components show overheating failures.
Check for moisture damage appearing as white, green, or brown corrosion on circuit traces. Moisture enters through damaged door seals or excessive steam. Corroded boards need replacement as cleaning rarely restores full function.
Whirlpool Dishwasher Component Replacement Guidelines
Some repairs require new parts. Understanding replacement procedures helps you decide between DIY and professional service.
Door Latch Assembly Replacement
Door latches wear from repeated use. Failed latches prevent the dishwasher from knowing the door is closed.
Purchase the correct latch assembly using your model number. Whirlpool model numbers appear on the door frame or interior wall. Don’t substitute with “universal” latches. They rarely work correctly.
Remove the inner door panel by unscrewing the perimeter screws. Take photos of wire connections before disconnecting anything. The latch mounts with two to four screws accessible from inside the door.
Install the new latch in the exact position as the old one. Reconnect wires according to your photos. Test door closure before reassembling the panel. The latch should engage firmly with an audible click.
Control Board Replacement Process
Control boards are expensive components ranging from $150-400. Verify the board is truly failed before ordering. Many symptoms that seem like board failures have simpler causes.
Order the exact replacement board using your complete model number. Generic boards don’t exist for dishwashers. Each model requires its specific board.
Photograph all wire connections from multiple angles. Label wires with tape if your photos aren’t clear. Remove the old board by unscrewing its mounting clips. Some boards have dozens of wire connections.
Transfer connections one wire at a time to the new board. Don’t disconnect all wires then try reconnecting them. You’ll forget which goes where. Secure the new board with all mounting screws. Test operation before closing the panel.
Thermal Fuse Replacement
Thermal fuses cost $10-25 and install easily once accessed. The challenge is reaching them.
Disconnect power at the breaker before starting. Remove the lower kickplate and outer door panel to access the fuse. It’s usually wrapped in heat-shrink tubing with wire terminals on each end.
Cut the wires close to the old fuse. Strip 1/4 inch of insulation from each wire end. Connect the new fuse using crimp connectors or wire nuts. Some replacement fuses come with pre-installed connectors.
Ensure the fuse sits in the same location as the original. It needs to sense temperature from the heating element or motor. Improper positioning prevents it from protecting the appliance.
Whirlpool Dishwasher Model-Specific Troubleshooting
Whirlpool manufactures distinct dishwasher lines with unique characteristics. Your model affects troubleshooting approach.
| Model Line | Common No-Power Cause | Unique Feature | Reset Method |
| Quiet Partner | Thermal fuse failure | External fuse location | Breaker reset + door cycle |
| Gold Series | Control board software | Advanced diagnostics | Button combination reset |
| Stainless Tub | Door latch sensor | Magnetic latch | Latch recalibration sequence |
| Portable Models | Cord/plug issues | External power supply | Plug inspection required |
Quiet Partner Series
Quiet Partner models place the thermal fuse in an accessible location behind the kickplate. This design simplifies fuse replacement but makes the fuse more vulnerable to false trips.
These models also use sensitive door switches that fail more frequently than other lines. If your Quiet Partner won’t turn on, test the door switch first. It’s the most common failure point.
The control boards in Quiet Partner units are moisture-resistant but not waterproof. Ensure the door seal is intact. Damaged seals allow steam to reach the control board.
Gold Series Advanced Features
Gold Series dishwashers include diagnostic modes accessible through button combinations. Press “High Temp” and “Heated Dry” simultaneously for three seconds to enter diagnostic mode.
The control panel displays error codes in this mode. Code “1” indicates door switch problems, Code “6” signals heating element failures, and Code “8” means control board issues. Reference your service manual for complete code lists.
These models feature sleep modes that make them appear completely off. Press any button to wake the unit. The panel illuminates after a two-second delay.
Portable Dishwasher Considerations
Portable Whirlpool dishwashers face unique challenges from their mobile nature. The power cord endures frequent plugging and unplugging. This causes connection wear and eventual failure.
Inspect the cord where it enters the dishwasher housing. Flex it gently while watching for intermittent power. This movement reveals internal wire breaks. Replace cords showing this symptom immediately.
Portable models also experience more door alignment issues. The wheels and movement throw off door latch alignment. Check that the door sits squarely in the frame. Adjust the leveling feet to ensure the unit sits stable.
Whirlpool Dishwasher Preventive Maintenance Strategies
Preventing power failures beats fixing them. These maintenance practices extend dishwasher life and prevent unexpected shutdowns.
Monthly Power System Checks
Once monthly, inspect the junction box connections. Ensure wire nuts remain tight. Look for any new discoloration or heat damage. Catching these issues early prevents complete failures.
Clean the control panel with a damp microfiber cloth. Remove grease and food splatters that accumulate from cooking activities. Moisture and grease create electrical paths where none should exist.
Test the GFCI reset button if your installation uses one. Press test then reset. This verifies the safety device functions correctly. Replace GFCI outlets that don’t trip during testing.
Quarterly Electrical Testing
Every three months, test your dishwasher circuit voltage. This requires a basic multimeter. Test at an accessible outlet on the same circuit. Voltage should remain stable at 120V ±5V.
Decreasing voltage over time indicates developing electrical problems in your home. Voltage below 115V stresses appliance components. They work harder and wear faster. Address voltage issues before they damage your dishwasher.
Check the circuit breaker for warmth. Breakers should feel cool or slightly warm to touch. Hot breakers indicate overloading or breaker failure. Replace hot breakers immediately.
Annual Professional Inspection
Schedule annual service inspections to catch problems before they cause failures. Professional technicians test components that require disassembly to access.
They’ll measure heating element resistance, test control board outputs, and verify proper ground connections. This service costs $100-150 but prevents $300-500 repair bills. According to Association of Home Appliance Manufacturers data, regular maintenance extends appliance life by 30-50%.
Technicians also update control board software if updates exist. Whirlpool occasionally releases firmware updates fixing bugs that cause random shutdowns. These updates prevent future problems.
Whirlpool Dishwasher Emergency Troubleshooting Scenarios
Some situations need immediate attention. These emergency scenarios help when your dishwasher fails at the worst possible time.
Pre-Holiday Gathering Power Loss
Your dishwasher dies right before hosting family dinner. You need it working within hours. This emergency sequence prioritizes likely causes.
First, cycle the breaker completely. Leave it off for five full minutes. This hard reset clears many electronic glitches. While waiting, clean the door latch area thoroughly.
Try the control lock release combination. Hold the appropriate buttons for five seconds. Test all cycle selections. Sometimes one cycle works while others don’t. This indicates partial control board failure.
If nothing works after these steps, call emergency appliance service. Explain the time constraint. Many services offer same-day repairs for emergencies. Expect to pay premium rates but get your dishwasher running.
Power Surge Aftermath
Storms passed through and now your dishwasher is dead. Other appliances might be affected too. Power surges damage specific components predictably.
Check the thermal fuse first after power surges. Surges often trip this safety device. Testing and replacing the fuse takes 30 minutes. Keep spare thermal fuses for your model on hand.
The control board is the second surge casualty. These boards include some surge protection but not unlimited capacity. Large surges overwhelm the protection and fry sensitive components.
Don’t rush to replace the control board immediately after surges. Wait 24 hours and test again. Sometimes the board needs time to reset from surge exposure. This saves buying unnecessary parts.
Water Leak Power Shutdowns
Water leaking from your dishwasher triggers automatic shutdowns. The leak detection system cuts power to prevent flooding. Your dishwasher won’t turn back on until you address the leak.
Locate the leak source before attempting power restoration. Common leak points include door seals, hose connections, and pump seals. Dry the leak area completely with towels.
Some Whirlpool models use water sensors in the base pan. When water triggers these sensors, power stays off even after drying. You’ll need to manually reset the sensor by accessing the base pan and drying it thoroughly.
Remove the lower kickplate and check the base pan. Tilt the dishwasher slightly back to drain any accumulated water. The sensor resets once the pan is completely dry.
Cost Analysis and Decision Making
Repair costs vary widely based on the failed component and labor rates. Understanding these costs helps you make informed decisions.
| Component | Part Cost | DIY Time | Professional Cost | When to DIY |
| Thermal Fuse | $10-25 | 30 min | $150-200 | If comfortable with electrical |
| Door Latch | $35-70 | 45 min | $175-250 | Straightforward mechanical task |
| Control Board | $150-400 | 1 hour | $350-600 | If you follow instructions carefully |
| Wire Harness | $40-100 | 1-2 hours | $200-350 | Requires electrical experience |
| Junction Box Repair | $20-50 | Variable | $150-300 | Only with electrical license |
Repair vs Replace Calculation
Calculate your dishwasher’s remaining value before investing in expensive repairs. Dishwashers typically last 9-13 years with proper maintenance.
If your unit is older than 8 years and needs control board replacement, consider buying new. Modern dishwashers offer better efficiency and features. Energy Star certified models save $35-50 annually on utility bills.
Repairs costing more than 50% of replacement price rarely make financial sense. New dishwashers (View on Amazon) include warranties covering parts and labor. This protection provides peace of mind that repairs don’t offer.
Factor in your time value when deciding between DIY and professional repair. If you’ll spend 4 hours troubleshooting without guaranteed success, professional service might cost less in total.
Extended Warranty Considerations
If your dishwasher is under warranty, check coverage before attempting DIY repairs. Most warranties void if non-certified technicians perform work.
Extended warranties typically cover power-related failures. They don’t cover user error like using wrong detergents or physical damage. Read the warranty terms carefully before filing claims.
Some credit cards automatically extend manufacturer warranties. Check if the card you used for purchase offers this benefit. You might have coverage you didn’t know existed.
Whirlpool Dishwasher Safety Protocols
Working with dishwasher electrical systems involves real hazards. Follow these safety rules without exception.
Electrical Safety Requirements
Turn off the circuit breaker before touching any wires or internal components. Test for voltage even with the breaker off. Other circuits might feed the same junction box.
Use insulated tools rated for electrical work. Regular tools conduct electricity. Insulated tools protect against accidental contact with live wires. These tools have distinctive rubber coatings on handles.
Keep one hand behind your back when testing live circuits. This prevents electrical current from crossing your chest. Current crossing your chest can disrupt your heart rhythm.
Work in dry conditions only. Never work on dishwashers while standing in water. Wear rubber-soled shoes. Keep a Class C fire extinguisher nearby. This extinguisher type works on electrical fires.
When Professional Help Is Mandatory
Some scenarios absolutely require licensed electricians or appliance technicians. Don’t attempt these repairs yourself.
Call professionals when you see sparking, smell burning plastic, or observe smoke. These indicate serious electrical faults beyond DIY scope. Continuing to troubleshoot could start fires.
Buzzing or humming sounds from the junction box signal dangerous wiring problems. These noises indicate loose connections arcing. Arcing creates extreme heat and fire risk.
If you’re uncomfortable working with electricity, there’s no shame in calling professionals immediately. Your safety matters more than saving repair costs.
Read Also: Frigidaire Dishwasher Not Starting But Lights Blinking (DIY Fix!)
FAQs
Why did my Whirlpool dishwasher suddenly stop working?
Sudden failures typically result from power interruptions, tripped breakers, or blown thermal fuses. Check your breaker panel first for tripped breakers. Reset any tripped breakers completely by turning them fully off then on. If the breaker trips again immediately, you have a short circuit requiring professional diagnosis. Thermal fuses also blow suddenly during heat-related events.
Can a dishwasher stop working if it’s not used regularly?
Yes, infrequent use causes specific failure modes. Control boards can malfunction from long periods of inactivity. Door seals dry out and crack. Internal components corrode from moisture that doesn’t evaporate. Run your dishwasher at least once weekly even without dishes. Use a rinse cycle to keep seals moist and components moving.
How do I know if my dishwasher needs a new control board?
Control board failures show distinct symptoms beyond just not turning on. Look for random cycles starting spontaneously, buttons that work intermittently, or displays showing error codes continuously. If you’ve tested power supply, door switches, and thermal fuses with normal results, the control board is the likely culprit. Visible burn marks on the board confirm failure.
What causes multiple Whirlpool dishwashers to fail?
Manufacturing defects affect specific model ranges. Whirlpool occasionally issues recalls for widespread problems. Check the Consumer Product Safety Commission database using your model number. Some model years have known control board defects or thermal fuse issues. Manufacturer defects might qualify for free repairs even outside warranty periods.
Is it safe to run a dishwasher that randomly turns off?
No, random shutdowns indicate serious underlying problems. The safety systems are triggering for valid reasons. Running the unit despite shutdowns risks fire, water damage, or electrical shock. Diagnose and fix the root cause before continuing use. Random shutdowns often precede complete failures or dangerous situations.
How long do dishwasher thermal fuses last?
Quality thermal fuses last the appliance’s lifetime under normal conditions. They’re designed as one-time protection devices. When they blow, something caused excessive heat. The average dishwasher goes its entire life without blowing a thermal fuse. If you’ve replaced the fuse and it blows again, serious problems exist requiring professional evaluation.
Can I bypass a blown thermal fuse temporarily?
Never bypass thermal fuses under any circumstances. These safety devices prevent house fires. Bypassing them removes essential protection from overheating components. The inconvenience of a non-working dishwasher beats the catastrophe of a house fire. Replace blown fuses rather than bypassing them.
What’s the most common reason Whirlpool dishwashers won’t turn on?
Tripped circuit breakers cause approximately 35% of no-power complaints. People often overlook this simple cause while assuming complex failures. The second most common cause is control lock activation at 20% of cases. Door latch failures account for 15%. These three issues represent 70% of all won’t-turn-on problems. Start troubleshooting with these likely causes.
Get Your Whirlpool Dishwasher Running Again
A Whirlpool dishwasher not turning on feels like a major crisis during the moment. Those dirty dishes aren’t washing themselves.
But you now understand the electrical journey from breaker to control board. You know which components fail most frequently and how to test them systematically. You can differentiate between simple fixes and problems requiring professional intervention.
Start with the obvious causes: breakers, control locks, and door latches. These solve the majority of cases within minutes. Move to component testing only after eliminating simple causes. Document your findings as you progress through troubleshooting steps.
Remember that safety trumps speed every time. Turn off power before touching anything internal. If you feel uncomfortable at any point, stop and call professionals. Your dishwasher will be cleaning dishes again soon, whether you fix it or someone else does.