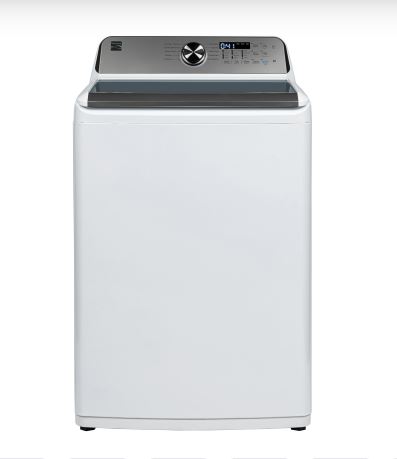
If your Kenmore washer model 110 has stopped working properly, you’re not alone. This workhorse appliance, known for its durability and reliability, can develop issues over time.
Whether your machine won’t start, refuses to drain, or keeps filling with water, most problems have straightforward solutions you can tackle yourself. You won’t need to call a repair technician for every little issue.
The Kenmore washer model 110 troubleshooting process involves identifying specific symptoms, checking error codes, and systematically testing components like the lid switch, drain pump, water inlet valve, and drive belt. Most common issues (including drainage problems, spinning failures, and electrical malfunctions) can be resolved with basic tools and minimal technical knowledge.
Key Takeaways
Before diving into specific problems, here’s what you need to know about troubleshooting your Kenmore model 110.
- Always unplug the washer before attempting any repairs or inspections. This protects you from electrical shock and prevents the machine from starting unexpectedly.
- Error codes provide specific diagnostic information that narrows down the problem. Learning to read these codes saves you time and money.
- Many issues stem from simple causes like clogged drain hoses or worn belts. Check the obvious problems first before assuming you need expensive parts.
- The lid switch is one of the most common failure points in this model. It’s also one of the easiest and cheapest parts to replace.
- Regular maintenance prevents most operational problems. A little prevention goes a long way with these machines.
Kenmore Washer Model 110 Troubleshooting Overview
| Problem | Most Likely Cause | Quick Fix | Difficulty Level |
|---|---|---|---|
| Won’t turn on | Electrical connection, lid switch | Check power, test lid switch | Easy |
| Won’t spin | Lid switch, drive belt, motor coupling | Replace faulty component | Moderate |
| Won’t drain | Clogged pump, kinked hose | Clear blockage, straighten hose | Easy |
| Won’t stop filling | Faulty water inlet valve | Replace inlet valve | Moderate |
| Won’t rinse | Timer malfunction, water valve | Test timer, check valve | Moderate |
| Error codes displaying | Various sensor issues | Decode and address specific code | Varies |
Understanding Kenmore Washer Model 110 Troubleshooting Codes
Your Kenmore model 110 communicates problems through a series of diagnostic codes. These codes appear on digital displays or can be accessed through a special test mode on older models.
Understanding what each code means saves you time and helps you order the right parts. You won’t waste money replacing components that are working fine.
Common Error Codes and What They Mean
The most frequent error codes you’ll encounter include problems with drainage, control boards, and water levels. Here’s what each one tells you about your washer.
F1 or E1: Control Board Failure
This code indicates a primary control board failure. The main electronic control board detected an internal malfunction.
Before replacing the expensive control board, try unplugging the washer for 5 minutes to reset the system. If the code persists after the reset, the board needs replacement.
LD or F02: Drainage Problem
This signals that water isn’t draining within the expected timeframe. Your washer is telling you something is blocking the water from leaving the tub.
Check your drain hose for kinks first. Remove any clogs from the pump filter.
Make sure the standpipe height meets specifications (between 39 and 96 inches). Too low creates a siphoning problem, and too high prevents proper drainage.
Sud or Sd: Excessive Suds
This means your washer detected too many soap bubbles. It happens when you use too much detergent or the wrong type for your machine.
Run a rinse and spin cycle without clothes to clear the suds. Use less detergent going forward, and make sure you’re using HE detergent (View on Amazon) if you have an HE washer.
OE or F03: Overflow Condition
The pressure switch detected too much water in the tub. Water levels exceeded what the washer expected for the selected cycle.
This typically points to a faulty water inlet valve that isn’t closing properly. Sometimes the pressure switch itself has malfunctioned and is sending false readings.
Accessing Diagnostic Mode
For models without digital displays, you can manually trigger diagnostic mode. This lets you see error codes on machines with basic control panels.
Turn the dial to the normal wash position. Within 5 seconds, rotate the dial in this sequence: Normal, Drain/Spin, Normal, Drain/Spin, Normal.
All indicator lights should illuminate if done correctly. The washer will run through a test cycle, and any error codes will flash through the indicator lights.
Count the flashes to determine the code. One long flash followed by three short flashes indicates error code 1-3, for example.
Resetting Error Codes
Sometimes error codes appear due to temporary glitches. A simple reset can clear these false alarms.
Unplug the machine for 1-2 minutes. This allows the capacitors to fully discharge.
Plug it back in and wait for the control panel to fully reset. Run a test cycle to see if the error returns.
If the code immediately reappears, you’re dealing with a genuine hardware problem that requires repair. The reset confirmed the problem is real, not just a sensor hiccup.
Kenmore Washer Model 110 Won’t Spin
A washer that agitates but refuses to spin is one of the most frustrating problems. Your clothes come out soaking wet, and you’re left wringing them out by hand.
Several components can cause this issue, but they’re all testable and replaceable. Most homeowners can handle these repairs with basic tools.
Here’s how to go about it when your Kenmore Washer Model 110 won’t spin:
Lid Switch Testing and Replacement
The lid switch serves as a safety mechanism that prevents the washer from spinning when the lid is open. It’s also the most common reason for spin cycle failures.
The switch contacts wear out over time, especially if the lid is closed forcefully. This is the first thing to check when your washer won’t spin.
How to Test the Lid Switch
Unplug the washer and open the control panel. Locate the lid switch (usually near the lid hinge).
Use a multimeter (View on Amazon) set to continuity mode. With the lid closed, press the switch actuator.
You should get a reading of near-zero ohms. With the lid open, you should get no continuity at all.
If the switch fails this test, replace it. The part costs between $15-30 and takes about 20 minutes to install.
Drive Belt Inspection
The drive belt connects the motor to the transmission and drum. A broken, loose, or severely worn belt prevents spinning entirely.
You’ll need to access the belt by removing the cabinet. This sounds intimidating but is straightforward on most model 110 washers.
Checking Belt Condition
Unplug the washer and turn off water supply. Remove the cabinet by taking out the retaining clips.
Inspect the belt for cracks, fraying, or glazing. A glazed belt looks shiny and slick instead of slightly rough.
Check belt tension by pressing on it. It should deflect about 1/2 inch when pressed firmly.
A glazed belt slips during spin cycles. Replace any belt showing these wear signs. The belt should feel slightly rough to the touch, not smooth or shiny.
Motor Coupling Issues
The motor coupling connects the motor to the transmission on direct-drive washers. This plastic coupling absorbs the torque during startup.
It protects the motor from overload. Over time, it wears down or breaks completely.
Signs of a Failed Motor Coupling
Watch for these symptoms. The washer agitates slowly or not at all.
You hear a loud grinding noise during operation. The spin cycle never starts despite the motor running.
Shredded plastic pieces appear underneath the washer. These are bits of the broken coupling.
Replacing the motor coupling requires removing the cabinet and accessing the motor assembly. The part is inexpensive ($10-20), but the repair takes about an hour if you’re working carefully.
How to Reset Kenmore Washer Model 110
Resetting your washer clears temporary errors and returns the control system to factory defaults. This process differs from a simple power cycle.
It can resolve issues that persist through basic troubleshooting. Think of it as rebooting your computer when things act strange.
Standard Reset Procedure
The basic reset works for most operational glitches. It’s the first thing to try when your washer acts up without showing error codes.
Press and hold the Start/Pause button for 5 seconds. Unplug the washer from the electrical outlet.
Wait 60 seconds to allow capacitors to fully discharge. Plug the washer back into the outlet.
Lift and lower the lid six times within 12 seconds. You have 30 seconds to start this after plugging in the machine.
The lid lifting sequence recalibrates the lid switch and control board. If done correctly, the washer will run through a quick diagnostic check.
Master Reset Using the Control Panel
For persistent issues, perform a master reset. This goes deeper than the standard reset and clears all stored data.
Select any wash cycle. Press and hold the Modifiers and Options buttons simultaneously.
While holding those buttons, press the Power button. Hold all three buttons for at least 3 seconds.
Release the buttons when all lights illuminate. The washer will drain any water and reset to factory defaults.
This clears all custom settings and saved cycles. You’ll need to reprogram any preferences afterward.
When Resetting Doesn’t Work
If your washer still malfunctions after resetting, you’re dealing with a hardware failure. The problem isn’t in the software or temporary memory.
Check these components next. Look at the control board for visible burn marks or damaged traces.
Inspect wiring harnesses for loose connections or corroded terminals. Examine the user interface board for stuck buttons or moisture damage.
Control board failures require professional diagnosis or replacement. These boards cost $150-300, so verify the diagnosis before ordering parts.
Kenmore Washer Model 110 Won’t Turn On
Complete power failure is alarming but often has simple causes. Before assuming major electrical problems, work through these systematic checks.
Many “won’t turn on” calls turn out to be tripped breakers or unplugged cords. Start with the basics that solve 40% of these issues.
Electrical Supply Verification
Check the outlet by plugging in a lamp or phone charger. If nothing works, the problem is your home’s electrical system, not the washer.
Look at your circuit breaker or fuse box for a tripped breaker. Washers typically run on dedicated 15 or 20-amp circuits.
Inspecting the Power Cord
Look for damage along the entire cord length. Check for cuts, exposed wires, or melted insulation.
Wiggle the cord where it enters the washer. If the lights flicker or momentarily come on, the internal connection has failed.
Replace the entire power cord rather than attempting repairs. Electrical tape and wire nuts aren’t safe solutions for this problem.
Testing Outlet Voltage
Use a multimeter (View on Amazon) to check outlet voltage. You should read approximately 120 volts AC.
Significant deviation indicates electrical supply problems. These require an electrician, not an appliance repair person.
Door/Lid Switch Problems
Even with power flowing, a faulty lid switch can prevent the washer from turning on. The control board receives a signal from this switch before allowing any operation.
This is a safety feature. The machine won’t run if it thinks the lid is open.
Testing the Lid Switch
Open the washer lid. Locate the small plunger or magnetic sensor where the lid meets the frame.
Press the plunger manually while observing the control panel. You should hear a click or see the panel lights activate.
If nothing happens, the lid switch or its wiring has failed. Check the wire harness connections before replacing the switch itself.
Corroded or loose connectors cause intermittent failures that mimic switch problems. A $0 fix beats a $30 part replacement.
Control Board Examination
The main control board processes all commands and powers the display. A failed board results in a completely dead washer.
Visual inspection can reveal obvious damage without testing equipment.
What to Look For
Check for burn marks or discoloration on circuit traces. Look for bulging or leaking capacitors.
Inspect for cracked solder joints around large components. Watch for corrosion from water damage.
Power surges and voltage spikes commonly damage control boards. If you’ve experienced recent electrical storms or power outages, the board may have taken a hit.
Installing a surge protector (View on Amazon) on your washer outlet prevents future damage. It’s a $20 insurance policy.
Kenmore Washer Model 110 Won’t Drain
Standing water in your washer after a cycle ruins clothes and creates mildew problems. Drainage issues range from simple blockages to failed pumps.
Most homeowners can diagnose and fix the problem. You don’t need special tools for basic drain troubleshooting.
Drain Hose Inspection and Clearing
The drain hose carries water from the tub to your standpipe or utility sink. Proper installation and maintenance prevent most drainage problems.
Start here because it’s the easiest fix. A kinked hose takes 30 seconds to straighten.
Checking for Kinks and Crimps
Look along the entire hose length. The hose should maintain a gentle arc without sharp bends.
A kinked hose restricts water flow, causing slow drainage or complete backups. Straighten any crimped sections and secure the hose to prevent future kinking.
Verifying Standpipe Height
The drain hose should enter the standpipe at a height between 39 and 96 inches above the floor. Too low creates a siphoning problem.
Too high prevents proper drainage. The hose end should rest 4-6 inches into the standpipe, not pushed all the way to the bottom.
Clearing Internal Blockages
Unplug the washer and turn off water. Place a shallow pan under the drain hose connection.
Remove the hose from the standpipe. Detach the hose from the washer (usually a spring clamp holds it).
Flush the hose with hot water from a utility sink. Use a plumber’s snake for stubborn clogs.
Small items like coins, buttons, and bobby pins commonly lodge in the hose. Pour any standing water into the pan before removing the hose to minimize mess.
Drain Pump Filter Maintenance
Most Kenmore 110 models have an accessible drain pump filter that catches debris before it reaches the pump. This filter should be cleaned every 3-6 months.
A clogged filter is the second most common drainage problem. It takes 5 minutes to clean.
Locating and Cleaning the Filter
Find the small access panel at the front bottom of the washer. Place towels underneath to catch residual water.
Turn the filter cap counterclockwise (usually 1/4 turn). Pull out the filter and remove accumulated lint, hair, and debris.
Rinse the filter under running water. Reinstall the filter, turning clockwise until it stops.
Some models hide the filter behind the lower kick panel. Check your owner’s manual for exact location if you can’t find it.
Drain Pump Testing and Replacement
The drain pump actively pushes water out of the tub. A failed pump motor or blocked impeller prevents drainage.
You’ll hear the pump trying to run but water won’t leave the tub. Sometimes the pump is completely silent.
How to Test the Drain Pump
Remove the front panel to access the pump. Disconnect the wire harness from the pump.
Check for debris wrapped around the impeller blades. Fabric softener sheets love to wrap around these.
Use a multimeter to test pump resistance (should read 5-15 ohms). Manually spin the impeller, it should rotate freely.
If the impeller is jammed with fabric or debris, clear it and reassemble. If the motor fails the resistance test or won’t run with direct power, replace the entire pump assembly.
Drain pumps cost $30-60 and take about 45 minutes to replace. It’s one of the more common repairs on these washers.
Kenmore Washer Model 110 Won’t Stop Filling
An overfilling washer floods your laundry room and wastes water. This problem indicates failed water control components that require immediate attention.
Don’t ignore this issue. Water damage from an overflow can cost thousands in repairs to your floor and walls.
Water Inlet Valve Problems
The water inlet valve controls hot and cold water entry into the washer. Solenoids inside the valve open and close based on signals from the control board.
When these solenoids stick open or fail to close completely, water continues flowing. Even with the washer off, water trickles in.
Symptoms of Inlet Valve Failure
Water slowly trickles into the tub even when washer is off. The washer overfills during any cycle.
One temperature works but the other doesn’t. You see visible water leaking from valve connections.
Testing the Inlet Valve
Turn off the water supply and unplug the washer. Remove the top panel or back panel to access the valve.
Disconnect the wire harness. Use a multimeter to test each solenoid (should read 500-1500 ohms).
Inspect the valve screens for sediment buildup. Check rubber seals for deterioration.
Hard water deposits commonly clog the inlet valve screens, preventing proper closure. Clean the screens by removing the water supply hoses.
Gently brush the screens with an old toothbrush. If the solenoids fail the electrical test, replace the entire valve assembly.
Pressure Switch and Hose Check
The pressure switch tells the control board when the tub has reached the correct water level. It connects to the tub via a small air hose.
As water fills the tub, air pressure increases in this hose. This triggers the switch to stop the fill cycle.
Common Pressure Switch Issues
A clogged pressure hose prevents accurate level sensing. Remove the hose (usually clear or black rubber) and blow through it.
You should feel minimal resistance. Wash out any debris with warm water and dish soap.
Testing the Pressure Switch
A failed pressure switch doesn’t send the stop signal even with proper air pressure. The switch typically mounts on the frame near the control panel.
Remove the wire harness. Use a multimeter to check continuity between terminals.
Blow into the pressure port while monitoring the multimeter. You should see the switch toggle between open and closed.
Replace the pressure switch if it doesn’t respond to air pressure changes. This repair costs $25-40 for the part.
Control Board Communication Errors
Sometimes the water inlet valve functions correctly but the control board fails to send the shutoff signal. This represents a board-level failure.
It’s the least common cause but the most expensive to fix.
Before Replacing the Control Board
Verify all wire harnesses seat firmly in their connectors. Check for water damage or corrosion on the board.
Test the valve and pressure switch to rule out component failures. Try a master reset to clear any software glitches.
Control board replacement should be your last resort. Exhaust all other possibilities first because this part is expensive.
Also Read: Why Your Kenmore Washer Fills with Water and Then Stops
Kenmore Washer Model 110 Won’t Rinse
Proper rinsing removes detergent residue and leaves clothes fresh. When the rinse cycle fails, clothes come out soapy, stiff, or with visible detergent streaks.
You might notice skin irritation from detergent left in fabrics. This is a quality of wash issue that needs addressing.
Timer and Cycle Control Issues
The timer or electronic control board manages cycle transitions. This includes the switch from wash to rinse.
A faulty timer may skip the rinse cycle entirely. It might also fail to advance to the spin after rinsing.
Mechanical Timer Problems (Older Models)
The timer is the dial you turn to select cycles. Inside sits a small motor that advances contacts through the cycle sequence.
These motors fail over time. The contacts also become corroded.
Listen for the timer motor ticking during operation. If you don’t hear this sound, the timer motor has likely failed.
You can temporarily advance the cycle by manually turning the dial to the rinse position. This confirms timer replacement is necessary.
Electronic Control Board Issues (Newer Models)
Digital controls use solid-state components to manage cycles. These rarely fail partially.
If the rinse cycle is skipped, suspect incorrect cycle selection by the user. Check for sensor failures reporting incorrect information.
Look into water supply problems preventing rinse water entry. The control usually isn’t the problem if everything else works.
Water Supply and Distribution
The rinse cycle requires adequate water flow. If water doesn’t enter the tub during rinse, several components could be responsible.
Start by ruling out simple water supply problems.
Water Inlet Valve Testing
The valve has separate solenoids for different temperatures. If the cold water solenoid fails, cold water rinses won’t work.
Test both hot and cold solenoids with a multimeter. Replace the valve if either reads outside the 500-1500 ohm range.
Checking Water Pressure
Your home water pressure should be at least 20 psi for proper washer operation. Low pressure causes slow filling that may trigger timeout errors.
This causes the washer to skip the rinse and move to spin.
Turn on a nearby faucet while the washer attempts to rinse. If the faucet flow significantly decreases, you have a supply line problem.
This requires a plumber, not an appliance repair.
Detergent Dispenser Blockages
The rinse cycle pulls water through the detergent dispenser to flush any remaining soap. If the dispenser is clogged, rinse water may not properly reach the tub.
This is more common than you’d think.
Cleaning the Dispenser System
Remove the entire dispenser drawer (usually pulls straight out). Soak in hot water with white vinegar for 30 minutes.
Use an old toothbrush to scrub away residue. Flush the dispenser housing with hot water.
Check the small siphon tubes for clogs. Dry thoroughly before reinstalling.
Liquid fabric softener is particularly prone to creating gummy buildup. Consider using dryer sheets instead if you experience repeated dispenser problems.
Preventive Maintenance Tips
Regular maintenance prevents most problems and extends your washer’s lifespan. These machines can last well beyond the typical 10-14 year expectancy with proper care.
A few minutes of maintenance each month saves hundreds in repairs.
| Maintenance Task | Frequency | Impact |
|---|---|---|
| Clean drain pump filter | Every 3 months | Prevents drainage issues |
| Inspect hoses for wear | Every 6 months | Prevents floods |
| Run washer cleaning cycle | Monthly | Reduces odors and residue |
| Check for leaks | Monthly | Catches problems early |
| Level the washer | After moving | Prevents excessive vibration |
| Leave lid open between loads | Always | Prevents mildew growth |
Use the Right Detergent
HE washers require HE detergent. Regular detergent creates excessive suds that confuse sensors and strain pumps.
Follow the detergent manufacturer’s dosing instructions. More soap doesn’t mean cleaner clothes, it means more problems.
Don’t Overload the Washer
The tub should be filled loosely to about 3/4 capacity. Overloading strains the motor and prevents proper agitation.
It causes excessive wear on the transmission and suspension components. Your clothes won’t get clean either.
Address Small Leaks Immediately
That tiny drip from a hose connection will worsen over time. Tighten connections right away.
Replace worn hoses. Check valve seals at the first sign of moisture.
Keep the Washer Level
An unlevel washer vibrates excessively during spin cycles. This causes premature wear on shock absorbers, suspension springs, and the transmission.
Use a bubble level (View on Amazon) to verify the washer sits perfectly level side-to-side and front-to-back. Adjust the leveling legs as needed.
Frequently Asked Questions
Why is my Kenmore washer model 110 making loud noises during spin?
Loud banging, grinding, or scraping sounds typically indicate worn suspension components or a failing transmission. Foreign objects stuck between the inner and outer tubs also cause noise.
Check for coins, buttons, or underwire bras that may have escaped the inner basket. These metal items scrape against the outer tub during spinning.
If the tub moves excessively during spin or the noise sounds like metal grinding on metal, the transmission or drive components need professional inspection. Suspension rod deterioration also causes banging as the tub strikes the cabinet during high-speed spinning.
How long should a Kenmore washer model 110 last?
With proper maintenance, a Kenmore 110 series washer typically lasts 12-15 years. These models have a reputation for durability due to their simple mechanical design.
Factors affecting lifespan include usage frequency, water hardness, maintenance practices, and whether the machine is overloaded regularly. Washers in hard water areas experience more component failures due to scale buildup.
Regular cleaning, using appropriate detergent amounts, and addressing small problems before they escalate significantly extends operational life. Some well-maintained units run for 20 years or more.
Can I replace parts on my Kenmore washer model 110 myself?
Most Kenmore 110 repairs fall within the capability of homeowners with basic mechanical skills. You’ll need common tools like screwdrivers, pliers, and occasionally a socket set.
Straightforward replacements include lid switches, drive belts, drain pumps, inlet valves, and hoses. These repairs typically take 20 minutes to an hour.
More complex repairs involving the transmission, motor, or suspension system require advanced skills and specialty tools. Always unplug the washer and shut off water before attempting any repair.
If you’re uncomfortable with electrical testing or major disassembly, hire a professional technician. The repair cost is worth it for complex jobs.
What does it mean when my Kenmore washer model 110 shakes violently?
Violent shaking indicates load imbalance, worn suspension components, or an unlevel machine. Start by redistributing the load.
Heavy items like blankets or towels should be washed with similar weight items to maintain balance. Don’t wash a single heavy item alone.
Check that the washer sits level using a bubble level. Adjust the front leveling legs until perfect. The bubble should sit dead center in both directions.
Worn suspension rods or springs no longer dampen movement effectively. This allows the tub to bang against the cabinet. If leveling and load distribution don’t resolve the shaking, inspect suspension components for damage and replace worn parts.
How do I know if the motor on my Kenmore washer model 110 has failed?
Motor failure symptoms include complete failure to agitate or spin, humming without movement, strong burning smells, or tripped circuit breakers. The washer tries to start but can’t get going.
Test the motor by disconnecting it from the drive system and applying direct power. It should run smoothly without unusual noises.
Check for continuity between motor terminals using a multimeter. A failed motor will show infinite resistance or very low resistance indicating a short circuit.
Since motor replacement approaches the cost of a new washer, confirm the diagnosis before purchasing this expensive part. Make sure it’s not the motor coupling or belt first.
Why does my Kenmore washer model 110 smell musty?
Musty odors result from mold and mildew growth in the tub, pump, and hoses. This happens when moisture remains in the washer between uses.
Prevent odors by leaving the lid open after each wash cycle. This allows air circulation and complete drying.
Run a cleaning cycle monthly using washing machine cleaner or two cups of white vinegar. Wipe down the door seal and top of the basket after each use.
If the smell persists, check the drain pump and hoses for standing water or trapped debris that harbors bacteria. Sometimes a dead mouse or rat gets into the washer and dies, causing persistent odors.
What should I do if water leaks from my Kenmore washer model 110?
First, identify the leak source. Water pooling underneath could come from inlet hoses, the pump, tub seals, or internal hoses.
Tighten hose connections at the inlet valves and drain hose. Inspect hoses for cracks, bulges, or age-related deterioration.
Replace any suspect hoses. Water leaking during agitation suggests a worn tub seal or damaged basket.
Water appearing during fill points to inlet valve problems. For persistent leaks you can’t locate, call a technician.
Internal seal replacement requires significant disassembly. It’s not a beginner-level repair.
How often should I clean the drain pump filter?
Clean the drain pump filter every three months under normal use conditions. If you wash pet bedding, heavily soiled work clothes, or have family members with long hair, increase cleaning frequency to monthly.
A clogged filter restricts drainage and causes longer cycle times. It strains the pump motor unnecessarily.
Set a reminder on your phone to maintain this schedule. You’ll notice improved drainage performance and fewer error codes with regular filter maintenance.
This simple five-minute task prevents the majority of drainage-related service calls. It’s the easiest way to keep your washer running smoothly.
When to Call a Professional
While many Kenmore model 110 problems are DIY-friendly, some situations warrant professional help. Know your limits before you get in over your head.
Call a technician if you’re uncomfortable working with electrical components. Mistakes with electricity can be fatal.
The transmission makes grinding noises or fails to engage. This requires special tools and expertise to diagnose properly.
Water leaks from internal seals requiring major disassembly. You’ll spend more time than it’s worth without experience.
The control board needs replacement and you want warranty coverage. Technicians can warranty their work, you can’t.
Multiple systems fail simultaneously suggesting a complex electrical problem. This indicates damage from power surges or water intrusion.
You’ve attempted repairs without success. Sometimes you need a fresh set of eyes and proper diagnostic equipment.
Professional appliance technicians have specialized tools and diagnostic equipment. They also provide warranties on their work, offering peace of mind that DIY repairs don’t include.
Request quotes from multiple service providers and ask about their experience specifically with Kenmore 110 models. A technician familiar with these washers will diagnose and repair problems more efficiently.
Making the Most of Your Kenmore 110
Your Kenmore washer model 110 represents reliable, straightforward technology that’s built to last. Most operational problems stem from wear on relatively inexpensive components.
You can replace these yourself with basic tools and clear instructions. By systematically working through potential causes and understanding error codes, you’ll keep this dependable machine running for years.
The key is addressing small issues before they cascade into major failures. Stay on top of routine cleaning. Don’t overwork the machine with excessive loads or harsh detergents.
With this guide in hand, you have the knowledge to diagnose and fix the most common problems. You’ll save hundreds of dollars in service calls.
You’ll also gain confidence in your ability to maintain essential household appliances. That’s worth more than the money saved.