Your Whirlpool microwave just stopped working. Maybe it went completely dead, or the display shows cryptic error messages, or some features work while others don’t. Whatever the problem, you’re stuck without a working microwave and need answers fast.
Most Whirlpool microwave problems come from blown fuses, tripped breakers, defective door switches, failed control boards, or thermal protection activation.
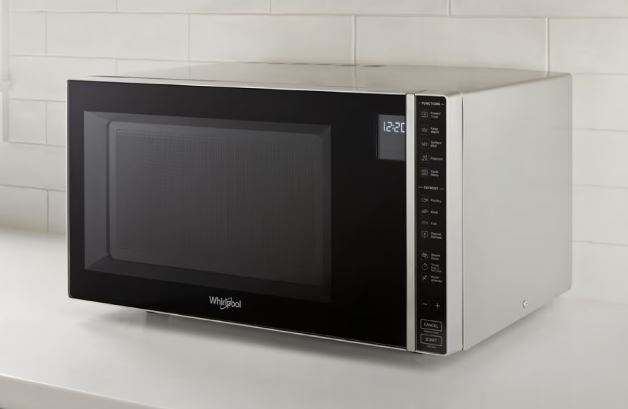
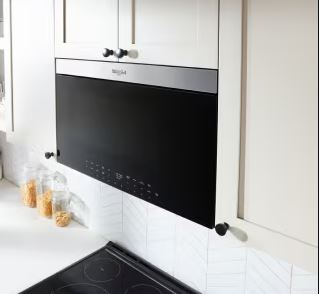
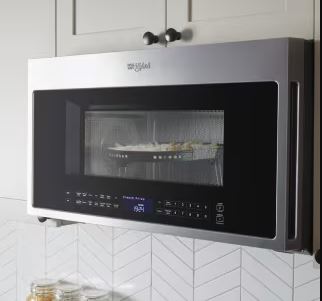
Here’s what you need to know: Whirlpool makes different microwave types like countertop, over-the-range, built-in, and combination models. Each type has its own failure patterns, which means the fix for a countertop model might be different from what works on a built-in unit.
This troubleshooting guide covers every common Whirlpool microwave failure across all installation types. I’ll walk you through complete power failures, partial breakdowns affecting displays or lights, and model-specific issues that plague certain series.
Quick Diagnosis for a Whirlpool Microwave Not Working
| Problem | Power? | Display? | Common Models | What’s Wrong | Repair Cost |
|---|---|---|---|---|---|
| Completely dead | No | No | All types | Blown fuse/tripped breaker | $0-$150 |
| Display only | Yes | Yes | All types | Door switch/thermal fuse | $80-$180 |
| No display | Yes | No | Digital models | Display panel/ribbon cable | $100-$250 |
| “Open/close door” | Yes | Yes | All types | Door switch failure | $80-$180 |
| Works then stops | Yes | Yes | Built-in models | Thermal protection | $100-$280 |
| Start button dead | Yes | Yes | All types | Membrane switch wear | $100-$220 |
| Light not working | Yes | Yes | All types | Bulb/socket failure | $15-$80 |
| Fan not running | Yes | Yes | OTR models | Fan motor failure | $80-$180 |
| After power outage | Varies | Varies | All types | Memory corruption | $0-$350 |
Understanding Whirlpool Microwave Models
Whirlpool Corporation makes microwaves under multiple brands including Whirlpool, Maytag, KitchenAid, and Amana. They share components, so troubleshooting principles apply across all these brands.
Installation type dramatically affects what goes wrong. Built-in models overheat more often because they’re trapped in cabinets. Over-the-range units get moisture damage from stovetop steam, while countertop models suffer mechanical stress from being moved around.
Model numbers tell you what type you have. Numbers starting with “WM” are standard microwaves, “WMH” means over-the-range, “WMC” indicates countertop, and “UMV” shows under-cabinet mounting.
Digital control systems differ from old mechanical dial models where digital models have more sophisticated failures but give you better diagnostic information through error codes. Combination microwave-convection units have separate control systems, so one function might fail while the other keeps working.
When Your Whirlpool Microwave Has Power But Won’t Work
Power reaching your microwave without it actually working indicates specific component or safety system failures. This symptom narrows down the diagnosis significantly because you know power isn’t the issue.
The display lights up, the clock keeps time, and touchpad buttons might beep when pressed. Everything looks normal except nothing actually heats your food.
Systematic Diagnosis Steps
Test every control button and document which ones produce beeps or display changes. If all buttons are unresponsive, control lock is probably active, so look for a small lock icon on the display.
If buttons respond but nothing starts, your door interlock system has failed where safety switches prevent operation despite the controls working fine. Check for error messages or codes because these alphanumeric displays point to specific component failures.
Listen for any mechanical sounds when you try to use it. Clicking relays or humming transformers give you diagnostic clues about what’s happening inside.
Thermal Protection System Problems
Thermal fuses protect against fire by permanently opening when temperatures exceed 165°C. Once blown, you have to replace them because they don’t reset like circuit breakers.
Whirlpool places multiple thermal fuses throughout their microwaves for magnetron protection, cavity protection, and control board protection. Testing requires a multimeter to check continuity, and blown fuses show infinite resistance across their terminals.
Built-in and over-the-range models blow thermal fuses more frequently because cabinet enclosures and proximity to cooking surfaces increase thermal stress. Always identify why the fuse blew before replacing it, because inadequate ventilation, blocked exhaust, or failed cooling fans cause the protection to activate.
Door Interlock Safety System
Three door switches work together providing triple-redundant safety where primary, secondary, and monitor switches must all indicate closed position. When any switch fails or door alignment prevents proper engagement, your microwave has power but won’t operate, and this is actually correct safety system function.
Listen for three distinct clicks when closing the door firmly, because missing clicks indicate switch or alignment problems. Door switches fail from mechanical wear after 50,000 to 100,000 open-close cycles, so expect failures around years 5 to 8 of regular use.
Switch replacement costs $60 to $150 professionally, and replacing all three at once prevents repeat service calls.
Control Board Partial Failures
Control boards can fail in sections where display circuits may function while cooking circuit controls don’t. Power supply regulators on control boards provide different voltages to various systems, and regulator failure creates selective functionality loss.
Micro-cracks in circuit board solder joints interrupt signal pathways, and these invisible defects require professional diagnostic equipment to find. Control board replacement costs $200 to $380 for most Whirlpool models, making this repair economically sensible for built-in and premium units.
Some electronics specialists repair board-level defects through component replacement costing $120 to $200 when feasible.
When Your Whirlpool Microwave Display Isn’t Working
Display failures create complete or partial information loss, and your microwave may operate normally or remain completely non-functional depending on what failed. Completely dark displays indicate power supply failures, ribbon cable disconnection, or failed display panels, though the microwave might still operate blindly.
Display Component Architecture
Whirlpool uses LED or LCD displays depending on model year and series. LED displays are more reliable but consume more power than LCDs.
Display panels connect to control boards through flat ribbon cables, and these cables can disconnect, break conductors, or corrode at connection points. Power supply sections on control boards provide dedicated voltage for displays that fail independently from cooking control circuits.
Backlight systems illuminate LCD displays where LED backlight failures create dim or completely dark displays despite functioning LCD elements. Display failures rarely affect cooking capability, so manual operation may be possible even with completely dark displays.
Troubleshooting Dark Displays
Verify your microwave has power by testing the outlet with another appliance to confirm power delivery. Listen for sounds indicating operation like cooling fans, turntable motors, or transformers humming, because this proves the microwave attempts to function.
Shine a bright flashlight at the display where very dim images visible only under direct light indicate backlight failure. Press buttons and listen for beeps because audible feedback proves the control board functions despite display failure.
Check for blown fuses in your electrical panel since partial power delivery can affect displays while other systems work.
Display Ribbon Cable Repair
Remove the control panel cover following manufacturer disassembly procedures, which typically requires removing 4 to 8 screws. Locate the ribbon cable connecting display to control board since these flat cables have connectors at each end.
Carefully disconnect and reconnect the ribbon cable, ensuring proper seating in connectors with audible clicks. Inspect the ribbon cable for obvious damage where creases, tears, or discoloration indicate replacement necessity.
Clean ribbon cable contacts with 90% isopropyl alcohol because oxidation prevents proper electrical contact.
Display Panel Replacement
Replacement display panels cost $80 to $180 depending on model complexity, and LED displays cost more than LCD panels. Installation requires careful ribbon cable routing because incorrect paths create stress causing premature cable failure.
Some displays integrate with touchpad assemblies where complete replacement includes all control buttons. Test display function before final reassembly because discovering problems after panel reinstallation doubles your disassembly time.
Professional display replacement costs $150 to $280 total, which includes diagnosis, parts, and installation labor.
When You Get “Open/Close Door” Error Message on Whirlpool Microwave
This specific door error message means the control board detects door interlock system problems where the safety system prevents operation. The message persists even with firmly closed doors because switches report open status or alignment prevents proper engagement.
Door Switch Testing Procedures
Remove the control panel to access the three door switches that mount near the latch mechanism. Test each switch individually with a multimeter in continuity mode by pressing switches manually while measuring resistance.
Functional switches show zero ohms when closed and infinite ohms when open, so any intermediate readings indicate failing switches. Replace all three switches simultaneously because one failed switch often damages adjacent switches through electrical stress.
Switch replacement prevents this specific error in 90% of cases, with the remaining 10% involving wiring or control board issues.
Door Latch Alignment Correction
Worn hinges cause door sag that prevents proper latch engagement where switches don’t fully close despite the door appearing shut. Visual inspection reveals misalignment where the latch hook doesn’t enter the strike plate squarely or completely.
Hinge adjustment or replacement costs $40 to $80, and this preventive repair avoids expensive switch replacement down the road. Some strike plate repositioning resolves alignment issues by loosening mounting screws and adjusting position slightly.
Verify proper alignment by observing the latch-to-strike engagement where the hook should enter centered and fully.
Wiring and Connection Verification
Trace wiring from door switches to the control board looking for obvious breaks, corrosion, or loose connections. Wire harness connectors sometimes work loose from vibration, and firmly reseating connectors resolves intermittent issues.
Corroded wire terminals require cleaning with electrical contact cleaner, while severely damaged connectors need replacement. Professional wiring diagnosis uses continuity testing through entire circuits to identify breaks invisible to visual inspection.
Wiring repairs cost $75 to $150 professionally, which includes diagnosis and connection restoration.
Whirlpool Microwave Not Working After a Power Outage
Power outages don’t physically damage microwaves but create software corruption and require system resets. Surges during power restoration cause actual component damage that’s more serious.
Many Whirlpool models won’t operate until you reset the clock after outages, and this intentional design ensures you’re aware that power was interrupted.
Immediate Post-Outage Actions
Unplug your microwave for at least 5 minutes to clear control board volatile memory that got corrupted during the outage. Check the circuit breaker in your electrical panel because outage restoration surges sometimes trip breakers.
Inspect the outlet by testing it with another appliance since outlet damage from surges prevents microwave operation. Look for error codes or unusual display messages that indicate specific problems caused by the outage.
Verify the clock shows correct time or a flashing display because many models require clock setting before operation.
Clock Reset Requirements
Press “Clock” or “Options” depending on your model type, and the hours digit will begin flashing for input. Enter current time using number keys, then press “Clock” again to advance to minutes entry.
Some models require AM/PM selection where you press “1” for AM or “2” for PM, then finalize with “Clock.” On models without dedicated clock buttons, press “0” to access settings and navigate to the clock option.
After setting the clock, test basic operation by trying a 10-second cooking cycle to verify functionality.
Surge Damage Assessment
Power restoration surges blow fuses, damage control boards, or destroy high-voltage components where professional diagnosis identifies surge damage. Blown line fuses are the most common surge damage, and these $3 to $8 parts protect expensive components.
Control board surge damage shows up as complete non-operation or erratic behavior where board replacement costs $200 to $380. Magnetron surge damage is rare but catastrophic with replacement costing $200 to $350 including labor.
Always use surge protectors (View on Amazon) on microwaves because quality surge protection costs $30 to $60 and prevents hundreds in repair costs.
When Professional Service Is Required
If standard resets don’t restore operation after outages, component damage exists and professional diagnosis identifies specific failures. Multiple component failures from surges may exceed economical repair costs, so compare repair estimates against replacement.
Built-in and over-the-range models justify higher repair investments because installation labor makes replacement substantially more expensive. Document outage circumstances when requesting warranty service since some manufacturers cover surge damage under specific conditions.
When Whirlpool Microwave Start Button Isn’t Working
Start button failure ranks among the most common touchpad issues because this button experiences maximum mechanical stress from concentrated usage. Other buttons working while only start fails isolates the problem to that specific membrane switch or circuit trace.
Membrane Switch Degradation
Touchpad membrane switches use conductive coatings that wear away from repeated pressure, and start buttons fail first due to highest usage. Testing requires accessing the touchpad back side to measure continuity while pressing the start button area.
Worn membranes show increased resistance rather than zero ohms, and eventually they stop conducting entirely. Cleaning membrane contacts with 90% isopropyl alcohol temporarily restores function, though this solution lasts only weeks to months.
Complete touchpad replacement is the permanent fix where Whirlpool touchpad assemblies cost $100 to $220 depending on model.
Alternative Start Methods
Some Whirlpool models allow starting using number pad shortcuts where pressing “1” starts cooking for 1 minute and “2” for 2 minutes automatically. This workaround provides temporary functionality while awaiting touchpad replacement, though not all models support this feature.
The “Add 30 Seconds” button starts cooking in 30-second increments, which bypasses the start button on models with this feature. Quick Touch settings start immediately when cooking time is entered, so check your model’s manual for this option.
These workarounds prove the start button specifically has failed, so use this information to prioritize touchpad replacement.
Touchpad Replacement Process
Order touchpad assemblies using complete model numbers from the service panel because generic touchpads rarely fit properly. Replacement requires removing the control panel cover, so document screw locations with photographs.
Disconnect the ribbon cable carefully by lifting the locking tab to prevent connector damage. Install the new touchpad matching original orientation exactly because misalignment causes buttons to register incorrect functions.
Test all buttons before reassembly since discovering defective parts after complete reinstallation is frustrating.
When Whirlpool Microwave Light Bulb Isn’t Working
Interior light failures are among the most straightforward repairs but require correct bulb types and proper installation procedures. The cavity light should illuminate when opening the door and during cooking, so darkness indicates bulb, socket, or switch failure.
Light Bulb Replacement Guide
Locate the bulb cover inside the cooking cavity where most Whirlpool models position this on the right side or ceiling. Remove the cover by unscrewing or unsnapping it since designs vary with some twisting while others require gentle prying.
The bulb is typically a 40-watt appliance bulb with E17 intermediate base, and you should never exceed specified wattage ratings. Replace with microwave-rated bulbs only because standard household bulbs can’t withstand microwave energy exposure and shatter.
Reinstall the cover securely since improper installation allows microwave energy escape through the opening.
Light Socket Failures
If new bulbs don’t work, the socket has likely failed where electrical contacts corrode or lose spring tension. Testing requires measuring socket voltage with a multimeter for an expected reading of 120 volts AC.
Zero voltage indicates switch or wiring problems upstream, while normal voltage with non-functioning bulbs confirms socket failure. Socket replacement costs $25 to $45 for parts where access requires removing interior panels.
Some technicians successfully repair sockets by cleaning contacts and restoring tension as a temporary fix lasting 6 to 18 months.
Door-Activated Light Switch
A microswitch detects door position and controls the light, and this switch fails from repeated mechanical cycling. Locate the switch near the door latch mechanism and press it manually while observing the light.
If the light illuminates when pressed manually, the switch works and door misalignment prevents automatic activation. If manual pressing doesn’t illuminate the light, the switch has failed and replacement switches cost $8 to $15.
Switch replacement requires accessing the control area as a moderately complex repair taking 30 to 45 minutes.
Cost Analysis for Light Repairs
| Component | DIY Parts | Professional Total | Difficulty | Time |
|---|---|---|---|---|
| Bulb only | $5-$12 | $40-$80 | Very easy | 5 min |
| Socket | $25-$45 | $80-$140 | Moderate | 30-45 min |
| Door switch | $8-$15 | $60-$120 | Moderate | 30-45 min |
| Wiring | $5-$20 | $75-$150 | Moderate-Hard | 45-90 min |
When Whirlpool Microwave Fan Isn’t Working
Fan failures in over-the-range models affect both cooling and ventilation functions where these systems protect components and exhaust cooking fumes. Cooling fans prevent component overheating while ventilation fans remove steam and odors from stovetops.
Cooling Fan Diagnosis
The cooling fan should operate during microwave use and continue briefly after cooking completes, so silence indicates fan motor failure. Listen carefully near ventilation grilles because blocked fans make labored sounds before failing completely.
Some Whirlpool models won’t start cooking if cooling fan failures are detected, and this safety feature prevents thermal damage. Fan motor replacement costs $60 to $120 for parts with professional installation adding $60 to $100 in labor.
Blocked fan blades sometimes mimic motor failure, so remove covers and check for debris before replacing motors.
Ventilation Fan Issues
Over-the-range ventilation fans have separate controls from microwave functions and operate independently. Ventilation fan failures don’t prevent microwave operation, though grease buildup increases from lost exhaust capability.
Control switches for ventilation fans fail from frequent use where replacement switches cost $15 to $30. Fan motor bearings seize from grease contamination, so regular cleaning extends motor life significantly.
Ventilation fan replacement costs $80 to $180 total, which includes motor, installation, and testing.
Fan Maintenance Requirements
Clean grease filters monthly on over-the-range models because clogged filters force motors to work harder causing premature failure. Charcoal filters require replacement every 6 months in recirculating mode where clogged charcoal filters block airflow completely.
Verify external vent ducting isn’t crushed or disconnected since proper ductwork is essential for fan effectiveness. Lubricate fan motor bearings annually if accessible because a drop of light machine oil extends motor life.
Professional fan service during annual maintenance prevents unexpected failures where technicians identify developing issues early.
Whirlpool Over-the-Range Microwave Problems
Over-the-range models face unique challenges from stovetop proximity where moisture, heat, and grease exposure accelerate component failures. These units integrate microwave, ventilation, and lighting functions, so failures may affect one system while others work normally.
OTR-Specific Failure Patterns
Moisture from stovetop cooking penetrates control panels, causing touchpad failures and control board corrosion. Grease accumulation on cooling components reduces heat dissipation where thermal protection systems activate more frequently.
Heavy cabinet mounting creates installation stress where door alignment issues develop progressively over years. Ventilation system integration means ductwork problems affect microwave performance, and blocked ducts cause thermal shutdowns.
External venting provides better component longevity than recirculating mode because humidity removal prevents internal moisture damage.
Installation-Related Issues
Improper mounting causes progressive door sag where weight distribution across mounting brackets is critical. Electrical connections behind OTR units sometimes loosen from installation stress causing intermittent power.
Ventilation ductwork must follow manufacturer specifications because undersized or excessively long ducts reduce effectiveness. Surrounding cabinet clearances affect thermal management where insufficient clearance causes overheating.
Professional installation assessment verifies mounting before component troubleshooting since fixing installation issues prevents recurring failures.
Model-Specific OTR Concerns
The WMH31017HZ series experiences door switch failures around year 6 or 7 because heavy door weight stresses switch mechanisms. WMH53521HZ models have sensor cooking integration where sensor failures prevent operation entirely requiring replacement or bypass.
WMH76719C combination units have dual control systems where microwave or convection may fail independently. Low-profile models in the WML75011H series have compact designs creating thermal challenges where ventilation is critical.
Extended warranties make sense for OTR models because installation complexity and costs justify repair over replacement.
Combination Whirlpool Microwave-Oven Problems
Combination microwave-convection units integrate separate heating systems where failures may affect one function while leaving the other operational. These sophisticated appliances have complex control systems, so troubleshooting requires understanding dual-mode operation.
Combination Unit Architecture
Separate heating elements serve microwave and convection functions where the magnetron generates microwaves while resistance elements provide convection heat. Control boards manage both systems but use independent control circuits, so one circuit can fail while the other functions.
Temperature sensors monitor each heating mode where sensor failures disable specific functions as safety measures. Combination cooking modes use both systems simultaneously, so failures affecting either system prevent combination operation.
These units cost $800 to $2,000 making repairs economically sensible, and installation complexity adds to replacement costs.
Diagnosing Dual-System Failures
Test each cooking mode independently by trying microwave-only, convection-only, and combination settings. If only one mode fails, the issue is system-specific, which narrows diagnosis to components serving that function.
If both modes fail, common components like door switches or control boards are suspect since these affect all functions. Error codes on combination units indicate which system has problems, so document exact codes for technician reference.
Professional diagnosis is recommended for combination units because system complexity makes DIY troubleshooting challenging.
Common Combination Unit Issues
Convection heating elements fail from thermal stress where replacement costs $100 to $180 for parts. Temperature sensors monitoring convection operation fail frequently, and these $25 to $50 parts are critical for safe operation.
Control boards on combination units cost $320 to $450 because added convection control complexity increases expense. Door seals experience more stress from dual heating where damaged seals affect both microwave and convection efficiency.
Fan systems serve both heating modes, so single fan failure affects overall performance.
Built-In Model Problems
Built-in models face unique challenges from cabinet integration where ventilation restrictions and permanent installation create specific failure patterns. These premium units justify higher repair investments because replacement involves substantial additional costs.
Built-In Installation Impact
Cabinet enclosures trap heat more effectively than freestanding installations where thermal fuses blow more frequently. Ventilation depends entirely on designed airflow paths, and blocked vents cause rapid component degradation.
Permanent mounting means door alignment is fixed at installation, so poor initial alignment causes lifetime problems. Accessing built-in units for service is more complex where technicians charge premium rates for built-in repairs.
Surrounding cabinetry sometimes blocks required clearances, and installation errors create operational problems.
Ventilation Requirements
Verify minimum clearance specifications are maintained because even 1/4 inch less than specified affects cooling dramatically. Check that cabinet vents align with microwave ventilation openings since misalignment creates dead air pockets.
Annual inspection should verify ventilation paths remain clear because remodeling sometimes blocks original designs. Infrared thermometer testing reveals hot spots where surface temperatures above 140°F indicate inadequate airflow.
Improving ventilation prevents thermal protection activation, so address airflow before replacing blown thermal fuses.
Trim Kit Considerations
Trim kits create finished appearances but affect airflow where improper installation blocks critical ventilation. Use only manufacturer-specified trim kits because aftermarket trims may not maintain proper clearances.
Installation instructions specify exact mounting positions, and deviations compromise ventilation compatibility. Some installers incorrectly seal trim kit gaps with caulk, though these gaps are intentional ventilation paths.
Custom trim work must respect ventilation requirements because aesthetic choices blocking airflow create expensive failures.
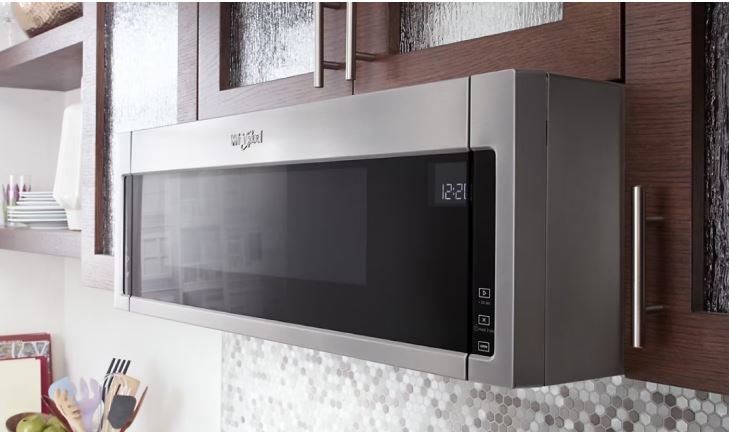
Whirlpool Low-Profile Microwave Problems
Low-profile over-the-range models in the WML series have compact designs creating unique thermal management challenges. These space-saving units fit where standard OTR models don’t, but reduced internal volume concentrates heat.
Low-Profile Design Constraints
Compact dimensions limit cooling component size where smaller fans and reduced airflow create thermal stress. Component density is higher in low-profile models because less internal space means heat concentrates.
Ventilation systems must work harder despite size constraints where fan motors experience greater workload. Thermal protection activates more frequently on low-profile models, and this is normal given design constraints.
Extended operation in hot environments exceeds design parameters, so these units need more cooling between uses.
Low-Profile Specific Issues
Thermal fuse failures are more common because the compact design creates higher operating temperatures. Cooling fan motors fail earlier from continuous high-load operation, so expect replacement around year 4 or 5.
Control boards overheat from proximity to heating components where board failures increase compared to standard models. Door switches experience accelerated wear because compact design creates different mechanical stress patterns.
These models require meticulous ventilation maintenance, so clean filters twice as frequently as standard OTR units.
Maximizing Low-Profile Longevity
Use ventilation fans during and after cooking to remove stovetop heat affecting the microwave. Avoid continuous heavy usage by allowing cooling periods between cooking sessions.
Clean grease filters every 2 to 3 weeks because low-profile models are more sensitive to filter contamination. Ensure surrounding cabinets don’t block ventilation since the compact design has no margin for ventilation errors.
Consider external venting upgrades because removing moisture and heat dramatically extends component life.
Universal Troubleshooting Steps for Whirlpool Microwaves
This troubleshooting approach applies to all Whirlpool microwave types regardless of installation.
Step-by-Step Diagnosis
Verify power at the outlet by testing with another appliance to rule out electrical supply issues first. Check circuit breaker status in your electrical panel by resetting breakers fully OFF then ON even if they appear normal.
Look for error codes or messages on the display, and document exact alphanumerics for technician reference. Test control lock status by checking for lock icons where pressing and holding “Stop/Cancel” for 3 seconds unlocks it.
Listen for three distinct clicks when closing the door because missing clicks indicate door switch or alignment problems. Perform a power cycle reset by unplugging for 5 minutes to clear software glitches and control board confusion.
Test individual functions systematically by trying turntable, light, fan, and heating independently. Document which functions work and which don’t because this pattern guides diagnosis toward specific components.
Preventive Maintenance Schedule
| Frequency | Task | Purpose | Time |
|---|---|---|---|
| Weekly | Clean interior | Prevent arcing and component damage | 5 min |
| Monthly | Clean grease filters (OTR) | Maintain cooling efficiency | 10 min |
| Monthly | Test door alignment | Catch developing switch problems | 2 min |
| Quarterly | Clean exterior vents | Ensure thermal management | 15 min |
| Semi-annually | Replace charcoal filter (OTR) | Maintain ventilation | 10 min |
| Annually | Professional inspection | Identify developing issues | 1 hour |
Common Questions
Why is my Whirlpool microwave not working but has power?
Whirlpool microwaves with power but no operation typically have blown thermal fuses, defective door switches, or activated control lock. Check for a lock icon on the display and press and hold “Stop/Cancel” for 3 seconds to unlock. Listen for three clicks when closing the door because missing clicks indicate door switch problems costing $80 to $180 to repair.
How do I fix my Whirlpool microwave display that’s not working?
Dark displays indicate power supply failures, disconnected ribbon cables, or failed display panels. Shine a flashlight at the display where very dim images suggest backlight failure. Reseat the ribbon cable connecting display to control board by removing the control panel. Professional display replacement costs $150 to $280 including parts and labor.
What does “open close door” mean on my Whirlpool microwave?
This message indicates door interlock problems where door switches report open status despite the door being closed. Causes include failed switches, misaligned latches, or wiring faults. Open and close the door firmly ten times, and if unsuccessful, door switch replacement costs $80 to $180 with all three switches replaced simultaneously.
Why won’t my Whirlpool microwave work after a power outage?
Power outages corrupt control board memory and reset clocks. Unplug for 5 minutes to clear corrupted memory, then reset the clock because many models won’t operate until the clock is set. Surge damage from power restoration can blow fuses or damage control boards costing $200 to $380 to replace.
How much does it cost to repair a Whirlpool microwave?
Repair costs range from $0 for control lock deactivation to $600 for multiple component failures on built-in units. Common repairs include door switches at $80 to $180, thermal fuses at $90 to $180, control boards at $200 to $380, touchpads at $100 to $220, and magnetrons at $250 to $400. Built-in models add $50 to $100 due to access difficulty, so always try free resets first.
Which Whirlpool microwave problems can I fix myself?
Safe DIY repairs include bulb replacement at $5 to $12, control lock deactivation for free, power cycle resets for free, and door alignment checks for free. Moderately skilled DIYers can replace door switches and touchpads. Never attempt magnetron, capacitor, or high-voltage component work because these require professional service due to lethal voltage hazards.
Bottom Line
Whirlpool microwave failures range from simple control lock confusion to complex component failures requiring professional service. Understanding your specific model type helps guide troubleshooting toward installation-specific issues, whether you have an over-the-range, built-in, combination, or low-profile model.
Most problems stem from door switches, thermal protection, control boards, or component wear that systematic diagnosis quickly identifies. Installation type dramatically affects both failure patterns and repair economics where built-in and over-the-range models justify higher repair investments due to installation complexity, while countertop units require careful cost-benefit analysis.
With proper maintenance addressing ventilation, cleaning, and door alignment, Whirlpool microwaves deliver years of reliable service across all installation types and model configurations.