Your KitchenAid microwave sits completely unresponsive, partially functional, or behaves erratically—and you’re left wondering what went wrong with your premium appliance. KitchenAid microwaves represent significant investments in kitchen functionality and aesthetic design, making any malfunction particularly frustrating.
KitchenAid microwaves stop working due to blown thermal fuses, defective door switches, tripped circuit breakers, failed control boards, magnetron burnout, or simple control lock activation. Built-in models experience additional installation-related failures from inadequate ventilation, while electrical issues affect all types. Proper diagnosis distinguishes between minor resets and major component replacement needs.
From complete power failures to specific component breakdowns like non-working lights or unresponsive start buttons, these home appliances require smart troubleshooting approaches. This troubleshooting guide addresses every KitchenAid microwave failure mode, provides model-specific reset procedures, and delivers proven solutions that restore your appliance to full operation.
KitchenAid Microwave Malfunction Quick Reference
| Failure Type | Visible Symptoms | Most Likely Cause | Immediate Test | Repair Cost |
| Completely dead | No lights, no display | Blown fuse or breaker | Check outlet with another device | $0-$150 |
| Display works, won’t start | Clock shows, no operation | Door switch or thermal fuse | Listen for door clicks | $80-$180 |
| No heating only | Everything runs, food cold | Magnetron failure | Heating test with water | $250-$400 |
| Interior light out | Light doesn’t illuminate | Bulb or socket failure | Visual bulb inspection | $15-$80 |
| Start button dead | Other buttons work | Button membrane failure | Test adjacent buttons | $120-$250 |
| Random shutdowns | Works then stops | Thermal protection active | Ventilation inspection | $100-$280 |
| Error codes displayed | Specific alphanumeric codes | Various component failures | Document exact code | Varies widely |
Why Is My KitchenAid Microwave Not Working?
KitchenAid microwaves incorporate premium components designed for longevity, but multiple failure points exist throughout these complex appliances.
Electrical power must reach the microwave through properly functioning outlets, circuit breakers, and internal fuses. Any interruption in this chain prevents operation entirely.
Safety interlocks using door switches prevent operation with improperly closed doors. These mechanical components wear over time and fail predictably.
Control systems manage all microwave functions through sophisticated circuit boards. Software glitches, power surges, and component aging cause various control failures.
High-voltage cooking systems include magnetrons, capacitors, and diodes that generate heat. These components endure extreme conditions and eventually fail.
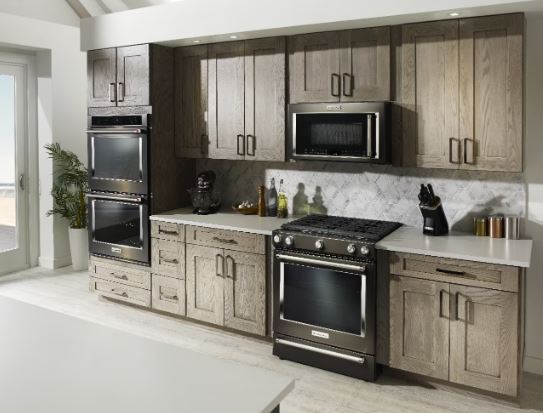
Understanding KitchenAid Microwave’s Architecture
KitchenAid microwaves share Whirlpool Corporation’s engineering platform but incorporate premium materials and extended warranty coverage.
The stainless steel construction resists corrosion better than painted alternatives. However, heavier doors stress interlock switches more aggressively.
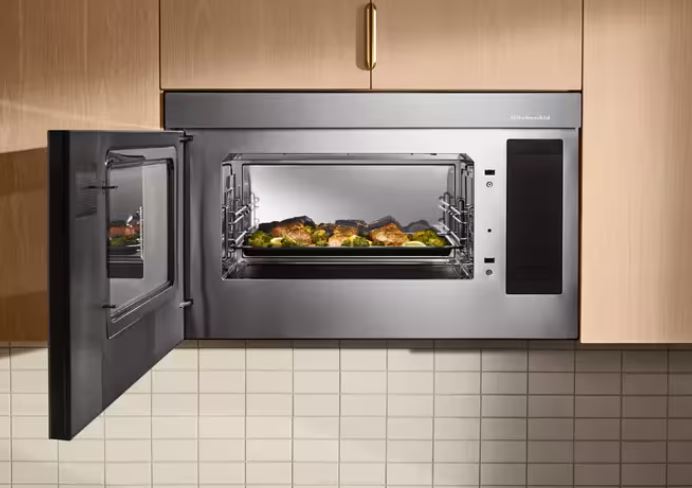
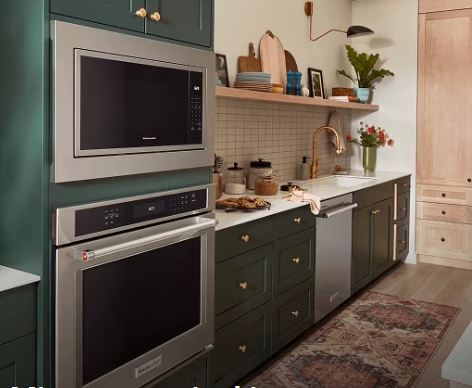
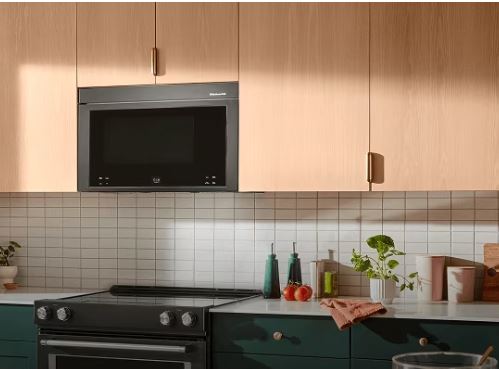
Built-in KitchenAid models integrate with surrounding cabinetry. This installation style affects thermal management and accessibility for repairs.
Convection combination units add complexity through dual heating systems. Separate control circuits for microwave and convection functions increase potential failure points.
Premium features like sensor cooking and custom programming require advanced control boards. These sophisticated components cost significantly more to replace.
14 Reasons Your KitchenAid Microwave Is Not Working
Below are 14 reasons KitchenAid microwaves fail and how to go about each case:
1. Tripped Circuit Breaker or Blown Household Fuse
The electrical panel breaker protecting your microwave circuit may have tripped. This is especially common after power outages or electrical storms.
Check your home’s electrical panel for tripped breakers. They’ll be in a middle position between ON and OFF.
Reset the breaker by switching it fully OFF then back ON. Simply pushing toward ON without this full cycle won’t restore power.
Repeatedly tripping breakers indicate overloaded circuits or microwave electrical faults. An electrician should investigate recurring trips.
Dedicated 20-amp circuits are required for most KitchenAid microwaves. Shared circuits with other appliances cause nuisance tripping.
2. Blown Internal Line Fuse
KitchenAid microwaves contain internal line fuses protecting against power surges. These glass tube or ceramic fuses blow to prevent component damage.
The line fuse is located near the power cord connection. Access requires removing the outer cabinet.
Testing requires a multimeter set (View on Amazon) to continuity mode. Blown fuses show infinite resistance (no beep).
Replacement fuses cost $3-$8 at hardware stores. Match amperage and voltage ratings exactly to original specifications.
Always identify why the fuse blew before replacement. Installing new fuses without fixing underlying problems wastes time and money.
3. Defective Door Interlock Switch Assembly
Three door switches work as safety interlocks in KitchenAid microwaves. All three must engage before cooking functions activate.
The primary switch enables power to the control circuit. The secondary switch provides redundant safety. The monitor switch detects failures.
Door switches fail from mechanical wear after thousands of open-close cycles. Stainless steel doors on KitchenAid models accelerate this wear.
Listen for three distinct clicks when closing the door firmly. Missing or weak clicks indicate switch problems.
Switch replacement costs $40-$80 for parts. Professional installation adds $60-$120 in labor charges.
4. Thermal Fuse Activation
Thermal fuses protect against fire hazards by permanently opening when temperatures exceed safe limits. They’re one-time devices requiring replacement.
KitchenAid places thermal fuses near magnetrons and exhaust pathways. Overheating from blocked ventilation triggers these safety devices.
Built-in models blow thermal fuses more frequently than countertop units. Cabinet enclosures trap heat more effectively.
Testing requires multimeter continuity checks. Blown thermal fuses show infinite resistance across terminals.
Simply replacing thermal fuses without addressing root causes guarantees repeat failures. Improve ventilation before reassembly.
5. Failed Main Control Board
The main control board orchestrates all microwave functions. When it fails, symptoms range from complete non-operation to bizarre behavior patterns.
Power surges, lightning strikes, and component aging damage control boards. Visual inspection sometimes reveals burnt components or bulging capacitors.
Partial board failures allow some functions while disabling others. The display might work while cooking functions remain dead.
Control board replacement costs $280-$450 depending on model complexity. This repair justifies itself only on premium or built-in units.
Some electronics specialists offer component-level board repair. This service costs $120-$200 when successful but isn’t always possible.
6. Magnetron Complete Failure
The magnetron generates electromagnetic waves that heat food. When it fails completely, the microwave runs through cycles without producing any heat.
Magnetrons typically last 8-12 years with proper use. Running microwaves empty or power surges cause premature failure.
A working magnetron produces distinct low-frequency humming during operation. Complete silence during cooking cycles indicates magnetron failure.
Professional testing measures magnetron current draw and output. DIY diagnosis is limited to observing complete lack of heating.
Magnetron replacement costs $200-$350 including parts and labor. This repair makes economic sense for built-in KitchenAid installations.
7. High-Voltage Capacitor Failure
Capacitors store massive electrical charges powering the magnetron. Even after unplugging, they retain lethal voltage for extended periods.
Failed capacitors prevent magnetron operation despite all other systems functioning normally. The microwave runs but produces zero heat.
Loud humming or buzzing sounds indicate capacitor problems. These symptoms often precede complete failure by days or weeks.
Capacitor replacement requires professional service due to extreme safety hazards. Never attempt DIY capacitor work without specialized training.
Replacement costs $150-$280 including professional discharge procedures and installation.
8. Control Lock Feature Activated
This isn’t a failure—it’s a misunderstood feature. Control lock deliberately disables all buttons to prevent accidental operation.
Check the display for a lock icon. This small symbol is easily overlooked in the corner of the screen.
Press and hold “Cancel/Off” for 3 seconds on most KitchenAid models. This standard sequence unlocks controls.
Some models require different combinations. Consult your user manual for model-specific unlock procedures.
Control lock accounts for approximately 25% of “broken microwave” service calls. This free solution saves unnecessary repairs.
9. Loose or Damaged Power Cord Connection
The power cord connection at the microwave can loosen from vibration. Built-in models experience this more than countertop units.
Unplug and inspect the cord carefully. Look for signs of heat damage, fraying, or loose terminal connections.
Outlet receptacles wear out over time. Test the outlet with another appliance to verify it provides stable power.
Loose outlet connections cause intermittent operation. The microwave works sometimes but fails randomly.
An electrician can replace worn outlets for $75-$150. This simple fix prevents appliance damage from voltage fluctuations.
10. Cooling Fan Motor Failure
Cooling fans aren’t just for ventilation—they’re safety components. Some KitchenAid models won’t operate without confirmed fan operation.
Listen for fan noise when the microwave should be running. Complete silence except for turntable indicates fan failure.
Failed fan motors prevent startup as a thermal protection measure. The control system detects missing airflow signals.
Fan motor replacement costs $80-$150 including parts and labor. This moderately complex repair requires partial cabinet disassembly.
Blocked fan blades sometimes mimic motor failure. Remove covers and check for debris before replacing motors.
11. Turntable Motor Malfunction
If the turntable doesn’t rotate, many KitchenAid models refuse to start cooking cycles. This safety feature prevents uneven heating.
Test by manually spinning the turntable glass. It should rotate freely with slight resistance from the motor coupling.
The drive motor costs $30-$60 for replacement. The plastic coupling often fails before the motor itself.
Coupler replacement costs only $5-$15 for parts. This sacrificial component protects the motor from overload damage.
Both motor and coupler are easily accessible beneath the cooking cavity. DIY replacement is feasible with basic tools.
12. Oven Temperature Sensor Failure
KitchenAid convection combination models use temperature sensors managing both cooking modes. Sensor failures disable microwave operation entirely.
“E-41” error codes indicate oven sensor problems. These sensors affect microwave functions despite seeming unrelated to microwave cooking.
Temperature sensors cost $25-$50 for replacement parts. Professional installation adds $60-$100 in labor.
Disconnecting faulty sensors sometimes restores basic microwave function. You’ll lose convection capability but regain microwave operation.
Professional diagnosis identifies which sensors affect what functions. Multiple sensor failures require systematic component testing.
13. Software Corruption in Digital Controls
Modern KitchenAid microwaves run embedded software that occasionally corrupts. This creates unpredictable failure patterns.
Complete power cycling clears many software glitches. Unplug for 5 minutes minimum to discharge capacitors fully.
Factory reset procedures restore default programming. Access these functions through hidden button combinations.
Some control boards require firmware reflashing by authorized service centers. This specialized service costs $100-$150.
Software issues don’t indicate hardware failure. They’re frustrating but usually resolve without parts replacement.
14. Installation-Related Ventilation Blockage
Built-in KitchenAid models depend on proper cabinet ventilation. Blocked airflow causes thermal protection systems to shut down operation.
Verify minimum clearance specifications on all vented sides. Even 1/4 inch less than specified dramatically impacts cooling.
Cabinet doors blocking vents are common installation mistakes. Remodeling sometimes obstructs originally adequate ventilation.
Infrared thermometer testing reveals hot spots during operation. Surface temperatures exceeding 140°F indicate inadequate airflow.
Improving ventilation prevents thermal fuse and cutoff activation. This addresses symptoms rather than replacing blown fuses repeatedly.
Need to replace your KitchenAid microwave? Check out the finest microwaves on Amazon!
KitchenAid Microwave Reset Procedures
Proper reset techniques resolve many issues without service calls or parts replacement. Here are your options for resetting a KitchenAid microwave:
Standard Power Cycle Reset
Unplug the microwave completely from the wall outlet. Don’t rely on circuit breakers—physically disconnect the power cord.
Wait exactly 5 minutes to allow complete capacitor discharge. This clears volatile memory in the control board.
While unplugged, press and hold the Start button for 10 seconds. This drains residual power from control circuits.
Plug back in and observe the startup sequence. The display should illuminate and clock should flash or show 12:00.
Test all functions systematically. Document which features work to identify remaining problems if reset proves incomplete.
Factory Reset Through Control Panel
Access factory reset by pressing specific button combinations. Methods vary by model series and manufacturing year.
For KMHC319 and similar models, press “Stop/Clear” then “1-2-3” within 2 seconds. The display enters programming mode.
Navigate using number keys to find the reset option. Press “Start” to confirm factory reset initiation.
All custom settings erase including clock time and favorite programs. You’ll need to reprogram everything after reset.
Document your current settings before factory reset. Photograph the display showing cooking preferences for easy restoration.
Hard Reset for Unresponsive Units
When standard resets fail, perform a hard reset through extended power disconnection. Unplug for 30 minutes minimum.
While unplugged, trip the circuit breaker protecting the microwave circuit. This ensures complete power isolation.
Press the Start button repeatedly while power is disconnected. This helps discharge any remaining stored energy.
After 30 minutes, restore circuit breaker first, then plug in the microwave. This sequence ensures clean power restoration.
If hard reset doesn’t restore function, hardware failure exists requiring professional diagnosis.
Diagnostic Mode Reset
Enter diagnostic mode to reset error codes and test individual components. This advanced procedure helps identify specific failures.
Press “1” followed by “Start” within 2 seconds on most KitchenAid models. The display shows test pattern.
Error codes appear as alphanumeric combinations. Document these codes before proceeding with reset.
Press “Stop/Clear” to exit diagnostic mode. Some stored errors clear automatically upon exit.
Persistent error codes after diagnostic reset indicate actual hardware problems needing repair.
Control Lock Deactivation
The control lock isn’t a malfunction requiring reset—it’s a feature requiring deactivation through specific button sequences.
Press and hold “Cancel/Off” for 3 seconds on standard models. Watch for the lock icon to disappear from the display.
Built-in models sometimes use “Stop” plus “3” held simultaneously. Consult your manual for model-specific sequences.
If the lock icon persists after correct sequence, perform a power cycle reset first. Then retry the unlock procedure.
Control lock settings survive power outages. Don’t expect automatic unlocking after power restoration.
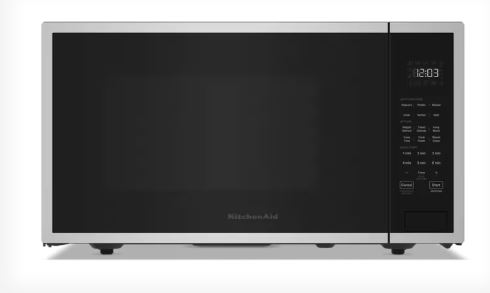
KitchenAid Microwave Light Not Working
Interior lights failing is one of the most common component issues in KitchenAid microwaves. This specific problem has distinct troubleshooting steps.
The interior cavity light should illuminate when opening the door and during operation. Darkness indicates bulb, socket, or switch failure.
Light Bulb Replacement Process
Locate the bulb cover inside the cooking cavity. Most KitchenAid models position this on the right side or ceiling.
Remove the cover by unscrewing or unsnapping it. Designs vary—some twist while others require gentle prying.
The bulb is typically a 40-watt appliance bulb with E17 intermediate base. Never exceed specified wattage ratings.
Replace with microwave-rated bulbs only. Standard household bulbs can’t withstand microwave energy exposure and shatter.
Reinstall the cover securely. Improper installation allows microwave energy to escape through the opening.
Light Socket Issues
If new bulbs don’t work, the socket has likely failed. Electrical contacts corrode or lose tension over time.
Testing requires removing the bulb and checking socket voltage with a multimeter. Expected reading is 120V AC.
Zero voltage indicates switch or wiring problems. Normal voltage with non-functioning bulb confirms socket failure.
Socket replacement costs $25-$45 for parts. Access requires removing interior panels in most models.
Some technicians successfully repair sockets by cleaning contacts and restoring spring tension. This temporary fix lasts 6-18 months.
Door-Activated Light Switch Failure
A small switch detects door position and controls the light. This microswitch fails from repeated mechanical cycling.
Locate the door switch near the latch mechanism. Press it manually while observing the light.
If the light illuminates when pressed manually, the switch works. Door misalignment prevents automatic activation.
If manual pressing doesn’t illuminate the light, the switch has failed. Replacement switches cost $8-$15.
Door switch replacement requires accessing the control area. This moderately complex repair takes 30-45 minutes.
Wiring Connection Problems
Loose or corroded wire connections prevent power from reaching the light socket. Vibration loosens terminal connections over time.
Remove interior panels to access light wiring. Look for obvious disconnections or burnt wire terminals.
Corroded connections require cleaning with electrical contact cleaner. Severely damaged connectors need replacement.
Reconnect loose wires firmly. Many connections use push-on terminals that simply press onto blade connectors.
Apply dielectric grease to connections during reassembly. This prevents future corrosion and ensures long-term reliability.
Cost Analysis for Light Repairs
| Issue | DIY Parts Cost | Professional Repair | Difficulty Level | Time Required |
| Bulb only | $5-$12 | $40-$80 | Very easy | 5 minutes |
| Socket replacement | $25-$45 | $80-$140 | Moderate | 30-45 minutes |
| Door switch | $8-$15 | $60-$120 | Moderate | 30-45 minutes |
| Wiring repair | $5-$20 | $75-$150 | Moderate-Hard | 45-90 minutes |
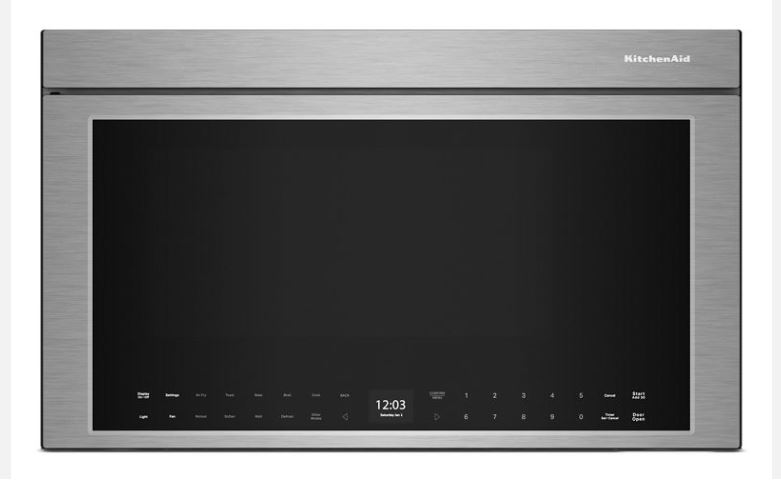
KitchenAid Microwave Start Button Not Working
The start button experiences more mechanical stress than any other control. Failure patterns are predictable and solutions well-established.
When the start button stops responding, verify if the other buttons still function normally. This isolates the problem to that specific button circuit.
Membrane Switch Degradation
KitchenAid uses membrane switch technology beneath the touchpad overlay. The conductive coating wears away from repeated pressure.
Start buttons fail first due to concentrated usage. Expect membrane wear after 50,000-100,000 presses.
Testing with multimeters reveals increased contact resistance. Worn membranes show 10+ ohms instead of near-zero resistance.
Cleaning can temporarily restore function. Remove the touchpad and clean the membrane with 90% isopropyl alcohol.
Complete touchpad replacement is the permanent solution. KitchenAid touchpad assemblies cost $80-$180 depending on model.
Control Panel Ribbon Cable Issues
A flat ribbon cable connects the touchpad to the main control board. Partial disconnection affects specific buttons.
Remove the control panel and reseat the ribbon cable. Clean contacts with isopropyl alcohol if corrosion is visible.
Listen for a distinct click when reseating. Properly connected cables lock into place audibly.
Damaged ribbon cables require replacement. These model-specific parts cost $15-$35.
Test button function before reassembling panels. Discovering problems after reinstallation doubles disassembly time.
Stuck Button Mechanism
Food splatter, grease, and moisture seep behind touchpads. This sticky residue prevents proper button travel or return.
Remove the touchpad assembly and clean thoroughly. Cotton swabs reach tight spaces around individual buttons.
Use 90% isopropyl alcohol exclusively. Other cleaners may damage membrane circuits or adhesive layers.
Some touchpads use rubber dome switches that can be individually cleaned. Remove domes and wipe both surfaces.
Preventive cleaning every 6 months prevents this issue. Maintain clean touchpad surfaces through regular wiping.
Complete Touchpad Replacement
When cleaning and connection checks fail, complete touchpad replacement becomes necessary. This moderately complex repair suits experienced DIYers.
Order touchpad assemblies using complete model numbers. KitchenAid touchpads are model-specific with no universal alternatives.
Replacement involves removing the control panel cover, disconnecting cables, and installing the new assembly. No high-voltage exposure occurs.
Parts cost $80-$180 depending on model features. Professional installation adds $100-$150 in labor.
Test all buttons before final reassembly. Discovering defective new parts after complete reinstallation is extremely frustrating.
KitchenAid Microwave Model-Specific Troubleshooting
Different KitchenAid series have unique characteristics affecting troubleshooting approaches.
KMHC319 Over-the-Range Series
This commercial-style model uses robust construction with excellent reliability. Most failures involve door switches due to heavy stainless door weight.
The control panel integrates with the door handle assembly. Replacement requires careful alignment during installation.
Thermal fuse location behind the control panel makes replacement labor-intensive. Budget 2-3 hours for professional service.
Parts availability through Whirlpool channels is excellent. Most components ship within 2-3 business days.
This series justifies repair over replacement due to $600+ original costs. Components warrant professional service investment.
KCMS1555 Built-In Series
Built-in models depend critically on proper ventilation. Most failures trace to inadequate cabinet airflow causing thermal protection activation.
Capacitive touchpads on this series require absolutely clean, dry operation. Humidity dramatically affects button responsiveness.
The convection integration adds complexity to troubleshooting. Separate heating elements and controls increase potential failure points.
Extended warranties make strong economic sense for built-in units. Single control board replacements exceed $400 total cost.
Professional installation assessment should verify ventilation before troubleshooting components. Inadequate airflow causes cascading failures.
KMBP100 Built-In Microwave
This model uses hybrid touchpad technology combining membrane and capacitive elements. Different repair approaches apply to different buttons.
Partial touchpad failures are common where one button type works while another doesn’t. This creates confusing diagnostic scenarios.
The magnetron on this series carries extended warranty coverage. Verify warranty status before authorizing expensive magnetron replacement.
Control board complexity increases repair costs significantly. Professional diagnosis prevents expensive parts replacement guesswork.
This premium model justifies repairs up to $600-$700. Built-in installation costs make replacement substantially more expensive.
KMCC5015 Combination Microwave
This convection-microwave combination has the most complex control system. Multiple cooking modes require extensive diagnostic knowledge.
When problems develop, determine which functions are affected. Microwave-only failures differ diagnostically from convection issues.
The large touchpad array increases moisture damage susceptibility. Size provides more opportunities for steam infiltration.
Temperature sensor integration affects both cooking modes. Sensor failures can disable the entire appliance despite working components.
Professional service is strongly recommended for combination units. Overlapping systems require specialized knowledge for accurate diagnosis.
Professional Diagnosis vs. DIY Troubleshooting
Understanding when professional service is necessary saves time and prevents damage.
Safe DIY Repairs
Control lock deactivation, power cycle resets, and circuit breaker checks are completely safe. These require no tools or disassembly.
Light bulb replacement involves minimal risk. No high-voltage exposure occurs in the cooking cavity.
Door switch testing and replacement is moderately safe. Low-voltage circuits don’t present electrocution hazards.
Touchpad assembly replacement involves no high-voltage work. Risk level is low for those comfortable with electronics.
Turntable motor and coupling replacement requires only basic tools. These components are easily accessible.
Repairs Requiring Professional Service
Magnetron replacement involves lethal high-voltage exposure. Capacitors retain dangerous charges days after unplugging.
Capacitor work should never be attempted without professional training. Improper discharge procedures cause death.
Control board diagnosis requires specialized testing equipment. Multimeters alone can’t properly evaluate board functions.
Thermal fuse replacement requires complete cabinet disassembly. Access difficulty and diagnostic complexity favor professional service.
Any repair involving the high-voltage circuit demands professional expertise. The risk-to-reward ratio doesn’t justify DIY attempts.
Warranty and Service Considerations
Understanding coverage options prevents unnecessary expenses.
Standard KitchenAid Warranty
One-year full parts and labor coverage applies to all KitchenAid microwaves. This includes component failures from manufacturing defects.
The magnetron receives 5-year limited parts-only warranty. Labor coverage ends after year one.
Control boards, touchpads, and switches are covered for 1 year only. Extended coverage requires separate purchase.
Cosmetic damage and user-caused failures are excluded. Normal wear typically isn’t covered under any warranty.
Warranty claims require proof of purchase. Register products within 30 days at KitchenAid’s website.
Finding Authorized Service
Use KitchenAid’s service locator at their website. Enter your zip code to find nearby authorized centers.
Authorized service uses genuine OEM parts exclusively. This ensures proper specifications and compatibility.
Technicians receive factory training on KitchenAid systems. Their expertise prevents misdiagnosis and incorrect repairs.
Service records remain in KitchenAid’s database. Documentation helps with future warranty claims or recall notifications.
Costs run 20-30% higher than independent shops but include quality assurance. The premium pays for expertise.
Preventive Maintenance Schedule
Regular care prevents many common failure modes.
Monthly Tasks
Clean interior thoroughly after every 15-20 uses. Food residue causes arcing that damages components.
Test door closing action for smooth operation. Binding indicates hinge wear requiring attention.
Verify all buttons respond with appropriate feedback. Deteriorating responsiveness warns of developing problems.
Check ventilation grilles for dust accumulation. Blocked vents reduce cooling efficiency.
Listen for unusual sounds during operation. New noises often precede failures by weeks.
Quarterly Maintenance
Remove and clean turntable components thoroughly. Grease buildup causes motor strain.
Inspect door seal for damage or debris. Compromised seals prevent proper switch engagement.
Clean external vents with vacuum and soft brush. Dust buildup on cooling components reduces heat dissipation.
Test outlet voltage during operation. Drops below 110V indicate electrical problems requiring correction.
Verify proper ground connection on three-prong plugs. Loose grounds create fire and shock hazards.
Annual Professional Inspection
Schedule preventive maintenance with authorized service. Technicians identify developing issues before failures occur.
High-voltage system testing catches degrading components. Early replacement prevents cascade failures.
Door alignment verification prevents switch wear. Adjustment adds years to component life.
Thermal imaging reveals hot spots indicating ventilation problems. Corrective action prevents thermal damage.
Deep cleaning of internal components removes inaccessible debris. Professional disassembly accesses unreachable areas.
Frequently Asked Questions
Why is my KitchenAid microwave not working at all?
Complete KitchenAid microwave failure typically indicates blown fuses, tripped circuit breakers, defective door switches, or activated control lock. Check the electrical panel for tripped breakers first. Verify the outlet works by testing with another appliance. Look for a lock icon on the display—control lock disables all functions deliberately.
How do I reset my KitchenAid microwave?
Unplug your KitchenAid microwave for 5 minutes to perform a standard reset. This clears control board memory and resolves software glitches. For factory reset, press “Stop/Clear” then “1-2-3” within 2 seconds on most models. Navigate to reset option and confirm. All custom settings erase during factory reset.
Why won’t my KitchenAid microwave start when I press the button?
Non-responsive start buttons typically result from worn membrane switches, loose ribbon cable connections, or stuck button mechanisms. Verify other buttons work to isolate the problem. Check for control lock activation by looking for a lock icon. Clean beneath the touchpad with isopropyl alcohol. Complete touchpad replacement costs $80-$180.
How much does it cost to repair a KitchenAid microwave?
KitchenAid microwave repairs range from $150-$450 depending on the failed component. Light bulb replacement costs $5-$12 DIY or $40-$80 professionally. Door switch replacement runs $80-$150. Control board replacement costs $280-$450. Magnetron replacement totals $250-$400. Built-in models add $50-$100 due to access difficulty.
Why does my KitchenAid microwave light not work?
Non-working interior lights indicate bulb burnout, failed light socket, defective door switch, or loose wiring. Replace the bulb first—use only microwave-rated 40-watt appliances bulbs. If new bulbs don’t work, test the socket for 120V power. Check the door-activated switch near the latch mechanism. Wiring repairs cost $75-$150 professionally.
Is it worth repairing a KitchenAid microwave?
Built-in KitchenAid microwaves justify repairs up to $600-$700 due to installation costs. Countertop models warrant repairs under $250 if less than 5 years old. For units over 8 years old, repairs exceeding 50% of replacement cost favor buying new. Consider energy efficiency improvements and warranty coverage on new models.
Restore Your KitchenAid Microwave’s Performance
KitchenAid microwave failures range from simple control lock confusion to complex component failures requiring professional service. Systematic troubleshooting distinguishes between user error, resettable conditions, and actual hardware problems. Most issues stem from door switches, thermal protection, control boards, or specific component failures that proper diagnosis quickly identifies.
Whether attempting DIY repairs or hiring professional service, understanding your microwave’s specific symptoms guides appropriate action. Built-in models justify higher repair investments due to installation costs, while countertop units require careful cost-benefit analysis. With proper maintenance and timely repairs, KitchenAid microwaves deliver years of reliable service matching their premium brand reputation.